How to Bleed a Radiator Without a Radiator Key: 5 Simple Methods That Work
To bleed a radiator without a radiator key, you can use several effective alternatives: a flathead screwdriver or coin for slotted valves, adjustable pliers or a small wrench for stuck valves, a multi-tool or pocket knife as a makeshift key, and a drill adapter or socket for stubborn vents. Remember to turn off your heating system, catch any drips with a cloth, and close the valve once water flows steadily. For detailed step-by-step instructions and safety tips, continue reading our full guide.
What bleeding a radiator means and why it matters
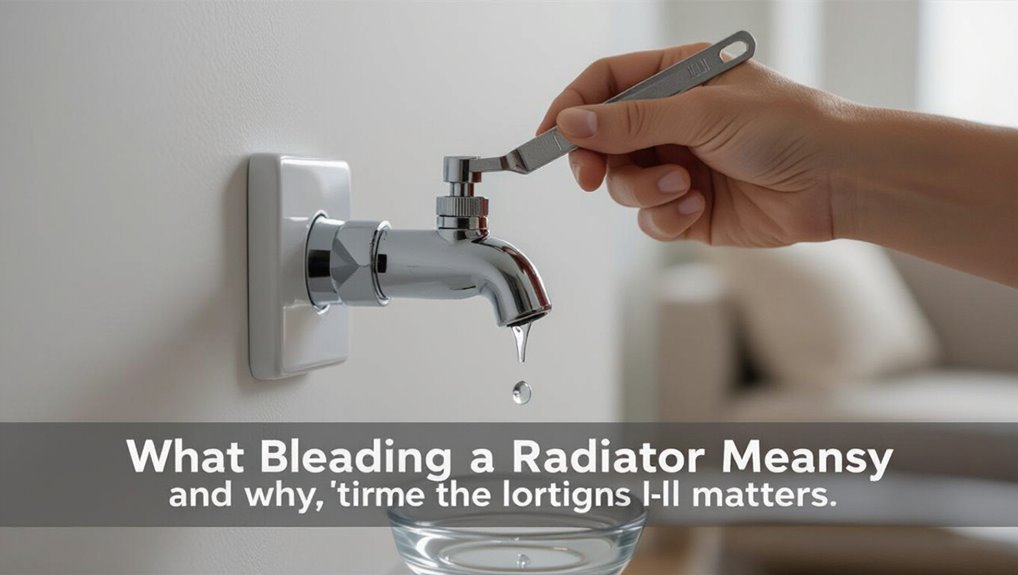
Bleeding a radiator means releasing trapped air so hot water can fill the entire unit, restoring proper heat circulation.
Common signs that bleeding is needed include cold spots, gurgling noises, and uneven room temperatures.
If air is not removed, heating efficiency drops, energy costs rise, and components may corrode or fail prematurely.
How trapped air affects radiator performance
Trapped air in a radiator forms pockets that displace hot water, reducing heat transfer and causing uneven warmth across the system. It lowers efficiency, increases fuel use, and can corrode components; addressing this often involves knowing how to bleed a radiator without a radiator key. Quick bleeding restores flow and balance.
| Effect | Cause | Remedy |
|---|---|---|
| Cold spots | Air pockets | Bleed valve |
| Noise | Turbulence | Venting |
| Inefficiency | Reduced flow | Rebalance |
Signs your radiator needs bleeding
When radiators start producing cold spots, strange noises, or uneven room temperatures, these are clear signs that air is preventing hot water from circulating properly and the unit requires bleeding; addressing the issue restores heat transfer, improves efficiency, and prevents long-term corrosion.
Other indicators include sluggish heating response, a consistently cold top or middle section, and visible water spitting from valves when vented.
Risks of not removing air from radiators
If air is left in a radiator, the heating system’s efficiency and reliability decline quickly: pockets of gas block hot water flow, causing cold spots, noisy pipes, and uneven room temperatures. Consequences include increased energy use, uneven comfort, corrosion risk, and premature pump wear. Timely bleeding restores circulation, reduces noise, and prevents damage.
| Issue | Effect |
|---|---|
| Cold spots | Reduced comfort |
| Air noise | System stress |
Quick answer: Bleed a radiator without a key overview of options
When a radiator key is unavailable, several alternatives can be used to release trapped air, such as a flathead screwdriver, pliers with socket adapters, or an adjustable spanner.
The person attempting this should guarantee the heating is off and the system has cooled to avoid scalding, and place a cloth and container beneath the valve to catch water.
Basic precautions include wearing gloves and eye protection and opening the valve slowly to control pressure.
When a radiator key is unnecessary
How can a radiator be bled without a traditional key? A radiator key is unnecessary when accessible bleed valves use flat screw heads, slotted screws, or hex fittings compatible with common screwdrivers or pliers.
Modern radiators often include integrated bleed knobs.
Temporary alternatives—like needle-nose pliers, adjustable spanners, or a flat screwdriver—allow controlled opening of the valve to release trapped air.
Safety precautions before starting
Before beginning to bleed a radiator without a key, one should take several basic safety precautions to prevent burns, water damage, and accidental system pressure loss.
Wear heat-resistant gloves and eye protection, turn off the heating and let the system cool, place a tray and absorbent cloth beneath the bleed valve, have a towel and bucket ready, and check boiler pressure before and after venting.
Method 1 Use a flathead screwdriver or coin
The section outlines the simple tools and materials required, such as a flathead screwdriver or a suitably sized coin, a cloth and a small container.
It then presents a concise step-by-step procedure and explains how to recognize when air has stopped escaping and water flows steadily.
Finally, it summarizes the main pros and cons of using household tools compared with a radiator key.
Tools and materials needed
A flathead screwdriver or a large coin serves as the simplest tool for opening many radiator bleed valves; choose a size that fits the slot snugly to avoid slipping and rounding the valve.
Necessary materials include a drip tray, a cloth, and gloves to protect hands and catch water.
Use steady pressure and proper positioning to prevent damage.
- Drip tray
- Absorbent cloth
- Protective gloves
Step-by-step procedure
Begin by confirming the heating system is switched off and the radiator is cool to touch.
Position a towel and container beneath the bleed valve. Insert a flathead screwdriver or coin into the valve slot and turn slowly counterclockwise until hissing starts; catch any drips.
Close the valve by turning clockwise when no more air escapes.
- Stay cautious and steady.
- Protect floors from spills.
- Use gentle turns only.
How to tell when bleeding is complete
Once the hissing stops and only a steady, slow drip or no liquid emerges, the bleed is effectively complete; a smooth, air-free stream or silence indicates trapped air has been expelled and the valve can be re-seated with the screwdriver or coin.
Confirm warmth returning to the radiator, verify no more sputtering sounds, snug the valve gently, and wipe any residue.
Pros and cons
With the bleed valve closed and warmth returning, attention can shift to evaluating methods for opening and closing that valve—starting with the flathead screwdriver or coin technique.
Pros: readily available tools, quick execution, no special purchase.
Cons: risk of damaging the valve or slipping, limited torque, poor fit on rounded heads, potential for minor injury.
Care and steady pressure mitigate most issues.
Method 2 Use adjustable pliers or wrench
This method outlines the tools and materials required, including adjustable pliers or an appropriately sized wrench, a rag, and a small container to catch water.
It then presents a concise step-by-step procedure and notes precautions to prevent valve damage, such as applying steady, controlled force and protecting the valve with cloth.
Finally, it summarizes the main pros and cons, comparing ease and grip security against the greater risk of slipping or over-tightening.
Tools and materials needed
A small set of basic tools and a few simple materials are required when using adjustable pliers or a wrench to bleed a radiator.
The person should prepare items that protect surfaces, catch water, and allow controlled valve turning. Proper selection reduces damage and mess; safety and readiness are prioritized over improvisation.
- Adjustable pliers or small wrench
- Bowl or pan and towel
- Protective gloves and goggles
Step-by-step procedure
Begin by ensuring the heating system is off and cooled. Then place the bowl or pan beneath the radiator bleed valve and lay the towel under the bowl to protect the floor.
Use adjustable pliers or a wrench to slowly open the valve until air hisses. Close when water appears, then check pressure and restart heating.
- Open slowly to control flow
- Watch for steady water
- Repressurize if needed
Preventing valve damage
After bleeding is complete and the wrench or pliers are still in hand, care should be taken to avoid damaging the valve.
Use a properly sized adjustable wrench, apply steady pressure, and avoid sudden twists. Protect finishes with a cloth, grip on flats rather than rounded surfaces, and release slowly.
Inspect for leaks and tighten minimally to prevent stripping or cracking.
Pros and cons
While adjustable pliers or a wrench offer strong, fast grip for stubborn valve nuts, they can also increase the risk of cosmetic or mechanical damage if used without care.
Advantages: quick, widely available, effective on seized valves.
Disadvantages: potential to round or crack fittings, slip hazards, and overtightening.
Recommended: use protective jaw covers, apply steady controlled force, and stop if resistance feels abnormal.
Method 3 Use a radiator bleed key alternative tool (multi-tool or pocket knife)
This method is appropriate when a dedicated bleed key is unavailable and the radiator valve accepts a flat or small tool.
The section will list required tools and materials, give a concise step-by-step procedure, and note safety tips.
It will also compare pros and cons of using a multi-tool or pocket knife versus a proper bleed key.
When this option is appropriate
If a standard radiator bleed key is unavailable or access is tight, a small multi-tool or a sturdy pocket knife can serve as an effective substitute for opening the bleed valve.
This option is most appropriate for straightforward, low-pressure domestic radiators where the valve slot matches the tool and the user is comfortable working carefully to avoid stripping the fitting.
It suits quick, occasional bleeding when professional tools are absent.
Tools and materials needed
A small set of basic items is required to use a multi-tool or sturdy pocket knife as a radiator bleed key substitute. The person should gather simple protective gear and items that prevent damage and collect any escaping water.
Suitable choices are compact, readily available, and chosen for safety and fit.
- Gloves for grip and burn protection
- Small bowl or cloth to catch drips
- Multi-tool or strong pocket knife with flat tip
Step-by-step procedure
Begin by ensuring the heating system is off and the radiator is cool to the touch. Then position the bowl or cloth beneath the bleed valve to catch any water.
Using a multi-tool or pocket knife, gently insert the flat edge into the valve. Turn slowly counterclockwise until air hisses, then close when steady water appears.
- Work patiently and controlled
- Observe valve movement
- Keep cloth ready
Safety tips and pros/cons
After the bleed valve has been opened and air released, attention should turn to safety practices and weighing the advantages and drawbacks of using a multi-tool or pocket knife instead of a proper radiator bleed key. Wear gloves, protect flooring, and avoid stripping the valve. Benefits: convenience, cost; Risks: slippage, damage, poor fit.
| Aspect | Benefit | Risk |
|---|---|---|
| Cost | Low | Damage |
| Access | Handy | Slippage |
| Fit | Portable | Poor seal |
Method 4 Use a drill adapter or socket and bit
Method 4 explains using a drill adapter or a socket and bit to speed the radiator-bleeding process, listing the required tools and materials such as the correct-size bit, a low-speed drill or ratchet, a container, and rags.
The step-by-step procedure covers securing the bit in the valve, opening it slowly with controlled power, and monitoring for air and steady water flow.
Guidance also notes when to avoid power tools—on old, corroded, or plastic valves—and summarizes pros and cons like speed versus risk of over-torquing.
Tools and materials needed
A small set of specific tools is required to bleed a radiator efficiently when using a drill adapter or a socket-and-bit approach. Necessary items focus on compatibility, control, and safety to avoid damage or spills.
Precision and appropriate sizes prevent rounding the valve.
- Drill with adjustable torque and compatible adapter
- Correct socket or hex bit matching the valve
- Protective gloves and a small catch container
Step-by-step procedure
When using a drill adapter or socket-and-bit setup, begin by ensuring the boiler is off and the system has cooled to avoid scalding or pressure spikes. Then fit the correct socket or hex bit to the radiator bleed valve and attach it securely to the drill or ratchet so the tool engages squarely without slipping.
Open the valve slowly, collect drips, and close it when steady water appears.
- Maintain steady, gentle torque.
- Keep container and cloth ready.
- Check system pressure after bleeding.
When to avoid power tools
Under what conditions should power tools be avoided: whenever the radiator valve, surrounding fittings, or the system itself show signs of corrosion, deformation, or leakage that could cause a bit to slip or a seal to fail.
Additionally, avoid drills if access is cramped, the valve feels rigid or brittle, electrical tools risk water contact, or the user lacks experience; choose manual methods instead.
Pros and cons
Using a drill adapter or socket and bit speeds up bleeding by allowing quick, controlled rotation of the bleed valve while minimizing hand fatigue.
Pros: fast, consistent torque, useful for tight valves, reduces slippage.
Cons: risk of over‑tightening, stripping valve, water spray if applied too quickly, requires compatible tool and caution.
Best with low torque and steady control.
Method 5 Call a simple DIY trick: use a coin-operated or makeshift lever
This method describes using a coin, flathead screw, or improvised lever as the only tools and any small container or cloth for catching drips.
It outlines step-by-step how to insert the coin or lever into the valve, turn slowly to release trapped air, and close the valve when water appears.
The paragraph notes when the technique is appropriate (tight spaces, no bleed key available) and summarizes pros (fast, no special tools) and cons (less torque, risk of slipping or damage).
Tools and materials needed
When a radiator’s bleed valve is stiff or lacks a proper key, a simple coin-operated or makeshift lever provides a quick, effective way to open it; the method requires only a few common items: a sturdy coin or flat tool (such as a screwdriver blade), a rag to catch drips, a small container for released water, and protective gloves to prevent cuts and contact with hot liquid.
- Coin or flat metal tool
- Rag and small container
- Protective gloves
Step-by-step procedure
Having gathered a sturdy coin or flat metal tool, a rag, a small container, and gloves, the user can proceed to the bleeding steps.
Turn the heating off and let the radiator cool.
Place the container beneath the bleed valve, insert the coin into the slot, turn slowly counterclockwise until air hisses, then close when water appears.
Dry and test.
- Safety first
- Controlled release
- Confirm heat restoration
Best situations for this method
In many common household situations, a coin or flat metal tool provides a simple, effective lever for bleeding radiators with standard slot-style bleed valves. It suits quick fixes, locked-tool scenarios, and occasional maintenance when access is limited.
| Situation | Ideal use |
|---|---|
| Missing key | Emergency bleed |
| Tight space | Slim tool fits |
| One-off fix | Quick solution |
| Travel | Portable option |
| Low cost | No purchase needed |
Pros and cons
Although improvised levers like coins or thin metal strips are convenient and often effective for slot-style bleed valves, they trade precision and grip for accessibility: the main advantages are portability, zero cost, and suitability for tight spaces, while the drawbacks include slippage, limited torque that can round or damage valve heads, and greater risk of incomplete bleeding compared with a proper radiator key.
They suit emergencies but risk tool failure.
How to check and top up central heating pressure after bleeding
After bleeding radiators, the next step is to check the boiler pressure gauge, usually found on the front of the boiler or within the control panel.
If the pressure is low, water can be safely added using the filling loop or isolation valves, following manufacturer instructions and closing valves once the correct level is reached.
Aim for the recommended pressure range (typically 1–1.5 bar when cold) and contact a professional if pressure drops repeatedly or cannot be restored.
Locating the boiler pressure gauge
When checking pressure after bleeding, the boiler pressure gauge is usually found on the front panel of the boiler or near the system’s control unit.
It is a small dial or digital readout marked in bar (often 0–3 bar) showing the current system pressure.
Inspect nearby panels, consult the boiler manual for model-specific locations, and guarantee visibility before proceeding with any pressure checks.
How to safely add water to the system
Check the boiler pressure gauge immediately after bleeding to confirm whether the system requires water; most domestic systems should sit between about 1 and 1.5 bar when cold, though the correct range may vary by manufacturer.
If low, add water via the filling loop slowly, watching the gauge. Isolate valves when finished and recheck for leaks.
- Open filling loop gradually
- Monitor gauge continuously
- Close and test system
Target pressure ranges and when to call a pro
How much pressure is right for a given system depends on the boiler type and manufacturer, but most domestic sealed systems should read roughly 1 to 1.5 bar cold and 1.5 to 2.0 bar when warm; consult the boiler manual or the label on the unit for the exact target.
After bleeding, check the gauge; top up slowly via the filling loop if below target.
Call a qualified engineer if pressure won’t hold, topping requires frequent attention, or faults/alarms persist.
Common problems and how to troubleshoot
A few common issues can appear after bleeding a radiator and each has a straightforward set of checks.
These include a radiator cold at the top despite bleeding, repeated air buildup requiring frequent bleeding, small leaks or drips that appear at the bleed valve, and cases where no air escapes when the valve is opened.
The following tips explain quick troubleshooting steps and when to call a professional.
Radiator still cold at the top after bleeding
Persistence of cold at the top of a radiator after bleeding signals there is still trapped air, insufficient flow, or an underlying valve or balancing issue preventing hot water from reaching the upper section.
Inspect and fully open lockshield and thermostatic valves, check for partial blockages or sludge, guarantee system pressure and pump function are correct, and rebalance the system or flush the radiator if flow remains restricted.
Continuous air buildup or repeated need to bleed
Why does a radiator keep filling with air or require frequent bleeding? Continuous air indicates leaks, poor system sealing, or circulating pump issues.
Entrained air can stem from corroded pipes, loose fittings, or an underperforming expansion vessel.
Troubleshooting involves pressure checks, inspecting joints, testing the pump, and evaluating the expansion tank.
Persistent problems warrant professional inspection to locate and rectify the root cause.
Leaks after bleeding and how to fix minor drips
If repeated bleeding and inspections do not eliminate trapped air, attention often turns to small leaks that reveal themselves only after the radiator has been opened.
Minor drips often stem from loose bleed valves, worn washers, or corroded threads.
Tighten valve gently, replace washers or use thread seal tape, and dry surrounding fittings.
Recheck after repressurizing; consult a plumber if corrosion persists.
No air released when opening valve
Check the bleed valve for obvious obstructions and confirm the system is cold before attempting to release air.
If nothing escapes, the radiator may be full of water or the valve is seized.
Try gently opening wider, tapping the valve, or using penetrating oil.
Verify central heating is off and pressure is correct.
If still no air, consult a plumber to inspect blockages or faulty valves.
Preventive maintenance to reduce need for bleeding
Preventive maintenance can greatly reduce the frequency of bleeding by keeping the heating system balanced and identifying issues early through regular checks.
Periodic professional services such as power flushing and scheduled inspections help remove sludge and restore efficient circulation.
Seasonal preparation tips—bleeding radiators before cold weather, checking valves, and confirming thermostat settings—further minimize air accumulation and performance loss.
Regular system checks and balancing radiators
Regular system checks and periodic balancing keep a hydronic heating system operating efficiently and minimize trapped air that leads to cold spots.
Technicians or competent homeowners should inspect valves, vents, pump operation, and pressure levels seasonally.
Adjusting flow via lockshield valves and ensuring correct system pressure reduces uneven heat distribution and the frequency of bleeding, extending component life and improving overall comfort.
Power flushing and professional maintenance intervals
Schedule periodic professional maintenance and consider power flushing as part of a long-term strategy to minimize trapped air and corrosion that necessitate frequent radiator bleeding.
Certified technicians assess system condition, remove sludge and scale, and restore flow.
Regular service intervals—typically every 3–7 years depending on usage and water quality—reduce blockages, improve heat transfer, and lower the frequency of manual venting.
Tips for seasonal preparation
As seasons change, a few targeted checks and simple adjustments can markedly reduce trapped air and the need for frequent bleeding.
Inspect valves and thermostatic heads for leaks, flush strainers and filters, and top up system pressure to recommended levels.
Schedule annual boiler servicing, purge low points before cooling seasons, and insulate pipework to prevent condensation and air ingress.
When to call a heating engineer instead of DIY
If radiators are cold despite repeated bleeding, make loud banging noises, or show signs of leakage or corrosion, a heating engineer should be contacted.
Likewise, any issue involving a gas boiler, pressure faults, or complex sealed-system components requires professional diagnosis and repair.
DIY should be limited to basic bleeding and visual checks while safety-critical or persistent faults are handled by a qualified engineer.
Signs of serious system faults
When should a homeowner stop bleeding radiators and call a heating engineer? Persistent cold spots after bleeding, repeated pressure loss, unusual noises, visible leaks, or unexplained thermostat failures indicate faults beyond DIY. Immediate professional attention prevents damage.
| Symptom | Concern |
|---|---|
| Persistent cold radiators | Circulation/blockage |
| Pressure drops | Leaks or pump failure |
| Loud banging | Airlock or component fault |
Situations involving gas boilers or complex systems
Because gas boilers and multi-zone or combi systems combine pressurised water, flammable fuel, and complex controls, homeowners should defer to a qualified heating engineer for any bleeding-related issues that intersect with those components.
A professional can assess pressure, safety interlocks, pump zones, and boiler diagnostics, preventing leaks, carbon monoxide risks, or warranty breaches.
Call for persistent pressure loss, odd noises, or control faults.
Quick troubleshooting checklist before and after bleeding
A short checklist helps confirm the system is safe and ready before bleeding and that the job succeeded afterward.
Technicians or homeowners can use a concise sequence to prevent damage, verify pressure, and confirm even heating.
Follow simple checks to catch issues early and validate results.
- Confirm boiler isolation and room ventilation
- Check system pressure and refill if needed
- Verify even heat distribution across radiators
Conclusion
Bleeding a radiator without the proper key can be straightforward if approached carefully, like finding a shortcut across a familiar field. The article summarized practical alternatives—flathead screwdriver, coin, pliers, multi-tool—and covered common problems, troubleshooting, and preventive maintenance. It advises when to stop and call a heating engineer. Readers are reminded to work safely, protect surfaces from released water, and verify system pressure and boiler settings after bleeding to guarantee proper heating performance.