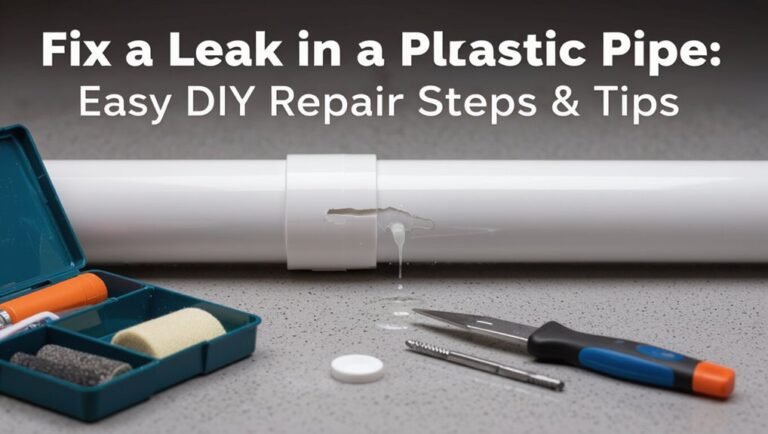
How to Fix a Leaky Sink Pipe: Quick DIY Repairs and When to Call a Plumber
To fix a leaky sink pipe, start by shutting off the water supply and containing any spills with buckets and towels. Next, inspect the visible fittings, supply lines, P-trap, and shutoff valves for loose connections, worn washers, or signs of corrosion. You can tighten fittings, replace damaged washers or supply lines, or swap out the P-trap using basic tools and plumber’s tape. If you’re working with copper pipes, use compression fittings; for PVC, apply solvent weld. However, if you encounter structural damage, mold, persistent leaks, or sewer problems, it’s best to call a plumber. Detailed repair steps follow.
What to Do First When You Discover a Leaky Sink Pipe
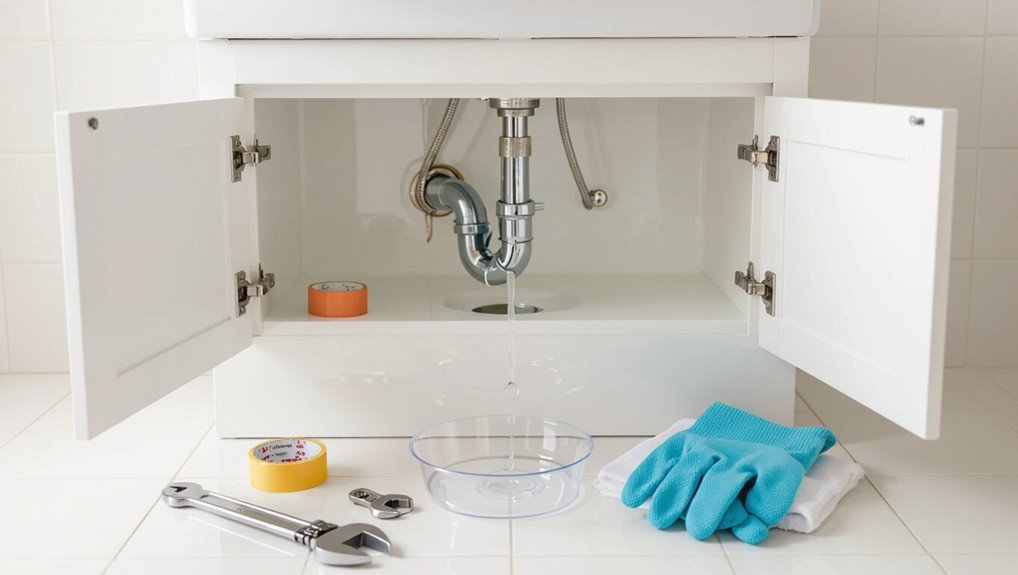
Upon discovering a leaky sink pipe, the first actions are to guarantee safety by turning off the water supply and clearing the area of electrical hazards.
Next, a quick inspection should determine whether the leak is visibly accessible under the sink or hidden within walls or fixtures.
Finally, gather basic tools and materials—adjustable wrench, bucket, rags, plumber’s tape and replacement washers or sealant—before proceeding.
Immediate safety and water-stopping steps
Act quickly to prevent damage and guarantee safety: shut off the water source, remove electrical hazards, and contain the leak.
Then place buckets and towels to limit spread, and use a temporary clamp or pipe repair tape if available.
Note how to fix a leaky sink pipe by documenting visible drip locations and water flow before attempting repairs or calling a plumber for persistent or unsafe leaks.
Identifying the leak source quickly (visible vs hidden)
With the immediate hazards managed and water contained, the next step is to pinpoint where the leak originates.
Visually inspect visible fittings: supply lines, shutoff valves, trap connections and tailpieces for drips, corrosion or loose joints.
For hidden leaks, dry surfaces, run the tap briefly and watch for reappearing moisture.
Check cabinet bottoms and nearby flooring for stains, swelling or puddles.
Tools and materials to gather before starting
Before starting repairs, assemble a compact kit of essential tools and materials so the job can proceed safely and efficiently.
Recommended items: adjustable wrench, slip-joint pliers, bucket, rags, plumber’s tape, pipe joint compound, replacement washers or slip nuts, rubber repair tape, putty knife, flashlight, and safety gloves.
Keep a phone nearby for reference or emergency contact with a plumber if needed.
Quick DIY Fixes for Common Sink Pipe Leaks
The section outlines quick, practical remedies for common sink pipe leaks, including tightening or replacing a leaking faucet supply line and securing a loose P-trap connection.
It covers routine parts replacements such as compression washers and O-rings, and the proper use of plumber’s tape and pipe-joint compound to guarantee reliable seals.
It also summarizes temporary repairs—pipe clamps, epoxy putty, and rubber patches—useful for stopping leaks until permanent fixes can be made.
Fixing a leaking faucet supply line
Identify the leaking supply line quickly to prevent water damage and wasted water; most leaks occur at the compression nut, flexible hose connection, or along an aged braided line.
Turn off water, place a bucket, tighten the compression nut or hose coupling with pliers, replace damaged braided lines, and use new ferrules if needed.
Test for leaks and retighten slightly if required.
Repairing a loose P-trap connection
Loosened slip nuts at a P-trap commonly cause slow drips or steady leaks beneath a sink and can usually be fixed without special tools.
Turn off water, place a bucket, hand-tighten slip nuts, and realign trap sections so joints seat evenly.
If threads are damaged, replace the nut or entire trap.
Test for leaks by running water and inspecting joints carefully.
Replacing worn compression washers and O-rings
After hand-tightening or replacing a faulty P-trap nut, a homeowner may still see drips from compression fittings or threaded faucet tails. Worn compression washers and O-rings are common culprits that can be replaced quickly with minimal tools.
Shut off water, disassemble the joint, note part size, swap in matching washer or O-ring, reassemble and test. Inspect nearby seals for damage.
Using plumber’s tape and pipe joint compound correctly
Apply plumber’s tape or pipe joint compound to threaded connections to create a watertight seal and prevent leaks caused by imperfect threads or minor corrosion.
Use PTFE tape wrapped clockwise three to five turns, keeping threads clear. For metal fittings or gas-rated joints, consider pipe joint compound compatible with materials.
Clean and dry threads before application, tighten firmly but avoid over-torquing to prevent damage.
Temporary fixes: pipe clamps, epoxy putty, and rubber patch methods
When a small leak appears and immediate professional repair isn’t possible, homeowners can rely on temporary fixes like pipe clamps, epoxy putty, and rubber patches to stop or slow drainage until a permanent solution is made.
These methods are quick, limited-duration stops that require inspection and eventual replacement.
- Clean surface thoroughly
- Dry before applying
- Mold epoxy to seal
- Tighten clamp firmly
- Replace pipe promptly
Step-by-Step Repair: Replacing a Leaking P-Trap
A concise checklist of tools and replacement parts is provided before starting the repair.
The procedure covers safely removing the old P-trap, inspecting and preparing pipe ends and fittings, and installing the new trap.
The section concludes with testing steps to confirm a watertight seal.
Tools and replacement parts checklist
One clear, organized checklist speeds the P-trap replacement process and helps prevent trips to the hardware store mid-repair.
Essential tools: adjustable wrench, slip-joint pliers, bucket, flashlight, work gloves, plumber’s tape, and rag.
Replacement parts: new P-trap assembly (correct diameter), slip nuts and washers, foam gasket or rubber seals.
Optional: silicone sealant and tubing cutter.
How to remove the old P-trap safely
Begin by clearing the area under the sink and positioning the bucket directly beneath the P-trap to catch residual water; this prevents spills and keeps the workspace tidy.
Turn off water if applicable, loosen slip nuts with channel pliers, and gently lower the trap into the bucket.
Empty contents, inspect for hidden clips or adhesive, and remove the trap fully, keeping all hardware organized for reassembly.
Inspecting and preparing pipe ends and fittings
With the old P-trap removed and parts set aside, the next step is to inspect and prepare the pipe ends and fittings for a clean, leak-free connection.
Examine tailpiece and wall stub for corrosion, cracks, or deformities. Remove old sealant and debris with a rag and fine sandpaper.
Confirm threads are intact; replace any damaged nuts, washers, or ferrules before assembly.
Installing a new P-trap and testing for leaks
Install the new P-trap by sliding the slip nuts and washers onto the tailpiece and wall stub, aligning the trap arm and curved section so threads engage without cross-threading.
Hand-tighten nuts, then snug with pliers—avoid overtightening.
Run water and inspect joints for drips. If dry, check after several minutes and under pressure.
Replace fittings if persistent leaks occur; call a plumber for stubborn or structural issues.
Step-by-Step Repair: Fixing a Leaking Supply Line or Valve
Before any work begins, water is shut off and residual pressure relieved to prevent spraying.
The procedure then covers removing and replacing a worn flexible supply line, followed by evaluating and either repairing or replacing a faulty shutoff valve.
Finally, the repair is verified by leak-testing and making any necessary final adjustments.
Shutting off water and relieving pressure
Shut off the water supply and relieve system pressure to prevent leaks from worsening and to provide a safe working environment.
Locate the shutoff valve under the sink or the home’s main valve, turn clockwise to close, then open the faucet to drain residual water and depressurize lines.
Keep a bucket and towel ready.
Verify flow has stopped before proceeding with repairs.
Replacing a flexible supply line
Begin by confirming the water is off and the lines are depressurized.
Then gather the necessary tools: an adjustable wrench, slip-joint pliers, replacement flexible supply line of the correct length and fitting size, plumber’s tape (Teflon), and a bucket or towel.
Disconnect the old line at both ends, clean threads, apply tape, hand-start then tighten fittings.
Inspect for leaks, and restore water slowly to test.
Repairing or replacing a shutoff valve
Isolate the fixture by turning off the main water supply and draining the lines.
Inspect the shutoff valve for corrosion, cracks or leaking at the packing nut.
Tighten the packing nut slightly; replace the washer or stem if persistent.
For damaged valves, remove and note thread type, install a compatible replacement with plumber’s tape, and hand-tighten before final wrench snugging.
Leak-testing and final adjustments
After reassembling the supply line or installing the replacement valve, the technician proceeds to leak-testing and final adjustments to confirm a watertight connection and proper operation.
Water is slowly turned on, fittings inspected for drips, and paper towels or tissue used to detect slow leaks.
The technician tightens connections as needed, cycles the valve, checks for pressure stability, and verifies no leaks under load.
When the Leak Is in Copper, PVC, or Galvanized Pipes
When a leak appears the first task is to identify whether the line is copper, PVC, or galvanized, since each material requires different fixes.
Copper sections may be repaired by soldering or brazing where heat access is safe, or by using compression fittings as a no-heat alternative.
PVC requires solvent welding or slip-repair couplings, while corroded galvanized pipes often need special fittings or replacement due to degradation.
Identifying the pipe material and appropriate repair methods
Begin by determining the pipe material, since repair techniques differ considerably for copper, PVC, and galvanized steel: copper often requires soldering or compression fittings.
PVC is best served by solvent welding or specialty epoxy, and galvanized pipes may need threading repairs or replacement due to corrosion.
Assess corrosion, joint type, and access.
Match sealants, fittings, and tools to the specific material; prioritize replacement when integrity is compromised.
Soldering/brazing copper vs using compression fittings
Although both soldering/brazing and compression fittings can stop leaks in copper lines, they differ in permanence, required skill, and suitability for specific situations.
Soldering/brazing yields a stronger, permanent joint but demands heat, flux, and experience.
Compression fittings require no heat, are quicker and reversible, but may loosen over time or fail on damaged tubing.
Choice depends on skill, access, and longevity needs.
PVC solvent welding and slip-repair techniques
After weighing the pros and cons of soldering versus compression fittings for copper lines, attention turns to repairs that suit PVC and mixed-metal systems: solvent welding for PVC and slip-repair techniques for copper or galvanized runs.
PVC joints require proper primer, solvent cement, correct fit and cure time.
For metal leaks, slip-on repair sleeves or rubber coupling clamps provide temporary or semi-permanent seals without full pipe replacement.
Addressing corroded galvanized pipe issues
Corroded galvanized pipes require a different approach than copper or PVC repairs because rust weakens the metal from the inside out, often causing hidden pitting and reduced structural integrity.
Assessment involves visual inspection and tapping for thin spots.
Small leaks may need pipe section replacement with threaded couplings or conversion to copper/PVC via dielectric fittings.
For widespread corrosion, recommend full replacement and professional evaluation.
Diagnosing Hidden or Persistent Leaks
Hidden or persistent leaks often reveal themselves through warped cabinet floors, peeling paint, musty odors, or unexplained water stains on walls and ceilings.
Technicians may use dye tests in the sink, moisture meters to map damp areas, and inspection cameras to pinpoint the source behind finishes.
These tools, combined with observations around the fixture, help determine whether the problem lies in the plumbing lines or the faucet and fittings.
Signs of a concealed leak under cabinets or in walls
Several subtle indicators can signal a concealed leak beneath cabinets or inside walls, and recognizing them early limits damage and mold growth.
Inspect for persistent musty odors, peeling or bubbled paint, and soft or discolored cabinet floors.
Warped baseboards, unexplained increases in water bills, or damp insulation when accessible also suggest hidden leaks.
Prompt attention prevents structural decay and health risks.
Using dye tests, moisture meters, and inspection cameras
Detecting the exact source of a persistent or concealed leak often requires targeted diagnostic tools: dye tests to trace active drips, moisture meters to quantify dampness behind finishes, and inspection cameras to visualize inaccessible spaces.
Dye applied to trap water reveals flow paths; meters map moisture gradients guiding cuts; cameras confirm pipe damage, joint failure, or hidden pools, enabling precise repair planning or informed referral to a plumber.
Determining if the leak is plumbing or fixture-related
After using dye, moisture meters, and cameras to locate moisture and visualize damage, the next step is deciding whether the source lies in the building plumbing (supply or drain lines) or in the fixture itself (faucet, cartridge, seals, or supply fittings).
Test by isolating supply valves, observing pressure changes, and running dye while watching joints. Persistent wetness at pipe joints indicates plumbing; dripping from spouts or base indicates fixture failure.
Tools, Materials, and Replacement Parts Guide
A concise inventory of tools, common spare parts, and sealing products helps streamline sink pipe repairs and prevent repeat leaks.
Below are recommended items to have on hand before beginning work:
- Adjustable wrench and channel-lock pliers
- Replacement P-trap, compression washers, and slip fittings
- Plumber’s tape (PTFE) and pipe joint compound
- Silicone sealant and pipe repair tape for temporary fixes
- Basin wrench and small hacksaw for tight or corroded fittings
This list covers typical needs for most household sink repairs.
Essential tools for most sink pipe repairs
Most sink-pipe repairs require a concise set of tools and materials that balance functionality with portability.
A basin wrench, adjustable wrench, slip-joint pliers, plumber’s tape, pipe joint compound, flashlight, bucket, shop towels, utility knife, and small hacksaw cover most tasks.
A compact tool kit organized for under-sink access speeds repairs and reduces trips for forgotten items.
Common parts to keep on hand (P-traps, washers, fittings)
Keeping a small inventory of common replacement parts prevents minor leaks from becoming emergency calls.
Stock a spare P-trap (plastic and metal options), assorted rubber and neoprene washers, slip-joint nuts, tailpiece adapters, and compression fittings in common sizes.
Include replacement sink strainer assemblies and a few hose clamps.
Label sizes and store parts with basic tools for quick, accurate swaps.
Recommended sealants, tapes, and temporary repair products
With common parts on hand, attention shifts to the sealants, tapes, and temporary repair items that make quick fixes reliable until permanent repairs are possible.
Recommended supplies include plumber’s tape (PTFE) for threaded joints, silicone sealant for gaps, epoxy putty for small cracks, rubber repair tape for emergency wrapping, and hose clamps to secure patches.
Keep manufacturer-rated products and cure times in mind.
Common Mistakes to Avoid During Repairs
Home repairers often cause further damage by over-tightening fittings, which can crack pipes or strip threads.
Using the wrong sealant or tape can leave joints unsealed or chemically incompatible with pipe materials.
Failing to address underlying causes such as corrosion or high water pressure allows leaks to recur despite surface repairs.
Over-tightening fittings and cracking pipes
Over-tightening fittings is a common cause of new leaks and hairline cracks in plumbing repairs. Excessive torque can strip threads, deform compression rings, or fracture brittle pipes, especially older PVC or galvanized sections.
Technicians advise hand-tightening then a fraction of a turn with a wrench. Inspect joints for stress, replace damaged fittings, and use proper torque specifications to prevent creating more problems during repair.
Using the wrong sealant or tape
After fixing stripped threads or replacing cracked fittings, attention must turn to the sealant and tape used on joints—choosing the wrong type can negate a careful repair.
Using plumber’s tape on compression fittings, non‑threaded connections, or incompatible adhesives causes leaks or component damage.
Select thread‑seal tape for tapered threads and appropriate pipe dope or silicone for required materials; follow manufacturer specs and cure times.
Ignoring underlying causes like corrosion or high water pressure
When underlying causes such as corrosion or persistently high water pressure are overlooked, a repaired pipe often fails again shortly after work is completed.
Ignoring root issues yields repeated leaks, wasted parts, and escalating damage.
Proper diagnosis—inspecting pipe walls, testing pressure, and evaluating fittings—guides whether patching suffices or replacement and pressure regulation are required.
Address causes to guarantee lasting repairs.
When to Call a Professional Plumber
Signs such as structural water damage, visible mold, or persistent leaks indicate the situation needs expert diagnosis rather than DIY fixes.
Complex problems—sewer line failures, hidden wall leaks, or recurring issues—also warrant a licensed plumber who can inspect thoroughly, advise on permits, and provide reliable repairs.
Homeowners should vet candidates by checking licenses, references, insurance, asking about experience and warranty, and budgeting for typical cost ranges before committing.
Red flags that require expert diagnosis (structural water damage, mold)
Hidden issues such as structural water damage or pervasive mold warrant immediate professional assessment rather than DIY repair.
Signs include sagging ceilings, softened floors, staining beyond the sink area, persistent musty odor, visible black or fuzzy mold, or health symptoms among occupants.
These indicate concealed leaks or compromised framing; a licensed plumber or contractor should diagnose extent, source, and remediation to prevent recurrence and safety risks.
Complex situations: sewer line issues, hidden wall leaks, recurring leaks
Addressing complex plumbing problems requires prompt professional involvement, particularly for sewer line failures, leaks concealed within walls, or persistent recurrences after attempted fixes.
These situations risk structural harm, health hazards, and hidden damage. A plumber can perform diagnostics—camera inspection, pressure testing, moisture mapping—and execute repairs or replacements safely.
Homeowners should not delay when leaks are unexplained, recurrent, or tied to sewage.
How to choose a qualified plumber and what to ask
When should a homeowner call a professional plumber, and how can they be sure the choice is qualified?
A qualified plumber holds valid licensing, insurance, and local references.
Ask about experience with similar leaks, warranty on work, estimated timeline, and written quotes.
Verify licensing online, read recent reviews, and confirm scope before work begins.
Trust clear communication and transparent pricing.
Typical cost ranges and when repairs may require permits
Repair costs for a leaky sink pipe typically range from a modest DIY outlay—$10 to $50 for parts—to several hundred dollars for professional labor and replacement parts, with average plumber visits falling between $150 and $350 depending on region and complexity.
Permits may be needed for pipe relocations or structural changes; call a plumber when leaks persist, involve main lines, or require code compliance.
| Scenario | Action |
|---|---|
| Minor drip | DIY seal |
| Corroded trap | Replace |
| Hidden leak | Professional |
| Pipe relocation | Permit likely |
| Main line | Immediate plumber |
Preventive Maintenance to Avoid Future Leaks
A concise preventive plan reduces the chance of future sink leaks by combining routine inspections, correct installation, and seasonal care.
The inspection checklist should cover visible joints, supply lines, P-trap condition, and evidence of slow drips or corrosion.
Proper installation practices and scheduled long-term maintenance—such as tightening fittings before winter and replacing worn washers—help avert failures.
Regular inspection checklist for under-sink plumbing
Regular monthly inspections of under-sink plumbing help catch small issues before they become costly leaks. This checklist highlights key areas—visible joints, supply lines, P-trap, shutoff valves, and cabinet floor—for a quick, systematic review and notes what signs to watch for and when to escalate to a professional.
Inspect for drips, corrosion, loose fittings, discoloration, odors, and pooled water. Tighten, replace seals, or call a plumber if persistent.
Proper installation practices to reduce failure risk
Building on routine inspections, proper installation practices greatly reduce the likelihood of future leaks by addressing common failure points at the outset.
Installations should use correctly sized fittings, quality seals and thread tape, and tightened connections to manufacturer torque specifications.
Guarantee straight pipe runs, proper slope for drainage, secure supports to prevent stress, and accessible shutoffs.
Professional verification is advised for complex assemblies.
Seasonal and long-term maintenance tips
How can seasonal attention and long-term upkeep greatly reduce the chance of leaks? Regular inspections, tightening fittings, replacing worn washers and seals, and clearing drains prevent stress and corrosion.
Winterize exposed pipes, monitor water pressure, and schedule periodic professional checks. Keep accessible shutoff valves operable and document repairs.
Consistent preventive actions extend component life and minimize emergency repairs.
Quick Troubleshooting Flowchart for Leaky Sink Problems
A concise troubleshooting flowchart guides the reader through stepwise decision points from detection to resolution of a leaky sink.
It begins with identifying the leak source, proceeds through quick checks (tighten, replace washer, inspect seals), and directs to repair or call a professional based on results.
This structured approach speeds diagnosis and reduces unnecessary work.
Stepwise decision points from detection to resolution
Start by confirming the leak source and severity to direct appropriate steps—identify whether water drips from a visible joint, the tailpiece, the P-trap, or from beneath the countertop, and note whether the leak is steady, intermittent, or only present when the faucet is on.
Then follow concise decision points:
- Isolate water supply.
- Inspect and tighten fittings.
- Replace washers or seals.
- Swap P-trap if corroded.
- Call a plumber for persistent or hidden leaks.
Conclusion
When a sink pipe leaks, ignoring it could summon a small indoor flood, a heroic mold colony, and a dramatic drywall collapse worthy of a disaster movie—but quick, sensible action often thwarts the theatrics. Simple fixes frequently stop drips; for stubborn or complex issues, a professional’s expertise prevents escalating damage and expense. Prompt inspection, proper tools, and modest vigilance keep plumbing problems minor, sparing homeowners from melodrama and expensive, messy repairs.