How to Fix an Overflow Drain in a Tub: Step-by-Step Repair Guide
To fix an overflow drain in your tub, start by inspecting the faceplate for leaks or clogs. Clear any debris from the weep holes and replace any corroded gaskets or plates using basic tools. Hand-thread fasteners, ensure gaskets are seated evenly, and tighten screws in a crisscross pattern. Test the repair by filling the tub to the overflow level and checking for seepage. Adjust as needed. Follow these step-by-step instructions and troubleshooting tips for a complete repair.
What an Overflow Drain Is and Why It Matters

An overflow drain is a secondary opening near the top of a tub that prevents water from spilling over by channeling excess water into the plumbing.
Visible signs that it needs repair include slow draining, leaks around the overflow plate, or discolored water stains on surrounding walls.
If left unaddressed, a faulty overflow can cause water damage, promote mold growth, and create complications with homeowner insurance claims.
Purpose and function of an overflow drain in a tub
Serves as a secondary outlet near the tub rim, the overflow drain prevents water from rising above a safe level and directs excess into the plumbing system.
It maintains water level control, reduces spill risk, and protects fixtures and floors from damage.
Proper understanding aids DIYers researching how to fix overflow drain in tub and informs decisions about maintenance, parts, and safe operation.
Common signs the overflow drain needs repair
After explaining how the overflow drain controls water levels and protects surrounding fixtures, attention turns to recognizing when that system is failing.
Common signs include slow or blocked drainage, visible corrosion or mineral buildup around the overflow plate, persistent odors, water leaking behind the trim, and a loose or nonfunctional overflow cover.
Timely identification prompts inspection and repair.
Potential risks of a malfunctioning overflow (water damage, mold, insurance issues)
Neglected overflow drains can lead to serious consequences beyond a soggy bathroom floor: unchecked water can seep into walls and subfloors, promoting structural damage, rot, and costly repairs.
Persistent dampness fosters mold and mildew, posing health risks and remediation expenses.
Insurers may deny claims for neglected maintenance, increasing out-of-pocket costs and liability.
Prompt repair mitigates damage, health hazards, and financial exposure.
Quick Diagnosis: Identify the Problem Fast
A quick visual inspection checklist helps flag obvious issues such as loose plates, corrosion, or visible leaks.
Simple tests—running water to check for slow drainage and placing paper towels around the overflow to detect seepage—confirm whether water is escaping.
These observations then distinguish cosmetic problems (surface rust, stained trim) from structural concerns (cracked housing, persistent leaks requiring repair).
Visual inspection checklist
Begin with a focused visual inspection to quickly narrow down the likely cause of the overflow problem.
The inspector notes observable signs and records findings without testing. Check for obvious faults and prepare for targeted repairs.
- Corroded or loose overflow plate and screws
- Visible cracks, gaps, or misaligned trim
- Water staining or mineral buildup around seam and wall
How to test for leaks and slow drainage
To test for leaks and slow drainage, the inspector fills the tub to a marked level and observes the overflow area, drain, and surrounding wall for escaping water and slow drawdown.
They time drainage after removing the stopper, listen for gurgles, check adjacent ceilings or cabinets for moisture, and run dye or food coloring to reveal hidden leaks.
Notes document rate and location.
When the overflow issue is cosmetic vs structural
Distinguish quickly between cosmetic and structural overflow issues by inspecting for visible damage, testing for leaks, and evaluating surrounding materials:
superficial problems include stained or corroded faceplates, loose trim, or minor discoloration that do not admit water, while structural issues involve cracks, warped walls, persistent moisture, or active leaks indicating compromised seals or framing.
Cosmetic fixes: clean, replace trim, touch up finishes.
Structural: remove trim, dry, repair seals, consult contractor.
Tools and Materials You’ll Need
A concise list of essential tools—adjustable wrench, screwdrivers, pliers, and a flashlight—prepares the homeowner to tackle most overflow drain repairs.
Common replacement parts such as gaskets, a faceplate, bolts, and plumber’s putty should be purchased ahead of time to guarantee a smooth repair.
If corrosion, hidden damage, or uncertain plumbing configurations are present, a licensed plumber should be contacted.
Essential tools for overflow drain repair
Gathering the right tools before starting an overflow drain repair streamlines the job and reduces the chance of mistakes.
A concise set of hand tools and inspection items guarantees efficient, safe work without overbuying.
- Adjustable wrench, pliers, and screwdriver set
- Flashlight or inspection mirror for visibility
- Bucket, towels, and gloves for cleanup and protection
Replacement parts and materials to buy (gaskets, faceplate, bolts, plumber’s putty)
With the basic tools in hand, attention turns to the replacement parts and consumables needed to complete an overflow drain repair.
Purchase a correctly sized rubber gasket, metal or plastic faceplate matching tub finish, stainless or brass overflow bolts, and plumber’s putty or silicone sealant.
Include replacement screws, a neoprene washer, and thread sealant tape to guarantee a watertight, durable assembly.
When to call a professional instead
When should a homeowner stop and call a professional?
A professional is advised if leaks persist after gasket replacement, corrosion or damaged piping is evident, threads or studs are stripped, access requires cutting into walls, or the job involves unfamiliar soldering, cast-iron work, or complex drain assemblies.
Call a licensed plumber for persistent odors, recurring clogs, or when local code permits and inspections are required.
Step-by-Step Repair: Fixing a Leaking Overflow Drain
The following steps guide a straightforward repair of a leaking overflow drain, beginning with preparing the work area and shutting off nearby water sources.
The overflow plate and cover are removed to inspect and extract the old gasket or seal. Then contact surfaces are cleaned and any debris cleared.
Finally, a new gasket is installed or the overflow assembly is replaced to restore a watertight seal.
Step 1 Prepare the work area and shut off nearby water sources
Clear the area around the tub and lay down towels or a plastic sheet to protect floors and catch drips.
Then locate and turn off any nearby water sources—such as the bathroom shutoff valves or the home’s main water supply—before beginning work.
Gather basic tools, a flashlight, and a bucket.
Confirm good lighting, ventilate the room, and place a phone nearby for emergencies.
Step 2 Remove the overflow plate and cover safely
With the work area secured and water off, attention shifts to the overflow assembly.
The technician removes the cover screws using a screwdriver or hex key, holding the plate to prevent drops. After loosening, the cover and faceplate are lifted straight off.
Any retained hardware is placed on a towel. Care is taken to avoid scratching the tub finish and disturbing surrounding caulk.
Step 3 Inspect and remove the old gasket or seal
Begin by visually inspecting the exposed overflow opening and gasket area for cracks, hardening, or compression set; a compromised seal typically appears flattened, torn, or brittle and often shows mineral buildup or mold along its edges.
If damaged, grasp the gasket with pliers or fingers and peel it away, noting orientation and any retaining clips or adhesive for proper replacement.
Step 4 Clean contact surfaces and clear built-up debris
Scrape away grime and mineral deposits from both the tub’s overflow lip and the face of the replacement gasket so mating surfaces are smooth and free of residue.
Use a plastic scraper, soft brush, and white vinegar or a mild descaler to remove calcium and soap scum.
Dry surfaces thoroughly and inspect for pitting or cracks.
Clear surrounding weep holes and threads of any remaining debris.
Step 5 Install a new gasket or replace the overflow assembly
Install the new gasket or replace the overflow assembly by aligning the gasket against the tub’s overflow lip and seating it evenly before tightening the cover plate or reattaching the assembly.
Verify the gasket matches the flange profile, then position the replacement assembly, hand-thread fasteners to avoid cross-threading, and progressively snug hardware.
Confirm gasket continuity and visual sealing before proceeding to final plate reattachment.
Step 6 Reattach the overflow plate and tighten to proper torque
Reattach the overflow plate by aligning it over the gasket or assembly so the screw holes match the tub’s flange. Then hand-thread the screws to guarantee proper engagement.
Using a screwdriver or nut driver, tighten screws evenly in a crisscross pattern to compress the gasket uniformly.
Apply recommended torque—avoid overtightening—and confirm the plate sits flush and level against the tub surface.
Step 7 Test for leaks and proper operation
With the overflow plate secured and torqued, the next step is to verify there are no leaks and that the overflow functions correctly.
Fill the tub to the overflow level, inspect for drips around the plate and inside the access panel.
Operate the stopper to confirm proper sealing and release.
Monitor for several minutes; tighten connections if any seepage appears, then retest.
Repair Variations for Specific Problems
Different causes of overflow failure call for different repairs, from replacing a corroded or broken overflow plate to swapping an internal overflow pipe or flange.
More complex situations, such as a hidden leak behind the tub wall, may require opening the wall and professional assessment.
For short-term protection while waiting for parts, simple temporary measures can limit water damage until a permanent fix is performed.
Fixing a corroded or broken overflow plate
A corroded or broken overflow plate can undermine a tub’s seal and appearance, so addressing it promptly prevents leaks and further damage.
Inspect fasteners and surrounding caulk, remove the plate, and replace with a matching, corrosion-resistant model.
Clean and dry the mounting area, apply appropriate silicone or plumber’s putty, secure the new plate, and test for a watertight seal before finishing.
Replacing an internal overflow pipe or flange
Begin by evaluating the damage to the internal overflow assembly to determine whether the pipe or flange requires full replacement.
If cracked, corroded, or leaking at joints, remove trim and access cover, detach connections, and extract the defective section.
Install a matching replacement, confirm gasket seals, tighten fasteners, and test for leaks.
Restore trim and verify proper overflow function.
Addressing a hidden leak behind the tub wall
Several situations can conceal a slow or persistent leak behind the tub wall, and successful repair depends on accurately locating the source before cutting or replacing materials.
Technicians use moisture meters, infrared cameras, or small inspection holes to trace leaks to pipe joints, drain connections, or damaged backing.
Once identified, they isolate water, remove affected drywall, repair or replace plumbing, and restore waterproofing and wall finishes.
Temporary fixes while waiting for parts
While waiting for replacement parts, practical temporary fixes can limit water damage and keep a tub functional without risking permanent harm.
Use plumber’s tape on threaded connections, apply a removable silicone patch over minor overflow leaks, tighten accessible fittings, and insert a rubber stopper for overflow control.
Reduce water pressure, monitor for moisture, and schedule permanent repairs promptly to prevent worsening damage.
Sealing Techniques and Materials Comparison
Different sealants offer trade-offs in durability, flexibility, and ease of installation when repairing an overflow drain. The table below summarizes key pros and cons and indicates recommended choices for common tub materials. This comparison helps select the appropriate sealant for metal, acrylic, or ceramic tubs.
| Sealant | Recommendation by tub material |
|---|---|
| Rubber gasket: good elasticity, may compress or degrade; best for metal tubs | Metal tubs: rubber gasket; Acrylic/Ceramic: not recommended |
| Silicone vs plumber’s putty: silicone is flexible and waterproof; plumber’s putty is easy to mold but can stain or fail on some plastics | Acrylic/Ceramic: 100% silicone; Metal: plumber’s putty acceptable if manufacturer permits |
Pros and cons of rubber vs silicone vs plumber’s putty seals
A homeowner choosing a sealant for a tub overflow must weigh durability, flexibility, and ease of use.
Rubber gaskets offer easy installation and decent flexibility but can compress or degrade over time.
Silicone provides long-lasting, waterproof, flexible seals resistant to mold but requires curing.
Plumber’s putty is pliable and removable yet can stain porous surfaces and may break down with prolonged water exposure.
Recommended sealant choices for different tub materials
After comparing rubber, silicone, and plumber’s putty, the next consideration is matching sealant properties to tub material to confirm a lasting, watertight overflow seal.
For acrylic or fiberglass, use neutral-cure silicone or specialty acrylic adhesive.
For cast iron or steel, standard silicone or plumber’s putty works.
For stone or tiled surrounds, use silicone formulated for stone.
Verify compatibility and follow cure times.
Preventing Future Overflow Problems
A simple routine inspection and maintenance schedule helps catch seal failures and slow drains before they become major issues.
Adjusting water use habits—such as avoiding prolonged high-flow fills—reduces mechanical wear on the overflow assembly.
Regularly clearing debris, using strainers, and treating vulnerable surfaces will prevent clogs and corrosion.
Routine inspection and maintenance schedule
Regular, scheduled inspections help catch small issues with the overflow drain before they become costly problems.
A concise maintenance schedule prevents corrosion, clogs, and seal failure.
Recommended tasks and frequency:
- Inspect faceplate and gasket monthly; tighten or replace as needed.
- Flush and test overflow channel quarterly; clear debris.
- Replace aging gaskets and hardware every 2–3 years or at first sign of leakage.
Water use habits that reduce overflow wear
Pairing a consistent inspection routine with thoughtful water use further reduces stress on the overflow assembly and extends its service life.
Limiting bath fill levels, avoiding sudden high-volume inputs, and using moderate water pressure when rinsing minimize hydraulic strain.
Regularly allowing the tub to drain fully between uses prevents prolonged moisture exposure.
These habits lower mechanical wear and reduce the frequency of overflow-related repairs.
How to protect the overflow from clogs and corrosion
Many homeowners can prevent most overflow issues by keeping the opening and surrounding assembly free of debris and corrosive buildup; routine cleaning, proper ventilation, and simple protective measures reduce clogging and slow material degradation.
Regularly inspect gaskets and trim, flush the overflow with vinegar or mild cleaner, install a mesh screen, avoid corrosive chemicals, and address leaks promptly to prevent rust and mineral accumulation.
Cost, Time, and Difficulty Estimates
Typical do-it-yourself overflow drain fixes often require one to three hours and minimal parts, keeping costs low.
If the problem is more extensive—corroded components, hidden leaks, or compromised tub fittings—professional plumbing services may be necessary, increasing both time and expense.
A licensed plumber will provide a scope estimate and itemized pricing, commonly charging a service call plus labor and parts.
Typical DIY time and cost breakdown
Estimate time, cost, and difficulty before starting: replacing or repairing a tub overflow drain generally takes 30 minutes to 2 hours for a DIYer with basic tools, costs between $15 and $75 for parts (rubber gasket, flange kit, replacement overflow plate or pop-up assembly), and ranges from easy to moderate difficulty depending on access and whether the bath trim or overflow assembly behind the wall must be removed.
| Item | Typical |
|---|---|
| Time | 30–120 min |
| Cost | $15–$75 |
When repairs escalate to professional plumbing services
Call in a professional when the overflow problem involves hidden damage, complex pop-up mechanisms, corroded or seized components, or access behind the wall.
Expect higher labor and parts costs than DIY, potential permit or inspection fees, and elapsed time from a few hours to a day for straightforward fixes or multiple days for structural or behind-wall work.
Difficulty ranges moderate to high.
What to expect from a plumber: scope and pricing
A plumber’s assessment generally defines the scope of work, expected costs, and timeframe up front, breaking the job into diagnostics, parts replacement or repair, and any required access or structural work.
Typical small overflow fixes take 1–3 hours with $100–$350 labor plus parts; more complex repairs involving wall removal or valve replacement can span a day and cost $400–$1,200 or more, depending on region.
Troubleshooting Common Repair Failures
Persistent leaks after a gasket replacement often indicate improper seating, damaged mating surfaces, or a wrong gasket size rather than a faulty part.
Misaligned or stripped mounting bolts can prevent a proper seal and may require realignment, rethreading, or replacement with larger fasteners and anchors.
If cracks, rot, or movement are evident in the tub or surrounding wall, the problem is structural and requires repair beyond simple drain component replacement.
Why leaks persist after replacing the gasket
Why does water still seep from the overflow after the gasket has been replaced?
Possible causes include improper gasket seating, uneven mating surfaces, cracked or warped overflow plate, residual debris preventing a seal, degraded sealant application, or an incorrect gasket size.
Inspect surfaces for damage, clean thoroughly, confirm correct part fit, and apply proper sealant and torque to guarantee an even, continuous compression seal.
Dealing with misaligned or stripped mounting bolts
Begin by evaluating the bolt alignment and thread condition visually and with simple tools: misaligned bolts will bind or cross-thread when turned, while stripped threads spin without drawing the overflow plate tight.
Realign bent bolts or replace with correct-length stainless fasteners. If threads are damaged, install brass or nylon threaded inserts or use longer bolts with a backing washer.
Retest for snug, leak-free seating.
Signs the tub or wall needs structural repair instead
If tightening or replacing bolts and inserts fails to stop leaks or the overflow plate cannot seat evenly, the problem may be structural rather than hardware-related.
Indicators include visible cracks in the tub or wall, water stains spreading beyond the fixture, soft or sagging wallboard, persistent mold despite repairs, and movement when pressure is applied.
Professional assessment and framing or tub replacement may be required.
Photo and Diagram Guide to Overflow Components
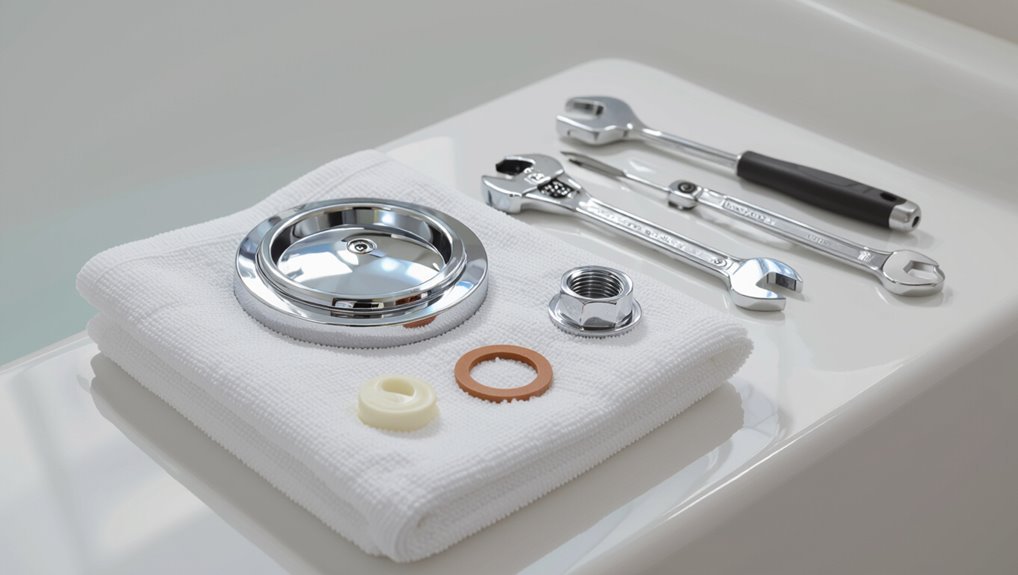
A labeled diagram of the overflow assembly and its seals is provided to clarify each component and its relationship to the tub.
Accompanying before-and-after photos illustrate typical repair scenarios, highlighting worn seals and correct reinstallation.
These visuals support accurate identification and guide effective repairs.
Labeled diagram of overflow assembly and seals
The labeled diagram clarifies the overflow assembly by identifying each component and its seal: the overflow faceplate, mounting screws, overflow pipe, gasket, rubber seal or O-ring, and the interior connection to the tub drain.
Clear callouts show seal orientation, material type, and typical wear points. Annotations indicate fastener sizes and where to access the seal for inspection or replacement.
Before-and-after photos of common repairs
Several paired photos illustrate typical overflow repairs, each accompanied by a simplified diagram identifying the affected component and seal.
A concise caption notes problem, repair step, and result.
Visuals compare corroded flanges, torn gaskets, and misaligned assemblies before and after replacement, highlighting seal placement and torque points.
- Corroded flange replacement
- Gasket swap and seat restoration
- Realignment and retorque steps
Conclusion
In closing, calm care corrects a common conundrum: clogged, cracked, or creaky overflow connections. Consistent checks, concise repairs, and correct components conserve comfort and cut costly consequences. By balancing basic tools, bright troubleshooting, and brief preventative practices, homeowners boost bathtub behavior and banish bothersome breaches. Steady, smart maintenance sustains safety, saves money, and secures serene soak sessions—showing simple steps solve slippery situations and strengthen structural soundness.