How to Install Kitchen Sink Plumbing: Step-by-Step Guide for DIYers and Pros
To install kitchen sink plumbing, follow these clear steps: start by measuring the space and shutting off the water supply. Remove the old sink, then dry-fit the new sink and faucet to ensure proper placement. Seal and secure the sink in position, then connect the supply lines and shutoff valves. Install the drain and P-trap, ensuring the correct slope for drainage. Finally, test for leaks and ensure proper venting. Use the right tools, compatible fittings, and materials that comply with local codes. For troubleshooting, address slow drains or leaks with targeted repairs. Continue reading for detailed instructions, diagrams, and safety tips to confidently complete your installation.
Overview of Kitchen Sink Plumbing Installation
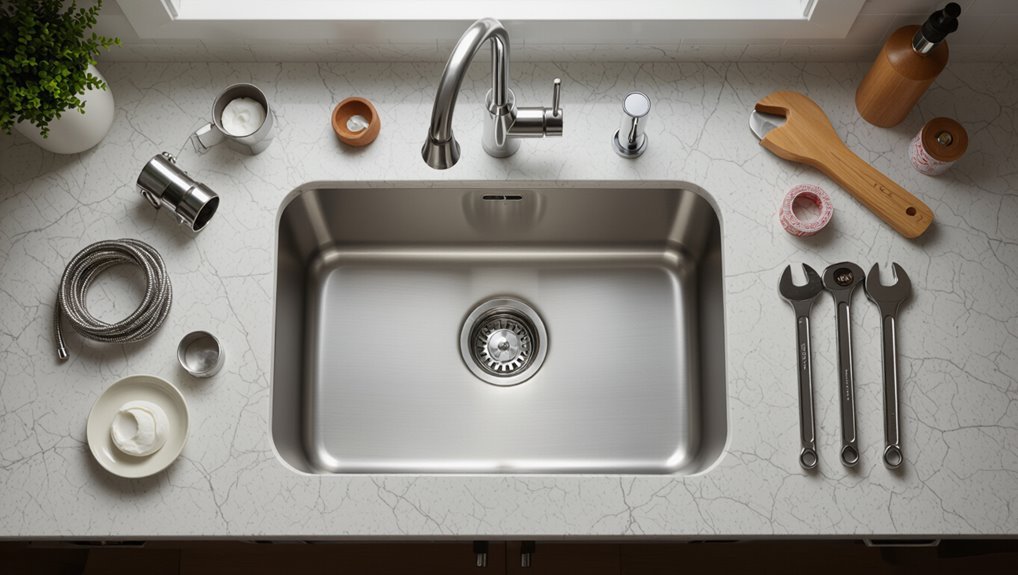
This section outlines the steps covered in the guide, including drain and trap installation, faucet and supply line connections, and sealing and testing procedures.
It also identifies which tasks are suitable for a competent DIYer and which situations—such as major pipe rerouting or persistent leaks—warrant hiring a licensed plumber.
A concise tools and materials checklist is provided so readers can confirm they have everything needed before starting.
What this guide covers
How does a kitchen sink plumbing installation unfold from start to finish? This guide outlines how to install kitchen sink plumbing with concise steps, tools, safety, common fittings, and troubleshooting for DIYers and pros.
| Stage | Focus |
|---|---|
| Preparation | Measurements, shutoff |
| Tools | Wrenches, sealant |
| Installation | Drain, trap, supply |
| Testing | Leak checks |
| Troubleshoot | Common fixes |
Who should attempt this project and when to call a pro
Although basic sink assemblies and simple supply-line swaps are well within reach for homeowners with steady hands and basic plumbing tools, more complex tasks—like altering drain lines, moving supply or waste locations, working on gas lines, or repairing sewer connections—require a licensed plumber.
DIYers comfortable with shutoffs, simple fittings, and local codes may proceed.
Call a pro for structural changes, persistent leaks, sewage issues, or permit-required work.
Tools and materials checklist
A clear, organized tools-and-materials list sets the stage for an efficient kitchen sink installation, ensuring tasks proceed without unnecessary delays.
Essential items include reliable wrenches, pipe cutter, plumber’s putty, and supply lines. Safety gear and sealants prevent mistakes.
Typical checklist:
- Adjustable wrench, basin wrench
- Pipe cutter, hacksaw
- Plumber’s putty, Teflon tape
- Supply lines, P-trap, fittings
Preparing for Installation
Before beginning work, measurements are taken and a plan is drawn to position the sink and guarantee proper clearances.
The water supply is shut off and basic safety precautions are observed to prevent leaks or injury.
Existing plumbing is inspected for layout, dimensions, and fittings to confirm compatibility with the new sink.
Measuring and planning the sink location
Careful measurement and thoughtful planning determine where the sink will sit, how it will function, and what adjustments the surrounding cabinetry and plumbing will require.
Measure cabinet opening, countertop thickness, and backsplash clearance.
Locate drain and faucet centers relative to studs and waste lines.
Verify appliance and drawer clearances.
Plan for trap placement and venting.
Mark cutout, account for mounting hardware, and confirm access for future maintenance.
Turning off water supply and safety precautions
Shut off the water at the house supply or localized shutoff valves and relieve pressure by opening a nearby faucet; this prevents unexpected flooding when disconnecting lines.
Verify zero flow, then shut main gas or electrical sources if nearby.
Wear safety glasses and gloves, place a bucket and towels to catch drips, and use proper tools.
Confirm valves operate smoothly before proceeding.
Assessing existing plumbing and compatibility with new sink
With water and power secured, the installer inspects the existing plumbing to determine if the new sink will fit and function properly.
Measurements of cabinet opening, faucet spread, drain location and tailpiece height are recorded.
Trap alignment, venting, shutoffs and supply line sizes are checked for compatibility.
Any adapters, extensions or reconfiguration needs are noted before proceeding with installation.
Removing an Old Sink and Clearing the Area
The technician begins by shutting off water and disconnecting supply lines and drain components to prevent leaks and spills.
Next, mounting hardware is removed and the old sink lifted free, taking care not to damage surrounding surfaces.
Finally, the countertop or cabinet opening is cleaned and any needed repairs are made to guarantee a proper fit for the new sink.
Disconnecting supply lines and drain components
Before disconnecting anything, the installer confirms the water supply is off at the shutoff valves and relieves pressure by opening the faucet.
Then protective gear and a bucket are positioned under the supply connections and trap to catch residual water.
Flexible supply lines are loosened at both shutoff and faucet ends, then removed.
The P-trap and tailpiece are unthreaded, inspected for debris, and set aside for cleaning or replacement.
Removing mounting hardware and old sink
Loosen mounting clips and fasteners around the sink perimeter, then lift the old sink free from the countertop.
Support the basin while detaching remaining clips and sealant with a putty knife.
Remove residual caulk, screws, and adhesive fragments.
Inspect exposed edges for hidden fasteners.
Coil and bag removed hardware and dispose of the sink per local regulations.
Clear the workspace for subsequent countertop repairs.
Cleaning and repairing the countertop or cabinet opening
After the sink is removed, inspect and clean the exposed countertop or cabinet opening to prepare for repairs and a proper reinstallation. Remove old sealant, debris, and water-damaged material; sand and dry surfaces. Patch chips or rot with suitable filler, reinforce weakened edges, and verify level and fit before placing the new sink.
| Loss | Renewal |
|---|---|
| grime | clarity |
| damage | hope |
Installing the New Sink: Step-by-Step
The installer begins by dry-fitting the sink and faucet to confirm alignment and clearances before any sealant is applied.
A continuous bead of appropriate sealant is then placed and the sink seated, removing excess sealant for a tight, watertight joint.
Finally, the sink is secured to the countertop or undermount brackets per manufacturer specifications to guarantee stable, long-term support.
Dry-fitting the sink and faucet
Dry-fit the sink and faucet to verify alignment, clearances, and component compatibility before applying sealants or making final connections.
Position sink in cutout, set faucet base and feed hoses, check mounting hole spacing, and confirm countertop overhang clearance.
Assemble drain, tailpiece, and trap fittings loosely to guarantee fit.
Mark interference points, adjust brackets, and note required hardware or trim changes.
Applying sealant and mounting the sink
Begin by ensuring all mating surfaces are clean, dry, and free of old sealant, dust, and oils so the new bead adheres properly.
Apply a continuous, even bead of silicone or plumber’s putty around the sink rim per manufacturer instructions.
Center the sink into place, press evenly to compress the sealant, wipe excess immediately, and allow specified curing time before connecting plumbing fixtures.
Securing the sink to the countertop or undermount brackets
Fit the sink into its sealed opening and secure it according to the countertop type: tighten mounting clips for drop-in or place and fasten undermount brackets beneath the counter.
Verify even pressure by alternating clips or bracket bolts, avoiding over-tightening that could crack countertop or deform sink.
Check alignment and level, adjust shims if needed, then retighten.
Wipe excess sealant and let cure before proceeding.
Installing Faucet and Accessories
Next, the faucet assembly and handles are mounted and tightened according to the manufacturer’s instructions.
Connections for pull-down sprayers, soap dispensers, and air gaps are routed and secured, with supply lines and spray hoses attached.
All fixture bases are sealed and checked to guarantee watertight joints and prevent leaks.
Installing faucet assembly and handles
Assembling the faucet and handles requires verifying that all components—spout, cartridge or stem, mounting hardware, and supply lines—match the sink’s hole configuration and the manufacturer’s instructions.
Position the gasket and escutcheon, feed supply lines through the hole, seat the faucet, and tighten mounting nuts evenly.
Install cartridges or stems, attach handles, test operation, and check for leaks before finalizing trim and securing connections.
Connecting pull-down sprayers, soap dispensers, and air gaps
Begin by locating each accessory’s mounting hole and verifying the length and fittings of its supply or hose lines against the faucet and under-sink space.
Thread hoses through holes, secure mounts, and tighten coupling nuts.
Connect the pull-down sprayer hose to the faucet swivel, attach the soap dispenser tube to its pump, and plumb the air gap to the dishwasher discharge using the correct size tubing and clamps.
Sealing around fixtures to prevent leaks
Proper sealing around the faucet and accessories guarantees water cannot seep into the countertop or cabinetry, preventing damage and mold. Apply plumber’s putty or silicone, tighten mounting hardware, and wipe excess. Inspect seals annually and after repairs. Use appropriate gaskets for soap dispensers and sprayers. Maintain clear drainage paths and replace degraded sealant promptly.
| Component | Sealant | Inspection |
|---|---|---|
| Faucet base | Silicone | Yearly |
| Sprayer hose | Gasket | After use |
| Soap dispenser | Putty | After install |
Connecting Water Supply Lines
Next, the focus shifts to selecting appropriate supply lines and shutoff valves that match the faucet fittings and local code.
The installer then connects the hot and cold lines to the corresponding faucet inlets, ensuring proper orientation and secure fittings.
Finally, the system is pressure tested and all joints are inspected for leaks before finishing.
Choosing supply lines and shutoff valves
Selecting the right supply lines and shutoff valves guarantees reliable, leak-free water delivery to the sink while allowing safe isolation for maintenance.
Choose braided stainless steel or reinforced PEX for durability; match fittings to existing threads (compression, flare, or sweat).
Use quarter-turn ball shutoffs for positive shutoff, confirm valve size matches supply (typically 1/2″ or 3/8″), and verify certification and pressure ratings.
Connecting hot and cold lines to faucet
With shutoff valves and supply lines chosen and installed, the installer can move on to attaching the hot and cold hoses to the faucet tailpieces. Use appropriate washers, hand-tighten then quarter-turn with a wrench, and guarantee correct hot/cold orientation. Secure lines to prevent kinks and avoid overtightening.
| Step | Action | Note |
|---|---|---|
| 1 | Align hoses | Hot = left |
| 2 | Tighten | Washer seated |
| 3 | Secure | No kinks |
Pressure testing and checking for leaks
Pressurize the system and inspect every joint and connection for signs of leakage.
Open shutoffs slowly, then run both hot and cold briefly to build pressure.
Observe supply hoses, valve fittings, and compression nuts for drips or dampness.
Tighten fittings incrementally if leaks appear; replace faulty washers or tape as needed.
Recheck after several minutes and under slight faucet flow to confirm integrity.
Installing the Drain and P-Trap
The next step covers assembling the sink tailpiece and securing the strainer to guarantee a watertight connection.
It then explains installing the trap adapter and fitting the P-trap to align with the drain outlet.
Finally, the section addresses attaching a garbage disposal where present and connecting the dishwasher drain to the waste line.
Assembling the tailpiece and strainer
Begin by seating the sink strainer into the drain opening and securing it from below.
Then attach the tailpiece and hand-tighten the slip nut and washer to create a snug, leak-resistant connection.
Verify alignment so the tailpiece runs straight down.
Trim tailpiece length if needed, deburr cut edges, and confirm all threaded or compression fittings are firm but not over-tightened before proceeding.
Connecting trap adapter and P-trap installation
Attach the trap adapter to the sink tailpiece outlet and align it with the wall drain stub, ensuring the adapter’s slip nut and gasket seat properly to prevent leaks.
Slide the P-trap inlet onto the adapter, tighten slip nuts by hand then quarter-turn with pliers.
Confirm trap arm slope toward the wall, check seals, run water and inspect for leaks; adjust as needed.
Attaching garbage disposal (if applicable) and dishwasher drain hookup
If a garbage disposal is being installed, it should be mounted to the sink’s flange and tightened according to the manufacturer’s instructions before connecting the drain.
Likewise, the dishwasher drain line must be routed to the disposal or sink tailpiece and secured to the designated inlet with a clamp or knockout plug removed, ensuring all slip-joint or hose connections use proper gaskets and are oriented to maintain the trap and air gap requirements.
The installer then assembles the P-trap, checks alignment, hand-tightens nuts, tests for leaks, and verifies dishwasher drain routing prevents backflow.
Common Problems and Troubleshooting
Common issues after installation include leaks at supply or drain connections, slow drainage from partial clogs, and sink movement or poor sealing around the rim.
Each problem has specific checks—tightening or replacing fittings and washers, clearing or snaking the drain, and reseating or re-caulking the sink.
Troubleshooting steps should be performed methodically to isolate the cause before replacing major components.
Fixing leaks at the supply or drain connections
Leaks at supply or drain connections often stem from loose fittings, worn washers, or damaged seals and should be diagnosed systematically to prevent water damage.
Inspect fittings, hand-tighten then torque to manufacturer specs, replace deteriorated washers or O-rings, and reseal threads with appropriate tape or compound.
Check compression nuts and slip-joint washers; test under pressure and correct persistent seepage by replacing faulty components.
Resolving slow drainage and clogs
Addressing slow drainage and clogs requires a systematic approach to identify whether the obstruction is in the P-trap, tailpiece, sink strainer, or farther down the drain line.
Begin with visual inspection and removal of the strainer, then detach and clean the P-trap.
Use a plumber’s snake for deeper blockages and flush with hot water.
Avoid chemical drain cleaners; repeat inspection after clearing.
Addressing sink movement or poor sealing
Tighten or reseat fixtures when a sink rocks or the seal around the basin shows gaps, since movement often stems from loose mounting hardware, warped countertops, or deteriorated caulking and gaskets.
Inspect clips, bolts, and underside supports; replace damaged gaskets and reapply silicone or plumber’s putty evenly.
Shim warped surfaces, torque fasteners to spec, and verify a watertight seal after testing.
Code, Safety, and Best Practices
The article shifts focus to code, safety, and best practices, noting that local code and venting requirements dictate many installation details.
It emphasizes proper slope and alignment for drain lines to guarantee reliable flow and prevent traps from siphoning.
It also lists materials and fittings to avoid, highlighting non-approved plastics, mismatched thread types, and improvised connections.
Local code considerations and venting requirements
When planning sink installation, compliance with local plumbing codes and proper venting is essential to secure safe, odor-free drainage and to avoid costly rework or fines.
Inspect permits, fixture trap sizes, vent placement, and minimum distances mandated locally.
Confirm vents prevent siphoning, follow approved materials and joint methods, and consult inspectors when altering existing venting to meet code and maintain system performance.
Proper slope and alignment for drain lines
Although proper slope and alignment are often overlooked, they determine whether a sink drains efficiently and resists clogs and leaks.
Drain runs should slope 1/4 inch per foot for 1½–2 inch pipes (minimum 1/8 inch per foot permitted in some codes).
Maintain straight runs, avoid sags and unnecessary bends, secure pipe supports, check pitch with a level, and test flow before finishing.
Materials and fittings to avoid
Several specific materials and fittings should be avoided to guarantee compliance, safety, and long-term performance of sink plumbing.
Avoid lead, unapproved galvanized fittings, and mixed-metal connections that cause galvanic corrosion.
Do not use drain-waste-vent traps undersized or with improper slope, solvent-welded connections where code requires mechanical, or nonlisted flexible hoses.
Always choose code-approved, corrosion-resistant components and certified seals.
Time, Cost Estimates, and When to Hire a Professional
Estimated completion time varies by skill—an experienced DIYer may finish basic sink plumbing in 2–4 hours, a moderately skilled homeowner in a half day, while a novice should expect a full day or more.
Costs break down into parts (faucet, trap, valves, connectors), tools (wrenches, plumber’s putty, a basin wrench) and possible labor, with DIY parts typically $50–$300 versus professional installs commonly $200–$800+ depending on complexity.
If leaks persist, water damage appears, gas connections or major drain rerouting are required, or local code permits demand a licensed tradesperson, hiring a plumber is advised.
Typical time required by skill level
Time and complexity vary with experience: a novice typically spends 3–6 hours installing a basic sink and faucet, an intermediate DIYer completes the job in 1–3 hours, and a skilled plumber often finishes in under an hour, not including unexpected repairs or permit waits.
Complexity increases with additional fixtures, tight access, old plumbing, or custom countertops; allow extra time for troubleshooting, drying, and testing.
Cost breakdown: parts, tools, and labor
A clear cost breakdown helps homeowners decide whether to DIY or hire a professional by outlining parts, tools, and labor. Estimates: basic parts $50–$200, tools $0–$150 (if rented), pro labor $150–$500. Choose DIY for savings; hire for complexity or code concerns.
| Item | DIY Range | Pro Range |
|---|---|---|
| Parts | $50–$200 | $75–$300 |
| Tools | $0–$150 | Included |
| Labor | $0 | $150–$500 |
Signs you should stop and call a plumber
Warning signs that demand professional help include persistent leaks, sewage odors, recurring clogs, visible water damage, and any issue involving gas lines or electrical components. When these occur, the homeowner should pause DIY efforts and call a licensed plumber.
Severe corrosion, warped cabinets, rising water bills, failed repairs, or complex rerouting require pro assessment.
Expect inspection fees, hourly rates, and possible emergency surcharges.
Maintenance and Care After Installation
After installation, periodic inspections of connections, drains, and valves help catch leaks and buildup before they cause damage.
Regular preventive maintenance—such as flushing drains and checking trap seals—extends system life and reduces clogs.
Attention to cleaning and preserving seals and finishes, using appropriate cleaners and gentle methods, maintains appearance and prevents deterioration.
Routine checks and preventive maintenance
Regular inspections keep a kitchen sink’s plumbing functional and prevent minor issues from escalating into costly repairs.
The homeowner or professional should perform simple, scheduled checks and address problems promptly.
- Check under-sink for leaks and dampness.
- Test faucet operation and flow rate.
- Inspect trap and drain for clogs and corrosion.
- Verify shutoff valves operate smoothly.
Cleaning and preserving seals and finishes
Once routine inspections identify leaks, worn seals or surface wear, attention should shift to cleaning and preserving the sink’s seals and finishes to prolong performance and appearance.
Use mild, nonabrasive cleaners and soft cloths; avoid bleach and harsh acids. Reseal with compatible plumber’s putty or silicone where needed.
Dry surfaces after cleaning, monitor seal integrity, and reapply protective coatings annually.
Quick Reference: Step-by-Step Checklist
This quick-reference checklist condenses the essential steps for installing kitchen sink plumbing into a concise sequence, covering preparation, rough-in connections, fixture installation, sealing, testing, and cleanup to guide a steady workflow.
- Verify measurements, shutoff, and supply layout.
- Install drain assembly and trap, align vents.
- Mount faucet, connect supply lines, secure fittings.
- Seal joints, pressure-test, inspect for leaks, tidy workspace.
Conclusion
Light glistens off freshly tightened fixtures as water first threads the new drain, answering months of planning with a soft, confident flow. The kitchen’s heartbeat steadies—pipes aligned like tidy rail tracks, sealant cured into invisible armor. Whether guided by careful DIY hands or a seasoned pro, the finished sink stands ready: a practical centerpiece where meals, conversations, and small daily rituals will ripple outward, steady and enduring.