How to Drain a Pipe Quickly and Safely: Step-by-Step Guide for Homeowners
To drain a pipe quickly and safely, start by isolating the affected section and shutting off the water supply. Open nearby faucets and drain valves to relieve pressure. Direct the water flow into a bucket, hose, or floor drain, using a pump or wet/dry vacuum for quicker removal. Always wear gloves and eye protection, check for electrical hazards, and confirm isolation before loosening any fittings. To avoid trapped air, vent the system and cap any open ends once you’re done. For more detailed techniques, tools, troubleshooting advice, and safety tips, continue reading.
How to Drain a Pipe Quickly and Safely: Immediate Steps for Homeowners
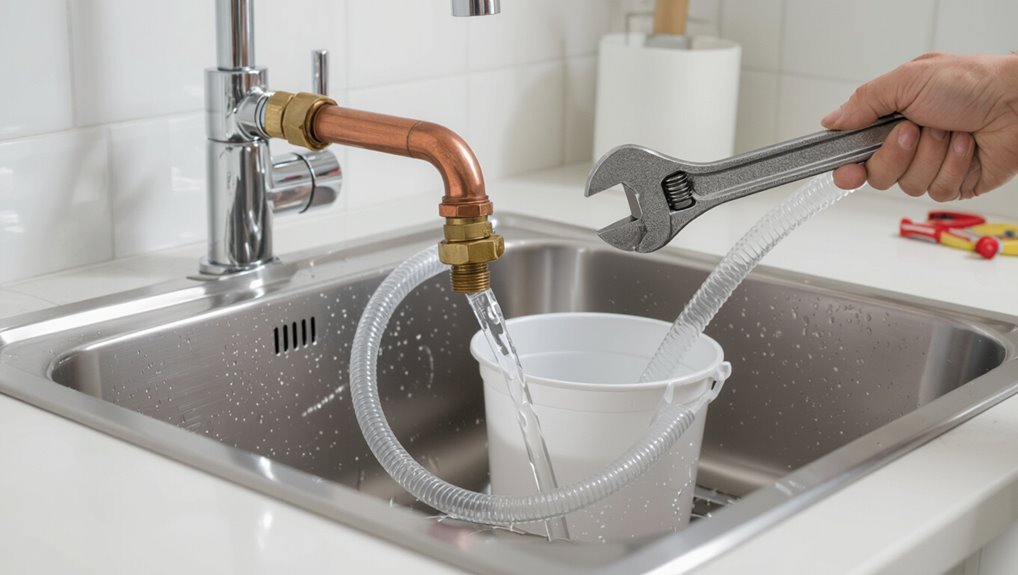
Before taking action, the homeowner should quickly assess the situation to identify the pipe type, leak severity, and any nearby hazards.
They should gather required tools and safety gear—shutoff valve access, bucket, wrench, gloves, and eye protection—before proceeding.
A brief, safe method follows: shut off water, relieve system pressure, contain spills, and perform the controlled drainage steps appropriate for the pipe.
Assess the situation before starting
A quick assessment of the situation helps determine the safest, most effective way to drain a pipe: identify the affected fixture, locate shutoff valves, check for active leaks or electrical hazards, and note the pipe material and accessibility.
The homeowner should evaluate water supply layout, downstream fixtures, potential contamination, and clear escape routes.
Document observations before proceeding with how to drain a pipe safely.
Required tools and safety gear
Essential tools and safety gear for draining a pipe include adjustable wrenches, bucket or hose for controlled discharge, rags or absorbent pads, and a pair of sturdy gloves and eye protection to prevent injury from pressurized water or debris.
The homeowner should also prepare basic containment and illumination.
- Adjustable wrench set
- Hose or bucket
- Absorbent pads/rags
- Safety gloves
- Safety glasses
Quick-safe method overview (direct action steps)
With tools and protective gear in place, the homeowner can follow a concise sequence to drain a pipe safely and quickly.
Shut off water supply, relieve system pressure, position a drain bucket and rags, loosen the lowest accessible joint or valve, open vents to allow air entry, drain until flow stops, reseal fittings, inspect for leaks, and restore supply slowly while checking function.
Step-by-Step Drainage Procedure
The procedure begins by shutting off the water supply and relieving system pressure to prevent flow during work.
The technician then isolates the affected pipe section and arranges gravity drainage by opening appropriate valves, faucets, or using drain plugs.
If gravity is insufficient, a wet/dry vacuum or pump is employed to speed water removal.
Shut off water supply and relieve pressure
Before beginning drainage, the water supply must be shut off and system pressure relieved to prevent unexpected flow or spray.
The homeowner locates and closes the main shutoff valve, then opens nearby faucets and a high‑and low point to bleed residual pressure.
For systems with valves only at fixtures, a service valve or pressure relief valve may be used to guarantee lines are depressurized.
Isolate the affected pipe segment
Having confirmed the supply is shut and pressure relieved, attention shifts to isolating the specific pipe segment to be drained.
The technician locates nearby isolation valves, closes upstream and downstream valves or uses temporary shutoffs, and confirms no bypasses feed the segment.
Cap or plug open ends and mark isolation points.
Verify isolation by checking for residual flow before proceeding.
Use gravity drainage: positioning and techniques
Once valves are confirmed closed and ends capped, the technician arranges the pipe so gravity encourages flow toward the chosen drain point.
The technician slopes sections uniformly, supports low spots, and secures temporary hangers to prevent sagging.
Flexible sections are straightened, joints aligned, and the discharge container positioned below the outlet.
Monitoring continues to guarantee steady gravity-assisted drainage without traps or airlocks.
Using valves, faucets, and drain plugs properly
Begin by confirming all upstream and downstream isolation points are secure and the chosen drain path is clear; then identify the specific valves, faucets, and drain plugs that will be used in sequence.
Operate valves slowly to release pressure, open faucets at low points to vent air, and remove drain plugs last for controlled flow.
Close devices gradually when finished and verify no leaks.
Employing a wet/dry vacuum or pump for faster removal
To accelerate drainage, a wet/dry vacuum or an appropriately sized pump is used to remove remaining fluid after isolation points are secured.
The operator should select equipment rated for the fluid type and flow rate, position intake hoses at the lowest accessible point, and confirm that discharge paths and receptacles comply with containment and disposal requirements before starting.
The operator monitors vacuum/pump performance, avoids air entrainment, and stops when flow ceases.
Flushing the line: how to rinse after draining
After draining, the line is flushed to remove residual contaminants and verify internal cleanliness. The operator selects an appropriate flushing medium (water, solvent, or approved cleaning solution) based on the fluid previously contained and system compatibility.
Flow rate and pressure are controlled to avoid damage. Flushed effluent is collected and disposed of per local regulations.
Multiple passes continue until samples show acceptable clarity and chemistry.
Closing and testing the system after drainage
With the line flushed and effluent handled appropriately, attention shifts to closing and testing the system to confirm integrity and safe return to service. Caps and valves are resealed, drain points closed, and temporary fittings removed.
Gradual system refill follows while inspecting for leaks, pressure anomalies, and proper flow. Complete functional checks, document results, and restore normal operation only after all tests pass.
Different Scenarios and Specific Techniques
Different situations require tailored draining methods depending on the type and location of the pipe.
Techniques vary for indoor fixtures, exposed metal or PVC supply lines, irrigation systems and hoses, and for hot water heaters or boilers where safety is critical.
Winterizing and freeze-prevention scenarios call for specific steps to remove or protect remaining water to avoid damage.
Draining indoor plumbing (sinks, toilets, showers)
Begin by identifying the specific fixture and the reason for draining—whether for repair, winterization, or to stop a leak—as each scenario changes the recommended procedure and tools.
For sinks, shut supply valves, open taps, and remove trap to clear water.
For toilets, shut valve and flush until empty; sponge residual.
For showers, close supply, open taps and drain low points; use a wet vac if needed.
Draining exposed metal or PVC supply lines
Identify the pipe material and layout before draining exposed metal or PVC supply lines, since thread types, joint seals, and slope determine the safest method.
For metal lines, shut valves, open lowest faucets, and use wrench-safe fittings; for PVC, relieve pressure, loosen solvent-welded sections only if replacing, and tip sections to drain.
Support piping, catch water, and inspect joints for leaks before reassembly.
Draining irrigation and outdoor hoses
Many outdoor water systems require tailored draining techniques based on configuration and climate; irrigation mains, sprinkler laterals, soaker hoses, and garden hoses each present distinct challenges.
Professionals recommend shutting valves, opening drain ports, and using quick-coupler keys for mains. Blowout with compressed air suits pressurized systems; gravity draining and rolling hoses remove residual water.
Insulate exposed components to prevent freeze damage.
Draining hot water heaters and boilers safely
Draining a hot water heater or boiler requires different steps depending on fuel type, system pressure, and whether the unit serves domestic hot water, radiant heat, or both.
Technicians should follow procedures specific to electric, gas, oil, and combi units, account for temperature and pressure relief (TPR) components, and use appropriate isolation, cooling, and disposal methods to prevent scalding, corrosion, or contamination.
Follow manufacturer purge, venting, and sediment-removal instructions, depressurize safely, capture and neutralize runoff, and verify controls before refilling.
Draining pipes in winterizing or freeze-prevention situations
Several common winterizing scenarios demand specific draining techniques to prevent freeze damage, from seasonal cottages and unheated cabins to commercial systems and irrigation lines.
Professionals assess system layout, isolate zones, open low points and drain valves, flush traps and appliances, blow out lines with compressed air where appropriate, and add antifreeze to closed loops.
Documentation and labels guarantee reliable restart.
Safety Precautions and Risk Management
The section outlines key safety measures for draining pipes, including steps to prevent scalding, chemical exposure, and contamination.
It covers lockout/tagout procedures for multi-unit water systems and techniques for managing pressurized or clogged lines.
Clear criteria are given for when work should stop and a professional plumber should be called.
Avoiding scalding, chemical, and contamination hazards
Because hot water, residual chemicals, and contaminants can create immediate health risks, operators should assess temperature and substance presence before opening any valve or fitting.
Use insulated gloves, eye protection, and thermal-resistant clothing.
Ventilate enclosed areas, sample water if chemical exposure is possible, and direct discharge away from people and food.
Dispose of contaminated runoff per local regulations.
Lockout and tagout for water systems in multi-unit homes
Following precautions for temperature and contamination, attention should turn to controlling access and energy sources when draining water systems in multi-unit homes.
Workers isolate main valves, shut off pumps, and de-energize heating components. Authorized personnel apply locks and durable tags indicating work scope and contact information.
Coordination with building management and occupants prevents accidental reactivation and guarantees clear responsibility throughout the draining procedure.
Handling pressurized or clogged pipes safely
When dealing with pressurized or clogged pipes, personnel should assume residual pressure and trapped contents pose immediate hazards and proceed only after verifying isolation and depressurization.
This includes confirming valve positions, slowly venting pressure through designated ports, and using pressure gauges to monitor reductions before any joint or fitting is opened.
Personnel must wear eye, hand, and respiratory protection, use non-sparking tools, and contain spills with absorbents.
When to stop and call a professional
If pressure cannot be fully verified as relieved, or if obstructions, corrosion, leaks, unusual odors, visible chemical residues, or unexpected fluid characteristics are encountered, work should stop and a qualified professional must be called.
A plumber or hazardous-materials specialist assesses structural integrity, identifies contaminants, and uses proper tools.
Homeowners should avoid improvisation, isolate the area, document conditions, and await expert intervention to prevent injury or property damage.
Tools, Products, and Materials Comparison
A concise comparison of tools and materials helps determine the most efficient approach for draining a pipe. The pros and cons of manual versus powered pumps and the selection of drain valves, adapters, and fittings are summarized below to guide practical choices. The following table highlights key options and typical use-cases.
| Item | Notes |
|---|---|
| Manual pumps | Portable, low cost, slower flow |
| Powered pumps | Faster, higher capacity, needs power |
| Valves & adapters | Choose materials and thread types for compatibility |
| Fittings | Match sizes, use proper seals to prevent leaks |
Manual vs powered pumps: pros and cons
Choose between manual and powered pumps by weighing portability, effort, speed, and cost.
Manual pumps are inexpensive, lightweight, and simple to maintain but require physical effort and work best for small volumes.
Powered pumps offer fast, continuous flow, handle larger volumes, and reduce labor, but they cost more, need a power source, and require maintenance.
Match choice to job scale and access.
Recommended drain valves, adapters, and fittings
When selecting drain hardware, compatibility and flow capacity should guide the decision alongside pump type and job scale discussed previously.
Recommended components balance durability, seal integrity, and ease of connection.
- Brass ball valves for durability and smooth shutoff
- PVC gate valves for low-cost corrosion resistance
- Quick-connect adapters for rapid setup
- Camlock fittings for high-flow transfers
- Hose barb reducers for secure hose joins
Common Problems During Drainage and How to Fix Them
Common issues that can arise during pipe drainage include persistent leaks at joints, blockages that prevent complete emptying, corroded or damaged valves, and trapped air that causes water hammer.
Each problem requires a specific diagnostic step—inspection for visible drips, flow testing to locate obstructions, valve assessment for wear, and observation of pressure surges.
The following guidance explains simple fixes and when replacement or professional help is warranted.
Leaks or drips at joints after draining
Inspecting joints after draining often reveals slow leaks or persistent drips caused by residual pressure, settled seals, or loosened fittings.
The homeowner should tighten fittings incrementally, replace damaged washers or O-rings, and reseat compression nuts.
Apply appropriate thread sealant or plumber’s tape to threaded joints.
After repairs, re-pressurize system slowly and monitor for steady seals before completing the job.
Blockages preventing full drainage
Blockages in a pipe can prevent complete drainage by trapping water behind debris, corrosion, or mineral buildup, producing slow emptying or standing pockets that complicate repairs.
Identify obstruction location using inspection ports or a plumber’s snake; flush with water or compressed air where safe.
Remove accessible debris, use appropriate bio or descaling agents for mineral scale, and retest drainage before reassembly.
Corroded or damaged valves and how to replace them
Corroded or mechanically damaged valves often cause leaks, restricted flow, or complete failure during drainage, requiring prompt replacement to restore system integrity.
Inspect valve types, shut off upstream supply, drain remaining fluid, and note pipe connections and fittings.
Remove seized hardware with penetrating oil, replace with matching, pressure-rated valve, apply proper sealing (PTFE tape or compound), tighten, and pressure-test for leaks.
Dealing with trapped air and water hammer
Recognize that trapped air and water hammer are distinct but related issues that can disrupt drainage: air pockets cause sputtering, slow flow, or uneven draining, while sudden pressure surges (water hammer) can rattle fittings, stress joints, and lead to leaks.
To remedy, bleed lines at high points, open faucets slowly, install air vents or water hammer arrestors, and check clamps and supports for loose piping.
Preventive Measures to Reduce Future Drainage Needs
Preventive steps can greatly reduce the frequency and complexity of future drainage tasks.
Regular maintenance to keep lines clear, insulating and protecting exposed pipes against freezing, and following best practices for seasonal shutdowns all help prevent blockages and damage.
Implementing these measures saves time, lowers repair costs, and improves system reliability.
Routine maintenance to keep pipes clear
Regularly scheduling simple maintenance tasks can greatly reduce the frequency of clogged or slow drains.
Homeowners should flush drains monthly with hot water, use enzyme-based cleaners quarterly, and install strainers to catch debris.
Inspect visible pipes for leaks or buildup seasonally and clear hair and food scraps promptly.
Professional inspections every few years help catch hidden blockages before they require emergency draining.
Insulation and freeze protection tips for exposed pipes
Many homeowners find that insulating exposed pipes and adding freeze protection measures greatly reduces the risk of bursts and the need for emergency draining.
Recommended actions include fitting foam sleeves, sealing gaps where cold air enters, applying heat tape per manufacturer instructions, and maintaining consistent ambient temperature in unheated spaces.
Regular inspections and prompt repairs of worn insulation prevent moisture buildup and thermal bridging.
Best practices for seasonal shutdowns
After insulating and protecting exposed pipes, homeowners should plan seasonal shutdowns to minimize the need for emergency draining later.
They should schedule and document shutoff dates, drain outdoor hoses and irrigation lines, isolate and winterize seldom-used fixtures, and shut off and drain water to unused buildings.
Regularly testing valves and keeping clear access prevents surprises and reduces future maintenance and emergency interventions.
Estimated Timeframes and Cost Considerations
Typical residential drain tasks often take from under an hour for simple sink clears to several hours for mainline or heavily clogged systems.
Costs vary widely: DIY fixes may require only basic tools and minimal expense, while professional services add labor, specialized equipment, and possible diagnostic fees.
Readers should weigh time, skill level, and potential hidden costs when choosing between DIY and hiring a pro.
Time required for common drain jobs
Several common drain jobs each have predictable time ranges that depend on factors like access, severity, and tools available.
Minor clogs often clear in 15–30 minutes with a plunger or hand auger.
Bathroom sink or shower backups typically require 30–60 minutes.
Mainline blockages, tree-root intrusions, or collapsed sections can take several hours to a full day, especially if excavation or camera inspection is needed.
DIY cost vs professional service cost factors
Knowing how long a job should take helps frame the decision between DIY and hiring a professional, because time directly affects labor cost, inconvenience, and risk.
Costs balance tools, expertise, and potential repairs. Consider:
- Tool purchase or rental vs service fee
- Hourly labor rates
- Time lost from work
- Risk of mistakes and repair costs
- Warranty and liability coverage
Checklist: Quick Reference for Safe Pipe Drainage
Begin by confirming system shutdown and isolating the pipe from supply and downstream connections to prevent unintended flow.
A concise checklist guarantees safety and efficiency during drainage operations.
- Verify power and valve isolation
- Wear PPE: gloves, goggles, mask
- Relieve residual pressure slowly
- Use proper drain container and fittings
- Inspect for leaks and secure caps before restart
Conclusion
A homeowner stands before a quiet pipe like a winter brook stilled beneath glass, tools arranged like lanterns on the bank. Methodical hands coax water out, each valve turned a small sunrise that sends the last drops sliding away. Calm attention keeps risk at bay, while simple care lays down a clear path for future flow. In that hush, maintenance becomes a steady craft, preserving the home’s hidden waterways for seasons to come.