How to Hook Up an Electric Hot Water Heater: Step-by-Step Guide for DIYers
To successfully hook up an electric hot water heater, you’ll need to connect the cold supply, hot outlet, temperature and pressure (T&P) relief valve, and electrical feed to a grounded dedicated 240V circuit, following the manufacturer’s specifications and local codes. Ensure the tank is properly secured, drained, and filled before applying power. Additionally, verify the breaker, wire gauge, and clearances, install dielectric unions and seismic straps as needed, and set the thermostat to around 120°F. Always obtain necessary permits and conduct safety checks. For a comprehensive guide, including detailed steps, diagrams, and troubleshooting tips, continue reading.
Can You Hook Up an Electric Hot Water Heater Yourself?
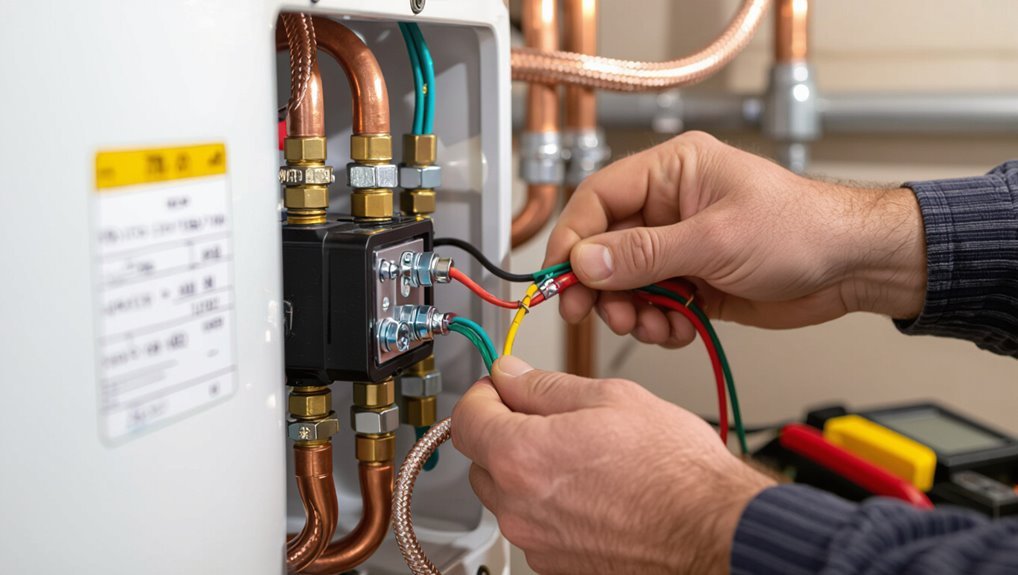
Evaluating whether to install an electric hot water heater hinges on basic electrical and plumbing skills, the time available, and local code or permit requirements.
A competent homeowner with wiring experience and the right tools can complete a straightforward replacement in a few hours, but unfamiliarity with circuits, tank connections, or permit rules increases risk.
If the job involves complex wiring, outdated systems, gas conversions, or municipal inspections, a licensed professional should be engaged.
Short summary of required skills, time, and legal considerations
Before attempting to hook up an electric hot water heater, a homeowner should have basic electrical and plumbing competence, including safe use of a multimeter, knowledge of local electrical codes, ability to make secure wire connections and pipe fittings, and comfort with turning off and locking out circuit breakers and shutting off water supplies.
Estimated time: 3–6 hours.
Permits and inspections may be required; research local rules for how to hook up a electric hot water heater.
When to call a licensed pro instead
Although many homeowners can handle straightforward replacements, a licensed professional should be called when the job involves unfamiliar electrical work, complex plumbing changes, older or nonstandard wiring, multifamily or commercial properties, or when local codes or permit requirements mandate certified installation and inspection.
A pro also helps with troubleshooting persistent issues, guarantees safe grounding and breaker sizing, and provides documentation for insurance and resale.
Basics What Is an Electric Hot Water Heater and How It Works
An electric hot water heater consists of a tank, one or two heating elements controlled by thermostats, a dip tube for cold-water delivery, and safety devices such as a temperature-and-pressure (T&P) valve.
Electric elements convert electrical energy into heat via resistance, warming the surrounding water inside the tank.
Units vary by design and capacity, from compact point-of-use models to large 40–80 gallon tanks for whole-house service.
Main components (tank, elements, thermostat, dip tube, T&P valve)
A typical electric hot water heater consists of several key components that work together to store, heat, and deliver hot water.
The tank stores water; electric elements heat it. A thermostat controls temperature; a dip tube directs cold inlet water to the tank bottom.
A temperature-and-pressure (T&P) relief valve prevents overpressure and overheating, discharging excess to avoid tank failure or scalding.
How electric heating elements heat water (basic electricity-to-heat explanation)
Electric heating elements convert electrical energy into heat through the resistance of a metal conductor: when current flows through the element, collisions between electrons and the conductor’s atoms generate thermal energy that transfers directly into the surrounding water.
Thermostats regulate element power by opening or closing circuits to maintain set temperature.
Heat moves by conduction and convection within the tank, raising water temperature efficiently and predictably.
Common types and sizes of electric water heaters
Having explained how heating elements produce heat and are controlled, the discussion now turns to the common types and sizes of hot water heaters available for homes and small commercial settings. Electric options include tank, tankless, and hybrid models; capacities typically range 20–80 gallons or instantaneous flow rates. Choose by space, demand, and efficiency.
| Type | Capacity/Flow | Typical Use |
|---|---|---|
| Tank | 20–80 gal | Homes |
| Tankless | 1–5 GPM | Point of use |
| Hybrid | 40–80 gal | Efficiency upgrades |
Safety, Codes, and Preparation
Before beginning any installation, the installer should verify required permits and local code requirements to guarantee legal and safe work.
Attention must be paid to electrical factors—correct breaker sizing, grounding, amperage limits, and a means of disconnect—and to plumbing protections such as temperature/pressure relief valves, shutoffs, and compliant water connections.
A clear checklist of tools, materials, and personal protective equipment combined with disciplined safe-work practices reduces risk and guarantees a proper, code-compliant installation.
Required permits and local code considerations
Although local requirements vary, obtaining the proper permits and confirming code compliance is vital before installing a hot water heater.
Failure to do so can result in fines, failed inspections, or unsafe installations.
Contractors, inspectors, or municipal websites should be consulted to determine required permits, inspection schedules, venting and seismic straps, plumbing setbacks, and appliance location rules.
Documentation guarantees legal and safe installation.
Electrical safety: breaker, grounding, amperage, and disconnect requirements
With permits secured and local requirements confirmed, attention shifts to electrical safety for the water heater: proper breaker sizing, grounding, circuit amperage, and a means of disconnection must meet code and manufacturer’s specifications.
The installer verifies dedicated circuit capacity, correct wire gauge, secure grounding to the equipment grounding conductor, and an accessible disconnect or switch.
All work complies with NEC and local amendments.
Plumbing safety: pressure relief, shutoffs, and water supply codes
When preparing the plumbing for an electric hot water heater, the installer guarantees that pressure-relief devices, shutoff valves, and supply connections meet code and manufacturer requirements to protect the system and occupants.
The installer verifies TPV/TPR valve sizing, discharge piping direction and termination, accessible cold-water shutoff, and backflow prevention.
Water supply piping materials, expansion control, and seismic/bracing rules are confirmed per local code.
Tools and materials checklist
Before beginning physical work, the installer compiles a concise tools-and-materials checklist that reflects the verified safety devices, shutoffs, and piping requirements noted previously.
Essential items are listed, quantities confirmed, and code-compliant parts selected before work begins.
- Adjustable wrench, pipe cutter, soldering kit or compression fittings
- T&P relief valve, dielectric unions, approved pipe and fittings
- Voltage tester, conduit, labeled breakers and wiring materials
Personal protective equipment and safe work practices
Every installer must wear appropriate personal protective equipment and follow established safe-work practices to minimize risks from electrical shock, scalding, burns, and mechanical injury.
Required PPE includes insulated gloves, safety glasses, hearing protection, and slip-resistant footwear.
Lockout/tagout electrical supply, verify zero voltage with a tester, drain tank before work, vent systems properly, and follow local codes.
Maintain clear workspace and use proper lifting techniques.
Quick Compatibility Check What to Verify Before Buying or Installing
Before purchasing or installing an electric hot water heater, the installer should verify the electrical supply capacity and appropriate breaker size to guarantee the unit can be powered safely.
They should confirm tank capacity matches household hot water demand to avoid undersizing or excessive energy use.
Finally, they must check location constraints—clearances, lack of venting requirements, and floor support—to ensure the chosen model fits the space and installation conditions.
Electrical supply capacity and breaker size
Compatibility hinges on verifying that the home’s electrical service can handle the heater’s load and that the circuit breaker and wiring meet the unit’s specifications.
Confirm voltage (typically 240V), amperage draw, required breaker size and wire gauge per manufacturer and code.
Check panel capacity for additional load, upgrade if necessary, and guarantee a dedicated circuit with proper overcurrent protection and disconnect is installed.
Tank capacity and household hot water needs
Tank capacity must match household demand to prevent shortages during peak use; determine typical simultaneous hot water draws—showers, dishwasher, laundry—and compare their combined gallon-per-minute needs to the heater’s first-hour rating and recovery rate. Select a tank sized to cover peak first-hour demand plus cushion; factor in recovery if long or staggered usage is common.
| Use case | GPM estimate | Notes |
|---|---|---|
| Shower | 2.5 | High-flow |
| Dishwasher | 1.5 | Cycle peak |
| Laundry | 3.0 | Hot wash |
| Total | 7.0 | Compare to FHR |
Location constraints (clearance, venting not required, floor support)
After sizing a heater for peak first‑hour demand, attention shifts to where the unit will sit and whether the space will support it.
Verify required clearances to access panels and controls, confirm electric models need no venting, and guarantee the floor can bear a full tank’s weight.
Consider proximity to plumbing, a drain pan and seismic straps where codes require them.
Step-by-Step Installation Guide
The installation proceeds in a clear sequence to guarantee safety and code compliance.
First, power and water are shut off and, if replacing a unit, the old tank is drained and removed.
The new heater is positioned and secured.
Plumbing connections (cold feed, hot outlet, T&P valve, dielectric unions) are made, and the electrical connections (correct wire size, secure terminations, and grounding) are completed.
Step 1 Turn off power and water
Begin by cutting power to the heater at the breaker panel and shutting off the cold-water supply valve to the unit.
Verify power is off with a non-contact tester and confirm water flow stops at a nearby hot faucet.
Follow safety checks before proceeding.
- Confirm breaker labeled and switched off
- Test for voltage at heater terminals
- Close isolation valves and tag if needed
Step 2 Drain and remove old unit (if replacing)
Drain the tank to a safe working level before disconnecting any fittings.
Attach a garden hose to the drain valve, open a hot water tap to vent, and drain until cool.
Close valves, disconnect electrical supply, then undo water connections and remove vent or dielectric nipples.
Lift the old unit with assistance, clear debris, and prepare the area for the new heater.
Step 3 Position and secure new heater (clearances, seismic strapping)
Place the new electric water heater where it will sit permanently, ensuring required clearances around access panels, controls, and venting paths are maintained and that the floor can support the unit’s filled weight.
Level the tank, shim if necessary, and secure with manufacturer-recommended seismic straps or bands anchored to framing at correct heights.
Verify stability and access for future service before proceeding.
Step 4 Plumbing hookups: cold feed, hot outlet, T&P valve, and dielectric unions
With the tank set and secured, the installer connects the plumbing: the cold-water feed to the heater’s inlet, the hot-water outlet to the house distribution, and the temperature-and-pressure (T&P) relief valve to an appropriate discharge pipe, installing dielectric unions at the water connections to prevent galvanic corrosion where dissimilar metals meet.
Connections are soldered, threaded, or flared per local code; all joints are pressure-tested for leaks.
Step 5 Electrical hookup: wiring, wire size, connections, and grounding
After the plumbing is completed and pressure-tested, attention shifts to the electrical hookup for the electric hot water heater.
The electrician confirms power is off, selects correct wire gauge per heater amperage and local code, runs a dedicated conduit, secures connections to the thermostat/element terminals with proper lugs, tightens grounding conductor to chassis, and tests continuity and breakers before restoring power.
Step 6 Install temperature and pressure relief valve and discharge pipe
Install the temperature and pressure relief (T&P) valve and its discharge pipe to protect the heater from overpressure or excessive temperature.
Apply pipe thread sealant to the valve, screw it into the designated opening, and orient the discharge outlet downward.
Use properly sized piping, slope toward a safe drain, secure the pipe to the heater, and terminate the outlet within code-required distance from floor level.
Step 7 Fill the tank and purge air (how to check for leaks)
Open the cold-water supply slowly to begin filling the tank, watching the pressure relief valve and all fittings for any signs of leakage.
Close nearby hot taps until steady water flows to expel air.
Observe fittings, solder joints, and connections for drips.
If leaks appear, shut supply, tighten or rework joints, then refill and repeat purge until flow is smooth and leak-free.
Step 8 Restore power and set thermostats; initial warm-up checks
Power is reconnected only after confirming the tank is full, all fittings are dry, and the pressure-relief valve is closed.
The electrician or qualified installer then restores the circuit breaker (or screws in the fuse) for electric units and verifies the thermostat is set to the recommended initial temperature—typically 120°F (49°C)—before energizing.
The installer observes for abnormal noises, checks for tripped protection, and guarantees water begins warming within expected time.
Step 9 Final testing: verify element operation, temperature, and safety devices
With the circuit energized and the tank warmed to operating temperature, attention turns to confirming each heating element, thermostat, and safety device functions correctly.
The technician performs measurements, inspects for leaks, and cycles safety cutouts. Record results and correct anomalies before use.
- Measure element current and resistance; compare to specs.
- Verify thermostat setpoints and actual water temperature.
- Test T&P valve and high-limit cutoff.
Troubleshooting Common Problems After Installation
After installation, the technician inspects electrical and breaker issues first, following a concise checklist for no-power conditions.
Next, common causes of no or insufficient hot water are evaluated, along with fixes for thermostat, element, and wiring faults.
Finally, leaks at fittings or the tank and strange noises from sediment are diagnosed with recommended repair and flushing or maintenance steps.
No power or tripped breaker checklist
Why won’t the water heater respond when switches are on?
The checklist isolates electrical causes:
- verify breaker position and reset if tripped,
- inspect the wiring harness and junction connections for loose or burnt contacts,
- confirm the disconnect switch is ON,
- test voltage at the heater terminals with a multimeter,
- and check the high-limit fuse or thermal cutoff.
Call a licensed electrician if unsure.
No hot water or insufficient hot water causes and fixes
Diagnose common causes of no or insufficient hot water by checking temperature settings, fuel or power supply, and component function before assuming installation error.
Inspect thermostat settings, upper and lower elements, and thermostats for continuity. Verify incoming voltage and wiring connections.
Flush sediment from tank to restore capacity. Confirm dip tube integrity and correct tank sizing for household demand.
Replace failed heating elements or thermostats as needed.
Leaks at fittings or tank diagnosis and repair options
Inspect leaks promptly to prevent water damage and determine whether the source is a fitting, valve, or the tank itself.
Check visible fittings, inlet/outlet unions, pressure relief valve, and drain connections.
Tighten or replace faulty fittings, use appropriate thread sealant or new gaskets, and test.
If the tank body leaks or corrosion is evident, recommend replacing the heater rather than attempting repairs.
Strange noises or sediment issues flushing and maintenance steps
Listen for popping, rumbling, or knocking—these sounds often signal mineral buildup or trapped steam from sediment settling at the tank bottom.
Drain the tank periodically to remove sediment: shut power, attach hose to drain valve, flush until clear, then refill and restore power.
Inspect and replace anode rod if corroded.
Consider water-softening measures to reduce recurrence and extend element life.
Common Mistakes DIYers Make
Many DIYers make installation errors that compromise safety and performance, including undersized wiring or incorrect breaker sizing.
Common oversights also include skipping permits or code requirements and improper T&P valve installation or discharge piping.
Poor grounding and loose electrical connections further increase risk and should be checked carefully.
Undersized wiring or improper breaker sizing
Using undersized wiring or the wrong breaker for an electric hot water heater risks overheating, voltage drop, and tripped circuits that degrade performance and create fire hazards.
DIYers often misjudge current draw and run smaller-gauge cable or undersized breakers, causing insulation damage and nuisance trips.
Proper conductor size and correct breaker match rated load and distance; verify ampacity tables and manufacturer specifications before final connection.
Skipping permit or code requirements
After undersized wiring or improper breakers, another frequent error is proceeding without permits or ignoring local electrical and plumbing codes.
DIYers who skip permits risk failed inspections, fines, voided insurance, and unsafe installations. Compliance guarantees proper grounding, bonding, disconnects, and clearances.
Securing permits also documents work for future owners and prevents costly corrective actions after undisclosed, noncompliant installations are discovered.
Incorrect T&P valve installation or discharge piping errors
Misinstalling the temperature-and-pressure (T&P) relief valve or its discharge piping is a common and dangerous mistake among DIYers.
Improper valve orientation, wrong size, using flexible tubing, or routing discharge upward can block flow, trap pressure, or cause scalding and flooding.
Discharge must be rigid, correctly pitched, terminate safely, and match valve specifications to guarantee reliable overpressure relief and occupant safety.
Poor grounding and electrical connection errors
Failing to properly ground and secure electrical connections on an electric hot water heater creates serious shock and fire hazards.
DIYers often use improper wire gauges, loose terminals, or inadequate connectors, causing overheating and arcing.
Bonding and grounding must follow code, with correct conduit, strain reliefs, and torque on terminals.
When uncertain, consult a licensed electrician to verify safe, code-compliant connections.
Maintenance and Best Practices Post-Installation
After installation, a clear maintenance plan should be established covering recommended flush intervals and periodic anode rod inspections to prevent scale and corrosion.
Guidance on energy-saving measures—including ideal thermostat settings and insulation—helps reduce operating costs.
The homeowner should also be advised on winterizing procedures or freeze protection where needed and on when to schedule professional inspections for safety and efficiency.
Routine maintenance schedule (flush intervals, anode rod checks)
Regular maintenance preserves tank efficiency and prevents premature failure; a clear schedule for flushing and inspecting the sacrificial anode rod is central to that plan.
- Flush tank annually to remove sediment; more often in hard-water areas.
- Inspect anode rod every 2–3 years; replace when depleted or corroded.
- Check pressure relief valve and fittings yearly; address leaks or corrosion promptly to extend tank life.
Energy-saving tips and thermostat settings
To maximize efficiency and lower operating costs, homeowners should set the water heater thermostat and adopt usage habits that align with household demand and safety requirements.
Recommended setpoint is 120°F for energy savings and scald prevention; raise only if necessary.
Install a programmable or smart controller, lower temperature during absence, insulate the tank and pipes, and repair leaks promptly to reduce standby losses.
Winterizing and freeze protection (if applicable)
When household routines and thermostat settings are adjusted for efficiency, attention should shift to winterizing and freeze protection to prevent damage and maintain performance.
Drain or insulate exposed pipes, install heat tape where needed, and guarantee the heater’s location is protected from freezing drafts.
Maintain a minimum safe ambient temperature, shut off and drain the unit if property will be vacant or unheated.
When to schedule professional inspections
Although routine homeowner checks catch many issues early, scheduling professional inspections verifies hidden problems are identified and corrected before they cause failure or inefficiency.
Professionals should inspect new installations after the first season, then every 1–3 years depending on water quality and usage. Inspections focus on electrical connections, element integrity, thermostat accuracy, pressure relief operation, and sediment buildup to verify safety and efficiency.
Parts, Costs, and When to Upgrade
Typical components—tank, heating elements, thermostats, anode rod, valves and fittings—have predictable lifespans that influence replacement timing.
A clear cost breakdown compares the unit price, materials, and the difference between DIY and professional labor.
Signs for replacement include age beyond expected service life, falling efficiency, and repeated failures or leaks.
Typical parts and their expected lifespan
A water heater consists of several serviceable components—tank, heating elements or burner assembly, thermostat, sacrificial anode, dip tube, pressure-relief valve, and fittings—each with its own normal lifespan and replacement cost. Typical lifespans guide maintenance and replacement timing to avoid failures.
| Component | Typical lifespan |
|---|---|
| Anode, elements, valves | 3–10 years |
| Tank, thermostat, fittings | 8–15 years |
Cost breakdown: unit, materials, and DIY vs pro labor
Cost considerations for replacing an electric hot water heater break down into three main categories: the unit itself, ancillary materials and fittings, and labor—either DIY time or professional installation.
Typical tank units range $400–$1,200; parts (valves, connectors, T&P, electrical supplies) add $50–$250.
DIY saves labor costs but requires skill; pro installation typically adds $300–$800 depending on complexity and permits.
Signs it’s time to replace the heater (age, efficiency, recurring issues)
After outlining expenses and labor choices, attention turns to when replacement makes more sense than repair.
Indicators include units older than 10–15 years, rising energy bills despite maintenance, frequent leaks, repeated thermostat or element failures, rusty or discolored water, and inadequate hot water capacity.
When multiple signs coincide, replacement often yields better reliability, efficiency, and lower long‑term costs.
Helpful Resources and References
The article points readers to sample wiring and plumbing diagrams that illustrate common hookup configurations.
It directs homeowners to local building departments and utility providers for code requirements and permit guidance.
Recommended further reading includes manufacturer installation manuals and reputable trade guides for safe, compliant installation.
Sample wiring and plumbing diagrams
Several clear diagrams are provided to illustrate typical electrical and plumbing layouts for installing an electric hot water heater.
These diagrams show wiring runs, breaker sizing, grounding, and the cold/hot water piping, pressure-relief connections, and shutoffs.
Diagrams include single- and dual-element heaters, recommended conduit and cable paths, junction box placement, thermostat wiring, typical valve locations, and sample elevation views for clear component relationships.
Where to find local code info and permit guidance
Having reviewed wiring and plumbing diagrams, attention turns to locating local building codes and permit requirements that govern electric hot water heater installations.
Guidance is available from municipal permitting offices, state plumbing/electrical boards, and utility providers. Consult official sources before starting work to guarantee compliance and inspection scheduling.
- Local building department websites
- State electrical/plumbing board contacts
- Utility company permit guidance
Recommended further reading and manufacturer installation manuals
Because proper installation hinges on exact specifications and safety requirements, installers and homeowners should consult authoritative trade guides and the specific manufacturer’s installation manual before beginning work.
Recommended resources include the National Electrical Code, plumbing and HVAC trade publications, manufacturer technical bulletins, wiring diagrams, and installation videos.
Retain manuals, follow torque, clearance, and wiring specs, and contact manufacturer support for ambiguities.
Conclusion
With proper preparation and respect for safety, a homeowner can successfully install an electric hot water heater; however, when in doubt, “measure twice, cut once.” Following codes, verifying compatibility, and using the correct tools and parts reduces risk and costly mistakes. Regular maintenance preserves efficiency and prolongs lifespan, while knowing when to call a professional prevents expensive errors. In short, careful planning and attention to detail turn a challenging job into a manageable one.