How to Connect PEX Piping: Step-by-Step Guide for DIY and Pros
To connect PEX piping effectively, start by choosing the right type of tubing (PEX-A, PEX-B, or PEX-C) and gather the necessary tools and fittings. Follow these steps: measure and cut the pipe, deburr the edges, and support the runs according to local code. For crimp or clamp connections, slide a ring onto the pipe, seat the fitting, and use the correct tool to compress it. If using PEX-A, employ an expansion kit and allow time for recovery. With push-fit fittings, ensure full insertion and perform a pull test to confirm stability. Finally, pressure-test the system, check for leaks, and adhere to best practices for long-lasting connections. For further details, troubleshooting tips, and code compliance, continue reading.
Overview of Connecting PEX Piping: Core Concepts and When to Use It
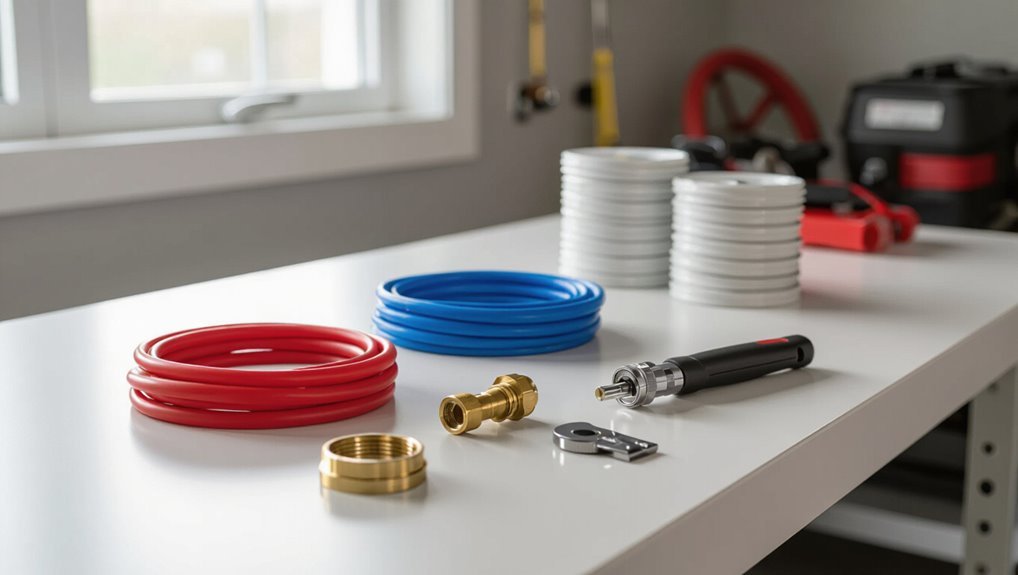
PEX is a flexible, cross-linked polyethylene tubing commonly used for residential water supply, radiant heating, and remodels where ease of routing matters.
Compared with copper and CPVC, it offers corrosion resistance, freeze tolerance, and simpler joins but can have temperature/UV limits and different long-term performance considerations.
Available in PEX-A, PEX-B, and PEX-C formulations, compatibility with fittings and connection methods should guide material and tool choices.
What PEX piping is and common applications
Cross-linked polyethylene tubing (commonly called PEX) is a flexible, durable plastic pipe designed for water distribution, radiant heating, and hydronic systems.
It suits potable water branches, in-floor heating, snow-melt loops, and boiler connections.
Installers and DIYers appreciate its bendability and fewer fittings when learning how to connect pex piping.
Use appropriate fittings, tools, and zoning considerations for reliable service.
Advantages and limitations compared with copper and CPVC
Compared with copper and CPVC, PEX offers notable trade-offs in cost, flexibility, and installation speed: it is generally less expensive and far more flexible—reducing fittings and labor—while copper excels in durability, heat resistance, and longevity.
CPVC provides rigid, solvent-welded runs that resist chemical degradation.
PEX resists corrosion, tolerates freeze movement, and simplifies retrofits, but can be sensitive to UV, rodent damage, and certain chlorine concentrations.
Types of PEX (PEX-A, PEX-B, PEX-C) and compatibility considerations
Having outlined how PEX stacks up against copper and CPVC, the next focus is on the different grades of PEX and how they affect joining methods and component choices.
PEX-A (most flexible, ideal for expansion fittings), PEX-B (common, stiffer, crimp or clamp fittings), and PEX-C (less common) require compatible fittings, tools, and manufacturer-approved connections to guarantee seal integrity and warranty compliance.
Tools, Materials, and Safety Preparations
Before beginning work on PEX connections, a concise inventory of essential tools—tube cutters, crimp/clamp tools, expansion kits, and push-fit pliers—should be assembled.
The choice of fittings (crimp, clamp, push-to-connect, or expansion) and a parts checklist for pipe lengths, rings, adapters, and seals must be confirmed to match the chosen system.
Appropriate safety gear and precautions, such as gloves, eye protection, and pressure testing procedures, should be planned for both DIYers and professionals.
Essential tools list
Tools and materials for PEX installations should be selected to match the chosen connection method and job scale; a basic kit typically includes PEX cutter, crimp or cinch tool (or expansion tool for expansion systems), appropriate fittings and rings, a deburring tool, line-level or pressure gauge, pipe supports, and thread sealant where needed.
- Cutting, deburring, measuring
- Crimp/expansion and compression tools
- Supports, sealants, testing gauge
Types of fittings and connection systems (crimp, clamp, push-to-connect, expansion)
A range of PEX connection systems—crimp, clamp (cinch), push-to-connect, and expansion—offers installers distinct trade-offs in speed, tool requirements, reusability, and long‑term reliability. Choice depends on access, code, and skill. Crimp/clamp use rings and tools; push-to-connect simplifies repairs; expansion suits AL-PEX installations.
| System | Key trait |
|---|---|
| Crimp/Clamp | Economical, proven |
| Push-to-Connect | Fast, reusable |
| Expansion | Secure, specialized |
Materials and parts checklist before starting
One clear checklist guarantees the installer gathers all necessary tools, materials, and safety gear before any PEX work begins.
Essential items include fittings matched to PEX type, correct pipe sizes, and joining tools. Verify quantities and condition.
Typical checklist:
- PEX tubing, fittings, clamps/crimps
- Crimp/expansion tool or push-fit compatible tool
- Pipe cutter, deburring tool, tape, markers
Safety gear and precautions for DIYers and pros
With the checklist complete and components verified, attention shifts to personal protection and safe work practices that reduce injury and damage during PEX installation.
Wear safety glasses, cut-resistant gloves, and hearing protection when using power tools. Use knee pads, respirator for solvent fumes, and sturdy footwear.
Guarantee proper ventilation, lockout of water supply, clear workspace, adequate lighting, and follow manufacturer torque and crimp specifications.
Preparing the Worksite and PEX Tubing
Before laying PEX, the installer plans the run on paper or plans, marking support spacing and verifying local code requirements.
Accurate measuring and clean cutting of PEX followed by proper deburring guarantee leak-free connections.
Routes are then adjusted to navigate walls, joists, and insulation while maintaining required clearances and fastening points.
Planning the run: layout, support spacing, and code considerations
A clear plan for the run establishes pipe routing, support spacing, and code compliance before any cutting or fastening begins; it should show start and end points, change-of-direction locations, fixture drops, and any required isolation valves so installers can anticipate bends, thermal movement, and structural penetrations.
The plan specifies hanger intervals, anchor points, required freeze protection, permitted wall and floor penetrations, and local code clearance requirements.
Measuring, cutting PEX, and deburring techniques
Measure each run twice and mark the PEX at the fixture and fitting points, accounting for bends and insertion depths of the chosen connection method.
Use a quality PEX cutter for straight, square cuts. Deburr or chamfer edges to remove burrs and prevent O-ring damage.
Confirm length before expanding or crimping. Keep tubing clean, supported, and protected from kinks during handling.
Working around obstacles: walls, joists, and insulation
Having confirmed lengths and prepared tubing, the installer next navigates structural and thermal obstacles that affect routing and protection.
They drill holes centered in joists, maintain required clearances from electrical and HVAC, and use protective plates where pipes cross studs.
Insulation gaps are sealed; sleeves prevent abrasion. Bends follow manufacturer radii and straps secure runs, minimizing stress and preserving access for future maintenance.
Step-by-Step: Making Crimp and Cinch (Clamp) Connections
Crimp and cinch (clamp) systems are chosen based on PEX type, application pressure requirements, and installer preference.
First, tubing is measured and cut squarely, the ring slid on, and the fitting inserted fully before positioning the tool.
Finally, the ring is secured with the appropriate crimp or cinch tool and the joint is inspected and pressure-tested for leaks.
When to use crimp and cinch systems
When is a crimp or cinch (clamp) system the right choice for joining PEX?
These systems suit residential and light commercial work where speed, low tool cost, and predictable joints matter.
Crimp/clamp work well with limited access, standard copper or stainless rings, and earlier installations requiring proven reliability.
They are ideal for routine potable water lines and retrofit projects.
Step 1 Measure and cut tubing accurately
Accurate measurement and a straight, clean cut are the foundation of a reliable crimp or cinch connection; even small errors can cause leaks or weaken the joint.
Measure twice, mark clearly, and cut perpendicular with a sharp PEX cutter.
Deburr or square the end, remove any crush marks, and verify length against fitting depth.
Consistent, clean cuts guarantee proper seating and seal.
Step 2 Slide on ring, insert fitting fully
Slide the copper or stainless steel ring onto the tubing before seating the fitting, ensuring the ring faces the joint and is positioned far enough back to allow the fitting to be fully inserted.
The installer pushes the fitting until its shoulder contacts the tubing end, confirming full engagement.
Visually inspect alignment and verify tubing beads against the fitting’s stop to prevent leaks before clamping.
Step 4 Position tool and secure the ring
Position the crimp or cinch tool squarely over the ring so its jaws are centered and perpendicular to the tubing.
Squeeze the handles firmly and steadily until the tool indicates a full crimp or the cinch band seats.
Release and remove the tool.
Confirm the ring is uniformly deformed with no gaps, and the fitting remains fully inserted and aligned before proceeding.
Step 5 Inspect and test the connection
After the ring is deformed, visually inspect the joint for a uniform crimp or fully seated cinch band and confirm the fitting remains flush with the pipe.
Probe the connection gently to verify mechanical engagement.
Restore system pressure gradually and monitor for leaks at normal operating pressure and temperature.
Recheck after initial thermal cycles and document results before burying or concealing the joint.
Common errors to avoid with crimp/cinch connections
Once the connection has been inspected and pressure-tested, attention should turn to common errors that can compromise crimp and cinch (clamp) joints.
Avoid improperly sized rings or clamps, incomplete seating of the fitting, uneven tool compression, nicking or stretching PEX, failing to remove burrs or debris, and using damaged tools.
Recheck ring alignment and retest pressure after correction.
Step-by-Step: Making Expansion (PEX-A) Connections
The section explains when expansion fittings are appropriate and then outlines the required steps: mark and cut the tubing, expand the tubing and insert the fitting, and allow recovery time before inspecting the joint.
It also covers common troubleshooting for expansion connections. Practical tips and inspection checkpoints are provided to guarantee reliable, leak-free joints.
When to use expansion fittings
Determining when to use expansion fittings hinges on the type of PEX and the application’s requirements: expansion fittings are appropriate for PEX-A systems because the tubing’s memory allows the expanded pipe to contract tightly around a plain or flange fitting, creating a secure, leak-resistant joint without crimp rings.
Use expansion where flexibility, minimal fittings, and manufacturer-approved systems are prioritized, and avoid with PEX-B/C or incompatible accessories.
Step 1 Mark and cut tubing
Begin by measuring the run and marking the PEX-A tube at the exact point where the fitting will seat, allowing for the required insertion depth plus any needed allowance for trimming.
Use a straightedge and fine marker for a precise line. Cut squarely with a PEX-specific cutter, remove burrs and debris, and verify the end is clean, smooth, and perpendicular before proceeding.
Step 2 Expand tubing and insert fitting
Next, expand the PEX-A tubing with a compatible expansion tool until the inner diameter visibly widens to accept the fitting; do not over-expand.
Hold the tool squarely, apply steady pressure, and check for uniform expansion.
Immediately insert the correct-sized fitting fully into the expanded end, ensuring proper alignment.
Maintain a straight pull to seat the fitting; avoid twisting or angling during insertion.
Step 3 Allow recovery time and inspect joint
Allow the PEX-A tubing to recover around the fitting for the manufacturer’s recommended time, watching for the inner diameter to close uniformly and create a snug, gap-free fit.
After recovery, visually inspect the joint for full seating, consistent compression, and absence of folds, cracks, or gaps.
Verify alignment and mark the tubing if required for future reference before pressure testing per guidelines.
Troubleshooting expansion joints
When an expanded PEX-A joint does not recover properly around the fitting, systematically inspect for common causes: insufficient expansion, damaged or dirty fittings, tubing nicked during preparation, incorrect expansion ring size, or prolonged exposure to contaminants or extreme temperatures.
Verify tool calibration, remeasure tubing diameter, clean and deburr surfaces, replace compromised components, and re-expand if necessary.
Pressure-test repaired joints before burying or insulating.
Step-by-Step: Using Push-to-Connect (Push-Fit) Fittings
Push-to-connect fittings offer quick, tool-free joints suitable for many PEX installations, though they can be bulkier and more expensive than other methods and may have temperature or code limitations.
The procedure for use includes cutting and deburring the pipe, marking insertion depth, pushing the pipe fully into the fitting, and verifying a secure hold by a gentle pull test.
If removal is needed, most push-fit fittings can be disconnected with a release tool or collar and inspected for reuse according to manufacturer guidance.
Benefits and limitations of push-fit connectors
Push-fit connectors offer a fast, tool-free method for joining PEX piping, making them popular for repairs, remodels, and tight-access installations.
They provide quick installation, reusability in many brands, and reliable seals when used correctly.
Limitations include higher cost than crimp or clamp fittings, potential incompatibility with some PEX types or codes, and reduced suitability for high-vibration or long-term buried runs.
Step-by-step insertion and verification
Begin by preparing the PEX end: cut squarely, deburr, and mark the insertion depth for the chosen fitting.
Insert PEX straight into the push-fit until the depth mark meets the shoulder. Rotate slightly to guarantee seating.
Tug gently to confirm retention.
Visually inspect the O-ring area for full engagement and check for leaks under low pressure, then normal operating pressure.
Removing and reusing push-fit fittings
To remove and potentially reuse a push-to-connect fitting, first shut off water and relieve system pressure, then confirm the line is dry.
Use a proper disassembly tool or push down the collet while twisting the pipe out.
Inspect O-rings and internal grab ring for damage.
Clean components, replace any compromised seals, and test with low pressure before returning to full service.
Joining PEX to Other Materials (Copper, PVC, Valves, Appliances)
Modified fittings and adapters bridge PEX to copper, PVC, threaded fittings, and common appliances.
Proper selection and installation—such as using crimp or clamp fittings for PEX-to-copper, solvent-weld or threaded adapters for PVC, and compatible connectors for valves—ensures leak-free joints.
Guidance on mounting and connecting valves, water heaters, and fixtures emphasizes correct adapter type, proper supports, and following manufacturer torque and clearance recommendations.
Transition fittings and adapters required
Connecting PEX to different plumbing materials requires specific conversion fittings and adapters that match both the pipe type and the chosen connection method, such as crimp, clamp, barb, or press.
Conversion options include PEX-to-copper adapters, PVC solvent-weld or threaded adapters, threaded brass or stainless steel nipples for valves, and appliance-specific fittings.
Select compatible materials, pressure ratings, and seals for a secure, code-compliant conversion.
Best practices for connecting to copper and threaded fittings
When joining PEX to copper or threaded fittings, follow methods that preserve system integrity, prevent leaks, and comply with local code.
Use approved connection fittings (crimp/clampex, push-fit, or expansion with copper adapters), guarantee clean, deburred copper, apply appropriate thread sealant on male threads, avoid dissimilar metal corrosion with dielectric unions, support joints to prevent stress, and pressure-test connections before concealment.
Installing valves, water heaters, and fixtures with PEX
Installers should select compatible fittings and mounting points, then follow manufacturer instructions and local code to join PEX to valves, water heaters, and fixtures.
Use approved connection fittings or adapters for copper, PVC, or threaded connections.
Secure pipes with proper supports, maintain required clearances, and install dielectric unions where dissimilar metals meet.
Pressure-test systems and inspect for leaks before finishing.
Pressure Testing and Leak Detection
The section covers common pressure tests and their typical target pressures for PEX systems, plus a clear step-by-step testing procedure to follow before commissioning.
It also outlines practical methods for locating leaks and recommended fixes once a test reveals a loss of pressure.
The tone remains procedural and focused on safety, compliance, and verifying joint integrity.
Types of pressure tests and required pressures
Several common pressure tests are used to verify PEX system integrity, each defined by test medium, duration, and target pressure to reveal leaks or weaknesses without damaging the tubing.
Typical tests include hydrostatic (water) at 1.5–2× working pressure or minimum 100–150 psi, pneumatic (air) at lower pressures with caution, and soap/visual checks for fittings; code requirements may set specific limits.
Step-by-step pressure testing procedure
Before starting, guarantee all PEX runs are fully connected, valves are positioned as during normal operation, and fixtures and air gaps are isolated so the test stresses only the piping and fittings.
Isolate system sections, attach a calibrated gauge, pressurize slowly to specified test pressure, hold for required duration while monitoring drop, inspect visible joints, record results, then depressurize and return valves to service.
How to locate and fix leaks after testing
Begin by systematically tracing the pressurized circuit to pinpoint the leak source: start at the highest and most accessible fittings, listen and feel for escaping air or water, and use a calibrated gauge, soapy solution, or electronic leak detector to confirm suspicious spots.
Isolate the section, relieve pressure, replace or re-crimp faulty fittings, repair damaged PEX with a coupler or insert fitting, then re-test to verify integrity.
Common Problems, Root Causes, and Fixes
Common failures in PEX systems include cold-weather cracking and freeze damage, discoloration and kinking that restrict flow, and issues from incompatible chemicals or nearby corroding metals.
Each problem has distinct root causes—thermal stress, improper handling or routing, and chemical exposure or galvanic reactions—that guide the appropriate remedy.
Decisions about repairing fittings versus replacing pipe sections should be based on the extent of damage, accessibility, and long-term reliability.
Cold-weather cracking and freeze protection
Many instances of PEX failure in cold climates stem from rapid freezing, prolonged low temperatures, or exposure to UV and chemicals that embrittle the polymer.
When water inside the tubing freezes, it expands, creating stress concentrations that can cause cracking at fittings, bends, or thin sections.
Prevention includes insulating exposed runs, maintaining heat in crawlspaces, installing freeze protection cables or trace heating, and draining isolated lines before winter.
Discoloration, kinking, and flow restriction issues
After addressing freeze-related damage and prevention, attention turns to aesthetic and performance issues such as discoloration, kinking, and flow restriction, which can arise even in temperate conditions.
Discoloration often signals mineral buildup or UV exposure; flush and protect lines.
Kinking from tight bends weakens tubing; replace or use expansion fittings.
Flow restriction commonly stems from debris or undersized runs; clean, reroute, or upsize accordingly.
Corrosion and chemical compatibility mistakes
Several factors can lead to corrosion and chemical compatibility failures in PEX systems, including exposure to aggressive water chemistries, contact with incompatible adhesives, solvents, or metals, and use of improper fittings or sealants.
Common problems include pinhole leaks, brittle joints, and metal staining.
Root causes are wrong material selection and contaminated installation.
Fixes: flush system, replace affected components with compatible materials, and verify chemical resistance.
When to replace sections vs. repair fittings
Corrosion or chemical damage that affects a localized fitting presents a different repair scenario than degradation along a run of PEX tubing.
Determining whether to replace a section or repair fittings depends on the extent, location, and cause of the failure. Localized fitting failure usually warrants replacing the fitting and reseating adjacent crimps.
Widespread tubing degradation requires cutting out and replacing the affected PEX section with new, properly supported piping.
Code, Permits, and Best Practices for Longevity
The discussion turns to code, permits, and practices that affect PEX installations, including typical local code requirements and when permits are required.
Attention should be given to recommended support spacing, allowance for thermal expansion, and proper insulation to prevent stress and heat loss.
Following manufacturer-recommended installation methods and maintenance practices helps extend service life and preserve warranty coverage.
Typical code requirements and permit considerations
Many jurisdictions require permits and adherence to plumbing codes when installing PEX piping, including specifications for pipe type, fittings, support spacing, insulation, and allowable exposures to heat and sunlight.
Inspectors often verify material listings, approved connection methods, and pressure/temperature ratings.
Permit applications typically need plans and installer credentials.
Compliance guarantees safety, prevents costly rework, and may affect insurance and resale disclosures.
Recommended support spacing, expansion allowance, and insulation
When installing PEX, installers should follow manufacturer and code-prescribed support spacing to prevent sagging and undue stress, typically every 32–48 inches for horizontal runs and at each change of direction.
Closer spacing is required near fittings and where pipes pass through studs or framing.
Allow expansion by leaving 1/4–3/8 inch clearance at penetrations, using offsets or loops for long runs, and insulate cold and hot lines per code.
Best practices to extend service life and ensure warranty compliance
A few straightforward precautions and adherence to code requirements markedly extend PEX system life and preserve manufacturer warranties.
Install only approved fittings, follow manufacturer installation instructions, and obtain required permits.
Use correct crimps/clamps, maintain specified support and expansion gaps, protect from UV and rodents, and avoid contact with incompatible metals or chemicals.
Document work and retain receipts to validate warranty claims.
Time-Saving Tips, Tools Upgrades, and Cost Considerations
The section outlines practical tips and upgraded tools that shorten installation time and produce cleaner joints.
It compares upfront tool and material costs with potential long-term savings from reduced leaks and maintenance.
It also clarifies criteria for choosing between DIY work and hiring a professional based on skill level, complexity, and local code requirements.
Pro tips for faster, cleaner installations
Speed up PEX installations by grouping tasks, using the right tools, and planning material runs before cutting any pipe.
Professionals recommend labeling runs, preassembling manifolds, and staging fittings to reduce trips.
Use ratcheting crimpers, quality tubing cutters, and calibrated expander heads for consistent results.
Keep a clean workspace, deburr connections, and seal threads with appropriate tape or compound to prevent leaks and rework.
Comparing upfront cost vs. long-term savings
Efficiency often hinges on initial choices, so professionals weigh the upfront cost of tools and materials against projected labor savings and system longevity. Decisions favoring quality fittings and crimp tools reduce leaks, callbacks, and replacement frequency, offsetting higher purchase prices over time.
| Item | Upfront Cost | Long-term Benefit |
|---|---|---|
| Crimp tool | High | Durable crimps |
| Rings | Low | Reliable seal |
| Manifold | Medium | Easier maintenance |
| Labor | Variable | Faster installs |
When to hire a professional vs. DIY criteria
Balancing upfront investment against long-term savings guides whether a project suits a homeowner or requires a pro: complex layouts, limited time, or systems serving multiple fixtures usually justify hiring licensed installers, while straightforward runs to replace a single branch can be handled by an experienced DIYer.
- Time: pros save hours on complex jobs.
- Tools: crimp/expansion tools cost justify hire for occasional use.
- Risk: permits, leaks, and warranty needs favor professionals.
Quick Reference Checklists and Diagrams
A concise set of quick-reference materials helps installers work efficiently and avoid mistakes.
Suggested items include a pre-installation checklist, a connection-type quick comparison chart, and a diagram of common fittings and symbols.
These tools allow fast verification of materials, methods, and assembly before and during installation.
Pre-installation checklist
Before any cutting or crimping begins, the installer should confirm project-specific requirements and site conditions against a concise pre-installation checklist—materials, tools, fittings, and permits; piping runs and routings; fixture locations and water source connections; pressure and temperature ratings; and any local code or manufacturer constraints.
- Inventory: confirm PEX type, fittings, tools, and spare parts.
- Layout: mark runs, supports, and fixture inlets.
- Compliance: verify permits, code limits, and manufacturer instructions.
Connection type quick comparison chart
With the pre-installation checklist completed, installers can move to selecting the appropriate connection method; this quick comparison chart condenses common PEX connection types—crimp, clamp, push-fit, expansion, and threaded—into concise checklists and diagrams that highlight tool needs, installation steps, typical failure modes, and code considerations.
| Type | Tools | Notes |
|---|---|---|
| Crimp | Crimp tool, rings | Reliable, needs gauge |
| Clamp | Clamp tool, rings | Easier on thin PEX |
| Push-fit | None | Fast, reversible |
| Expansion | Expander | Strong, learning curve |
| Threaded | Wrench, tape | For connections, leak risk |
Common fittings and symbols diagram
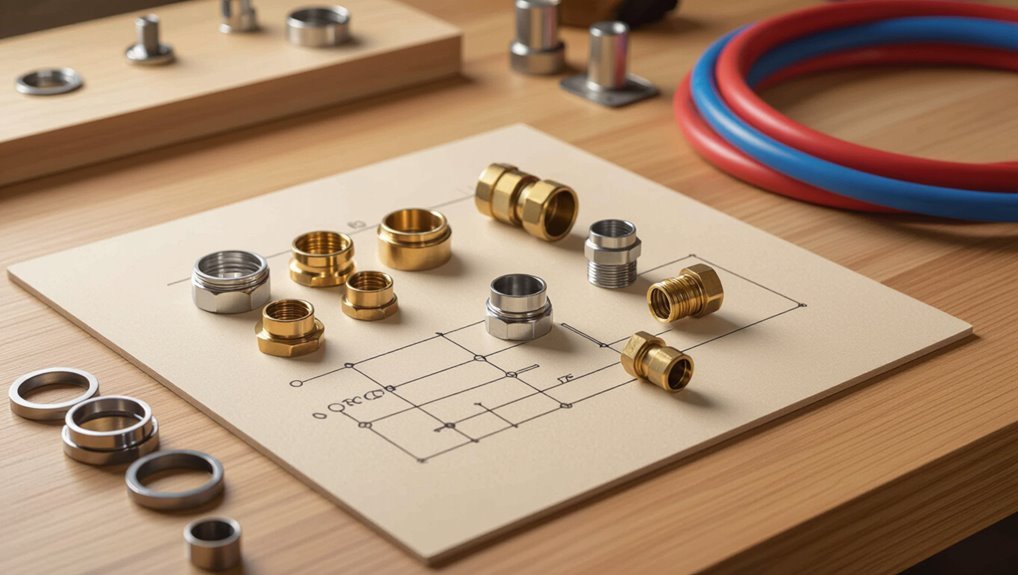
Common fittings and their schematic symbols are presented here as a compact reference to speed identification and prevent installation errors.
The diagram includes crimp, clamp, push-fit, expansion, and threaded adapters with symbols for tees, elbows, couplings, reducers, and valves.
A legend explains material abbreviations (PEX, PB, CPVC), direction arrows, and torque or ring sizes for rapid, accurate selection during planning and installation.
Conclusion
Connecting PEX piping blends simple technique with careful prep, whether for a weekend DIY or a pro installation. With the right tools, fittings, and adherence to code, reliable joints are achievable. What prevents a solid connection more than rushed work or skipped inspections? Thoughtful layout, correct connection method, and testing guarantee longevity and safety. Ultimately, patience and proper practice turn PEX into a durable, flexible solution for modern plumbing needs.