How to Clean a Propane Heater Safely: Step-by-Step Guide for Peak Performance
To clean a propane heater safely and ensure peak performance, follow these essential steps:
- Safety First: Shut off the propane supply and allow the heater to cool. Ensure the workspace is well-ventilated and remove any flammable materials.
- Protect Yourself: Wear gloves and eye protection throughout the cleaning process.
- Check for Leaks: Use a soapy-water leak test on fittings to ensure there are no leaks before proceeding.
- Disconnect and Move: Carefully disconnect the propane cylinder and relocate the heater for easier access.
- Disassemble: Remove grills and filters.
- Clean Components: Vacuum and brush the burners and pilot assembly. Use compressed air to clear any debris from ports, and wash any washable filters.
- Replace Gaskets: Ensure all gaskets are fresh and in good condition.
- Reassemble: Carefully put the unit back together, ensuring all components are secure.
- Final Leak Test: After reassembly, perform a leak test on all connections to confirm safety.
- Monitor Operation: During initial operation, watch for any soot or unusual sounds, and refer to additional troubleshooting steps if needed.
By following these steps, you can safely clean your propane heater and maintain its efficiency.
How to Clean a Propane Heater Safely: Quick Overview and Key Precautions
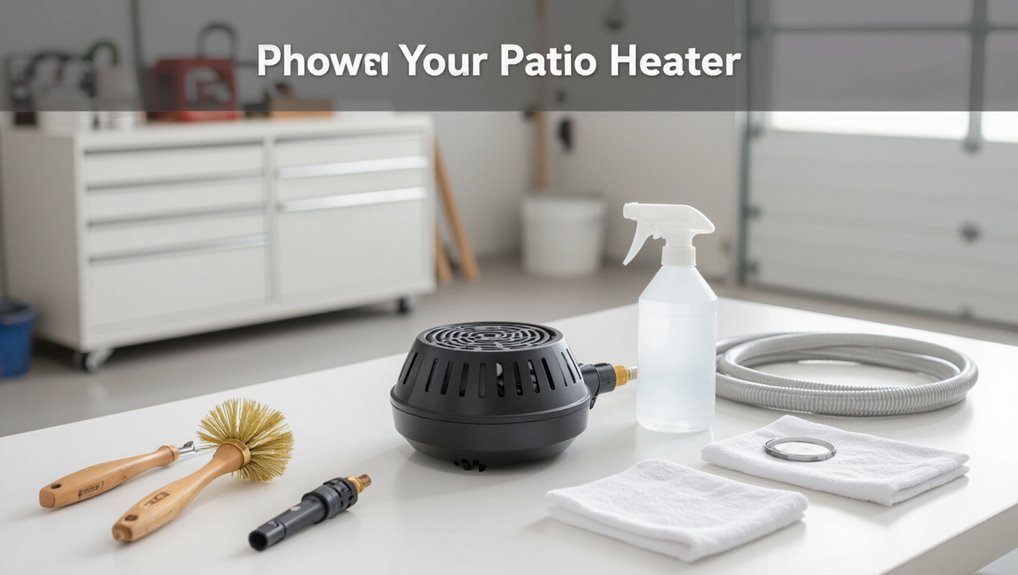
Before beginning any cleaning, the heater should be powered off, the propane supply disconnected, and the unit allowed to cool completely to prevent ignition or burns.
Required tools and supplies typically include a soft brush, vacuum with a crevice attachment, non-abrasive cloths, mild detergent, and replacement filters or gaskets if specified by the manufacturer.
Following these precautions and having the right equipment reduces fire, leak, and component-damage risks during maintenance.
Immediate safety precautions before cleaning
Shut off the propane supply and allow the heater to cool completely before any cleaning begins to prevent fires or burns.
Before proceeding, confirm the area is well ventilated and remove nearby flammables.
Verify connections are secure and leak-free using soapy water tests only after shutdown.
Wear gloves and eye protection.
Keep a functioning fire extinguisher nearby and follow manufacturer warnings on labels.
Tools and supplies needed for a safe cleaning
Essential tools and supplies include a soft-bristled brush, a vacuum with a soft brush attachment, lint-free cloths, mild dish soap, and a can of compressed air for dislodging dust from burners and vents.
Additional items: adjustable wrench, screwdriver set, replacement filters or gaskets, a flashlight, gloves, safety goggles, and a small container for screws.
Keep a fire extinguisher nearby.
Understanding Your Propane Heater: Basic Components and Why Cleaning Matters
Propane heaters come in several common types—portable, wall-mounted, and freestanding models—that have different cleaning needs and access points.
Key components that typically require routine maintenance include the burner, pilot assembly, grills/reflector, and any air or fuel filters.
Indicators that cleaning is needed are reduced heat output, unusual odors or visible soot, and persistent pilot-light problems.
Common types of propane heaters and differences in cleaning needs
A variety of propane heater designs—portable cylinder models, wall-mounted units, freestanding garage heaters, and patio-style infrared or forced-air systems—each have distinct parts and cleaning requirements.
Portable units demand attention to vents and fuel connections; wall-mounted and garage heaters involve access panels and ducting.
Patio infrared models emphasize reflector and emitter care; forced-air types require blower and intake maintenance.
Parts that most require regular cleaning (burner, pilot, grills, reflector, filters)
Regular cleaning of the burner, pilot assembly, grills, reflector, and filters prevents performance loss and safety hazards by keeping combustion surfaces clear, maintaining proper airflow, and ensuring reliable ignition.
The burner requires debris removal and inspection for corrosion; the pilot needs gentle clearing and alignment checks. Grills and reflector benefit from dust and residue removal.
Replace or clean filters per manufacturer intervals.
Signs your heater needs cleaning (performance, smell, soot, pilot issues)
Smoke, odor, sputtering flames, and slow or uneven heating are clear indicators that a propane heater needs cleaning.
Accumulated soot, visible debris on burners or grills, and a yellow or irregular flame suggest combustion issues.
Persistent pilot light failures, frequent cycling, or lingering chemical smells indicate clogged jets or vents.
Prompt inspection and targeted cleaning restore efficiency and safety.
Step-by-Step Preparation Before You Start
Before any cleaning begins, the propane supply should be turned off and disconnected according to safety procedures.
The unit must be allowed to cool, ventilated, and moved to a well-ventilated, level workspace.
Model-specific instructions should be reviewed and any required replacement parts gathered before proceeding.
Turning off and disconnecting the propane supply safely
Shut off the heater and close the cylinder valve to isolate the gas before performing any maintenance; this prevents fuel flow and reduces the risk of leaks or ignition.
Next, turn regulator bleed screws or control knobs to relieve pressure, then disconnect the hose at the regulator using proper tools.
Cap fittings, inspect for damage, and store the cylinder upright in a ventilated area away from heat.
Cooling, ventilating, and moving the heater to a safe workspace
With the propane supply isolated and fittings capped, allow the heater to cool completely and guarantee any residual gas has vented.
Open windows and doors or use fans to ventilate the area.
Wear gloves and protective eyewear, lift using proper posture or mechanical aids, and transport the unit to a clean, well-lit, stable workspace free from ignition sources and combustible materials.
Documenting model-specific instructions and gathering replacement parts
Several manufacturers include model-specific maintenance steps that affect disassembly, part compatibility, and safety features.
The operator should locate the heater’s make and model number and review the manufacturer’s manual or reliable online resources before proceeding.
Record serial numbers, note installed components, and photograph connections.
Cross-reference replacement part numbers, source genuine components, and assemble required tools and seals to guarantee correct, safe reassembly.
Detailed Cleaning Procedure
The following steps cover cleaning of all accessible components to restore safe, efficient operation.
Attention is given to external surfaces and grilles, the burner assembly and ports, and inspection and cleaning of the pilot and thermocouple.
Reflectors, heat exchangers, and air filters or screens are also addressed, with replacement recommended when cleaning is insufficient.
External surfaces and grille cleaning
Careful external cleaning helps maintain heater efficiency and prevents debris from entering the burner assembly. Surfaces and grilles are wiped with a soft cloth and mild detergent, rinsed, and fully dried.
Corrosion or paint damage is inspected and treated promptly. Filtered compressed air can dislodge dust from grilles before wiping.
- Use a soft brush for crevices
- Avoid abrasive cleaners
- Dry thoroughly to prevent rust
Cleaning the burner assembly and ports
After cleaning external surfaces and grilles, attention shifts to the burner assembly and ports, where accumulated debris or spider webs can obstruct gas flow and affect combustion.
Disconnect fuel, remove access panels, and use a soft brush and vacuum to clear soot and dust.
Inspect ports for clogs; gently clear each with compressed air or a non-metallic pick.
Reassemble and leak-test before use.
Inspecting and cleaning the pilot and thermocouple
Begin by ensuring the heater’s fuel supply is shut off and all components are cool to the touch; then locate the pilot assembly and thermocouple for inspection.
Visually check for soot, corrosion, or loose connections. Use a soft brush and compressed air to remove debris. Wipe contacts with alcohol, straighten bent thermocouple, and verify secure mounting.
Reassemble and test for proper ignition.
Cleaning reflectors and heat exchangers
Remove loose dust and grime from reflectors and heat exchangers before any deeper cleaning is attempted, ensuring the heater is cool and the gas supply remains off.
Use a soft brush and a vacuum with a brush attachment to dislodge debris.
Wipe surfaces with a damp, lint-free cloth and mild detergent if needed, then dry thoroughly.
Reassemble and inspect for corrosion or warping.
Cleaning or replacing air filters and screens
Inspect the heater’s air intake area and screens visually to determine whether filters need cleaning or replacement, ensuring the unit is cool and the gas supply remains off.
Remove screens and filters per manufacturer instructions.
Vacuum loose debris, wash washable filters with mild detergent, rinse thoroughly and air dry.
Replace permanently damaged or clogged filters.
Reinstall only dry, intact filters and properly seated screens.
Reassembling components correctly and torque/fastener checks
Carefully reassemble components in the reverse order of disassembly, ensuring each part seats correctly and aligns with mating surfaces before fastening.
Use specified fasteners and replace damaged hardware.
Apply correct torque values from the manufacturer to avoid leaks or warping; use a calibrated torque wrench for critical fittings.
Verify all connections, valve linkages, and wiring harnesses are secure.
Perform a leak and function test after assembly.
Post-Cleaning Safety Checks and Testing
After reassembly, the technician performs a leak test on the propane connection using a soapy water solution to check for bubbles.
The pilot light is then ignited and the flame inspected for correct color, steady behavior, and proper position.
Finally, initial operation is monitored for any unusual odors, soot buildup, or irregular sounds before regular use resumes.
Leak testing the propane connection (soapy water method)
Begin leak testing by applying a soapy water solution to all fittings, valves, and the hose-to-regulator connection.
Then pressurize the system and watch for bubbles indicating escaping gas. If bubbles appear, depressurize, tighten or replace the faulty component, and retest.
No bubbles confirm integrity; wipe away residue, monitor connections periodically, and store the heater with the valve closed and regulator protected.
Pilot light ignition and flame inspection (color, stability, position)
Ignite the pilot following the manufacturer’s procedure and observe the flame immediately for color, steadiness, and position relative to the thermocouple or flame sensor.
A proper pilot burns blue with minimal yellow tips, remains steady without flicker, and envelops the sensor/thermocouple.
If the flame is weak, displaced, or primarily yellow, shut off gas and inspect burner ports, cleanliness, and air/gas mixture before retrying.
Monitoring initial operation for odors, soot, or irregular sounds
Start the heater and observe its initial minutes of operation closely for any unusual odors, visible soot, or atypical noises.
Note faint chemical smells that fade within minutes versus persistent gas or burning odors.
Watch for soot accumulation on surfaces and uneven flame patterns.
Listen for rattles, hissing, or popping.
If any of these persist, shut off the unit and inspect connections or seek professional service.
Maintenance Schedule and Best Practices for Peak Performance
Maintenance needs vary by heater type and usage, with light-use models requiring less frequent cleaning than commercial or heavy-use units.
Seasonal preparation—including winterizing, end-of-season shutdown, and fuel-system checks—protects components and guarantees reliable operation.
Keeping a dated maintenance log with notes on cleaned parts and replacement intervals helps determine when components should be serviced or replaced.
Recommended cleaning frequency by heater type and usage
Although frequency varies with model and environment, a consistent cleaning schedule keyed to heater type and usage guarantees safe, efficient operation.
Portable patio heaters: inspect and clean monthly during heavy use; infrared and unit heaters: quarterly checks; commercial floor-mounted systems: monthly filters, quarterly burner cleaning.
Adjust for dusty or coastal conditions with more frequent attention.
- Monthly: heavy-use portable
- Quarterly: infrared/unit heaters
- Monthly/quarterly: commercial systems
Seasonal prep: winterizing and end-of-season shutdown
When the heating season ends, a clear, checklist-driven shutdown prevents corrosion, blockages, and regulator damage while preserving safety and performance for the next use.
Drain fuel lines per manufacturer, disconnect and cap the cylinder, remove debris and cover the unit with a breathable, waterproof cover, inspect hoses and seals for cracks, lubricate moving parts, and store indoors or elevated to avoid moisture and pests.
Record-keeping: maintenance log and when to replace parts
After seasonal shutdown steps are completed, a concise maintenance log becomes the centralized record that guides future care and part replacement.
Entries list dates, performed tasks, fuel changes, inspections, and serial numbers for components. Notes flag wear patterns, error codes, and hours of operation.
Replacement intervals follow manufacturer recommendations and observed degradation: filters yearly, hoses every 3–5 years, burners on performance loss.
Troubleshooting Common Problems After Cleaning
After cleaning, the guide addresses common post-service issues such as a weak or yellow flame and the corrective steps to restore proper combustion.
It also explains how to isolate and respond to a persistent gas odor, diagnose a pilot that will not stay lit, and identify causes and remedies for excessive soot or blackening.
Readers are directed to simple checks and safe corrective actions before seeking professional repair.
Weak or yellow flame and corrective steps
A weak or yellow flame indicates incomplete combustion and reduced heater efficiency, commonly caused by clogged burner ports, improper gas pressure, or air-to-fuel ratio imbalance.
Inspect and clean burner ports with compressed air or a soft brush. Check regulator and hose for damage. Verify correct tank pressure and valve settings, and adjust air shutter or venturi per manufacturer instructions.
Test flame after each adjustment.
Persistent odor of gas: steps to isolate and respond
Several scenarios can cause a persistent gas odor following cleaning, and the technician must treat any such smell as a potential leak until proven otherwise.
Evacuate area, shut off propane at the tank, and ventilate.
Use a soap-and-water solution to test connections and fittings for bubbles.
If leak suspected or detected, do not operate; contact a certified technician or gas supplier for inspection and repair.
Pilot won’t stay lit: diagnostics and fixes
One common post‑cleaning issue is a pilot that lights but fails to stay lit. Technicians should begin by confirming proper gas flow, clean and realign the pilot assembly, and then move on to systematic checks of thermocouple function, pilot orifice blockage, and air drafts that can extinguish the flame.
Replace a failing thermocouple, clear small obstructions, verify correct pilot flame pattern, and retest under normal ventilation.
Excessive soot or blackening: likely causes and remedies
After confirming the pilot system and thermocouple operation, technicians should inspect for excessive soot or blackening, which indicates incomplete combustion or fuel contamination.
Examine burner ports, air shutters, and venting for blockage; clean or replace clogged components.
Verify correct gas pressure and regulator function.
Advise using approved propane, purge lines if contaminated, and schedule professional service for persistent soot to prevent carbon monoxide risks.
When to Seek Professional Service or Replacement
Persistent odors, unexplained pilot or ignition failures, visible corrosion, or gas leaks are clear signs that a professional inspection is required.
The homeowner should weigh the typical costs and scope of professional maintenance against replacement, considering age, repair frequency, and safety upgrades.
When seeking service, they should choose a licensed propane technician and ask about certification, insurance, diagnostic procedures, and written cost estimates.
Signs that indicate professional inspection is required
Safety concerns arise when a propane heater exhibits signs that exceed routine maintenance; these indicators warrant prompt professional inspection or replacement to prevent fire, carbon monoxide exposure, or equipment failure.
Persistent yellow or erratic flame, strong gas odor, unexplained soot or corrosion, pilot or ignition failures, frequent shutoffs, abnormal noises, or visible regulator or line damage all justify immediate evaluation by a qualified technician.
Costs and scope of professional maintenance vs replacement
Weighing the costs and scope of professional maintenance versus replacement requires balancing immediate repair expenses, long-term reliability, and safety risks. Professionals evaluate diagnostics, parts, labor, and expected lifespan; replacement may be justified for frequent failures or outdated safety features. Compare estimated repair cost, remaining service life, safety improvements, warranty, and downtime.
| Factor | Consideration |
|---|---|
| Repair Cost | Parts + labor estimate |
| Lifespan | Remaining years |
| Safety | Compliance, risks |
| Warranty | Coverage differences |
| Downtime | Time out of service |
Choosing a qualified technician and what to ask
When should a homeowner call a professional for propane heater service?
A qualified technician should be licensed, insured, and experienced with propane systems.
Ask about certifications, references, detailed diagnostics, parts warranty, labor rates, and safety checks performed.
Request a written estimate, timeline, and explanation of recommended repairs versus replacement.
Verify emergency availability and documentation of completed work.
Safety Mistakes to Avoid and Preventive Tips
The section highlights common cleaning mistakes that can create fires, leaks, or carbon monoxide risks and explains how to avoid them.
It also covers safe storage and handling practices for propane cylinders to prevent accidental release or damage.
Practical tips to extend heater life and improve fuel efficiency are provided to reduce maintenance needs and operating costs.
Common cleaning mistakes that create hazards
Careless cleaning practices—such as using flammable solvents, ignoring ventilation, or leaving protective components disconnected—can turn routine maintenance into a fire, carbon monoxide, or burn hazard.
Other risky errors include wet-cleaning live fittings, bypassing leak checks, using improper tools that damage seals, and restarting without verifying burner integrity.
Follow manufacturer procedures, wear PPE, and perform post-cleaning leak and combustion checks.
Safe storage and handling of propane cylinders
Propane cylinders require disciplined storage and handling to prevent leaks, fires, and explosive risks; improper placement, rough transport, or neglecting valve protection are common causes of incidents.
Cylinders should be stored upright, outdoors or in well-ventilated areas, away from heat sources and ignition.
Secure during transport, cap valves, inspect for damage or corrosion, and rotate stock to use older cylinders first.
Tips to extend heater life and improve fuel efficiency
Following proper cylinder storage and handling practices naturally leads to routine maintenance habits that prolong a heater’s service life and cut fuel use.
Regular inspections, timely filter and burner cleaning, and correct pilot adjustments prevent inefficiency and hazards. Replace worn parts promptly and use recommended fuels.
- Clean burners and vents seasonally
- Check seals, hoses, and valves for leaks
- Service controls and thermocouples annually
Quick Reference: Checklist for Safe Propane Heater Cleaning
A concise checklist helps guarantee safe, efficient cleaning of a propane heater by outlining required tools, safety steps, and inspection points before, during, and after service.
A technician or homeowner can follow a brief, ordered list to prevent leaks, ignition failures, and damage.
Key entries include pre-cleaning shutoff and ventilation, component cleaning/replacement, and post-service leak and function tests.
- Shut off gas, ventilate, gather tools
- Clean/inspect burner, pilot, filters
- Leak test, reassemble, operational check
Conclusion
Regular cleaning keeps a propane heater safe and efficient, and the steps outlined make the task approachable for most homeowners. If someone worries they lack the skill, simple precautions—disconnecting the tank, working in a well-ventilated area, following the checklist—minimize risk and make the process manageable. For complex repairs or persistent issues, a qualified technician can be called. With routine care and sensible caution, a propane heater delivers reliable, peak performance.