How to Stop Water Pump Noise: 10 Proven Fixes to Silence Your Pump Quickly
If you’re dealing with a noisy water pump, it’s essential to address the issue promptly to prevent further damage. Common causes of pump noise include loose mounts, trapped air, cavitation, worn bearings, and electrical issues. To quickly resolve the noise, you can try several fixes: shut off the pump, bleed trapped air, tighten fittings and mounts, add vibration pads, isolate pipes, and inspect impellers and seals. If you notice grinding sounds or electrical odors, stop the pump immediately and consult a professional. To avoid future noise problems, conduct regular monthly inspections and annual checks on bearings and alignment. This guide provides ten effective solutions, step-by-step diagnostics, and advice on when to repair or replace your pump for a quieter operation.
Why your water pump makes noise and when to worry
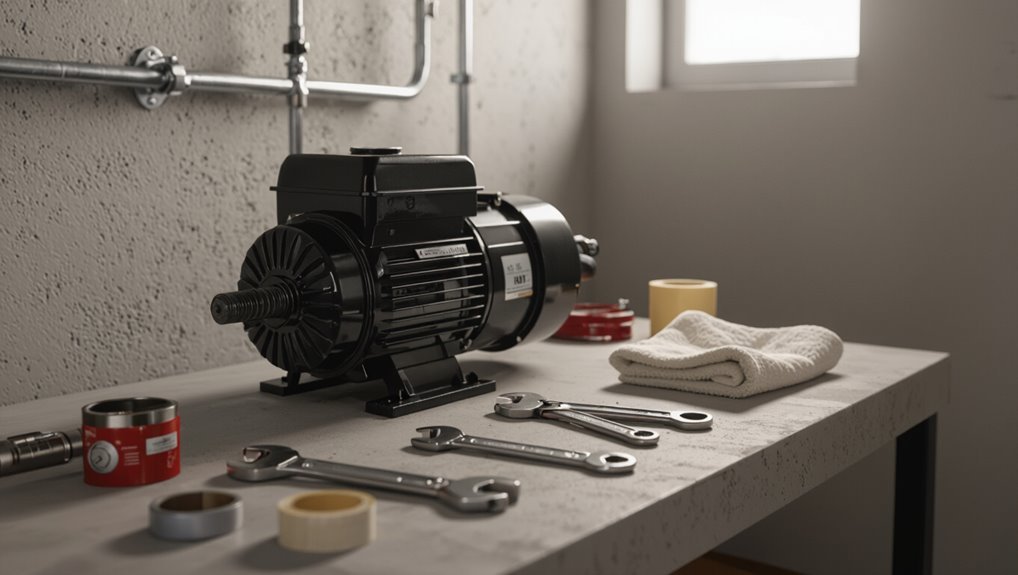
Noise from a water pump can take several forms—vibration, humming, knocking, or grinding—each pointing to specific issues like misalignment, electrical faults, air in the line, or worn bearings.
Certain sounds accompanied by overheating, leaking, smoke, or sudden loss of pressure indicate imminent failure or safety risk and require immediate action.
For less severe noises, basic checks and simple fixes may suffice, but persistent, unclear, or dangerous symptoms warrant a professional inspection.
Common noise types and what they indicate (vibration, humming, knocking, grinding)
When a water pump starts making unfamiliar sounds, different tones and patterns point to specific problems: vibration often signals loose mounts or misalignment; humming suggests electrical or motor issues; knocking indicates cavitation or air pockets; grinding points to worn bearings or impeller damage.
Identifying the sound guides remedy selection and prioritizes steps in how to stop water pump noise without unnecessary disassembly.
Safety and damage signs that require immediate action
Recognizing the sound type is only the first step; certain audible clues and associated symptoms require immediate intervention because they indicate imminent failure or safety hazards.
Loud grinding, metal-on-metal clanks, burning smells, smoke, sudden loss of pressure, rapid temperature rise, leaking fluid, or electrical tripping signal urgent danger.
Power down, isolate the pump, and address leaks or exposed wiring before further operation to prevent catastrophic failure.
When to call a professional versus DIY
Although some sounds are benign and easy to fix, others indicate issues that exceed typical homeowner skills. Deciding whether to call a professional depends on the symptom severity, the suspected cause, and the tools or permits required.
Minor tasks—tightening mounts, replacing feet, clearing debris—are DIY.
Call a pro for persistent vibration, internal bearing failure, electrical faults, unusual pressure swings, leaks at seals, or when inspections require permits and pressure testing.
Quick fixes to silence a noisy water pump (fast actions you can take)
A few fast actions can often stop pump noise without major repairs.
First, shutting the pump off and bleeding trapped air, then tightening loose fittings and mounting bolts, frequently eliminates rattles and cavitation sounds.
If noise persists, replacing worn rubber mounts or vibration pads and isolating pipes with cushioning clamps will reduce transmitted vibration.
Turn off pump and bleed air from the system
Shut the pump down before attempting any inspection, then open a bleed valve or loosen a high-point fitting to release trapped air; this simple procedure often stops rattling or cycling caused by air pockets and prevents damage from run-dry conditions.
After bleeding, restart briefly to confirm steady flow and listen for remaining noise. Repeat bleeding until air-free; monitor pressure and system operation for consistency.
Tighten loose fittings and mounting bolts
Check all visible connections and fasteners, since loose fittings and mounting bolts are a common, easily fixed source of pump vibration and rattling.
Inspect pipe joints, hose clamps, electrical conduit clips and pump base bolts. Use appropriate tools and torque to snug connections without overtightening.
Recheck after short operation. Tightening often eliminates low-frequency knocks and reduces wear on pump components quickly and safely.
Check and replace worn rubber mounts or vibration pads
After tightening visible fasteners, attention should turn to the rubber mounts or vibration pads that isolate the pump from its support.
Inspect for cracks, compression, oil contamination or hardening.
Replace deteriorated mounts with OEM or rated anti-vibration pads of matching load capacity and thickness.
Guarantee secure, even seating and torquing to spec.
Proper replacement greatly reduces structure-borne noise and extends pump lifespan.
Isolate pipes with cushioning or clamps
Isolating plumbing from the pump with cushioning or specialized clamps prevents vibration transfer that commonly amplifies noise through walls and supports.
Install rubber-lined pipe clamps, foam sleeves, or neoprene strips at contact points and secure pipes with flexible hangers.
Confirm clamps match pipe size, avoid overtightening, and isolate rigid fittings.
These simple measures greatly reduce structure-borne noise and improve overall system quietness.
10 proven fixes with step-by-step actions
This section lists ten proven, actionable fixes for common water pump noises and outlines clear steps for each repair.
Each fix addresses a specific source of vibration, grinding, or air-related noise so the reader can prioritize based on symptoms.
The following five examples highlight critical mechanical and system-level actions to evaluate.
- Remove air and prime the pump properly
- Replace or service a failing bearing
- Realign or replace a worn shaft or coupling
- Clean or replace a clogged impeller
- Install or replace a pressure tank or bladder
1. Remove air and prime the pump properly
Bleed trapped air and restore the pump’s prime to eliminate the high-pitched whine and intermittent flow caused by air pockets.
Shut power, close suction and discharge valves, open the air bleed or priming port, then slowly refill the casing with water until a steady stream emerges.
Close the port, reopen valves, and restart.
Verify continuous, smooth flow and repeat if sputtering persists.
2. Replace or service a failing bearing
Replace worn bearings promptly to stop grinding, rumbling, or knocking that indicates metal-on-metal contact inside the pump.
Inspect bearings for play and roughness, then disconnect power and remove the motor per manufacturer instructions.
Clean components, press out old bearings, install correct replacements or lubricate sealed types, reassemble, torque fasteners, and test operation.
Repeat maintenance at recommended intervals to prevent recurrence.
3. Realign or replace a worn shaft or coupling
Realigning or replacing a worn shaft or coupling restores concentricity between the motor and pump, eliminating vibration, chatter, and premature bearing wear caused by misalignment or excessive play.
Steps: isolate power, drain system, mark shaft positions, loosen coupling fasteners, measure runout, shim or reposition components, replace coupling or shaft if runout exceeds specs, retighten, rotate by hand, test under power for quiet operation.
4. Clean or replace a clogged impeller
After correcting shaft or coupling misalignment, attention should shift to the impeller, since buildup or damage there directly reduces flow and causes noise from cavitation or imbalance.
Inspect visually, disconnect power, drain pump, remove housing, and check vanes for debris, corrosion, or cracks.
Clean with brush and vinegar or replace the impeller if warped or eroded.
Reassemble, refill, and test for reduced noise.
5. Install or replace a pressure tank or bladder
Install a properly sized pressure tank or replace a failed bladder to eliminate short-cycling and the associated hammering or whining that often comes from a water pump system.
Inspect tank integrity and air charge, drain water, depressurize, detach plumbing, replace bladder or install new tank, reassemble, recharge to manufacturer-specified psi, and test for stable cycles and silence.
6. Adjust pressure switch settings and replace faulty switches
Check the pressure switch settings and inspect the switch itself, since incorrect cut-in/cut-out points or a failing switch commonly cause rapid cycling, banging, or continuous motor humming.
Verify electrical power off, remove cover, note current cut-in/cut-out settings, adjust increments per manufacturer, test operation.
Replace corroded contacts, worn springs, or faulty switches with correct-rated units; retest for stable cycling.
7. Add or upgrade anti-vibration mounts and isolators
If pressure switch adjustments and replacements reduce cycling noise but residual vibration persists, adding or upgrading anti-vibration mounts and isolators is an effective next step.
Inspect existing mounts, note wear or hardening. Select neoprene, rubber or spring isolators sized for pump weight.
Shut power, support pump, remove old mounts, install new isolators with proper torque and spacing. Test operation and retighten after run-in.
8. Insulate and secure loose piping to reduce resonance
Secure loose piping and add insulation to cut pump-induced resonance, which often amplifies and transmits vibration throughout a building.
Inspect runs for movement, clip pipes to studs with cushioned clamps, and replace worn hangers.
Wrap metal pipes with foam or rubber insulation, secure joints with tape or mastic, and isolate contact points where pipes meet floors or walls to prevent sound transfer.
9. Reduce water hammer with check valves or water hammer arrestors
Reduce water hammer by installing check valves or dedicated water hammer arrestors, which absorb sudden pressure spikes when valves close and prevent loud banging in pipes.
Identify affected lines, shut off supply, drain the system, and mount arrestors near fast-closing fixtures or pumps.
For check valves, verify correct flow direction and secure fittings.
Test by restoring pressure and cycling valves to confirm noise elimination.
10. Replace an undersized or failing pump with correct sizing
While water hammer arrestors address pressure spikes, persistent noise or poor flow often stems from an undersized or failing pump that cannot meet system demands.
Inspect pump capacity, run-time, and vibration. Compare system flow/pressure requirements to pump curve.
Replace with correctly sized, quieter model rated for demand. Install vibration isolators, check valves, and proper wiring.
Test performance and adjust controls for ideal, silent operation.
Diagnosing noise by pump type and system
Different pump types and system setups produce distinct noise signatures that point to specific causes and fixes. The following table summarizes common noise sources and targeted remedies for centrifugal, submersible, and well/booster pumps, plus general system checks. Readers should use these cues to match symptoms to practical corrective actions.
| Noise source / symptom | Typical targeted fix |
|---|---|
| Centrifugal: cavitation, bearing wear | Reduce suction lift, replace bearings, check impeller clearance |
| Submersible: motor hum, vibration | Tighten mounts, check electrical supply, replace motor or shaft seals |
| Well/booster: cycling, pressure fluctuations | Adjust pressure switch/tank, inspect check valve and tank bladder |
| General system checks: pipe resonance, air in lines | Add restraints, insulation, air eliminator, bleed trapped air |
Centrifugal pumps typical causes and targeted fixes
Centrifugal pump noise often stems from a limited set of mechanical, hydraulic, or system-level issues, and diagnosing it requires matching symptom patterns—such as vibration, whining, or cavitation sounds—to their likely sources.
Bearings, misalignment, or looseness cause rumble/vibration; impeller damage or imbalance produces whining; cavitation yields gravelly noise and flow loss.
Targeted fixes: replace bearings, realign, tighten mounts, trim or replace impeller, correct NPSH and piping.
Submersible pumps typical causes and targeted fixes
Submersible pumps present a different set of acoustic signatures and failure modes than the above centrifugal styles, because their motors, bearings, and hydraulics operate fully submerged and are confined within the pump column.
Typical causes include worn bearings, cavitation from low intake, electrical faults, and clogged impellers.
Targeted fixes: replace bearings or impeller, repair seals, guarantee proper intake depth, and correct voltage or wiring.
Well/booster pumps typical causes and targeted fixes
Diagnose well and booster pump noise by isolating whether the sound originates from the pump unit, the motor, or the piping and pressure components.
Since each location points to distinct causes such as worn bearings, pressure tank issues, water hammer, air entrainment, or electrical faults, targeted fixes consequently range from bearing or motor replacement and pressure tank recharging to installing surge arrestors, correcting suction leaks, and verifying voltage and control settings.
Inspect mounts, valves, and check valves for looseness or failure.
Balance impellers, replace worn seals, purge entrained air, and adjust pressure switch settings to restore quiet operation.
Tools, materials, and parts checklist for repairs
A concise checklist of tools, materials, and spare parts helps guarantee pump-noise repairs proceed safely and efficiently.
The technician should confirm they have the right hand tools, electrical testers, vibration isolation options, common replacement parts, and personal protective equipment before beginning work. Missing an item can extend downtime or create safety hazards.
- Adjustable and socket wrenches, pliers, and screwdrivers
- Multimeter, clamp meter, and basic electrical test leads
- Vibration isolators, rubber mounts, and anti-vibration pads
- Spare seals, bearings, impellers, and replacement fasteners
- Safety gear: gloves, eye protection, hearing protection, and lockout/tagout supplies
Essential tools (wrenches, multimeter, vibration isolators, etc.)
Essential tools for quieting a noisy water pump center on accuracy, access, and isolation: a set of adjustable and fixed wrenches, socket set, insulated screwdrivers, and a good-quality multimeter for electrical checks;
vibration isolators or rubber mounts, hose clamps, and shaft couplers for mechanical damping;
and basic sealants, gaskets, replacement bearings, and impeller kits for common wear repairs.
Also include torque wrench, bearing puller, anti-vibration pads.
Common replacement parts to have on hand
Spare parts and consumables kept nearby minimize downtime and speed common repairs: replacement bearings, shaft seals, and impeller kits for worn internals; mechanical seals and O‑ring/gasket sets for leaks; hose clamps, flexible couplings, and threaded adapters for plumbing connections; and an electrical spare of start/run capacitors, motor brushes (if applicable), and commonly used fuses.
Also stock thread sealant, anti-seize, replacement bearings housings, and spare impeller keys.
Safety gear and precautions
Why are the right safety items indispensable before any pump repair? A checklist guarantees hazards are minimized: safety glasses, gloves, ear protection, respirator for chemicals, insulated tools, lockout/tagout kit, non-slip footwear, and a sturdy flashlight.
Also include replacement seals, O-rings, gasket paste, thread tape, and basic wrenches.
Verify power isolation, depressurize lines, and follow manufacturer instructions before starting work.
How to adjust pressure switch and pressure tank settings safely
The section outlines how to identify the correct cut-in and cut-out pressures for a given system and why those settings affect pump cycling and noise.
It then summarizes safe, step-by-step procedures for adjusting the pressure switch and testing the system response.
Finally, it covers checking and restoring the pressure tank bladder, including when recharging or replacing it is required.
Identifying correct cut-in and cut-out pressures
When diagnosing pump cycling, technicians should first confirm the system’s cut-in and cut-out pressures, since incorrect settings are a common cause of frequent starts or long runs.
Typical residential switches are set to 30/50 psi, but older or specialized systems may use different ranges.
Confirm documented system requirements, match tank precharge to cut-in minus 2 psi, and verify pressure gauge accuracy before proceeding.
Steps to adjust the switch and test system response
Begin by de-energizing the pump circuit and relieving system pressure to guarantee a safe working environment before any adjustments are made.
Then loosen the pressure switch cover, mark existing settings, and adjust the nuts to change cut-in/cut-out separations as required.
Restore power, cycle the pump several times, observe pressure gauge behavior and listen for abnormal noises.
Readjust incrementally until stable, correct operation is achieved.
Recharging or replacing the pressure tank bladder
After verifying pressure-switch behavior and making any necessary adjustments, attention turns to the pressure tank bladder, which affects cycling and noise.
The tank should be isolated and drained, then the air charge checked with a gauge; recharge to manufacturer’s cut-in pressure minus 2 psi.
If the bladder is ruptured or leaks persist, replace the bladder or tank to restore proper cushioning and silence.
Preventive maintenance plan to keep your pump quiet
A concise preventive maintenance plan keeps pump noise low by combining simple monthly and annual checks with targeted service tasks.
Routine tasks should include lubrication, alignment verification, and scheduled part replacements to prevent wear-related vibration.
Clear record-keeping and monitoring of specific signs—changes in pitch, new rattles, or pressure shifts—help identify trends before they become louder failures.
Simple monthly and annual checks
Establishing a simple schedule of monthly and annual checks prevents minor issues from escalating into persistent noise problems. Inspectors should visually examine mounts and couplings, listen for unusual tones during operation, and verify fastener tightness each month.
While conducting more thorough annual tasks such as alignment checks, bearing inspection or replacement, lubrication renewal, and vibration analysis. Records of findings guide corrective actions and track trends over time.
Lubrication, alignment, and scheduled part replacements
Maintain a regular program of lubrication, alignment, and timed part replacement to prevent wear-induced noise and extend pump life.
Technicians should use manufacturer-specified lubricants, follow torque and shaft alignment tolerances, and replace bearings, seals, and worn impellers at recommended intervals.
Proactive component swaps reduce vibration, overheating, and cavitation risks, preserving efficiency and minimizing sudden failures that generate disruptive noise.
Record-keeping and signs to monitor over time
Following lubrication, alignment, and scheduled part replacements, a structured record-keeping system helps track which interventions reduced noise and which conditions reoccur.
Logs should note date, symptom, measured decibels, performed action, parts replaced, and technician.
Monitor vibration patterns, temperature rises, flow rate changes, and intermittent knocking.
Regular review highlights trends, schedules preventive work, and validates effectiveness, preventing escalation and preserving quiet operation.
Cost and time estimates for common noise fixes
A concise comparison of DIY versus professional repairs helps readers weigh upfront costs against reliability and warranty coverage. Typical time estimates for each common fix are included to set realistic expectations for scheduling or weekend projects. The following table summarizes representative cost and time ranges for common noise remedies:
| Fix | DIY Cost (USD) / Time | Pro Cost (USD) / Time |
|---|---|---|
| Replace mount/isolator | $10–$50 / 30–60 min | $75–$200 / 30–90 min |
| Tighten/replace fittings | $0–$30 / 15–45 min | $50–$120 / 15–60 min |
| Replace bearings/impeller | $20–$150 / 1–3 hrs | $200–$600 / 1–4 hrs |
DIY vs professional repair cost ranges
Several common pump-noise fixes can be attempted by a homeowner, but costs and time differ sharply between DIY and professional options.
Simple tasks like tightening mounts or cleaning strainers often take 30–90 minutes and under $50 in parts.
In contrast, motor replacement or bearing jobs usually require a pro, running $200–900 and several hours to a half day.
DIY saves labor costs but may risk warranty voiding.
Professionals add diagnostic fees ($50–150) and guarantee work.
Typical time required per fix
After comparing DIY and pro options, typical time estimates help set realistic expectations for each repair.
Minor fixes—tightening mounts, adding pads, replacing clamps—usually take 20–60 minutes for someone with basic tools.
Bearing or impeller swaps often require 1–3 hours.
Complete pump replacement and plumbing adjustments can take 2–4 hours for professionals, longer for novices.
Diagnostic checks add 15–45 minutes.
Troubleshooting flowchart: match noise symptom to likely cause and next step
A simple troubleshooting flowchart guides readers to match a specific noise symptom with its most likely cause and the next corrective step.
Separate checklists cover humming or continuous vibration, intermittent banging or water hammer, and grinding or metallic noises.
Each checklist lists quick diagnostics and the recommended actions to verify and resolve the issue.
Humming or continuous vibration checklist
Begin by isolating the humming or continuous vibration to determine whether it originates from the pump motor, impeller, mounting, or piping resonance.
Inspect motor bearings, secure loose mounts, check for trapped air or cavitation, and verify impeller balance and clearances.
Tighten pipe supports, add vibration isolators, and measure electrical supply for imbalance or harmonic issues.
Document findings and apply corrective action.
Intermittent banging or water hammer checklist
Several quick checks can narrow intermittent banging or water hammer to its most likely causes and next steps.
Inspect fast-closing valves and faucets, confirm proper pump start/stop cycling, check for air chambers or waterlogged arrestors, verify pressure switch and relief valve settings, and examine pipe anchoring and expansion loops.
Match findings to corrective actions: adjust controls, replace arrestors, secure piping, or install a water hammer arrestor.
Grinding or metallic noise checklist
Multiple distinct grinding or metallic noises often point to mechanical wear, contact between moving parts, or loose fittings and should be diagnosed by matching the sound character and location to likely causes.
Checklist: identify noise pattern (continuous, intermittent, pitch), isolate zone (motor, bearings, impeller, pipework), inspect fasteners and mounts, check bearings and impeller for damage, replace worn components, retest for remaining vibration.
When replacement is the best option and selecting a quieter pump
Replacement is recommended when persistent noise stems from irreparable mechanical wear, repeated failures, or when repair costs approach the price of a new unit.
Selection should prioritize features that reduce noise—variable-speed motors, vibration-isolating mounts, and built-in or add-on insulation—and compare sound ratings, efficiency, and warranty among models.
Installation factors such as proper mounting, alignment, and plumbing isolation should be weighed alongside model comparisons to guarantee the quieter pump performs as designed.
Criteria that justify full pump replacement
When persistent noise stems from worn bearings, fractured housings, repeated motor failures, or chronic cavitation that cannot be resolved through repairs, full pump replacement becomes the most reliable course of action; selecting a quieter pump should then focus on matching required flow and head, choosing lower-rpm or variable-speed models, and prioritizing units with better acoustic ratings and vibration-isolated mounts.
Replacement is justified when repairs are costly, intermittent, or safety-compromised.
Features to choose for a quiet pump (variable speed, mount design, insulation)
After determining that a full pump swap is the best remedy for persistent noise and reliability issues, attention turns to features that minimize sound and vibration in the new unit.
Preferred options include variable-speed motors for steady, low-RPM operation; resilient mount designs or isolation pads to decouple structure-borne noise; and integrated or add-on acoustic insulation and vibration dampers to reduce airborne and transmitted noise.
Comparing models and installation considerations
Evaluate available models based on noise ratings, duty cycle, and compatibility with the existing plumbing and electrical systems to guarantee the new pump will address the specific sources of the nuisance sound. When replacement is preferable, choose variable-speed, vibration-isolated models sized correctly. Proper mounting and electrical protection prevent recurrence.
| Feature | Benefit | Consideration |
|---|---|---|
| Noise dB | Quieter operation | Verify specs |
| Mounting | Reduced vibration | Use isolators |
| Capacity | Efficient duty | Match system |
Conclusion
In sum, the guide equips readers to diagnose and quiet a noisy water pump with practical fixes, preventive routines, and clear decision points. While “an ounce of prevention is worth a pound of cure,” timely action and steady maintenance prevent small vibrations from becoming costly failures. When repairs exceed reasonable cost or noise persists despite thorough troubleshooting, replacement with a quieter, properly sized pump is the prudent next step to restore reliable, silent operation.