How to Install Irrigation Systems: A Step-by-Step Guide for Beginners
To install an irrigation system as a homeowner, start by selecting the right type for your needs—sprinklers for lawns and drip or soaker systems for garden beds. Next, map out zones based on plant requirements and sun exposure. Assess your water source, pressure, and flow, then choose the necessary components: pipes, valves, a controller, backflow prevention, and suitable emitters. Dig trenches, lay mains and laterals, wire valves, position heads or emitters, and test the system. Finally, ensure proper winterization. For comprehensive guidance, detailed steps, parts lists, and troubleshooting tips are available.
Overview of Home Irrigation Systems and When to Install Them
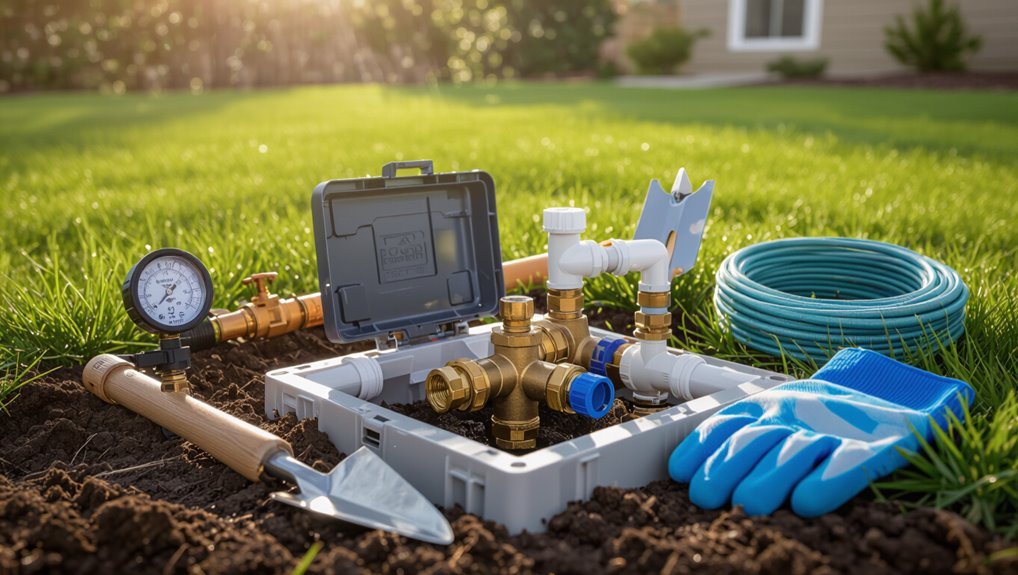
Home irrigation systems fall into several types—sprinkler, drip, soaker, and micro-spray—each suited to different plantings and water-efficiency goals.
The advantages and trade-offs of each option vary by application, with sprinklers favoring lawns, drip and soaker lines conserving water for gardens, and micro-sprays serving containers or dense beds.
Selection and installation timing should account for seasonal conditions, soil drainage, and site exposure to guarantee proper establishment and system performance.
Types of irrigation systems (sprinkler, drip, soaker, micro-spray)
Choosing the right irrigation system depends on landscape type, plant needs, water availability, and budget.
Homeowners learn how to install irrigation systems by comparing main options: sprinklers for broad coverage, drip for targeted root delivery, soaker hoses for beds, and micro-sprays for delicate areas.
Each system requires different piping, emitters, pressure regulation, and placement considerations before installation begins.
Pros and cons of each type for lawns, gardens, and containers
Several common irrigation types offer distinct advantages and trade-offs depending on whether they serve lawns, garden beds, or containers.
Sprinklers suit lawns for uniform coverage but waste water and cause runoff.
Drip systems deliver targeted moisture to garden beds, conserving water yet requiring clog-prone emitters.
Soaker hoses are simple for beds but uneven.
Micro-sprays fit containers and tight spots but need frequent adjustment.
Seasonal and site considerations for installation timing
After weighing the trade-offs among sprinklers, drip systems, soaker hoses, and micro-sprays, timing an installation becomes the next practical concern because season and site conditions greatly affect performance and longevity.
Install during mild, non-freezing seasons to prevent pipe damage and allow settling.
Consider soil type, slope, sun exposure, root growth cycles, and local watering restrictions to optimize layout, emitter selection, and start-up timing.
How to Plan an Irrigation System for Your Property
Planning begins with a clear assessment of the water source, meter location and available pressure.
The yard should be mapped into zones based on plant water needs, sun exposure and soil type, then used to calculate flow rate, pressure requirements and appropriate zone sizing.
With those figures, suitable valves, controllers, emitters, pipe sizes and a backflow preventer can be selected.
Assessing water source, pressure, and meter location
Before laying out lines or selecting heads, the property’s water source, available pressure, and meter location must be evaluated to confirm the system can deliver required flow and operate within component specifications.
Inspect supply type (municipal, well, reclaimed), measure static and dynamic pressure with a gauge, note meter and shutoff positions, and verify any backflow or pressure-reducing devices to validate compatibility and legal compliance.
Mapping your yard: zones, plant water needs, sun/shade, soil type
A clear property map is essential: divide the yard into irrigation zones according to plant types, sun exposure, and soil characteristics so each zone receives appropriate water amounts.
Mark lawns, flower beds, shrubs, vegetable areas, and trees; note full sun, partial shade, and shaded spots.
Record soil types—sandy, loam, clay—and group plants by similar water needs for efficient, targeted irrigation.
Calculating flow rate, pressure, and zone sizing
With zones defined by plant type, sun exposure, and soil, the next step is quantifying how much water each zone can receive: determine available flow (gallons per minute), system pressure (psi), and the number of fixtures or emitters per zone so each area is sized to match supply and plant demand.
Calculate total GPM per zone, check pressure losses, and adjust zone boundaries to stay within supply limits.
Selecting system components: valves, controllers, emitters, pipes, backflow preventer
Choose components that match calculated flow and pressure while balancing durability, maintenance, and budget.
The planner selects valves sized for zone flow, a controller offering required station count and scheduling features, emitters or sprinklers matched to plant needs, and pipe materials suited to pressure and soil.
Include a certified backflow preventer for code compliance.
Prioritize reliability and serviceability.
Materials and Tools Needed Before You Start
Before beginning installation, a clear parts list organized by system type (drip, sprinkler, spray) helps guarantee every component is on hand.
The project also requires specific hand and power tools, with heavier equipment available for rent if needed.
Finally, appropriate safety gear and any local permits should be confirmed to avoid delays and guarantee compliance.
Parts list by system type
Although specific components vary by design, each irrigation system requires a clear parts list so installation proceeds efficiently and without costly interruptions.
Common categories include water source fittings, distribution lines, control devices, and emitters.
Typical examples:
- Mainline pipe, valves, and connectors
- Lateral tubing or PVC with fittings
- Timers/controllers and backflow preventers
- Sprinkler heads, drip emitters, and stakes
Required tools and optional rental equipment
Gather the right tools to streamline installation and reduce downtime: a basic toolkit for most homeowners should include a shovel, trenching spade or hoe, pipe cutter or PVC saw, adjustable wrench, tape measure, Teflon tape, screwdrivers, and a utility knife, while specialized jobs may require rented equipment such as a trencher, auger, or pressure tester to speed excavation, bore holes, or verify system integrity.
Additional items: pipe primer, PVC cement, clamps, stakes, marker paint, hose fittings, and a compact hand tamper.
Safety gear and permit requirements
Several essential safety items and an understanding of local permit requirements are necessary before beginning an irrigation installation.
Protective eyewear, gloves, sturdy boots, ear protection, and a high-visibility vest reduce injury risk.
Utility locating services must be used to avoid underground lines.
Verify municipal permits, inspection schedules, and setback or water-use restrictions.
Keep documentation on site and follow regulations to prevent fines and hazards.
Step-by-Step Installation for a Sprinkler System
The installation begins with marking the layout and locating underground utilities to prevent conflicts and guide trenching.
Trenches are then cut and pipes placed following best practices while the mainline, lateral lines, and fittings are installed in sequence.
Valves and a valve box are connected to the water source, followed by mounting sprinkler heads, nozzles, and risers to finalize the system.
Marking layout and locating underground utilities
Before any trenching begins, the layout must be clearly marked and all underground utilities located to prevent damage and guarantee system accuracy.
A scaled plan guides sprinkler head positions, pipe runs, valves and zone boundaries. Mark lines with spray paint and flags.
Call utility-locating services and verify electrical, gas, water and telecom lines. Record locations on the plan before proceeding.
Trenching and pipe placement best practices
Begin trenching along marked lines with appropriate equipment—hand trenchers, walk-behind trenchers, or a shovel—maintaining consistent depth and slope to protect pipe integrity and guarantee drainage.
Remove rocks and roots, keeping trenches neat.
Lay pipe on smooth bedding, avoid sharp bends, and provide slack for thermal movement.
Backfill in layers, tamp gently, and verify alignment before final compaction to prevent future settling.
Installing mainline, lateral lines, and fittings
With trenches prepared and bedding smoothed, installation of the mainline, laterals, and fittings proceeds methodically to establish water delivery and zone control.
The mainline is laid first, maintaining grade and avoiding kinks. Laterals branch from tees or manifolds toward sprinkler locations.
All joints receive correct solvent or compression fittings, glued or tightened per material specifications, then inspected for alignment before backfilling.
Installing valves, valve box, and connection to water source
Once the mainline and laterals are in place, the installation of valves, valve box, and the connection to the water source focuses on establishing reliable zone control and a durable service inlet.
Install a manifold of electrically actuated zone valves on the mainline, mount them in a frost-resistant valve box, run control wiring to the controller, and connect a backflow preventer and shutoff to the potable supply per local code.
Setting and mounting sprinkler heads, nozzles, and risers
After the valves and backflow assembly are secured and control wiring routed, attention moves to locating and installing sprinkler heads, nozzles, and risers to achieve correct coverage and reliable operation.
Stakes mark head positions; trenches reveal lateral lines.
Thread risers into fittings, set pop-up heights to match turf or mulch, attach appropriate nozzles, adjust arc and radius, and test for uniform spray and leaks.
Backflow preventer installation and code compliance
Begin by locating the service connection and verifying pressure and flow requirements; the backflow preventer must be installed where it will reliably stop contaminated irrigation water from entering the potable supply while remaining accessible for testing and maintenance.
Choose a device approved by local codes, mount at correct orientation and elevation, install shutoffs and drains, apply approved materials and joint methods, and schedule required inspections and certification.
Pressure testing, flushing, and leak checks
Pressure testing, flushing, and leak checks verify the integrity and cleanliness of the installed sprinkler piping before backfilling and final commissioning.
Technicians pressurize zones to specified PSI, monitor for pressure drop, and inspect joints. They flush mains and laterals to remove debris, then operate emitters to confirm flow.
Any leaks are located, repaired, and retested until readings remain stable and clear water flows.
Step-by-Step Installation for a Drip Irrigation System
The section outlines installing a drip system beginning with laying main tubing and fitting pressure regulators and filters to protect components.
It then covers branching with distribution lines and fittings, placing emitters, micro-sprays, or drip stakes, and securing tubing with options for burying or surface layout and UV protection.
Finally, it addresses flushing the lines, testing the system, and adjusting emitter flow for uniform irrigation.
Laying main tubing and installing pressure regulators and filters
Lay out the main tubing route across the garden before connecting any fittings to guarantee a clear, efficient layout that minimizes bends and elevation changes.
Secure tubing with stakes, cut to length, and glue or push-fit ends.
Install a pressure regulator at the water source to maintain recommended drip pressure, then mount a filter to protect emitters.
Test for leaks and correct pressure before proceeding.
Branching with distribution lines and fittings
After confirming the main tubing is secure and free of leaks, attention turns to branching distribution lines and installing fittings to feed individual planting zones.
Measure branch lengths, cut tubing squarely, and insert barbed tees or elbows. Use clamps or compression fittings where needed, secure lines with stakes, and slope gently for drainage.
Test each branch for flow and leaks before covering.
Installing emitters, micro-sprays, and drip stakes
Begin by identifying each plant’s water needs and spacing to determine emitter types and placement: point-source emitters suit individual plants, micro-sprays cover small ground areas, and drip stakes deliver subsurface moisture.
Install emitters at root zones, use pressure compensating emitters where slopes vary, space micro-sprays for overlapping coverage, and secure drip stakes to maintain depth.
Test flow and adjust output per plant requirements.
Securing tubing, burying vs. surface layout, and protecting from UV
Secure tubing firmly and choose its placement based on soil, foot traffic, and aesthetic needs: surface layout allows easy access and winter flushing, while burying lines 1–3 inches protects against UV, accidental damage, and heat stress but complicates repairs.
Use stakes or pins every 2–3 feet, secure fittings with clamps, apply UV-resistant tape or tubing, and shield exposed sections with mulch or conduit.
Flushing, testing, and adjusting emitter flow
Flush the lines, test each zone, and adjust emitters to confirm even, clog-free delivery before finalizing the system.
The installer opens main valves, flushes debris, then runs each zone sequentially. Observations note weak, strong, or clogged emitters; replacements, pressure adjustments, or flow restrictors correct imbalances.
Final verification confirms uniform output, records settings, and schedules routine flushing to maintain performance.
Installing Automatic Controls and Timers
Selecting the right controller—basic or smart—sets the foundation for automated irrigation.
Proper wiring of valves and integration of sensors like rain and soil moisture guarantee the system responds to real conditions.
Programming zone- and season-specific schedules and linking the controller to home automation or water-saving features maximizes efficiency.
Choosing a controller: basic vs. smart controllers
When choosing an irrigation controller, homeowners and professionals must weigh simplicity against flexibility: basic controllers offer reliable, schedule-driven operation with straightforward programming, while smart controllers add weather-based adjustments, remote access, and conservation features that can reduce water use but require connectivity and occasional updates.
Selection hinges on budget, site complexity, desired automation, and willingness to manage firmware, apps, and cloud services for peak performance.
Wiring valves and connecting sensors (rain, soil moisture)
Before powering up the controller, the installer should run and secure low-voltage wiring from each zone valve to the controller, verifying wire gauge and conductor count meet distance and load requirements.
Common practice uses 18–14 AWG stranded cable with a dedicated common and one lead per valve. Connections should be watertight at valves and controller.
Install rain and soil moisture sensors per manufacturer wiring: common to sensor terminal, switch or data line to input, and follow grounding and surge protection recommendations.
Programming watering schedules by zone and season
A clear watering schedule balances plant needs, local climate, and system capacity by assigning start times, run durations, and frequency for each zone.
Controllers should group zones by plant type and sun exposure, set shorter cycles for fine-textured soils, and schedule multiple short cycles for deep watering.
Adjust seasonal programs monthly, reduce frequency in cool months, and increase during heat or establishment periods.
Integrating with home automation and water-saving settings
Installers configure controllers and timers to communicate with household automation hubs and enforce water-saving parameters, linking zone programs to weather sensors, flow meters, and smart assistants.
They set sensor-based suspensions, adjust run times for seasonal evapotranspiration rates, and enable leak alerts.
Integration uses secure Wi-Fi or wired protocols, schedules prioritize turf and drought-tolerant planting, and remote access simplifies monitoring and updates.
Troubleshooting Common Installation Problems
Common installation problems include low pressure, noisy pipes, uneven coverage, leaks, clogged emitters, and misaligned heads that reduce system performance.
Electrical faults in valves or the controller often cause zones to fail or run unpredictably.
Backflow or cross-connection concerns require prompt correction to protect the potable water supply.
Low pressure, noisy pipes, and uneven coverage
Troubleshooting low water pressure, noisy pipes, and uneven coverage requires identifying root causes—such as supply limitations, pipe size or slope issues, air in lines, worn components, or improperly spaced heads—and systematically testing each element to restore reliable, quiet, and uniform irrigation.
Technicians should measure static and dynamic pressure, inspect pipe pitch and supports, purge air, verify valve operation, and adjust head spacing and spray patterns for balanced coverage.
Leaks, clogged emitters, and poor head alignment
Diagnose leaks, clogged emitters, and misaligned heads by systematically inspecting visible fittings, testing flow at emitters, and observing spray patterns during operation.
Repair leaks with appropriate couplings or sealant, replace damaged tubing, and tighten fittings.
Clear clogged emitters by soaking in vinegar or using a needle.
Adjust head alignment and spray radius to eliminate overspray and guarantee uniform coverage across planted areas.
Electrical issues with valves or controller
Begin by checking the controller and valve wiring for loose connections, damaged insulation, or corroded terminals, since most electrical problems stem from poor contact or water intrusion.
Verify voltage at the controller, test solenoids with a multimeter, and inspect zone wiring for shorts or breaks.
Replace faulty solenoids, reseal wire splices, and confirm programming and transformer output before retesting zones.
Resolving backflow or cross-connection concerns
Addressing backflow and cross-connection concerns requires identifying potential points where contaminants could enter the potable water system and ensuring proper backflow prevention devices are installed, tested, and maintained.
Inspect connections, hose bibs, and chemical injectors; select appropriate preventers (pressure vacuum breakers, reduced pressure assemblies); follow local codes; schedule annual testing and recordkeeping; repair leaks promptly; train users on avoiding improper attachments to irrigation lines.
Maintenance and Winterization Procedures
A concise seasonal maintenance checklist helps preserve performance and catch wear before it causes failures.
Winterization methods—blowout with compressed air versus manual draining—are compared to protect sprinkler and drip systems from freeze damage.
Spring startup procedures include flushing lines, inspecting heads and emitters, and recalibrating the controller for local weather and plant needs.
Regular seasonal maintenance checklist
Prepare a concise seasonal maintenance checklist that guarantees reliable irrigation performance throughout the year by scheduling inspections, cleaning, adjustments, and winterization tasks at appropriate intervals.
Regular checks preserve efficiency, prevent failures, and extend system life. Prioritize valve operation, filter cleaning, head alignment, and controller programming.
Suggested tasks include:
- Inspect pipes and fittings for leaks
- Clean filters and strainers
- Adjust and test sprinkler heads
- Verify controller schedules and sensors
How to winterize sprinkler and drip systems (blowout vs. drain)
When freezing temperatures approach, winterizing sprinkler and drip systems prevents costly pipe bursts and component damage by removing or isolating water before it can freeze.
Choosing between a compressed-air blowout and gravity/drain methods depends on system type, local climate severity, and installer skill.
Inspect valves, backflow preventers, and filters; shut off water, relieve pressure, and either use a pro-rated blowout or open low points and manual drains for passive drainage.
Spring startup and controller recalibration
Start systems methodically by restoring water supply, cycling each zone briefly to check for leaks, and then recalibrating the controller to seasonal settings.
Inspect valves, heads, and filters for damage or clogs. Adjust run times and schedule based on soil moisture, plant needs, and local evapotranspiration.
Test rain sensor and moisture sensors, update firmware if applicable, and document settings for future adjustments.
Water Efficiency, Regulations, and Cost Considerations
Effective irrigation balances water efficiency, regulatory compliance, and cost.
Practical measures such as zoning, soil-moisture sensors, and matched precipitation-rate heads can cut water use, while local codes, permits, and rebate programs influence system design and incentives.
Homeowners must weigh DIY versus professional installation costs and the long-term savings from reduced water bills and maintenance.
Tips to reduce water use: zoning, sensors, matched precipitation rates
Several straightforward strategies can markedly reduce irrigation water use: dividing landscapes into irrigation zones, installing moisture and rain sensors, and matching emitter flow rates to plant water needs and soil infiltration.
Proper zoning separates turf, shrubs, and beds for tailored schedules. Sensors prevent unnecessary runs after rain or during saturation.
Matching precipitation rates across heads and drippers guarantees uniform coverage and minimizes runoff.
Local codes, permits, and rebate programs
Many municipalities require adherence to local plumbing and water-use codes, and homeowners or contractors should verify permit requirements before installing or modifying an irrigation system. Compliance prevents fines, guarantees backflow protection, and may be needed for rebates. Check utility rebate eligibility and documentation.
| Code review | Permit check | Rebate info |
|---|---|---|
| Backflow | Inspections | Applications |
Cost breakdown: DIY vs. professional installation and long-term savings
A clear comparison of upfront and ongoing costs helps homeowners decide between DIY and professional irrigation installation, balancing water-efficiency gains, regulatory compliance, and long-term savings.
DIY reduces labor expenses but may incur higher maintenance, warranty gaps, and potential permit errors.
Professional installs cost more initially yet offer optimized system design, compliance assurance, performance warranties, and often greater water and cost savings over time.
Common Beginner Mistakes and How to Avoid Them
Beginners often make placement and component errors that reduce system performance, such as overlapping sprinkler heads, wrong nozzle choices, and improper zone layout.
Failing to measure available flow and pressure before installation leads to mismatched parts and uneven coverage.
Ignoring soil type and root depth when locating emitters can cause water waste or inadequate root-zone moisture.
Overlapping heads, wrong nozzle selection, and improper zoning
Overlapping sprinkler heads, incorrect nozzle choices, and poorly planned zones are common causes of uneven coverage, wasted water, and premature system wear.
Technicians should map irrigation areas, select nozzles by radius and precipitation rate, and group plants with similar needs.
Maintain proper spacing to guarantee head-to-head coverage without excess overlap, and design zones to balance run time and water distribution for efficiency and longevity.
Installing without measuring flow/pressure first
How can installers expect reliable performance without first measuring water pressure and flow? Skipping these measurements leads to mismatched heads, overloaded zones, short runtimes, and uneven coverage.
Professionals verify static and dynamic pressure plus system flow before design and component selection. Simple tests prevent pump stress, wasted materials, and frequent callbacks; corrective adjustments save time and guarantee system longevity and uniform irrigation.
Ignoring soil type and root depth when placing emitters
Many installers underestimate how soil texture and root depth dictate emitter placement, leading to inefficient water use and plant stress.
They place emitters too close or too far from trunks, ignore deep-rooted versus shallow-rooted species, and fail to match emitter flow to infiltration rates.
Proper assessment of soil percolation and root zones guarantees uniform moisture, reduces runoff, and promotes healthy establishment.
Example Project Plans and Quick Reference Templates
The section presents concise example project plans and quick-reference templates for common installations.
It includes a small single‑zone lawn sprinkler layout with a parts list, a multi‑bed vegetable garden drip plan showing emitter spacing, and a pre‑start checklist for first‑time installers.
Readers are encouraged to use these templates as starting points and adapt them to site-specific measurements and water availability.
Small lawn sprinkler plan (single-zone) with parts list
A concise single-zone sprinkler plan lays out the layout, component list, and basic installation steps required to irrigate a small lawn efficiently.
It specifies head placement, pipe runs, valve location, and watering duration.
Parts list: controller, solenoid valve, PVC pipe, spray heads.
Installation steps: trench, assemble, test, backfill.
Maintenance notes: seasonal checks and filter cleaning.
Vegetable garden drip plan (multi-bed) with emitter spacing
Several raised beds benefit from a tailored multi-bed drip plan that maps mainlines, laterals, and emitter spacing to plant types and root zones.
A layout shows valve zones per bed, barbed fittings, pressure regulation, and filtration.
Emitters range 4–12 inches for shallow crops, 12–24 inches for deeper roots.
Water budgets and run times per zone are specified for consistent moisture and efficiency.
Checklist for first-time installers before turning on the system
Before activating the irrigation system, installers should run a concise pre-start checklist that verifies plumbing integrity, pressure regulation, filtration, valve function, emitter placement, and controller programming to prevent leaks, uneven coverage, and component damage.
A final walk-through confirms readiness; corrections are documented.
Key checks include:
- Inspect joints and test for leaks
- Verify pressure and backflow protection
- Confirm filters and strainers are clean
- Cycle valves and check emitter output
Conclusion
After a heroic saga of pipes, timers and soggy gloves, the reader retires triumphant to a garden no longer acting like an unpredictable sprinkler-themed opera. The lawn behaves, the roses plot allegiance, and the drip lines whisper classified hydration secrets. Having navigated valves, layout and municipal paperwork, the would-be irrigation impresario stands back—muttering to the sun—and watches sensible water do its quiet, efficient work while neighbors gape at this newly civilized plot of paradise.