How to Install Baseboard Hot Water Heat: Step-by-Step DIY Guide for Homeowners
To install baseboard hot water heat, follow these essential steps: begin by assessing the heat requirements of each room and choosing appropriately sized convectors and piping. Prepare your boiler and workspace, and gather necessary tools, including basic plumbing equipment, a circulator pump, zone controls, and safety gear. Remove old heating units, install the new baseboards, and connect the supply and return lines to the boiler manifold. Don’t forget to purge the system of air, pressure-test for leaks, and balance the heating zones. Always adhere to local building codes, and refer to detailed procedures for troubleshooting as needed.
Overview of Baseboard Hot Water Heating and Project Scope
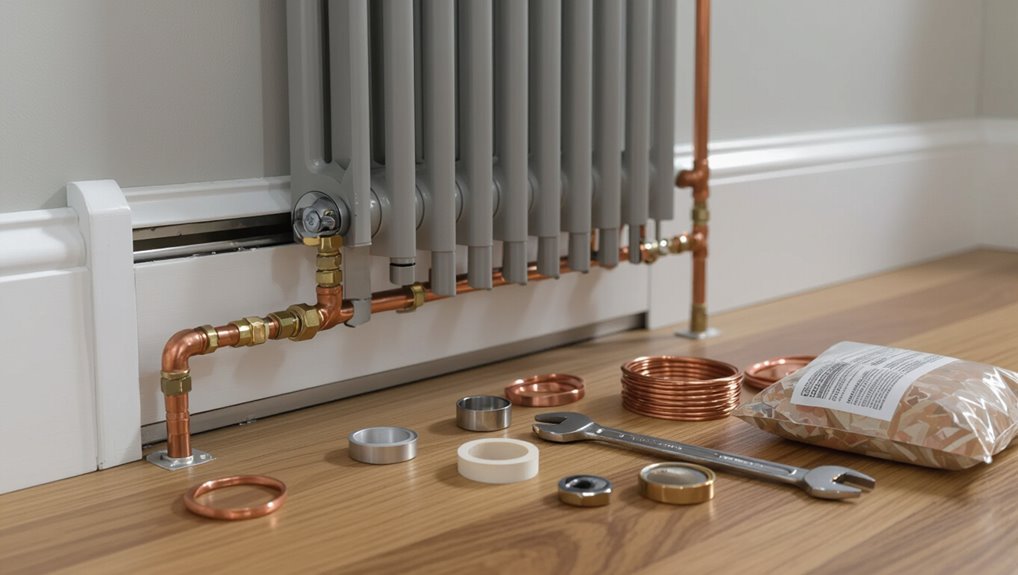
Baseboard hot water heating circulates heated water through wall-mounted convectors to provide steady, zoned warmth with quiet operation.
Typical use cases include whole-house retrofits and room additions where even heat and low maintenance are priorities, while benefits include improved comfort and energy control.
The project requires basic plumbing and pacing skills, several days to a week depending on scope, and attention to local codes and permits—hire a licensed pro for boiler work, complex piping, or permit-required inspections.
What baseboard hot water heating is and how it works
A hot-water baseboard heating system circulates heated water from a boiler through metal fins and pipes mounted along the perimeter of rooms to provide steady, convective warmth.
It relies on a closed loop, circulator pump, piping, thermostatic controls and valves.
The guide explains necessary components, basic heat transfer, zoning principles and safety considerations to clarify how to install baseboard hot water heat correctly and safely.
Typical use cases and benefits for homeowners
Having outlined how hot-water baseboard systems operate and their main components, the discussion now moves to when and why homeowners choose this approach.
Typical use cases include retrofit heating in older homes, quiet zoned warmth for bedrooms, and efficient supplement to forced-air systems.
Benefits: consistent radiant-like comfort, low maintenance, improved indoor air quality, and potential energy savings with proper boiler controls.
Required skills, time estimate, and when to call a pro
Installers should assess skill requirements and project scope before starting: basic plumbing and pipe-soldering knowledge, comfort with cutting drywall and mounting trim, and familiarity with boiler controls and system flushing are typically needed for a straightforward room-by-room retrofit.
Jobs involving new boiler installation, extensive repiping, multi-zone control wiring, or work on gas-fired equipment usually require a licensed professional.
Typical single-room installs take a day; whole-house projects vary widely.
Local codes, permits, and safety considerations
Where do local codes and permits intersect with a baseboard hot water heating project, and why must they be addressed before work begins?
Local codes dictate pipe materials, clearances, venting, and boiler connections; permits verify compliance.
Safety considerations include pressure testing, proper shutoffs, thermal expansion, and electrical bonding.
Failure to follow codes risks fines, insurance denial, and hazards; secure inspections and qualified trades when required.
Tools, Materials, and Equipment Checklist
The installer should assemble a concise list of plumbing and power tools alongside replacement parts and standard heating components specific to baseboard hot water systems.
Required supplies include pipe, valves, fittings, safety gear, and testing equipment, with optional upgrades noted for improved efficiency and serviceability.
This checklist frames procurement and preparation before work begins.
Plumbing tools and power tools needed
A concise, well-organized checklist of plumbing and power tools guarantees the baseboard hot water heating project proceeds safely and efficiently; it should list each item by function and note any size or capacity requirements so the installer can verify compatibility before work begins.
Essential plumbing tools: pipe cutter, tubing bender, adjustable wrenches, torch, flux, solder, emery cloth.
Power tools: drill with bits, reciprocating saw, impact driver, wet/dry vacuum.
Heating system components and replacement parts
Identify and inventory all heating system components and common replacement parts before work begins to guarantee uninterrupted installation and simplify future maintenance.
Include boiler, circulator pump, expansion tank, thermostats, air vents, pressure relief valve, zone valves or zone manifolds, baseboard convectors, mounting brackets, and appropriate fittings.
Stock spare gaskets, seals, check valves, isolation valves, and compatible fasteners to reduce downtime.
Pipe, valve, and fitting types for baseboard systems
Pipe selection, valve function, and fitting compatibility form the backbone of a reliable baseboard hot-water system and should be chosen to match system pressure, temperature, and layout requirements.
Use copper, PEX, or CPVC per local code; compression or sweat fittings for copper; crimp or push-fit for PEX.
Choose globe or ball valves for balancing and isolation, and bronze or brass fittings for durability and corrosion resistance.
Safety gear and testing equipment
With the right pipes, valves, and fittings selected for pressure and temperature, attention turns to the personal protective equipment and testing instruments that keep installers and systems safe.
Required PPE includes gloves, eye protection, steel-toe boots, and heat-resistant clothing.
Essential testing tools: pressure gauge, leak detector spray, digital thermometer, isolation valve tester, and portable pump for pressure testing and system flushing before commissioning.
Optional upgrades and materials for improved performance
Although not strictly necessary for basic operation, several optional upgrades and higher-grade materials can meaningfully improve efficiency, durability, and ease of maintenance for baseboard hot water systems.
Consider these additions to enhance performance and longevity:
- High-efficiency thermostatic radiator valves and smart zone controllers for precise temperature control.
- Corrosion-resistant copper or stainless piping and quality insulation to reduce heat loss.
- Magnetic dirt separators and better air vents for cleaner, more reliable flow.
Preparing the Work Area and Planning the Installation
Before beginning work, the installer surveys the existing heating system and maps the room layouts to identify riser locations and routing constraints.
Exact heat-load measurements determine the length and capacity of baseboard units, which in turn inform a concise parts list and loop plan.
Finally, the installer shuts down, drains, and isolates the boiler to guarantee a safe, dry system before any piping or mounting begins.
Assessing existing heating system and layout mapping
Inspect the current heating system and room layout to establish a clear baseline before any installation work begins.
Document boiler type, zone valves, radiator and piping locations, and access points.
Map wall lengths, window positions, and furniture that may obstruct baseboard placement.
Note existing thermostat locations and electrical feeds.
Photograph conditions and annotate a scaled layout for reference during installation.
Measuring room heat load and sizing baseboard units
Determine the required heat output for each room by calculating heat loss, then use that figure to size baseboard units so they meet the room’s BTU demand.
Measure room dimensions, insulation levels, window area, exterior wall exposure, and desired temperature differential.
Apply standard heat-loss formulas or software to obtain BTU/hour per room, then select baseboard lengths/rating to match those values.
Creating a parts list, riser locations, and loop planning
Lay out a clear parts list and mark riser locations and loop routes on the plans to guarantee materials, access, and balancing needs are addressed up front.
Specify tubing lengths, fittings, valves, air vents, clamps, and baseboard sections. Choose riser spots for shortest, accessible runs; plan return loops to minimize turns.
Note isolation valves, expansion space, and mounting requirements for efficient installation.
Shutting down, draining, and isolating the boiler
Before any piping or baseboard work begins, the boiler must be safely shut down, isolated, and drained to protect workers and prevent system damage.
Power and thermostat are turned off, fuel supply closed, and water feed valves shut.
Drain valves and low points are opened to clear remaining water.
The expansion tank is isolated, and the system is tagged to prevent accidental reactivation.
Removing Old Baseboard Units and Prepping Surfaces
The installer begins by safely removing the cover, fin-tube elements, and any piping connections, taking care to drain and cap lines to prevent spills.
Next, walls and floors are cleaned and leveled while the mounting surface is checked for rot, studs, and secure fastening points.
Finally, underlying pipes and valves are inspected and repaired or replaced as needed before new units are fitted.
Safe removal of cover, fin-tube elements, and piping connections
Carefully detach the cover and fin-tube elements, then shut off and isolate the boiler and zone valves before touching any piping; this guarantees minimal water loss and reduces risk of scalding or pressure-related injury.
Drain small sections as needed, cap or plug open ends, and catch residual water.
Label removed components, note valve positions, and inspect threads and unions for corrosion before disposal or reuse.
Wall and floor preparation, mounting surface checks
Prepare the work area by clearing furniture and covering floors with drop cloths. Then remove the old baseboard casing and mounting brackets to expose the wall and floor behind the unit.
Inspect studs, drywall, and floor for rot, mold, loose plaster, or uneven surfaces. Measure and mark stud locations and mounting heights.
Repair or reinforce substrate, ensuring a flat, level surface for new bracket alignment.
Inspecting and repairing underlying pipes and valves
Inspecting the exposed piping and valves for corrosion, leaks, and proper alignment is the next critical step before installing new baseboard units.
A qualified homeowner should drain the system, isolate and remove faulty valves, tighten fittings, and replace corroded sections with matching pipe.
Pressure-test repaired runs, confirm correct pitch and support, and guarantee shutoffs operate smoothly before mounting new baseboard units.
Installing New Baseboard Units Step-by-Step
The installer begins by positioning and securely mounting the baseboard cabinet and its brackets. Then, measures and cuts supply and return piping to fit.
Connections are made using the appropriate joining method—soldering, brazing, push-fit, or threaded—while trap primers, air vents, and isolation valves are installed on each run.
Finally, fin-tube elements are seated and covers fastened before system pressure testing.
Positioning and mounting the baseboard cabinet and brackets
Positioning the cabinet and brackets requires accurate measurement and alignment to guarantee proper heat distribution and a secure installation.
Determine cabinet locations relative to wall studs and floor level, mark bracket spacing per manufacturer instructions, and use a level for horizontal alignment.
Anchor brackets into studs or use appropriate wall anchors, confirm clearance for covers and trim, then temporarily hang cabinets to verify fit before final fastening.
Cutting, fitting, and connecting supply and return pipes
Begin by shutting off and draining the heating system to prevent leaks.
Then measure and mark pipe runs from the main supply and return to each baseboard unit, accounting for offsets and valve locations.
Cut copper or PEX to length, deburr ends, and dry-fit fittings.
Solder sweat joints or crimp PEX fittings per manufacturer instructions.
Secure runs to framing and pressure-test before finishing.
Installing trap primers, air vents, and isolation valves
Install trap primers, air vents, and isolation valves after the supply and return piping are securely in place and pressure-tested to guarantee proper operation and easy maintenance access.
Mount trap primers near floor drains, install automatic air vents at high points to prevent airlocks, and fit isolation valves at each baseboard run and near appliances for quick shutoff.
Verify alignment and leak-free seals.
Joining methods: soldering, brazing, push-fit, and threaded connections
Choosing the correct joining method for baseboard hot water systems—soldering, brazing, push-fit, or threaded—depends on pipe material, system pressure, accessibility, and the desired permanence of the connection.
Soldering suits copper with moderate temperatures; brazing offers stronger, high-temperature joints for steel or larger copper.
Push-fit provides quick, tool-free installation and serviceability.
Threaded connections work for steel or fittings where disassembly may be required.
Attaching fin-tube elements and securing covers
After the piping has been joined and pressure-tested, the fin-tube elements are lowered into their hanger brackets and aligned along the runs so the fins sit flush against the copper or steel tube.
Technicians then secure end caps and couplings, fasten mounting clips to the wall, and check level.
Finally, snap on the decorative covers, ensuring clips engage and the cover fits without pinching fins.
Integrating with Boiler and Piping System
The installer connects new baseboard runs to the boiler manifold or existing mains, ensuring proper fittings and flow direction.
Each loop is balanced with valves and, where needed, mixing valves to control supply temperature while zone controls and thermostats manage individual areas.
If adding zones or capacity, the system’s pump, boiler output, and piping layout are reviewed and upgraded as required.
Connecting new runs to the boiler manifold or existing mains
Begin by identifying the appropriate connection point on the boiler manifold or existing mains, ensuring system capacity, flow direction, and isolation valves match the new baseboard runs.
Cut and deburr supply and return pipes, install compatible tees or manifolds, and use proper fittings and sealant.
Securely tighten joints, pressure-test at recommended psi, purge air, and inspect for leaks before restoring normal boiler operation.
Balancing loops and installing balancing valves
Once new baseboard runs have been tied into the manifold or mains and verified leak-free, attention turns to balancing each loop to guarantee even heat distribution and efficient boiler operation.
Install adjustable balancing valves at each loop inlet, measure flow or temperature differentials, and iteratively adjust until target flows or room temperatures are achieved.
Document settings for future maintenance and retest after system stabilization.
Adding zone controls, thermostats, and mixing valves
Integrate zone controls, thermostats, and mixing valves to coordinate boiler output with demand across circuits, ensuring comfort, efficiency, and system protection.
Install zoned circulator pumps or motorized valves controlled by room or zone thermostats, wire per manufacturer instructions, and configure control panel sequencing.
Fit thermostatic mixing valves where domestic or low return temperatures are required, and set safety limits to prevent scalding and condensation.
Considerations for expanding system capacity or adding zones
When expanding baseboard hot-water heat or adding zones, assess boiler capacity, piping layout, and control strategy to guarantee the system can deliver required flow rates and temperatures without compromising efficiency or reliability.
Verify boiler BTU and pump capacity, confirm zone valve or manifold sizing, and balance circuits with proper pipe sizing and flow meters.
Update control logic and safety settings, and plan for future maintenance and boiler modulation limits.
Filling, Bleeding, and Pressure Testing the System
The installer follows a clear step-by-step filling procedure, bringing the system to the specified static and operational pressures before isolation.
Each baseboard loop is vented using appropriate air vents and purge valves while the installer watches pressure gauges and performs dye or hydro tests to confirm there are no leaks.
Once tightness is verified, the boiler is started in the prescribed sequence and heat transfer through each loop is confirmed.
Step-by-step filling procedure and target pressures
Begin by preparing the system for filling: confirm all valves to radiators and the boiler’s isolation valves are in the proper open or closed positions per the manufacturer’s instructions.
Ensure the drain cock is closed, and any temporary fill hose is securely attached to the domestic water supply.
Open the fill valve slowly, monitor gauge to target 12–15 psi cold (higher for taller systems), close, and perform leak check.
Proper air venting methods for each baseboard loop
After filling and confirming system pressure, attention shifts to venting each baseboard loop to remove trapped air that impedes flow and heat distribution.
Technicians open manual air vents or automatic air scoops at high points, cycle zones to force air toward vents, and bleed individual fins until steady water emerges.
Repeat until consistent temperature and uninterrupted circulation are achieved, then secure vents.
Leak testing and using pressure gauges and dye tests
Perform a systematic leak test by pressurizing the filled and bled system while monitoring for pressure loss and visible drips; this guarantees integrity before normal operation.
Record initial pressure with a calibrated gauge, watch for steady drops, and inspect fittings, joints, valves, and radiators.
If needed, introduce tracer dye to reveal slow leaks under UV light, repair, then retest until pressure holds.
Startup sequence for boiler and verifying heat transfer
Start the boiler only after the system has been completely filled, vented of air, and preliminarily pressure-tested to manufacturer specifications; this sequence guarantees proper circulation, prevents pump cavitation, and allows immediate detection of leaks or improper flow.
Gradually raise temperature, monitor pressure stability, open zone valves sequentially, re-bleed radiators as flow begins, and verify baseboard temperatures and steady return-to-boiler differential.
Troubleshooting Common Problems During and After Installation
After filling and pressure-testing, common issues may still arise that require systematic diagnosis.
The section outlines how to identify and remedy no-heat or uneven heating, persistent air and airlock elimination, leak location and repair at joints, valves, or fin-tube elements, and causes and fixes for banging, gurgling, and vibration.
Practical steps and repair options are presented to restore reliable, quiet operation.
No heat or uneven heating diagnosis and fixes
When a baseboard hot water system produces no heat or heats unevenly, the issue usually stems from air trapped in the lines, improper valve settings, circulation problems, or imbalanced zone controls.
Diagnosing requires systematic checks of air vents, supply and return temperatures, pump operation, and zone valves or thermostats to isolate the fault.
Check valve positions, confirm pump run and flow, verify boiler output, and compare zone temperatures to identify and correct restrictions, closed valves, failed pumps, or miswired controls.
Persistent air in system and how to eliminate airlocks
Persistent air in a baseboard hot water system often manifests as gurgling, cold spots, or intermittent flow and typically indicates trapped air pockets or improper venting rather than boiler failure.
Bleed radiators and high points with manual or automatic air vents, cycle the pump to force pockets toward vents, purge via a drain valve or purge station, and recheck system pressure and balance.
Leaks at joints, valves, or fin-tube elements and repair options
Identify and address leaks promptly to prevent water damage and loss of system pressure.
Inspect joints, valve packing nuts, and fin-tube seams for drips after pressurizing.
Tighten fittings, replace worn compression olives or packing, and swap damaged valves or crimped sections.
For fin-tube elements, drain and replace leaking sections or use factory-approved patch kits.
Re-pressurize and check for residual seepage.
Noise issues: banging, gurgling, and vibration causes and remedies
Why is the system making noise and what does each sound indicate?
Banging signals trapped steam or water hammer—secure piping, add air chambers, correct pitch.
Gurgling indicates air in the loop—bleed radiators, purge the system.
Vibration arises from loose mounting or flow turbulence—tighten brackets, check pump speed, install vibration isolators.
Re-test after each fix and monitor for recurrence.
Maintenance, Seasonal Checks, and Long-Term Care
A concise maintenance plan helps guarantee baseboard hot water systems run efficiently and reliably over time.
Regular seasonal checks should note leaks, corrosion, air in the lines, and proper thermostat response, while periodic flushing and approved chemical treatments prevent scale and corrosion.
Worn valves, vents, and components must be replaced promptly, and simple thermostat programming plus zoning or setback strategies can reduce energy use.
Routine inspection schedule and what to look for
Because reliable performance depends on regular attention, a clear inspection schedule should be established for baseboard hot water systems that covers monthly, seasonal, and annual checks.
Monthly: check for leaks, unusual noises, and thermostat function.
Seasonal: verify valve operation, air vents, and pipe insulation before heating season.
Annual: inspect circulator pump, pressure, expansion tank, and visible corrosion; document findings and address issues promptly.
Flushing and chemical treatment recommendations
After routine inspections identify leaks, corrosion, or reduced flow, flushing and chemical treatment are the next steps to restore circulation and prevent recurrence.
Perform a system flush to remove sediment and rust, then apply corrosion inhibitors and scale preventatives per manufacturer instructions.
Monitor pH and inhibitor concentration periodically, retesting annually.
Use compatible chemicals to protect seals and radiators, and document treatments for future maintenance.
Replacing valves, vents, and worn components
Inspecting and replacing worn valves, vents, and components guarantees reliable circulation and prevents leaks or pressure loss in baseboard hot water systems.
Periodically check inlet/outlet valves, automatic air vents, and radiator valves for corrosion, stiff operation, or seepage.
Replace faulty parts with compatible models, use proper seals and thread tape, and pressure-test the loop.
Document replacements and schedule future inspections.
Energy-saving tips and thermostat programming for hot water baseboards
Optimize energy use in hot water baseboard systems by combining seasonal maintenance with strategic thermostat programming.
Inspect and bleed radiators, flush boiler annually, and seal drafts to reduce demand.
Program thermostats with setbacks: lower temperatures during sleep and absence, and gradual recovery before occupancy.
Use consistent night setbacks, avoid rapid cycling, and consider smart thermostats and zoning to maximize efficiency and comfort.
Cost Breakdown, Time Estimates, and ROI Considerations
A concise cost breakdown covers typical material and labor ranges for baseboard hot water systems, from basic components to full professional installation.
Time estimates contrast a skilled DIY project, which can take several days, with professional work that often completes in one to two days depending on scope.
ROI considerations focus on energy-efficiency gains and projected heating-cost savings to determine payback periods.
Typical material and labor cost ranges
Typical installations of baseboard hot water heating vary widely in material and labor costs depending on system size, pipe type, and local labor rates; homeowners can expect most projects to fall within predictable low, mid, and high cost bands that reflect simple replacement, partial retrofit, or full-system new installations.
| Scope | Materials | Labor |
|---|---|---|
| Low | $200–$800 | $300–$700 |
| Mid | $800–$2,500 | $700–$2,000 |
| High | $2,500–$8,000+ | $2,000–$6,000+ |
Time estimates for DIY vs. professional installation
How long will installation take depends on whether a homeowner tackles the work or hires a pro:
DIY projects typically require weekends to several weeks depending on experience, room count, and plumbing complexity.
A professional crew can complete average systems in one to three days.
Time estimates should factor permit waits, unforeseen repairs, and testing; pros reduce risk and schedule uncertainty.
Energy efficiency and expected savings after upgrade
Estimating energy efficiency gains and payback requires comparing current heating performance with projected output from the baseboard hot water system, accounting for fuel type, boiler efficiency, thermostat controls, and insulation levels.
Typical upgrades yield 10–30% lower energy use versus older forced-air or inefficient boilers.
Calculate annual fuel savings, deduct installation and maintenance costs, and derive simple payback and ROI, typically 3–10 years.
Safety, Code Compliance, and When to Hire a Professional
Safety and code compliance are essential considerations before beginning a baseboard hot water heat installation, including understanding legal requirements, required inspections, and completing a permit checklist.
Complex situations—such as working with mains connections, multi-zone systems, or structural modifications—typically necessitate a licensed plumber or HVAC technician.
Homeowners should prepare a concise list of questions for contractors and request clear warranty and proof-of-insurance documentation before hiring.
Legal requirements, inspections, and permit checklist
Before beginning baseboard hot water heating work, homeowners and contractors must verify local building codes, required permits, and inspection schedules to guarantee code compliance and liability protection.
Confirm permit types (mechanical/plumbing), submit plans, and schedule rough and final inspections. Retain receipts and approval documents.
Follow inspection notes promptly. Failure to permit can void insurance, impede resale, or result in fines; consult the local authority for specifics.
Complex scenarios requiring a licensed plumber or HVAC tech
When systems involve multi-zone manifolds, oil-fired boilers, high-pressure steam conversions, structural modifications, or work that crosses fire-rated assemblies or gas lines, a licensed plumber or HVAC technician should be engaged to guarantee safe, code-compliant installation.
Professionals assess pressure, venting, combustion safety, seismic restraints, and brazing or welding needs, coordinate permits/inspections, and mitigate liability, ensuring system reliability and adherence to local codes.
Questions to ask and warranties to request from contractors
Having established when a licensed professional is required, homeowners should prepare focused questions and request specific warranties to verify safety, code compliance, and clear responsibility for future problems.
Ask about license, insurance, permit handling, code references, materials, leak prevention, and timeline.
Request written labor and parts warranties, warranty transferability, inspection documentation, and a clear punch-list and dispute-resolution clause before work begins.
Quick Reference: Installation Checklist and Troubleshooting Flowchart
A concise checklist summarizes essential pre-installation steps—materials, clearances, and system layout—so installers can confirm readiness before work begins.
A brief post-installation startup checklist covers purging, pressure checks, and thermostat calibration to verify safe operation.
A simple troubleshooting flowchart guides users through common issues such as cold spots, leaks, and noisy pipes with stepwise diagnostics and corrective actions.
Pre-installation checklist
Before any tubing or radiators are installed, the installer must complete a concise pre-installation checklist that verifies system compatibility, site measurements, and component readiness.
The checklist confirms piping layout, manifold locations, and clearance. It also inventories valves, fittings, and insulation.
Typical items include:
- Measure runs, heights, and connection points
- Verify boiler capacity and supply/return compatibility
- Inspect and list required parts and tools
Post-installation startup checklist
With the installation complete and components verified, attention turns to commissioning the system to confirm safe, efficient operation.
Follow a concise startup checklist to guarantee proper function, pressure, and safety devices before regular use:
- Slowly fill and purge air from zones, watching pressure gauges and thermostats.
- Inspect for leaks, tighten fittings, verify valve orientation.
- Gradually raise boiler temperature, confirm stable circulation and venting.
Quick troubleshooting steps for common issues
How should common post-installation problems be approached to restore reliable operation quickly?
The technician or homeowner follows a concise flow: verify power and thermostat, purge trapped air, and inspect valves and leaks.
Prioritize safety, document findings, and proceed stepwise from simple to complex.
Quick-reference steps:
- Check thermostat settings and power
- Bleed radiators and vents for air
- Inspect piping, valves, and fittings for leaks
Conclusion
The guide empowers a homeowner to install baseboard hot water heating with clear steps, tools, and safety notes. Following the outlined prep, removal, and installation sequence keeps the project on track and under budget, while routine maintenance preserves system life. When complexities arise, the reader is advised to call a pro rather than go it alone; prudent judgment guarantees code compliance, efficient operation, and long-term comfort without burning daylight.