How to Test a PVB Backflow Preventer: Step-by-Step Guide for Homeowners and Plumbers
To test a Pressure Vacuum Breaker (PVB) backflow preventer, follow these steps: isolate the device, relieve downstream pressure, and connect calibrated gauges to the test ports. A qualified tester will check both shutoff/check valves and the relief valve, recording pressure differentials and pass/fail results. Proper safety gear and documentation are essential. Homeowners may conduct basic tests if permitted. This guide provides detailed procedures, necessary tools, and troubleshooting tips.
What a Pressure Vacuum Breaker (PVB) Backflow Preventer Is and Why Testing Matters
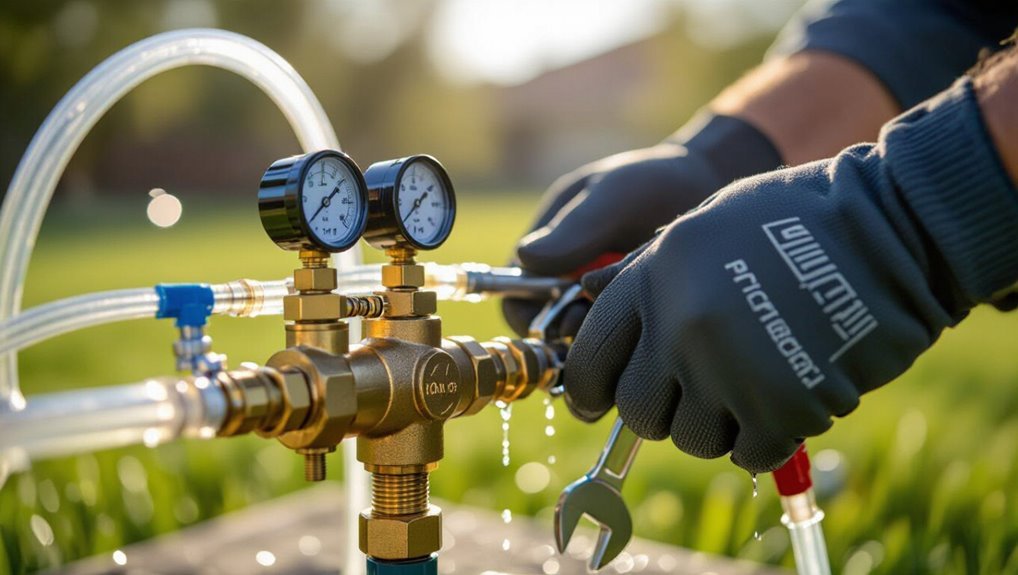
A Pressure Vacuum Breaker (PVB) is a mechanical device that prevents contaminated water from being siphoned back into a potable supply by using check valves and an air inlet to break vacuum conditions.
Regular testing is required by health codes to verify the PVB’s seals and valves function correctly and to protect public health.
Testing responsibilities vary by jurisdiction, with many areas requiring certified plumbers or backflow testers.
Though some homeowners may perform inspections where allowed.
How a PVB Backflow Preventer Works
Pressure vacuum breakers (PVBs) are mechanical assemblies installed on irrigation and outdoor water lines to prevent contaminated water from being drawn back into the potable supply.
A PVB uses check valves and an air inlet valve to stop backsiphonage; under backflow conditions the air inlet opens and isolates downstream water.
Inspectors follow procedures for how to test a pvb backflow by measuring differential pressures and valve operation.
Health and code reasons for regular testing
Because backflow can introduce pesticides, fertilizers, or biological contaminants into drinking water, routine testing of PVB backflow preventers is essential to protect public health and maintain system integrity.
Regular inspections verify valve function, detect wear or damage, and prevent contamination events.
Compliance with local plumbing codes and water utility regulations reduces liability, guarantees safe supply, and preserves community confidence in potable water systems.
Who is required to test a PVB (homeowners vs. plumbers)
Following regular inspections and code obligations, responsibility for testing a PVB typically falls to qualified backflow testers rather than untrained homeowners.
Local ordinances or water utilities usually mandate testing by licensed plumbers or certified technicians to guarantee accuracy, proper tools, and official documentation.
Exceptions exist where jurisdictions allow trained homeowners to test small residential devices, but most systems require certified professionals for compliance and safety.
Quick Summary: Can You Test a PVB Yourself?
A homeowner can handle simple visual inspections and basic shut-off checks on a PVB when local codes allow and the unit is easily accessible.
Routine annual testing, complex repairs, or any situation requiring certification should be left to a licensed backflow tester or plumber.
When in doubt about compliance or component condition, professional testing guarantees safety and legal adherence.
When DIY testing is acceptable
Judgment about whether a homeowner should test a PVB themselves hinges on competence, local law, and the complexity of the installation.
DIY testing is acceptable when the owner has basic plumbing skills, understands test gauge operation, follows manufacturer instructions, and local regulations permit non‑certified testing.
Simpler, accessible installations and low risk of contamination favor DIY, while uncertainty or confined spaces do not.
When to hire a certified tester or plumber
When local codes require certified testing, when the device is installed in a complex or confined location, or when the homeowner lacks confidence with gauges and shutoffs, a certified tester or licensed plumber should be hired.
Professionals guarantee compliance, accurate test results, proper repairs, and documentation for authorities.
Hire one when pressure issues, visible damage, or recurring failures are present, or for annual mandatory inspections.
Tools, Materials, and Safety Precautions Needed Before Testing
Before beginning a PVB test, the technician confirms the necessary tools and test kit components are on hand, including calibrated gauges, hoses, and adapters.
Appropriate personal protective equipment and clear site safety measures are established to prevent injury and contamination.
The system is prepared by locating and identifying shutoff valves and isolating the assembly according to local procedures.
Required tools and test kit components
A concise inventory of tools, test kit components, and safety gear is essential to perform a reliable PVB backflow test.
Required items include calibrated differential pressure gauge kit, hose and adapter set compatible with test cocks, isolation valves or wrenches, and a leak-free pressure source or pump.
Inspect calibration and cleanliness before use.
- Differential pressure gauge kit
- Hose and adapters
- Isolation valve tools
- Pressure source
Personal protective equipment and site safety
Although often overlooked, proper personal protective equipment and clear site safety measures are fundamental to protecting personnel and preserving test integrity.
Inspectors should wear safety glasses, gloves, steel-toe boots and hearing protection as needed. Use high-visibility vests and barricades for roadside sites.
Have spill kits, first-aid supplies and a charged fire extinguisher nearby. Guarantee adequate lighting and stable footing before testing.
Shutoff locations and preparing the system
Having addressed personal protective equipment and site safety, attention turns to identifying shutoff locations and preparing the system for testing.
The tester locates upstream and downstream shutoff valves, isolation saddles, and hose bibs.
Depressurize and drain the downstream side, secure valves to prevent accidental operation, attach test kit connections, and confirm a stable water supply and accessible relief ports before proceeding.
Step-by-Step PVB Testing Procedure for Homeowners and Plumbers
The procedure begins with a visual inspection of the PVB, followed by isolating the device and shutting off the water supply to guarantee a safe test environment.
The tester then connects the calibrated test kit and gauges, and follows a defined sequence to check check valve 1, the relief valve, and check valve 2.
Final interpretation of gauge readings against pass/fail criteria determines whether the PVB requires repair or replacement.
Preliminary visual inspection
Before performing any hands-on testing, a thorough preliminary visual inspection identifies obvious defects, improper installations, and environmental hazards that could affect a PVB’s function or the safety of the tester.
The inspector checks for corrosion, cracks, missing caps, evidence of leaks, proper orientation, secure mounting, unobstructed access, visible tamper seals, and clear labeling; note abnormalities before proceeding.
How to isolate the PVB and shut down supply
Isolate the PVB by closing the upstream shutoff valve and relieving downstream pressure to create a safe, zero-pressure environment for testing.
Confirm both inlet and outlet shutoffs are fully closed, then open a downstream test cock or faucet to bleed residual pressure.
Lock or tag valves per safety protocol.
Verify no supply flow and guarantee the unit is stable and dry before proceeding.
Setting up the test kit and gauge connections
With inlet and outlet shutoffs secured and downstream pressure bled, attention shifts to assembling the test kit and attaching gauges.
The technician selects calibrated differential and pressure gauges, confirms zero readings, and mounts hoses to the correct test ports using appropriate fittings.
Connections are hand-tightened then slightly snugged with a wrench.
Check for leaks and secure gauges at eye level for clear reading.
Sequential test steps to check check valve 1, relief valve, and check valve 2
Begin by verifying baseline readings on all gauges and confirming inlet and outlet shutoffs remain closed; this establishes a known starting point for the sequential checks.
Open inlet slowly, observe check valve 1 under test, record pressure differential.
Close inlet, open relief test cock, activate relief valve check, note cracking.
Finally, test check valve 2 by reintroducing inlet pressure and recording its differential.
How to interpret gauge readings and pass/fail criteria
How should the recorded gauge readings be evaluated to determine whether each section of the PVB meets code and safety standards?
The tester compares measured differential pressures to manufacturer and local code limits: check valves must hold specified minimum differentials and the relief valve must open within its setpoint.
Record values, note failures, and decide on repair or replacement per regulatory tolerances and safety protocols.
Reassembly, leak checks, and restoring water service
Reassemble the PVB components in reverse order of disassembly, ensuring all parts and gaskets sit correctly and threaded connections are hand-tightened before final torque.
This systematic approach minimizes the risk of misalignment or trapped debris that can cause leaks or malfunctions.
After tightening, slowly restore supply pressure, inspect joints and test cocks for leaks, cycle the device, verify gauge stability, and document results before returning the system to normal service.
Common Problems Found During Testing and How to Fix Them
Testing commonly reveals failed check valve readings, relief valve drips or inability to hold pressure, and leaks at unions, seats, or the body.
Technicians distinguish temporary fixes (tightening unions, replacing O-rings) from permanent repairs and assess whether individual parts can be replaced or the entire unit must be swapped.
The following section outlines typical causes for each fault and practical criteria for repair versus full replacement.
Failed check valve readings and typical causes
When a PVB displays failed check valve readings, the tester notes pressure differentials that fall outside manufacturer specifications or do not hold steady during the isolation and relief tests.
Common causes include worn or damaged disc seals, debris preventing proper seating, spring fatigue, corrosion, or misalignment from installation stresses.
Resolution involves cleaning, replacing seals or springs, realigning components, and retesting to confirm restored sealing performance.
Relief valve drips or failure to hold pressure
After addressing failed check valve readings, attention shifts to the relief valve, which is designed to open at a set differential to prevent unsafe backpressure.
If the relief drips or won’t hold test pressure, deposits, corrosion, or a worn seat are likely. Clean or replace the relief assembly, verify spring setting, and retest.
Persistent failure requires valve replacement by a qualified technician.
Leaks at unions, seats, or body and temporary vs. permanent repairs
Several common PVB leak locations include unions, seat fittings, and the valve body itself, each requiring a different diagnostic approach and repair scope.
Technicians isolate the unit, pressurize, and observe to pinpoint seepage.
Temporary fixes—thread sealant, tightening, or hose clamps—control leaks for short-term use.
Permanent repairs involve proper part replacement and reseating, tested for durability and code compliance.
When repair requires replacement of parts vs. full unit replacement
Diagnose the extent of damage precisely to determine whether individual components can be replaced or the entire PVB must be swapped out.
Small issues—worn seals, corroded springs, or minor seat damage—are often repaired with replacement parts and testing.
Extensive corrosion, cracked bodies, repeated failures, or unavailable parts necessitate full unit replacement to guarantee reliability, code compliance, and long-term prevention of backflow.
Documentation, Codes, and Reporting Requirements
Accurate recording of test results on the required forms is essential for compliance and future reference.
Technicians must follow local code frequencies and maintain any required certifications to guarantee inspections and reports are valid.
Municipal inspectors typically verify that forms are complete, tests met agency standards, and any failures were repaired and documented.
Recording test results and required forms
Recording and submitting PVB backflow test results is a mandatory step that guarantees compliance with local codes and preserves a verifiable history of device performance.
Testers must complete official forms, record serial numbers, pressures, pass/fail status, and repairs. Copies go to the property owner and authority.
- Device serial and location
- Test date and tester ID
- Measured pressures and valves
- Repairs and parts used
Local code frequencies and certification requirements
Local jurisdictions set specific testing intervals and certification criteria for PVB backflow preventers, typically requiring annual inspections but sometimes mandating biannual or more frequent tests for high-hazard or commercial connections.
Compliance often demands certified testers, approved testing forms, and timely submission to the authority.
Penalties, reinspection requirements, and record retention periods vary; consult local codes and utility guidance for precise obligations.
What municipal inspectors typically look for
After confirming that testing frequency and tester certification meet jurisdictional requirements, municipal inspectors next review the documentation, code conformity, and reporting tied to the PVB backflow preventer.
They verify completed test reports, proper installation per local code, current device tags, calibration records for test gauges, timely repairs for failures, and that required notifications were submitted to the authority having jurisdiction.
Maintenance Tips to Extend PVB Lifespan
Proper maintenance greatly prolongs a PVB backflow preventer’s service life, starting with seasonal care and winterization to prevent freeze damage.
Establishing a routine inspection schedule and teaching homeowners simple checks—such as looking for leaks, debris, or unusual pressure changes—helps catch problems early.
Understanding recommended replacement intervals and recognizing signs that replacement is needed guarantees timely component renewal before failures occur.
Seasonal care and winterization
Prepare a seasonal maintenance schedule to protect a pressure vacuum breaker (PVB) from freeze damage and wear.
During cold months, drain and winterize external piping, insulate exposed components, and remove or cover gauges and testers.
Before freeze season ends, restore covers, re-pressurize system gradually, and schedule professional servicing for worn seals.
Document actions and dates for warranty and compliance records.
Routine inspection schedule and simple homeowner checks
With freeze-season tasks completed and covers replaced, a simple routine inspection schedule helps catch wear before it leads to failure.
Visually inspect monthly, listen for leaks, exercise test cocks quarterly, and record observations. Promptly tighten fittings or call a pro for anomalies. Consistent logs reveal trends and prevent surprises.
- Check for visible cracks or corrosion
- Verify drain and weep hole flow
- Operate shutoff valves briefly
- Note unusual noises or pressure drops
Recommended replacement intervals and signs it’s time to replace
Most manufacturers recommend replacing a PVB backflow preventer every 5–10 years, but environmental factors and usage can shorten that span.
Consequently, schedule replacements based on age, operating history, and inspection findings rather than a fixed calendar alone.
Replace if tests show persistent leaks, reduced relief valve function, cracked or corroded body, repeated repairs, or failed annual certification.
Document replacements and parts used.
Cost, Time, and Choosing a Qualified Tester
Estimating costs and time helps owners decide between a DIY approach and hiring a professional, since test kits and parts are relatively inexpensive but certified testing fees and pump-downs can be higher.
When hiring, the owner should verify a tester’s certification, license, insurance, and local references or reviews.
A qualified technician’s visit typically includes inspection, pressure testing with calibrated gauges, minor adjustments or repairs if needed, and a written report or certification.
Typical DIY costs vs. professional testing fees
Cost comparisons help homeowners decide whether to tackle PVB backflow testing themselves or hire a certified tester. Typical DIY expense: kit purchase, time, risk of error. Professional fee: inspection, certification, warranty. Consider frequency, confidence, and local code.
| Option | Cost Range | Emotional note |
|---|---|---|
| DIY kit | $50–$200 | Empowering but anxious |
| Pro test | $75–$200+ | Reassuring |
| Repeat yearly | Varies | Routine burden |
How to vet and hire a certified backflow tester or licensed plumber
How should a homeowner choose between a certified backflow tester and a licensed plumber for PVB testing?
Homeowners should compare credentials, ask for current certification numbers, proof of insurance, and local licensing.
Obtain written estimates including test fee, travel time, and retest costs.
Check references and municipal approvals.
Prefer testers with specialized backflow experience; confirm availability and expected turnaround before hiring.
What to expect during a professional service visit
A typical professional visit for PVB testing combines a brief on-site inspection, diagnostic testing, and documentation, usually completed within 30–60 minutes depending on site access and system complexity.
Costs vary by region and unit complexity; expect a base fee plus parts if repairs are needed.
The tester should be certified, insured, provide a written report, and explain results and any recommended corrective actions.
Troubleshooting Scenarios and Example Test Logs
The section presents three concise troubleshooting scenarios and corresponding test logs for reference.
Example 1 shows an annotated passing test log with normal pressure and check valve readings.
Examples 2 and 3 outline a failed relief valve diagnosis with corrective steps and a frozen PVB incident with damage assessment and recovery procedures.
Example 1: Passing test log with annotated readings
Several concise readings from a properly functioning PVB backflow preventer are presented in this example test log, with each value annotated to show normal ranges and instrument reference points.
Static pressure 55 psi (supply), zone pressure 52 psi, differential across check 3 psi (within acceptable 2–5 psi), relief valve sealed at 0 psi, downstream drop <1 psi.
Pass: all tests within tolerance.
Example 2: Failed relief valve’ diagnosis and corrective steps
Inspecting a failed relief valve begins with confirming the symptom: an unexpected downstream pressure rise or continuous weep from the relief port during a standard PVB test.
The technician isolates supply, verifies upstream pressure, and cycles the relief valve manually.
Debris, worn seat, or spring fatigue are common causes.
Corrective steps: clean debris, replace seat or spring, retest to ascertain relief holds and no downstream leakage.
Example 3: Frozen PVB damage and recovery steps
Frozen PVB assemblies frequently show split bodies, cracked internals, or displaced seals after exposure to subfreezing conditions that allow trapped water to expand.
The technician documents visible damage, pressure test failures, and valve binding.
Recommended recovery steps: isolate and drain the line, replace damaged assembly or internals, retest per manufacturer standards, and record test values and corrective actions.
Notify owner of prevention measures.
Additional Resources and Where to Buy Parts and Test Kits
The article lists reputable manufacturers and commonly needed replacement parts for PVB backflow preventers to help readers source reliable components.
It also points to suppliers of test kits and gauges suitable for field use.
Finally, links to local plumbing codes and certification programs are provided so testers can verify compliance and training requirements.
Recommended manufacturers and replacement parts
Reliable brands and correctly specified replacement parts make testing and servicing a PVB backflow preventer straightforward and safe. Recommended manufacturers include Watts, Wilkins (Apollo), Febco, and Ames.
Genuine repair kits, spring assemblies, and test cocks guarantee proper operation. Purchase from authorized distributors or plumbing supply houses to ensure compatibility and warranty coverage.
- Watts genuine repair kits
- Wilkins/Olympic cartridges
- Febco springs and seals
- Certified test cocks
Links to local code resources and certification programs
Following the recommendations for manufacturers and genuine parts, one should consult local plumbing codes and certified tester programs to guarantee compliance and recognized credentials when purchasing parts or test kits.
Provide links to municipal code pages, state plumbing boards, and accredited tester organizations.
Include vendor listings for certified parts suppliers and authorized training providers, noting certification renewal, exam requirements, and approved test kit models.
Conclusion
In closing, the PVB’s silent vigilance protects water like a faithful gatekeeper; testing it routinely transforms unknown risk into known safety. Homeowners and plumbers who follow proper procedures, use the right tools, and heed maintenance tips preserve both plumbing and public health. Regular checks, timely repairs, and qualified testers prevent contamination and costly failures. Treat the PVB as essential, not optional, and routine testing will keep water flowing cleanly and confidently for years to come.