How to Clean a White Sink Quickly: 7 Easy Methods to Remove Stains & Restore Shine
To quickly clean a white sink and restore its shine, use simple household items for effective results. Start by applying a baking soda paste for everyday stains. For mineral deposits, white vinegar can help lift grime. For stubborn discoloration, combine hydrogen peroxide with baking soda. If you’re dealing with rust, lemon and salt work wonders. A mild abrasive pad can tackle scuffs. Remember to wear gloves and ensure good ventilation while avoiding harsh chemicals and metal brushes. Follow along for detailed methods and tips tailored to specific materials.
Quick overview fastest way to clean a white sink
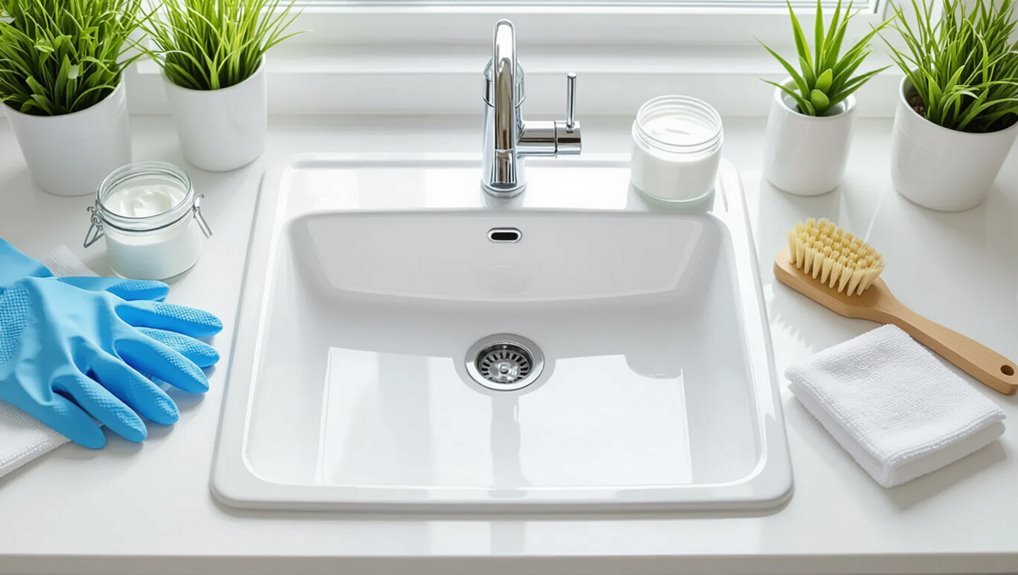
A one-sentence remedy for fresh stains is to apply baking soda and a little water, scrub gently, then rinse.
Quick methods suit routine touch-ups and minor discoloration.
Deep cleaning is recommended for set-in stains, heavy mineral buildup, or periodic maintenance.
One-sentence solution for immediate stains
Spritz the stained area with a 1:1 mixture of white vinegar and water.
Sprinkle baking soda over it, let fizz for one minute, then scrub with a soft sponge and rinse — the quickest reliable fix for immediate stains on a white sink.
This concise method demonstrates how to clean white sink surfaces efficiently; repeat if residue remains, then dry to prevent water marks.
When to use a quick method vs. deep cleaning
After the quick vinegar-and-baking-soda fix for surface stains, the choice between a rapid clean and a deep clean depends on time, soil level, and material.
Rapid methods suit fresh splashes, light soap scum, or when time is limited—use mild cleaners and a soft cloth.
Deep cleaning targets set-in stains, mineral buildup, or worn finishes, requiring stronger agents, scrubbing, and occasional soaking.
What you’ll need supplies and safety precautions
A concise list of common household cleaners and basic tools will be presented to prepare for cleaning a white sink quickly.
The paragraph will also note necessary protective gear and the importance of good ventilation when using stronger products.
Finally, it will warn about abrasives, harsh chemicals, and metal brushes that can scratch or stain white sink surfaces.
Common household cleaners and tools
Several basic items make quick sink cleaning effective: a mild abrasive cleaner or baking soda, white vinegar or a gentle all‑purpose cleaner, a soft scrub brush or nonabrasive sponge, a microfiber cloth, and rubber gloves.
These supplies tackle stains, soap scum, and mineral deposits. Choose nonabrasive tools and pH‑appropriate cleaners to protect finishes.
- Baking soda
- White vinegar
- Soft scrub brush
- Microfiber cloth
Protective gear and ventilation
Moving from the basic supplies, attention to protective gear and ventilation prevents irritation and keeps the task safe.
Wear nitrile gloves, eye protection, and an apron to avoid skin and clothing contact. Use a simple mask when mixing powders or strong agents.
Open windows, run an exhaust fan, and avoid enclosed spaces to disperse fumes. Dispose of used wipes properly.
What to avoid (products and tools that damage white sinks)
Avoid abrasive cleaners, metal scouring pads, and strong acids or bases that can etch, scratch, or discolor white sink finishes; instead, opt for non-abrasive cleaners, soft cloths or sponges, and pH-neutral products recommended by the sink manufacturer.
Also avoid bleach on porous or damaged coatings, harsh degreasers, and abrasive powders.
Test unfamiliar products on an inconspicuous area first and follow safety and ventilation guidance.
7 fast methods to remove stains and restore shine
A concise set of targeted techniques can quickly lift stains and restore the bright finish of a white sink.
These methods range from gentle household mixes for routine spots to stronger combinations for stubborn discoloration, with attention to surface safety. The following options provide practical choices depending on stain type and severity.
- Baking soda paste for everyday stains and gentle scrubbing
- White vinegar rinse to dissolve mineral deposits and water spots
- Hydrogen peroxide combined with baking soda for persistent discoloration
- Lemon with salt for light rust or hard-water rings; mild abrasive cleaner with a non-scratch pad for scuffs
Method 1 Baking soda paste for everyday stains
Sprinkle baking soda over wet sink surfaces to create a gentle abrasive that lifts everyday stains without scratching.
Mix a paste with water, apply to stained areas, and let sit 5–10 minutes.
Scrub with a soft sponge or cloth in circular motions, then rinse thoroughly.
Repeat for stubborn spots.
Finish by drying to prevent water marks and maintain shine.
Method 2 White vinegar rinse for mineral deposits
Soak affected areas with undiluted white vinegar to dissolve mineral deposits and restore shine quickly.
After 10–15 minutes, scrub gently with a soft brush or cloth, focusing on faucet bases and drain edges.
Rinse thoroughly with warm water to neutralize acidity.
Repeat for stubborn buildup.
Vinegar is safe for most sinks but test an inconspicuous spot first to prevent surface damage.
Method 3 Hydrogen peroxide and baking soda for stubborn discoloration
Combine hydrogen peroxide and baking soda to create a paste that targets stubborn stains and discoloration without harsh scrubbing.
Apply a thick layer, let sit 10–20 minutes, then gently agitate with a soft cloth or sponge. Rinse thoroughly and repeat for persistent marks.
This method whitens, lifts organic stains, and brightens glazed surfaces safely when used sparingly and rinsed well.
Method 4 Lemon and salt for light rust and hard-water rings
After using a peroxide-and-baking-soda paste for stubborn organic stains, attention can turn to lighter blemishes: lemon and salt form a quick, natural abrasive that brightens metal marks and mineral rings without harsh chemicals.
Cut a lemon, sprinkle coarse salt on stains, rub gently, let sit five minutes, then rinse and wipe.
Repeat for persistent spots and dry to prevent recurrence.
Method 5 Mild abrasive cleaner and non-scratch pad for scuffs
Reach for a mild abrasive cleaner and a non-scratch scrubbing pad to tackle scuffs and restore a sink’s shine without damaging the finish.
Apply cleaner sparingly to affected areas, scrub gently in circular motions, rinse frequently, and inspect progress to avoid over-scrubbing.
For stubborn marks, repeat once, then polish with a soft cloth.
This method refreshes surfaces safely and quickly.
Method 6 Commercial bleach spray for mold and deep stains
Use a commercial bleach spray to quickly remove mold and deep stains, following the product’s label for dilution and dwell time to guarantee effective disinfection without harming the sink finish.
Apply evenly, let sit the recommended time, then scrub gently with a soft brush. Rinse thoroughly and ventilate the area.
Wear gloves and eye protection; avoid mixing with ammonia or other cleaners.
Method 7 Denture tablets or effervescent cleaner soak for whitening
Drop a denture tablet or an effervescent cleaning tablet into the sink filled with warm water and let it fizz to lift stains and brighten the surface.
After 20–30 minutes, scrub gently with a soft cloth or sponge, rinse thoroughly, and dry.
This method safely removes light discoloration and mineral buildup without harsh chemicals, suitable for porcelain, ceramic, and many composite sinks.
Step-by-step routines for common sink materials
The next section outlines concise, material-specific routines for cleaning white sinks.
It covers porcelain sinks with quick steps and key precautions, stainless steel sinks with white coating including essential do’s and don’ts, and safe cleaning sequences for composite and acrylic white sinks.
Each set of steps is presented for fast, effective care while minimizing damage.
Porcelain sinks quick routine and precautions
For porcelain sinks, a quick routine focuses on gentle, nonabrasive cleaning to remove daily grime without dulling the glaze:
Wipe with a soft cloth and mild dish soap, rinse, then apply a paste of baking soda for spot cleaning.
Allow brief dwell, scrub lightly with a soft sponge, rinse thoroughly, and dry.
Avoid strong abrasives, harsh acids, and metal scouring pads to prevent etching.
Stainless steel white-coated sinks do’s and don’ts
Many stainless steel sinks with white coatings require gentle care to preserve the finish and prevent staining.
Use mild, nonabrasive cleaners and soft cloths; rinse thoroughly and dry to avoid water spots.
Do avoid steel wool, harsh scrubs, bleach, and acidic cleaners that can etch or strip the coating.
Test any cleaner on a hidden area before full application.
Composite and acrylic white sinks safe cleaning steps
Start by rinsing the sink to remove loose debris.
Use a mild dish soap and warm water with a soft cloth or sponge, avoiding abrasive pads.
For stains, apply a paste of baking soda and water, let sit 10–15 minutes, then gently scrub.
Rinse thoroughly and dry to prevent water spots.
Periodically condition acrylic with a manufacturer-approved polish.
How to tackle specific stubborn problems
Specific techniques address common stubborn issues that ordinary quick cleans miss. Safe rust removal avoids scratching finishes, while targeted methods dissolve hard-water rings, soap scum, and toothpaste residue.
Mold and mildew around drains and seams require focused cleaners and careful scrubbing to prevent recurrence.
Removing rust stains without scratching
Tackle rust stains on a white sink with gentle, nonabrasive methods to remove discoloration without damaging the surface.
Apply a paste of baking soda and lemon juice or white vinegar, let sit briefly, then wipe with a soft cloth.
For persistent marks, use a commercial rust remover safe for the sink material, following instructions carefully.
Rinse and dry thoroughly to prevent recurrence.
Eliminating hard-water rings and mineral buildup
Remove mineral deposits with targeted, gentle techniques that dissolve buildup without harming the sink finish.
Apply white vinegar or a commercial descaler to affected areas, let soak, then scrub with a soft brush or nylon pad. Rinse thoroughly and dry to prevent recurrence.
For stubborn rings, repeat treatment or use a paste of baking soda and vinegar, then polish with a microfiber cloth.
Getting rid of soap scum and toothpaste residue
Scrubbed areas around the drain and faucet often collect stubborn soap scum and toothpaste residue that dull a white sink’s finish; addressing these spots requires slightly different approaches than mineral deposits.
Use a mild abrasive paste of baking soda and water, apply with a soft cloth or sponge, rub gently, then rinse.
For persistent film, spray vinegar, let sit briefly, scrub, and rinse thoroughly.
Treating mold and mildew around drain and seams
Address mold and mildew around the drain and seams promptly, as these areas trap moisture and organic buildup that can discolor a white sink and emit musty odors.
Apply a 1:1 bleach-water solution or undiluted white vinegar, let sit 10–15 minutes, scrub with an old toothbrush, rinse thoroughly, and dry.
Repeat weekly; replace degraded caulk and improve ventilation to prevent recurrence.
Preventive maintenance to keep a white sink bright
A simple preventive routine keeps a white sink looking bright with minimal effort.
It recommends a 30–60 second daily wipe-down, a short weekly quick-clean checklist for soap scum and stains, and a monthly deep-clean schedule outlining stronger methods and safe products.
Following these intervals prevents buildup and reduces the need for intensive scrubbing.
Daily wipe-down routine (30 to 60 seconds)
Wiping the sink for 30 to 60 seconds each day prevents soap scum and mineral spots from building up, keeping the surface bright with minimal effort.
Using a microfiber cloth and a spray of diluted dish soap or white vinegar, focus on faucet bases and drain edges.
Rinse briefly and dry thoroughly to avoid water marks.
Repeat after heavy use to maintain sheen.
Weekly quick-clean checklist
Although only a few minutes are required, a weekly quick-clean checklist guarantees preventive maintenance keeps a white sink bright and stain-free.
It outlines concise tasks to prevent buildup, protect finishes, and maintain shine without deep scrubbing. Consistent weekly attention reduces stains and prolongs surface lifespan.
- Rinse and remove debris
- Apply mild cleaner, scrub lightly
- Wipe dry and polish fixtures
- Check and treat minor stains immediately
Monthly deep-clean schedule and methods
When monthly maintenance is due, the sink should receive a structured deep clean that targets residue, mineral buildup, and dullness without harming the finish.
Begin with a descaling soak (vinegar or citric solution), scrub with a nonabrasive pad and baking soda, rinse thoroughly, and polish with a microfiber cloth.
Inspect seals, aerators, and drains; repeat stubborn-spot treatment and apply a protective sealant if appropriate.
Comparing methods: speed, effectiveness, and safety
Different cleaning approaches are weighed for quick fixes versus deep stains, with attention to which sink materials respond best to each method. The comparison emphasizes speed, stain-removal effectiveness, and user safety to guide appropriate choices by material. The brief table below summarizes recommended options for common scenarios.
| Scenario | Best for Quick Fixes | Best for Deep Stains |
|---|---|---|
| Porcelain | Baking soda paste | Bleach soak (diluted) |
| Stainless steel | Mild dish soap + cloth | Cream cleaner (non-abrasive) |
| Composite/Quartz | Vinegar wipe (spot) | Manufacturer-safe stain remover |
Which methods are best for quick fixes vs deep stains
Choose methods based on the stain’s severity and the time available: quick fixes target surface grime and discoloration with fast-acting, low-effort products, while deep-stain solutions require abrasive or chemical approaches and more dwell time.
For quick fixes use baking soda paste, mild cleaners, or microfiber scrubs.
For deep stains use paste with baking soda plus peroxide, stronger cleaners, or gentle abrasives, observing safety and ventilation.
Best choices by sink material
Because sink materials respond differently to cleaners and abrasives, selecting the appropriate method balances speed, effectiveness, and safety:
Porcelain tolerates baking soda scrubs and mild bleach for stains;
stainless steel favors vinegar or baking soda with soft cloths to avoid scratches;
enameled cast iron needs gentle nonabrasive cleaners;
composite or acrylic benefits from diluted dish soap and microfiber;
stone requires pH-neutral cleaners and professional care for deep stains.
Mistakes to avoid that can damage a white sink
The article warns against common mistakes that can harm a white sink, such as using abrasive pads, harsh chemicals, or over-bleaching, which can scratch or discolor surfaces.
It also notes the hazards of improperly mixing cleaners—both for the sink finish and for occupant safety.
Readers are urged to choose gentle tools and follow label instructions to avoid damage and chemical risks.
Abrasive pads, harsh chemicals, and bleaching pitfalls
Scrubbing with heavy-duty scouring pads, pouring undiluted bleach, or mixing household cleaners may seem like quick fixes, but these actions can etch, discolor, or weaken a white sink’s finish.
Abrasive tools remove protective glazes; strong acids or alkalis cause pitting and dullness.
Opt for nonabrasive sponges and manufacturer-recommended cleaners, test products in an inconspicuous spot, and rinse thoroughly after cleaning.
Improper mixing of cleaners and safety risks
Mixing household cleaners can produce dangerous fumes and unexpected chemical reactions that jeopardize both sink finishes and human safety.
Combining bleach with ammonia or acids releases toxic chloramines or chlorine gas, which can corrode enamel and harm lungs.
Users should read labels, never mix products, ventilate spaces, and wear protective gear.
When unsure, choose single-purpose cleaners or consult manufacturer guidelines.
Quick troubleshooting and next steps
If stubborn stains persist after the recommended cleaning steps, the guide explains when to try stronger, sink-safe products and when to stop.
It notes indicators that professional help is warranted for deep stains or structural damage.
The section also outlines options for restoring a dulled or scratched finish, from polishing kits to professional refinishing.
When stains won’t budge’ when to call a professional
When persistent stains resist household cleaners and elbow grease, it’s time to reassess options and consider professional help.
A professional can identify stain type, material compatibility, and safe removal methods beyond DIY products.
Call a qualified cleaner or restoration specialist when stains are deep, involve porous materials, or when aggressive methods risk damage.
Request estimates, references, and warranty details before proceeding.
Restoring finish after damage (polishing and refinishing options)
Assess options for restoring a damaged finish by determining the sink material and extent of wear—minor scratches and dullness often respond to polishing.
Deeper gouges or compromised coatings require refinishing or professional repair. Use appropriate polishing compounds and pads for porcelain or stainless, deglaze and apply touch-up kits for enamel, or consider reglazing or hiring a refinisher for extensive damage to restore uniform shine and durability.
Conclusion
Like a small lighthouse cutting through kitchen fog, the quick methods outlined guide the reader back to a bright, white sink. With simple supplies and a few careful gestures, stains loosen, shine returns, and stubborn blemishes yield to consistent care. Regular, gentle maintenance keeps the surface luminous without harsh sacrifice. Armed with these options and cautions, one can restore and preserve a sink’s clear, reflective calm—ready once more for daily life’s small storms.