
How to Clean Gas Heater Burners Safely: Step-by-Step Guide for Better Heat
To clean gas heater burners safely and improve heat output, follow these essential steps: First, shut off the gas and power to the heater, ensuring proper ventilation, and wear protective gear. Next, remove access panels and detach the burners and pilot components. Vacuum and brush away soot and debris, soaking any greasy parts in mild detergent if necessary. Don’t forget to inspect and clean the pilot hood and thermocouple. Once everything is clean, reassemble the parts securely, perform a soapy-water leak test, and check for the proper flame. For a thorough guide and safety tips, continue reading.
How to Safely Clean Gas Heater Burners: Quick Summary
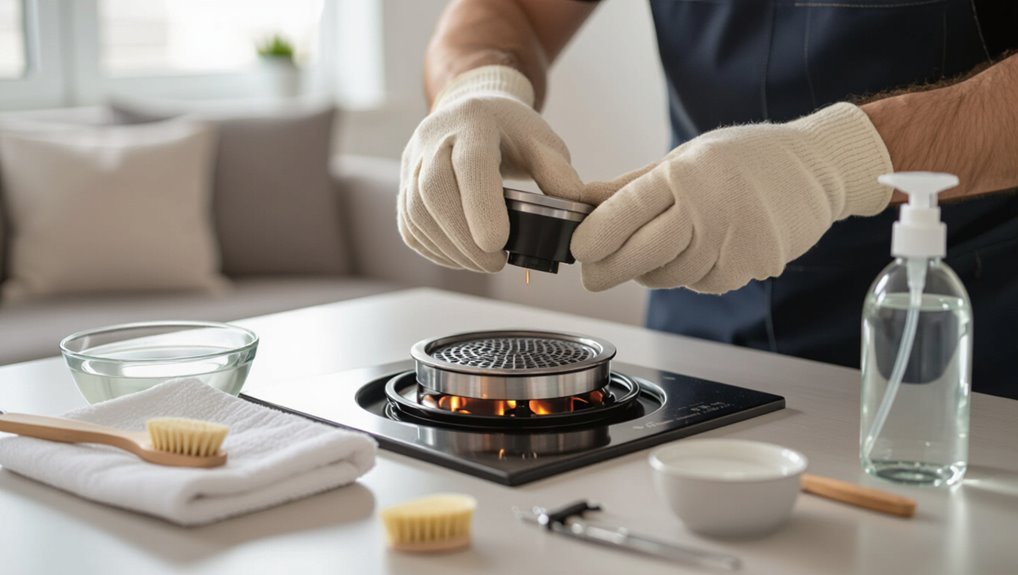
A safe burner cleaning restores proper flame pattern and efficiency while preventing gas leaks and fire hazards.
It is appropriate for competent DIYers with basic tools and safety gear, but a licensed technician should be called if there is persistent odor, damaged components, or uncertainty about gas connections.
Typical preparation requires 30–60 minutes, a screwdriver, soft brush, compressed air or vacuum, and PPE such as gloves and eye protection.
What a safe burner cleaning achieves
Properly cleaned gas heater burners restore efficient, even combustion and reduce risks from soot buildup, blockages, or fuel-air imbalances.
A safe cleaning improves heat output, lowers fuel consumption, minimizes carbon monoxide and soot production, and prolongs burner lifespan.
Clear documentation of steps and checks for leaks or damaged parts guarantees consistent performance.
Guidance on how to clean gas heater burners supports these outcomes.
Who should attempt this and when to call a pro
Who is suited to clean gas heater burners depends on skill, comfort with basic tools, and ability to follow safety procedures.
Individuals experienced with simple maintenance and who can isolate gas and power safely may proceed.
Call a professional if the heater has complex controls, persistent odor, visible damage, difficult access, recurring combustion issues, or if the person feels uncertain; licensed technicians handle diagnostics and repairs.
Time, tools, and safety equipment needed
Two to three hours is a realistic block for a straightforward burner cleaning, including cool-down, disassembly, inspection, cleaning, reassembly, and a careful test light.
More complex units or unexpected issues can extend this.
Necessary items include basic tools, cleaning supplies, and safety gear:
- Socket set, screwdrivers, wire brush.
- Vacuum, soft brushes, mild solvent.
- Gloves, safety glasses, carbon monoxide detector.
How Gas Heater Burners Work and Why Cleaning Matters
A gas heater burner consists of a fuel supply, an ignition source, burner ports or slots, and a heat exchanger that distributes warmed air.
Accumulated dirt, rust, and debris restrict airflow and fuel flow, causing incomplete combustion, reduced heat output, and increased soot or carbon monoxide risk.
Visible yellow or irregular flames, uneven heating, soot buildup, or a persistent smell of gas are common signs the burners need cleaning.
Basic parts of a gas heater burner
Understanding the basic parts of a gas heater burner helps explain how heat is generated and why cleaning prevents hazards and inefficiency.
A burner assembly includes the burner tube or head, ports or slots, ignition source (pilot or spark), gas valve and regulator, manifold, air shutter or mixing chamber, and mounting bracket.
Each component affects flame stability and requires inspection during maintenance.
How dirt, rust, and debris affect combustion and heat output
Even small amounts of dirt, rust, and debris on burner components can disrupt the precise air–fuel mix, altering flame shape, temperature, and stability.
Clogged ports reduce gas flow and richen the mixture while corrosion roughens surfaces and creates heat sinks that lower overall output.
Reduced combustion efficiency raises fuel consumption, increases soot and CO risk, and causes uneven heat distribution and premature component wear.
Common signs your burners need cleaning
When should a burner be inspected for cleaning? Signs include reduced heat, uneven flames, or yellow/orange flame color indicating incomplete combustion.
Increased gas smell, frequent pilot outages, or visible soot also warrant inspection. Regular checks prevent efficiency loss and safety risks.
- Reduced or uneven heat
- Yellow/orange or flickering flames
- Soot, odor, or frequent pilot failure
Pre-Cleaning Safety Checks
Before any cleaning begins, the technician confirms gas and electrical supplies are shut off following manufacturer and local code procedures.
They guarantee adequate ventilation and carbon monoxide precautions, inspect connections and components for leaks or damage, and don required protective gear.
A clear, well-lit workspace is established to keep tools and replacement parts accessible and to minimize hazards.
Turning off gas and power step-by-step precautions
One essential step is to cut off both the gas supply and electrical power to the heater before any cleaning begins.
The technician locates the gas shutoff valve and turns it fully clockwise, then switches off the breaker or unplugs the unit.
Confirm zero gas flow and no live electricity using appropriate meters.
Wait several minutes for residual gas to dissipate.
Ventilation and carbon monoxide risk mitigation
Adequate ventilation is critical to prevent carbon monoxide buildup during heater maintenance. The area should have windows or doors open and mechanical exhaust running where available.
Occupants and pets must vacate the space if ventilation is limited.
Install or verify functioning CO detectors nearby before starting work.
Monitor air quality and pause if dizziness, headache, or unusual odors occur.
Inspecting for gas leaks and damaged parts
Begin the pre-cleaning safety checks by shutting off the gas supply at the appliance and main valve, ensuring no fuel can flow while inspections proceed.
Then examine connections, hoses, and fittings for corrosion, cracks, or wear.
Smell for residual gas and use a soap solution to spot bubbles at joints.
Note damaged components and tag them for repair or replacement before cleaning.
Required safety gear and workspace setup
At least a pair of flame-resistant gloves, eye protection, and a basic respirator should be donned before any work begins, with sturdy, non-slip footwear recommended for the area around the heater.
Workspace should be ventilated, well-lit, and clear of combustibles. Tools and a fire extinguisher must be nearby.
Checklist:
- PPE worn
- Ventilation and lighting
- Tools and extinguisher ready
Step-by-Step Burner Cleaning Procedure
The procedure begins with removing access panels to expose the burner assembly and create a clear workspace.
Next, burners and the pilot assembly are detached following manufacturer safety guidelines so each part can be cleaned separately.
Cleaning methods vary by buildup—brushes, vacuuming, or mild solvents—after which the pilot light and thermocouple are cleaned.
All components are carefully reassembled and tested.
Removing access panels and exposing the burner assembly
Remove power and gas supply before accessing the heater to assure safety; once confirmed, unscrew or unlatch the access panels to reveal the burner assembly.
Inspect for screws, clips, or fasteners and set them aside. Gently remove the panel, avoiding sharp edges.
Note component positions and clear dust with a soft brush or vacuum on low.
Confirm workspace lighting and maintain ventilation.
Detaching burners and pilot assembly safely
Begin by verifying power and gas remain shut off. Then wait several minutes for components to cool before touching the burner and pilot area.
Using appropriate tools, loosen retaining screws and gently lift burners free, noting orientation and gasket placement.
Disconnect pilot thermocouple and igniter leads only if accessible; label connectors.
Place removed parts on a clean, nonconductive surface and inspect for damage before cleaning.
Cleaning methods for different buildup types
A clear, stepwise approach separates cleaning techniques by the type of buildup encountered.
Dry brushing and vacuuming remove loose soot and debris, while compressed air can dislodge blocked ports.
Stubborn grease benefits from soaking and gentle scrubbing.
Rust and corrosion require careful mechanical cleaning and appropriate rust treatment to restore safe operation.
Dry brushing and vacuuming soot and debris
Use a soft-bristle brush and a vacuum with a narrow nozzle to dislodge and extract loose soot and dry debris from the burner assembly and nearby passages.
Work gently to avoid bending electrodes or disturbing seals. Brush in component-aligned strokes, then vacuum immediately to capture particles.
Repeat until visible residue is gone. Dispose of collected debris and inspect for remaining buildup before proceeding.
Using compressed air to clear ports
After dry brushing and vacuuming, apply short bursts of clean, dry compressed air to the burner ports to dislodge trapped soot and loose particles that vacuuming could not reach.
Hold the nozzle several inches away and use controlled pulses to avoid bending or damaging the ports.
Work around the entire burner, then inspect ports visually and with a thin, nonmetallic probe if any obstructions remain.
Soaking and gentle scrubbing for grease and residue
Soak burners with greasy or sticky deposits in a mild detergent solution to loosen buildup before scrubbing; immersion times of 15–30 minutes are usually sufficient for light-to-moderate residue.
After soaking, rinse and use a soft brush or non-metallic scouring pad to remove softened grime, avoiding force that can deform components.
Dry thoroughly with compressed air or clean cloth before reassembly.
Addressing rust and corrosion safely
Addressing rust and corrosion requires evaluating the extent of metal loss and choosing treatments that remove oxidation without damaging burner ports or sealing surfaces.
Light surface rust can be removed with a brass brush and rust converter; deep pitting demands replacement.
After cleaning, rinse, dry thoroughly, and protect exposed areas with high-temperature paint or anti-corrosion coating.
Reinspect fittings and test for leaks before use.
Cleaning the pilot light and thermocouple
Begin by shutting off the gas supply and allowing the heater to cool completely before touching the pilot assembly.
Using a soft brush and compressed air, remove dust and soot from the pilot hood and orifice.
Wipe the thermocouple with a clean, lint-free cloth; do not sand or file.
Inspect for damage or bending; replace if corroded.
Recheck connections for tightness.
Reassembling burners and components correctly
Reassemble burners and associated components in the reverse order of disassembly, ensuring each part seats correctly and fasteners are secure.
Align burner ports, brackets, and heat shields precisely.
Reconnect gas lines, electrical leads, and grounding straps per original routing.
Replace access panels and filters.
Verify that moving parts operate freely and that no tools or debris remain in the assembly before proceeding to testing.
Leak test and safe relighting procedure
With the burners and components properly seated and secured, the next step is to perform a systematic leak test and a safe relighting procedure before restoring normal operation.
Inspect fittings and connections, apply soapy water, watch for bubbles, and tighten if needed.
Ventilate area, return gas slowly, light pilot per manufacturer instructions, confirm stable flame patterns, check for odors, and monitor briefly.
Tools, Cleaners, and Replacement Parts Guide
The next section lists essential items and guidance for maintaining burner performance and safety.
- Recommended tools and sizes
- Safe cleaning agents to use and avoid
- When to replace burner components and typical lifespans
This overview prepares the reader to choose the right tools, select noncorrosive cleaners, and recognize end-of-life signs for parts.
Recommended tools and sizes
A compact set of reliable tools and correctly sized replacement parts greatly reduces time and mistakes when cleaning gas heater burners.
This section lists the essential items—specific wrench and screwdriver sizes, brush types, cleaning solvents, and common replacement parts—so technicians can prepare precisely for the job.
Recommended: 7mm, 8mm, 10mm wrenches; 1/4″ and Phillips #2 screwdrivers; small wire, nylon, and bottle brushes; vacuum attachment; replacement orifice, thermocouple, and injector gaskets.
Safe cleaning agents to use and avoid
Choose cleaners that remove soot and grease without damaging metal, seals, or electronic components.
Mild dish soap with warm water, isopropyl alcohol for light residues, and approved non-corrosive degreasers are suitable.
Avoid bleach, ammonia, oven cleaners, strong acids, or abrasive powders that corrode surfaces or harm sensors.
Use minimal liquid, apply with soft brushes, and guarantee thorough drying before reassembly.
When to replace burner components and typical lifespans
After detailing suitable cleaners and what to avoid, attention should shift to recognizing when parts should be replaced rather than cleaned. Inspect for corrosion, cracks, persistent clogging, or warped ports. Replace corroded burners, degraded gaskets, malfunctioning igniters, and damaged valves per service intervals.
| Component | Typical Lifespan | Replacement Cue |
|---|---|---|
| Burner | 5–15 years | Corrosion/clogging |
| Igniter | 2–7 years | Intermittent sparks |
| Gasket/Seal | 1–5 years | Cracks/leaks |
| Valve | 8–20 years | Sticking/leaks |
Troubleshooting After Cleaning
After cleaning, the heater should be inspected for proper combustion: a steady blue flame centered on the burner indicates normal operation, while yellow, weak, or uneven flames suggest obstruction or air-to-gas ratio issues.
If soot or a persistent gas or burning odor remains, the burner and venting require reinspection and the appliance should be shut down until the source is identified.
Visible corrosion, cracked components, repeated ignition failures, or unexplained odor/soot are signs that a qualified technician is needed.
What to do if flame is yellow, weak, or uneven
Inspecting the burner flame immediately reveals whether cleaning resolved the issue: a healthy gas flame is steady and primarily blue, while yellow, weak, or uneven flames indicate remaining combustion or airflow problems.
Check burner ports for clogs, confirm proper air shutter adjustment, guarantee pilot/igniter alignment, and verify gas pressure.
If irregularities persist, shut off the heater and contact a qualified technician.
Persistent odor or soot after cleaning
If a heater continues to emit a persistent odor or deposit soot despite burner cleaning, it suggests incomplete combustion, residual contaminants, or airflow issues that were not fully resolved by the previous checks.
The technician should recheck burner alignment, pilot and orifice cleanliness, and vent paths. Clean filters, clear obstructions, and confirm adequate fresh-air supply; repeat safe ignition tests and monitor for improvement.
Signs of deeper issues requiring professional service
Recognition of deeper issues comes when basic cleaning and adjustments fail to restore safe, efficient operation: persistent yellow or sooty flames, repeated ignition failures, unusual noises, strong gas or chemical odors, visible corrosion or cracks on burner components, and elevated carbon monoxide readings all indicate problems beyond routine maintenance that warrant professional diagnosis and repair.
- Unsafe combustion or leaks
- Mechanical or ignition faults
- Structural damage or corrosion
Maintenance Schedule and Tips for Long-Lasting Performance
A clear maintenance schedule helps keep burners safe and efficient, with inspection and light cleaning frequency adjusted for usage intensity.
Simple monthly tasks—such as checking for debris, testing ignition, and ensuring proper airflow—paired with an annual professional inspection prevent buildup and premature wear.
Attention to sealed ductwork, correct thermostat settings, and routine burner tuning can reduce energy use and improve heat distribution.
How often to inspect and clean based on usage
Regularly inspecting and cleaning gas heater burners preserves efficiency and reduces safety risks; frequency should be matched to operating hours, environment, and fuel quality.
Light residential use warrants visual checks monthly and cleaning every 12–18 months.
Heavy use, dusty or pet-filled spaces, or poor fuel quality justify inspections quarterly and cleaning every 6–12 months.
Adjust schedule after unusual odors, soot, or performance drops.
Simple monthly and annual tasks to prevent buildup
Monthly and annual maintenance tasks keep burners free of debris and help detect wear before it affects safety or efficiency.
Perform these routine actions to prevent buildup and extend service life:
- Monthly: wipe external surfaces, vacuum nearby dust, and check pilot/igniter operation.
- Quarterly: inspect burner ports for clogging; clear gently with a soft brush.
- Annually: schedule professional inspection, clean internal components, and test safety controls.
Energy-saving tips and improving heat efficiency
Many homeowners can reduce fuel use and improve comfort by combining simple habit changes with targeted maintenance; optimizing burner performance, sealing ductwork, and calibrating thermostats yields measurable efficiency gains.
Regular burner cleaning, timely filter replacement, and annual professional tune-ups maintain combustion efficiency.
Install programmable thermostats, improve insulation, and eliminate drafts.
Monitor system pressure and flue integrity to prevent heat loss and unsafe operation.
Safety and Legal Considerations
Before attempting any cleaning, the homeowner should review local codes and the heater manufacturer’s recommendations to guarantee compliance.
Some procedures may void warranties or explicitly require certified technicians to perform service.
When in doubt, professional inspection and documentation preserve safety and warranty coverage.
Local codes, warranties, and manufacturer recommendations
When servicing gas heater burners, compliance with local building and fire codes, along with manufacturer guidelines, is essential to guarantee safety and maintain warranty coverage.
Technicians and owners should verify permit requirements, follow listed maintenance intervals, and use approved replacement parts.
Documentation of service preserves warranty claims. Ignoring local regulations or manufacturer instructions can create liability, code violations, and potential denial of coverage.
When cleaning voids warranties or requires certified technicians
Servicing burners by unqualified personnel can nullify manufacturer warranties and may violate local regulations, exposing owners to financial and legal risk.
Owners should verify warranty terms and local codes before attempting maintenance. If manufacturer guidance stipulates certified technicians, arrange professional service.
Document all work with receipts and service reports to preserve warranty coverage and demonstrate compliance with safety and regulatory requirements.
Quick Reference Checklist for Cleaning Gas Heater Burners
A concise checklist helps guarantee all essential steps for safely cleaning gas heater burners are completed in the right order.
It summarizes prep, cleaning, inspection, and reassembly to reduce errors and hazards.
- Shut off gas, unplug unit, and allow cooling.
- Remove covers, clean burners with brush and compressed air, clear ports.
- Inspect seals, test ignition, restore panels, and verify safe operation.
Conclusion
In the grand theater of domestic warmth, the gas heater burner bows for a quick, dignified scrub—an affair of elbow grease, caution, and mildly heroic patience. With valves obedient, vents cleared, and screws respectfully loosened, the protagonist emerges sputter-free and suitably proud. Neighbors remain blissfully unaware of the plumber’s-ego-sized triumph. Remember: regular tune-ups keep drama low, bills trim, and the household’s ambient smugness pleasantly sustainable.
