How to Bend PEX Without Kinking: 7 Pro Tips for a Smooth Curve
To bend PEX tubing without kinking, choose a flexible grade (PEX-A), pre-warm cold sections, and use a properly sized bending spring or form for support. Measure and mark the bend, warm the tube evenly, and guide it slowly to your desired radius while securing supports to prevent spring-back. Always respect the manufacturer’s minimum bend radius and check for any flattening or creases. By following these steps, you can minimize kinks and leaks effectively. More detailed tips and solutions are provided below.
What You Need to Know Before Bending PEX
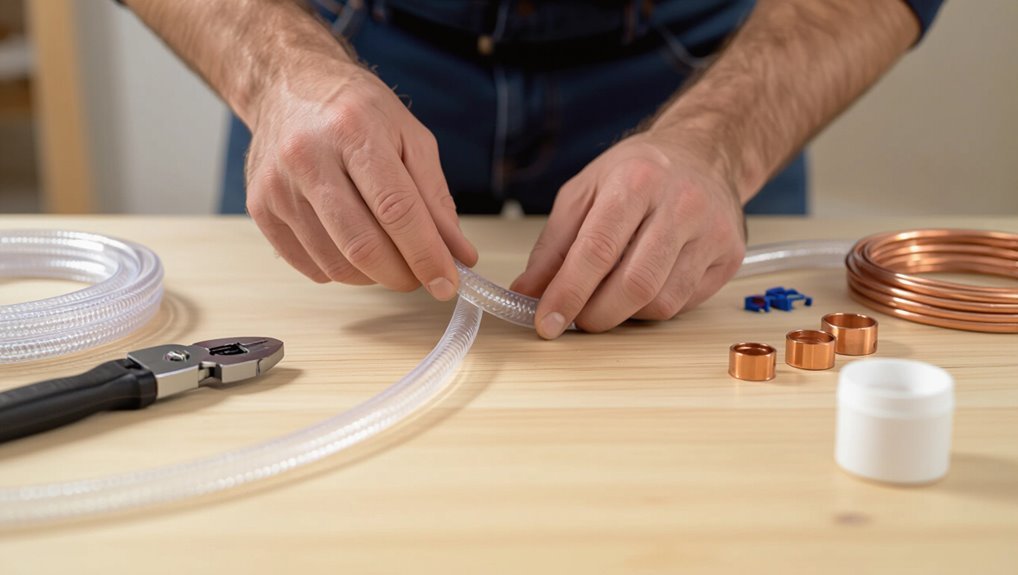
Before bending PEX, one must understand how the polymer’s flexibility and memory influence its tendency to kink and how that varies with PEX-A, PEX-B, and PEX-C and with different diameters.
Appropriate tools and accessories—such as bend supports, spring guides, and heat sources for tighter radii—are essential to preserve pipe integrity.
Finally, basic safety precautions and a cleared, well-lit workspace reduce risk and make controlled bends more consistent.
Why PEX Can Kink and How Material Properties Affect Bending
Understanding why PEX pipe kinks requires looking at its molecular structure, wall thickness, and temperature-dependent flexibility.
Material crystallinity, crosslink density and wall geometry determine stiffness and springback. Cold PEX becomes brittle, increasing kink risk; thin walls collapse under tight radii.
Proper technique and supports explain how to bend PEX without kinking by matching bend radius to material properties and using heat or formers when necessary.
Types and Sizes of PEX Relevant to Bending (PEX-A, PEX-B, PEX-C; diameters)
Having reviewed how material structure, wall thickness, and temperature govern PEX behavior, attention shifts to the specific types and sizes technicians will encounter, since these determine practical bending limits and the methods required to avoid kinks.
PEX-A offers greatest elasticity and forgiving bends; PEX-B and PEX-C are stiffer.
Smaller diameters bend tighter; larger diameters need gentler radii and support to prevent deformation.
Tools and Accessories Required for Safe Bending
Several essential tools and accessories are required to bend PEX reliably and without damage: a PEX bending spring or form, heat source when working cold lines, proper-rated insulation or foam, conduit supports and clamps, and fittings or stop collars to maintain shape during installation.
Additional helpful items include a tape measure, marker, deburring tool, and a bending guide to guarantee consistent radii and prevent kinks.
Safety Precautions and Workspace Preparation
Prepare the workspace and follow basic safety measures before bending PEX to reduce injury risk and prevent material damage.
Clear debris, guarantee stable footing, and organize tools within reach. Wear gloves, eye protection, and appropriate clothing.
Verify adequate lighting and ventilation. Inspect PEX for defects and measure layout to avoid sharp bends near obstructions.
Keep a fire extinguisher nearby when using heat.
Quick Answer: Best Practice for Bending PEX Without Kinking
The recommended minimum bend radius varies by PEX type and size, with larger diameters and certain formulations requiring gentler curves to prevent deformation.
As a practical rule of thumb: maintain a bend radius at least three times the pipe diameter for most residential PEX to avoid kinking.
Following these limits guarantees reliable bends without compromising flow or structural integrity.
Recommended Minimum Bend Radius by PEX Type and Size
When bending PEX, adhere to manufacturer-specified minimum bend radii to prevent kinking and preserve flow capacity. Typical guidance varies by type and size; using charts guarantees longevity. Consult product literature for exact radii and use supports for larger runs.
| PEX Type | Typical Minimum Radius |
|---|---|
| PEX-A 1/2″ | 1″ |
| PEX-B 3/4″ | 2″ |
One-Sentence Rule to Avoid Kinks
Always keep the bend radius at least three times the pipe’s outside diameter to prevent kinks and maintain flow capacity.
This simple rule guides installers to measure and mark bends, employ supports or bending springs when needed, and verify flexibility limits for specific PEX types.
Following it reduces repair, preserves pressure integrity, and guarantees consistent, code-compliant installations without relying on guesswork or excessive force.
Step-by-Step Method to Bend PEX Smoothly
The following steps outline a practical sequence for bending PEX without kinking: measure and mark the bend location, warm the tubing if needed with recommended methods and temperatures, and select an appropriate bending spring or hand bender.
During the bend, the tubing should be supported and guided to maintain the curve and prevent collapse.
Finally, secure the PEX in place and inspect the bend for any deformation before finalizing the installation.
Step 1 Measure and Mark the Bend Location
Before bending, measure the run and mark the exact point where the curve should begin using a pencil or erasable marker, aligning the mark with fittings, offsets, and any required clearances.
Confirm distances from walls, studs, and fixtures, and transfer measurements to the PEX.
Mark both start and end of the desired radius, noting orientation so the bend matches the planned routing.
Step 2 Warm the PEX if Necessary (Methods and Temperature Guidelines)
If ambient temperature or tube stiffness threatens a tight-radius bend, the PEX should be warmed to increase flexibility and reduce kinking risk.
Use warm water immersion, heat gun on low with constant motion, or ambient warming in a heated workspace.
Target 100–140°F (38–60°C); avoid overheating.
Monitor pliability and cool before fitting.
Do not apply open flame or concentrated heat.
Step 3 Use a Bending Spring or Hand Bender Properly
Once the PEX reaches the desired pliability, a bending spring or hand bender is used to form smooth, kink-free curves.
The installer inserts the spring into the tube or positions the hand bender at the mark, then applies steady, even pressure while maintaining the planned radius.
Release slowly, inspect for deformations, and repeat gently if adjustment is needed to preserve tubing integrity.
Step 4 Support and Guide the PEX During the Bend
While keeping the planned radius in mind, the installer supports and guides the PEX continuously to prevent twists and uneven stresses during the bend.
Hands, padded clamps, or temporary supports keep the tube aligned while the bend progresses. Small incremental motions and steady pressure maintain shape; frequent visual checks guarantee consistent curvature.
Any soft guide adjusts to avoid localized compression or kinking.
Step 5 Secure the PEX and Check for Deformation
Secure the PEX immediately after forming the desired radius to lock the shape and prevent spring-back.
Clamp or strap the tube in place using appropriate supports, avoiding sharp edges.
Inspect the bend for flattening, wrinkles, or ovalization; measure cross-section if necessary.
If deformation appears, relieve the clamp, reheat slightly, and remold.
Verify integrity before installation and pressure testing.
Seven Pro Tips to Prevent Kinking
A set of seven concise, practical tips helps professionals avoid kinks when bending PEX in varied conditions.
These recommendations cover material choice, temperature management, tools for shaping, and methods for keeping bends consistent and secure. Following them reduces wasted tubing and improves long-term reliability.
- Use PEX-A for installations requiring frequent or tight bends
- Pre-warm long runs when working in cold conditions
- Employ bending springs or formers to guide tighter curves
- Maintain proper bend radius and support PEX close to the bend to prevent twisting
Tip 1 Use PEX-A When Frequent Bends Are Required
When frequent bends are required, PEX-A offers the greatest flexibility of the three PEX types, allowing installers to form tight curves with minimal tools and far less risk of kinking.
Its cross-linked structure permits rebound after bending, reducing memory and restoring roundness.
Contractors favor PEX-A for manifold runs, confined spaces, and retrofit work where repeated curves or compact routing demand durable, kink-resistant tubing.
Tip 2 Pre-Warm Long Runs in Cold Conditions
Pre-warming long runs in cold weather reduces stiffness and lowers the chance of kinking during installation.
Installers should store coils in a heated area, use heat blankets or warm air, and allow tubing to equilibrate before unspooling.
Gentle, controlled warming improves flexibility without degrading material.
Monitor temperatures to avoid overheating, and handle warmed PEX carefully to maintain shape until secured in place.
Tip 3 Employ Bending Springs or Formers for Tighter Curves
Use bending springs or rigid formers to support PEX when making tight-radius turns, reducing stress that causes kinks.
These tools slip inside or clamp around tubing, maintaining shape while bending and preventing collapse. They allow controlled, uniform curves in confined spaces and minimize rebound.
Select springs or formers sized to pipe diameter and remove them after the bend cools to retain integrity.
Tip 4 Maintain Proper Bend Radius and Use Visual Templates
A clear understanding of a PEX tube’s minimum bend radius is essential to prevent kinks and preserve flow. Practitioners should reference manufacturer specifications and mark templates matching pipe diameter.
Visual templates and simple jigs guarantee consistent curves, reduce trial-and-error, and maintain internal diameter. Consistent radii minimize stress and extend service life while facilitating repeatable, code-compliant installations without relying on force or guessing.
Tip 5 Support PEX Close to the Bend to Prevent Twisting
Moving from maintaining consistent bend radii, attention turns to supporting PEX immediately adjacent to the curve to prevent twisting and uneven stress.
Secure clamps or straps within a few inches of each bend, using padded supports to avoid indentations.
Stabilizing the tubing distributes forces, keeps fittings aligned, and reduces the risk of kinks during installation.
Verify supports before finalizing connections.
Tip 6 Avoid Repeated Bending and Re-straightening
Avoid flexing PEX back and forth during installation, as repeated bending and re-straightening weakens the tubing and raises the chance of a permanent kink.
Installers should plan routing, measure once, and make each bend deliberately. If repositioning is necessary, use gentle, large-radius corrections and limit adjustments.
Minimize handling stress and avoid hammering or jerking motions that fatigue the material and compromise longevity.
Tip 7 Inspect and Test the Line After Bending
Inspect the bent section visually and by touch to verify the tubing retains a smooth, even curve with no flattened spots, sharp creases, or soft areas that signal internal stress.
Afterwards, pressure-test the line per specifications, checking fittings and joints for leaks.
Mark any suspicious areas and replace or rework affected runs.
Document results and retest after adjustments to guarantee long-term integrity.
Tools and Accessories Compared
The section compares bending springs, hand benders, and heat guns to show their strengths and limitations for different PEX diameters and bend radii.
It also covers when to use pipe supports, clamps, and templates to maintain alignment and prevent stress at fittings.
Recommended brands and typical price ranges are provided to help readers match tools to budget and project scale.
Bending Springs vs. Hand Benders vs. Heat Guns
Choosing the right method to bend PEX—bending springs, hand benders, or heat guns—depends on pipe size, bend radius, job scale, and desired finish. Bending springs protect thin PEX for tight radii; hand benders give repeatable, tool-driven control for larger tubing; heat guns soften for gradual reshaping when springs or benders can’t. Compare trade-offs below.
| Tool | Best use |
|---|---|
| Springs | Tight, small-diameter bends |
| Hand benders | Repeatable medium-large bends |
| Heat guns | Complex or corrective reshaping |
| Speed | Varies by tool |
When to Use Pipe Supports, Clamps, and Templates
Support pipework with the right clamps, supports, and templates to maintain bend integrity and meet code while easing installation.
Use spaced supports to prevent sagging and stress on bends, secure clamps to avoid movement during curing, and employ templates for consistent radii and repeatable runs.
Choose supports compatible with PEX size and insulation, and install per local code and manufacturer spacing recommendations.
Recommended Brands and Price Ranges
Several reputable brands consistently appear in pro and DIY toolkits for bending and supporting PEX, offering a range of quality and price points to match different project needs.
Professionals favor durable, calibrated tools; homeowners often choose budget-friendly kits with clear guidance.
Compare warranties, material, and ease of use to balance cost and longevity.
- RIDGID: professional, higher price
- SharkBite: mid-range, user-friendly
- Watts: reliable, varied options
- Apollo: affordable, basic kits
Common Problems When Bending PEX and How to Fix Them
Common issues when bending PEX include temporary kinks that spring back versus permanent deformations that weaken the tubing.
Repair methods range from cutting out the damaged section and using couplings or push-fit fittings to full replacement when integrity is compromised.
Ensuring proper repair and correct bending techniques minimizes the risk of leaks at bends and fittings.
Identifying a Kink vs. a Permanent Deformation
When PEX tubing shows an abrupt change in shape after bending, distinguishing a temporary kink from a permanent deformation is essential for deciding whether the line can be salvaged or must be replaced.
A kink typically rebounds slightly, feels sharp, and narrows the bore.
Permanent deformation remains set, shows wall thinning or creasing, and resists straightening; inspect for flow restriction, discoloration, or microcracks.
Repair Options for Kinked PEX (Cut-and-Join, Couplings, Replacement)
Evaluating repair options for kinked PEX begins with determining whether the damage is reversible or requires replacement.
Minor kinks may be eased with heat and reshaping; permanent crimps need removal of the damaged section.
Cut-and-join via push-fit or crimp couplings restores continuity.
Severely compromised runs warrant full replacement to guarantee long-term integrity and code compliance.
Preventing Leaks After a Bend
Prevent leaks after bending PEX by addressing the typical failure points that follow shaping: stress at the bend, improperly seated fittings, and micro-tears from overbending or kinking.
Inspect bends for hairline cracks, re-seat or replace fittings, and smooth sharp bends with spring support or heat.
Pressure-test circuits, trim damaged sections, and use proper clamps or crimp rings to guarantee consistent, leak-free connections.
Project Examples and Best Applications
Examples illustrate how PEX bending techniques apply in real projects, such as tight bathroom and under‑sink runs where compact, controlled bends are required.
For long horizontal runs, maintaining consistent radii and using supports prevents sagging and kinks.
Outdoor or cold‑weather installations call for preheating, larger bend radii, and protective routing to preserve flexibility.
Bending PEX for Tight Spaces: Bathrooms and Under-Sink Runs
When maneuvering the confined cavities behind vanities and within bathroom cabinets, installers rely on compact PEX bending techniques that maintain flow integrity without kinking. Tight under-sink runs and toilet supply loops frequently call for short, controlled radii, support clamps, and minimal fittings to preserve water pressure and ease future service.
Installers use heat-shaping, spring inserts, and proper anchoring to navigate obstructions while minimizing joints and ensuring accessibility.
Long Horizontal Runs: Strategies to Maintain Smooth Curves
Moving from tight under-sink and vanity maneuvers to longer horizontal runs shifts priorities from tight-radius tricks to maintaining consistent, gentle curves over extended distances to prevent flow restriction and fatigue.
Techniques include measuring and marking layout, using gradual bends with supports every 3–4 feet, avoiding sharp staples, accommodating thermal expansion with loops or slip joints, and routing along joists to minimize handling and long-term stress.
Outdoor and Cold-Weather Installations: Special Considerations
How should PEX be routed and protected where it faces freezing temperatures, UV exposure, and ground movement?
Install below frost line or inside insulated conduit, slope for drainage, and use heat tracing where necessary.
Shield from sunlight with UV-rated sleeves or conduit.
Anchor to limit lateral movement and include expansion loops for frost heave.
Choose cold-rated PEX and inspect joints for corrosion or stress.
Inspection, Testing, and Maintenance After Bending
After forming bends, the installer performs pressure testing on the newly bent PEX to confirm there are no leaks or weakened sections under operating conditions.
A concise visual and tactile inspection checklist — checking for surface cracks, flattened or pinched areas, and softness at the crease — guides immediate corrective actions.
For long-term performance, scheduled inspections, protection from UV and abrasion, and avoiding repeated flexing at the bend preserve integrity.
Pressure Testing Procedures for Newly Bent PEX
Begin by visually inspecting each newly bent PEX run for visible deformations, kinks, or compromised fittings before any pressurization.
Use a calibrated pump to pressurize the system to specified test pressure (typically 1.5× working pressure or local code value).
Maintain pressure for the required duration, monitor gauges for decay, and inspect joints for leaks.
Record results and relieve pressure safely when complete.
Visual and Tactile Inspection Checklist
A quick visual sweep and hands-on feel are essential to confirm integrity of newly bent PEX runs before leaving the job.
Inspect for surface cracks, pinches, discoloration, or flattened sections.
Palpate bends to detect soft spots, micro-creases, or irregular stiffness.
Verify clamps and supports are secure and not deforming tubing.
Note and tag any defects for immediate correction.
Long-Term Maintenance Tips to Preserve Bend Integrity
Establishes a routine inspection and testing regimen to guarantee bent PEX retains its shape and function over time.
Periodic checks include visual inspection for creases, discoloration, or stress marks and tactile confirmation of flexibility.
Perform pressure tests after significant temperature cycles or mechanical exposure.
Document findings, repair minor faults with heat re-forming or replace compromised sections, and schedule follow-up intervals based on usage and environmental stressors.
Quick Reference Cheat Sheet
A concise cheat sheet summarizes minimum bend radii by PEX diameter and type for quick on-site reference.
It lists recommended tools by task—hand benders, spring supports, or formers—and indicates when each is appropriate.
A compact troubleshooting flowchart guides users through common bend-related issues and corrective actions.
Minimum Bend Radii by Diameter and Type
Three clear tables summarize minimum bend radii for common PEX sizes and types, showing acceptable curves for PEX-A, PEX-B, and PEX-C across nominal diameters from 1/4″ to 1-1/4″. Practical minimums vary by material flexibility; tighter radii suit PEX-A, while PEX-B/C require larger curves. Use these baseline guidelines:
| Nominal size | Min bend radius |
|---|---|
| 1/4″ | 1″ |
| 3/8″ | 1.5″ |
| 1/2″ | 2″ |
| 3/4″ | 3″ |
| 1″ | 4″ |
Tool Selection Guide
Several essential tools streamline bending PEX without risking kinks: a heat gun or thermostatic PEX heater for stiff tubing, plastic or wooden bending springs for tight radii, wide-radius bending shoes for smoother curves, and cushioned clamps or pads to protect fittings during formation.
- Heat gun or PEX heater
- Bending springs (plastic/wood)
- Wide-radius bending shoes
- Cushioned clamps/pads
Troubleshooting Flowchart for Bend-Related Issues
Start by consulting the flowchart to quickly isolate common causes of restricted flow after bending PEX—kinking, crushes near fittings, overly tight radii, or residual memory in cold tubing.
Follow decision nodes: inspect visually, feel for soft spots, measure bend radius, test flow.
Apply corrective actions: re-bend with proper spring, replace damaged section, heat gently to relax memory, or add support sleeve.
Conclusion
Proper bending technique prevents costly failures: studies show flexible PEX endures over 50% fewer joint leaks when installed without kinks. Following recommended bends, using support tools, and warming the tube when necessary preserves pipe integrity and flow. Professionals who apply these tips extend system lifespan, reduce callbacks, and maintain warranty compliance. Inspecting bends and testing pressure post-installation guarantees durability, safety, and dependable performance for years of trouble-free service.