How to Check a Sump Pump Discharge Line: Step-by-Step Inspection & Troubleshooting Guide
To effectively check your sump pump discharge line, follow these steps:
- Shut Off Power: Begin by turning off the power to the sump pump.
- Monitor Pump Cycles: Observe the pump’s operation, listening for any sputtering or stalling sounds.
- Visual Inspection: Check both rigid and flexible pipes, fittings, and the discharge outlet for leaks, corrosion, or frost buildup. Ensure the discharge line has the proper slope and is adequately supported.
- Controlled Flow Test: Conduct a flow test to identify any clogs and confirm that the check valve is preventing backflow.
- Maintenance: If you find any damaged fittings, tighten or replace them. Clear any obstructions and insulate exposed sections of the discharge line.
Following these steps will help you maintain and troubleshoot your sump pump discharge line effectively.
How a Sump Pump Discharge Line Works
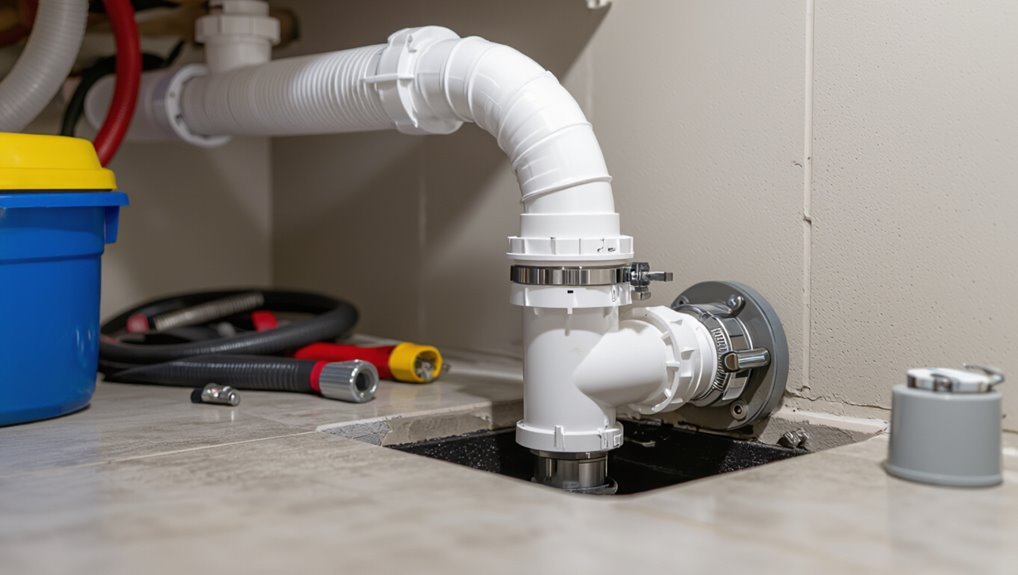
A sump pump discharge line carries water away from the basement to prevent flooding and protect the foundation.
It typically consists of the pump itself, a check valve to prevent backflow, and discharge piping with extensions and fittings to route water to a safe outlet.
Common materials include PVC, flexible hose, and sometimes metal, arranged in straight runs or with elbows and unions depending on site needs.
Purpose of the discharge line in a basement waterproofing system
Sump pump discharge lines channel groundwater and roof runoff away from a home’s foundation to prevent basement flooding and reduce hydrostatic pressure against foundation walls.
The discharge line’s purpose in a basement waterproofing system is to convey expelled water to a safe outlet, minimizing seepage, soil saturation, and foundation stress.
Regular inspections—how to check sump pump discharge line—ensure reliable drainage and protect the structure.
Common components: pump, check valve, discharge pipe, extensions, fittings
Effective operation of a basement drainage system depends on several key components working together: the pump that moves water, a check valve that prevents backflow, rigid or flexible discharge piping, extensions that route water away from the foundation, and fittings that join and redirect the line.
Each component’s condition influences flow, seals, and alignment; routine inspection targets leaks, secure connections, valve function, and proper extension placement to guarantee reliable discharge.
Typical materials and configurations
Materials for discharge lines typically include PVC, ABS, polyethylene, metal pipe, and flexible hose, each chosen for durability, freeze resistance, and ease of installation.
Common configurations use rigid pipe from pump to check valve, then flexible or buried segments to daylight or storm drain.
Slope, supports, unions, and protective insulation prevent backups, freezing, and joint stress, ensuring reliable discharge.
Quick Checklist: Signs Your Discharge Line Needs Inspection
Visible cracks, standing water near outlet fittings, or crushed and misaligned piping are clear visual indicators that the discharge line may be compromised.
Performance signs such as frequent pump cycling, a continually rising pit, or the pump running longer than normal can indicate a blockage or restricted flow.
Increased issues after heavy rain or during seasonal thaws warrant immediate inspection to prevent basement flooding.
Visual indicators of failure or blockage
Several clear signs indicate a sump pump discharge line may be failing or blocked.
Visible water pooling near the exit, damp or discolored siding, frost accumulation on the pipe in cold weather, sagging or crushed sections, and loose or missing clamps signal issues.
Debris or plant growth around the outlet, unusual odors, and wet soil along the run also warrant immediate inspection.
Performance indicators from the sump pit and pump cycling
Monitor the sump pit and pump cycling for clear performance cues that point to discharge line problems.
Rapid short cycles, unusually long run times, or continuous operation suggest restricted flow or partial blockage.
Rising water between cycles, audible strain or sputtering, and inconsistent float movement also indicate discharge issues.
Note elapsed runtime and cycle frequency to prioritize inspection and corrective action.
Seasonal or weather-triggered warning signs
When seasonal shifts or extreme weather arrive, homeowners can expect specific, recurring signs that the sump pump discharge line may need attention.
Observable clues include pooling or soggy soil near the discharge exit, reduced or blocked outflow during storms, unusual odors indicating stagnant water, intermittent icing in cold weather, and louder-than-normal pump cycling.
Timely inspection prevents backups and erosion.
Safety Precautions Before You Inspect
Before inspecting a sump pump discharge line, the technician should cut power to the pump and confirm circuits are de-energized to prevent electrical shock.
They should wear appropriate PPE and use a stable ladder with proper footing when accessing outdoor or basement discharge points.
If wiring issues, major clogs, or structural concerns are present, a licensed professional should be contacted rather than attempting a DIY fix.
Electrical safety and turning off power
Any inspection of a sump pump discharge line should begin with ensuring the electrical supply is safely isolated.
The inspector locates the pump circuit breaker or disconnect, switches it off, and verifies de-energization with a non-contact voltage tester or multimeter.
Lockout/tagout procedures are applied if available, and power is only restored after all checks and repairs are complete and tools are removed.
Personal protective equipment and safe ladder use
Donning appropriate personal protective equipment (PPE) and using ladders correctly reduce the risk of injury during a sump pump discharge line inspection.
Inspectors should wear safety glasses, gloves, sturdy footwear, and a mask if mold or debris is present.
Use a stable, rated ladder placed on level ground, maintain three points of contact, avoid overreaching, and have a second person nearby for support.
When to call a professional instead of DIY
Recognize situations that exceed routine maintenance and call a licensed plumber or licensed sump pump specialist when problems involve electrical faults, persistent flooding, sewage backflow, damaged or buried discharge lines, or complex backups that could compromise structural or health safety.
A professional is also warranted for inaccessible piping, repeated failures after DIY fixes, permit‑required repairs, or when diagnostic tools and secure shutoffs are needed to prevent injury or further damage.
Tools and Materials Needed for Inspection and Troubleshooting
A concise set of tools and spare parts streamlines inspection and troubleshooting of a sump pump discharge line.
The list below separates essentials, optional diagnostics, and commonly kept replacement parts to guide preparation. Having these items on hand reduces downtime and helps identify failures quickly.
- Basic visual and functional tools (flashlight, pliers, adjustable wrench, hose clamps)
- Optional diagnostic tools (multimeter, tubing snake, pressure gauge)
- Common replacement parts to keep ready (check valve, hose sections, gaskets)
- Safety and cleanup items (gloves, safety glasses, absorbent rags)
Essential tools for visual and functional checks
Several basic tools and a few specialty items are required to carry out effective visual and functional checks of a sump pump discharge line.
Essential items include a flashlight, adjustable wrench, pliers, screwdriver set, tape measure, bucket, and work gloves.
Also recommended are a hose clamp kit, pipe wrench or strap wrench for PVC, Teflon tape, and safety glasses for routine inspection and minor adjustments.
Optional tools for deeper diagnostics
For more thorough diagnostics beyond routine checks, the inspector may employ specialized tools that reveal hidden issues in a sump pump discharge system.
Useful items include a digital multimeter for electrical testing, an inline flow meter to quantify discharge rates, a waterproof borescope for internal pipe inspection, a pressure gauge to detect blockages, and a clamp ammeter to monitor motor current draw for intermittent faults.
Replacement parts commonly kept on hand
Many inspectors keep a small kit of commonly needed replacement parts to expedite repairs and prevent downtime. Kits typically include spare check valves, hose clamps, rubber couplings, PVC pipe segments and fittings, threaded adapters, Teflon tape, and gaskets.
Also useful are a spare discharge hose, inline strainer, and electrical connectors. Keeping labeled parts reduces service time and guarantees reliable, swift field repairs.
Step-by-Step Inspection of the Discharge Line
A systematic walk-through guarantees the discharge line functions and directs water away from the foundation. The inspector listens for unusual sounds at the pump, checks the outlet and check valve, and follows the piping for visible faults.
Finally, above-ground runs, slopes, and the external termination are verified for proper drainage.
- Observe pump operation and listen for abnormal noises
- Inspect the discharge outlet at the pump and check valve area
- Trace the discharge pipe for visible damage, kinks, or loose fittings
- Examine above-ground sections, slopes, extensions, and the external discharge termination
Step 1 Observe pump operation and listen for abnormal noises
Begin by standing near the sump pit and observing the pump as it cycles, noting whether it starts smoothly and runs without sputtering or stalling.
Listen for grinding, rattling, or high-pitched whining that indicates bearing or impeller issues.
Note irregular on/off timing, prolonged runs, or frequent cycling.
Record audible patterns and timing for further diagnosis or professional service.
Step 2 Inspect the discharge outlet at the pump and check valve area
Move close to the sump pump and visually examine the discharge outlet and check valve for leaks, corrosion, loose fittings, or misalignment.
Note any wetness, rust, or mineral buildup and tighten fittings if accessible.
Confirm the check valve orientation and body integrity; listen for backflow when the pump stops.
Photograph issues for records and plan repairs or replacement as needed.
Step 3 Trace the discharge pipe for visible damage, kinks, or loose fittings
With the outlet and check valve inspected, attention shifts along the discharge pipe to spot visible damage, kinks, or loose connections that can restrict flow or cause leaks.
The inspector follows the line from basement to nearby walls, feeling for soft spots, indentations, or misaligned joints.
Any cracked, crushed, or unsecured sections are noted for repair or replacement to restore reliable drainage.
Step 4 Examine above-ground sections, slopes, and extensions to the exterior
Next, the inspector evaluates all above-ground discharge sections, checking that pipes maintain a continuous downhill slope, are securely fastened, and have unobstructed extensions to the exterior.
He verifies joints for leaks, confirms slope prevents standing water, inspects hangers and clamps for corrosion or looseness, and guarantees temporary or permanent extensions are routed safely away from foundations without creating trip hazards or backflow opportunities.
Step 5 Inspect the external discharge termination and splash block or drainage system
Inspecting the external discharge termination and its splash block or connected drainage system focuses on ensuring that water is expelled safely away from the foundation and directed into an appropriate outlet.
Inspect for cracks, displacement, sediment buildup, and proper slope. Confirm the termination is above grade, secured, and not directed toward neighbors or walkways.
Verify connected pipes or swales route water to a storm drain or safe dispersal area.
Step 6 Test for flow and check for obstructions using water or hose flushing
Begin by running a controlled flow test: introduce water at the pump or upstream access point and observe the discharge line for steady, unobstructed flow.
Note weak spots, sputtering, or surges indicating partial blockages.
Flush the line with a garden hose if accessible, then inspect downstream outlets for debris ejection.
Repeat until flow is consistent; document locations needing repair or professional cleaning.
Step 7 Check for frozen or ice-blocked sections in cold weather
During cold weather, the discharge line should be checked for frozen or ice-blocked sections that can stop flow and risk pump overload.
Inspect exposed pipe for frost, bulging, or cracking. Trace the line to low spots where water can settle and freeze.
Gently tap suspicious sections to listen for ice. If blocked, thaw with warm water, a heat gun on low, or reroute/insulate the line.
How to Troubleshoot Common Problems
The troubleshooting section outlines how to identify and clear clogs, recognize check valve failures and test or replace them, and locate and repair leaks or loose fittings.
It also covers temporary fixes and long-term solutions for frozen discharge lines and how to address undersized or improperly routed piping that impedes drainage.
Practical, safety-minded steps and diagnostics are provided to guide effective repairs.
Clogs and blockages identification and safe clearing methods
Several common signs point to a clogged sump pump discharge line: reduced or no outflow when the pump runs, sputtering or intermittent discharge, water pooling near the foundation, and unusual pump cycling.
Inspect visible piping, joints, and exterior outlet for debris, ice, or sediment.
Clear soft blockages with a garden hose; use a plumber’s snake or remove and flush hard obstructions.
Wear gloves and eye protection.
Check valve failures symptoms, testing, and replacement guidance
If a check valve fails, backflow and rapid cycling often follow, causing water to return to the sump pit and forcing the pump to run more frequently.
Symptoms include constant pump runs, unusual noises, and visible discharge reversal.
Test by observing flow when pump stops or by briefly lifting the valve to check one-way action.
Replace with correct-size, pressure-rated valve, securing proper orientation and tight seals.
Leaks and loose fittings locating and repairing joints
A failed check valve often reveals itself first by movement of water through fittings, so attention quickly shifts to finding leaks and loose joints along the discharge line.
Inspect all connections, unions, and slip fittings for moisture, corrosion, or movement.
Tighten clamps or threaded couplings, replace damaged washers or seals, and apply appropriate PVC primer and solvent or plumber’s tape to guarantee watertight joints.
Freezing of discharge line temporary fixes and long-term solutions
Addressing a frozen discharge line begins by recognizing the signs—reduced or stopped flow, ice bulges along the pipe, or frost on fittings—and distinguishing temporary workarounds from permanent corrections.
Temporary fixes include applying warm water, using a hair dryer carefully, or insulating exposed sections.
Long-term solutions involve adding heat tape, increasing insulation, rerouting below frost line, and installing a larger slope or buried outlet to prevent recurrent freezing.
Undersized or improperly routed discharge causing poor drainage
Several common performance issues stem from discharge lines that are too small in diameter or routed with excessive bends and low slopes, which restrict flow and allow solids or debris to collect.
Inspect for kinks, sharp elbows, and insufficient slope. Upgrade to recommended diameter, straighten runs, add cleanouts, and guarantee a downhill grade.
Verify pump capacity matches piping to prevent backups and premature wear.
When to Repair vs Replace the Discharge Line
Assessment should consider the discharge line’s age, visible material degradation, and frequency of past failures to determine whether spot repairs are viable.
Comparing the cost and complexity of patching sections, replacing fittings, or installing a new line helps weigh short-term fixes against long-term reliability.
Persistent leaks, extensive corrosion, or structural damage that affects function are situations that typically warrant professional replacement.
Assessing age, material degradation, and repeated failures
Evaluate the discharge line’s service life and visible wear to decide whether repair or replacement is warranted.
Inspect for cracks, brittleness, corrosion, UV damage, and joint failures.
Note frequency of past repairs and recurring leak locations.
If degradation is widespread, material integrity is compromised, or failures recur despite fixes, replacement is prudent; isolated, repairable defects may justify targeted repairs.
Cost and complexity comparison of repairs versus full replacement
Compare costs and complexity by weighing upfront expenses, labor time, and long-term reliability: targeted repairs often cost less and are quicker when damage is localized and materials remain sound, whereas full replacement carries higher immediate cost and effort but reduces future failure risk and may be more cost-effective over the pump’s remaining service life.
Consider pipe accessibility, part availability, and warranty implications when deciding.
Situations that warrant professional replacement
After weighing repair versus replacement costs and complexities, certain conditions clearly justify calling a professional to replace a sump pump discharge line.
Extensive corrosion, multiple or recurrent leaks, irreparable clogs, collapsed or crushed piping, improper slope or routing, persistent freezing despite insulation, and visible foundation or landscaping damage indicate replacement.
Professionals guarantee correct materials, permits, trenching, and reliable long-term performance.
Upgrades and Preventive Improvements
Upgrading a discharge line can improve flow and reduce freeze risk by using larger-diameter or insulated piping and choosing routing that keeps water moving away from vulnerable areas.
Proper hardware—such as a reliable check valve plus a union or removable coupling—simplifies maintenance and prevents backflow.
Adding secondary safeguards like a battery backup pump and a high-water alarm provides extra protection against failures.
Using larger-diameter or insulated piping
Piping size and insulation are straightforward upgrades that can improve a sump pump system’s flow capacity and freeze resistance.
Increasing diameter reduces friction loss, easing pump workload and lowering clog risk.
Insulating or heat-tracing exposed discharge runs prevents freezing in cold climates.
Both changes require ensuring fittings, supports, and slope remain correct and compatible with the pump’s performance curve.
Installing a proper check valve, union, or removable coupling
Install a reliable check valve, union, or removable coupling to prevent backflow, simplify maintenance, and protect the pump from short-cycling.
Choose a spring or swing check rated for sump service and compatible pipe size. Fit a union or removable coupling near the pump for quick disconnection.
Guarantee proper orientation, secure threaded or glued joints, and test operation after installation to confirm one-way flow.
Routing options to reduce freezing and backflow risk
After fitting a check valve and quick-disconnect near the pump, attention should shift to how the discharge pipe is routed to minimize freezing and backflow risks.
Route pipe above frost line where possible, maintain continuous slope away from foundation, avoid low spots that trap water, insulate exposed sections, and terminate discharge beyond splash distance with a screened outlet.
Use rigid piping for durability.
Adding secondary safeguards: backup pumps and alarm systems
Consider adding secondary safeguards such as a battery-backed or water-powered backup pump and a high-water alarm to protect against primary pump failure or power loss.
Backup pumps activate automatically when the main pump or power fails; battery capacity and recharge rate should match expected outage duration.
Alarms provide early warning for rising water.
Regular testing and maintenance guarantee reliability and extend system life.
Seasonal Maintenance Schedule and Checklist
A seasonal maintenance schedule helps guarantee the sump pump discharge line remains clear and functional throughout the year.
It should specify spring and fall full inspections, winterizing steps to prevent freezing, and actions to take after storms. A concise checklist reduces response time and limits flood risk.
- Spring and fall: inspect fittings, check valve operation, clear debris from outlet
- Winterize: insulate exposed pipe, use heat tape or drain-back methods to prevent freezing
- After storms: inspect outlet and surrounding grading, remove blockages and check pump cycling
- Emergency actions: have backup power, shutoff procedures, and a professional contact list ready
Spring and fall full inspections
When seasonal temperature shifts arrive, homeowners should perform full spring and fall inspections to verify the sump pump system functions reliably through wetter months.
This scheduled check consolidates visual, mechanical, and electrical reviews—including basin cleaning, float and switch operation, discharge line integrity, and backup power readiness—into a concise checklist that reduces the risk of unexpected failures.
Inspect fittings, clear blockages, test cycling, confirm check valve function, verify discharge routing, and replace worn components promptly.
Winterizing steps to prevent freezing
Because cold weather can rapidly freeze exposed piping and incapacitate a sump pump just when runoff increases, homeowners should follow a focused winterizing checklist to prevent discharge-line freezeups.
Insulate exterior and aboveground discharge lines with foam sleeves and heat tape, slope lines for drainage, install a removable extension to discharge farther from the foundation, clear debris, and periodically run the pump during cold snaps to verify flow.
After-storm checks and emergency response actions
Inspect the discharge line and surrounding area promptly after any significant storm to confirm the pump is functioning and to identify damage or blockages that could cause immediate backup.
Check for debris, displaced hose, frozen or crushed sections, and pooling near the foundation.
Test pump operation, clear obstructions, secure loose fittings, and relocate redirected runoff.
If failure or damage exists, initiate repairs or a professional emergency service.
Cost Estimates and Typical Parts to Budget For
Typical DIY parts for a sump pump discharge line commonly include PVC pipe, couplings, and clamps, with single-item costs often ranging from a few dollars to under $50, while professional service fees for inspection or repairs can start around $100 and rise considerably for complex work. Expected lifespans vary by material—PVC and ABS often last 10–30 years if installed properly, whereas flexible hoses and rubber seals may need replacement every 3–7 years. The following table summarizes typical part costs, service fee ranges, and lifespan expectations to aid budgeting.
| Item/Service | Typical DIY Cost | Expected Lifespan |
|---|---|---|
| PVC pipe (per 10 ft) | $10–$40 | 10–30 years |
| Couplings/clamps | $2–$15 | 5–30 years |
| Flexible hose/accordion pipe | $15–$60 | 3–7 years |
| Inspection/professional visit | $100–$300+ | N/A |
Typical DIY part costs versus professional service fees
A handful of common parts and service scenarios account for most sump pump discharge line repairs and replacements, so understanding their typical price ranges helps homeowners decide between DIY and hiring a pro.
DIY parts:
- PVC pipe sections $5–$25
- fittings $2–$15
- clamps $1–$10
- check valves $15–$60.
Professional service fees:
- $75–$300 for troubleshooting
- $200–$800 for replacements.
Lifespan expectations for common materials
After outlining parts and service costs, homeowners should consider how long common discharge line materials are likely to last so budgeting covers both immediate repairs and eventual replacement.
PVC and polyethylene often last 20–50 years if UV exposure and freezing are minimized.
Flexible corrugated hoses degrade faster, typically 5–15 years.
Metal fittings and clamps can corrode within 5–25 years depending on environment; plan accordingly.
Troubleshooting Scenarios and Quick Fix Guides
A concise troubleshooting section follows, outlining common discharge-line problems, likely causes, and quick remedies to restore proper flow.
It presents stepwise checks for a pump that runs without ejecting water, containment fixes for pooling at the outlet, and actions for intermittent flow or gurgling noises.
The guidance emphasizes simple diagnostics and safety-conscious quick fixes before calling a professional.
- Stepwise diagnosis for “pump runs but no discharge” including check valves, clogs, and impeller function
- Containment and grading fixes for water pooling at the discharge outlet
- Root causes and remedies for intermittent flow or gurgling noises (airlocks, partial blockages)
- When to stop and contact a licensed plumber or electrician
Scenario: Pump runs but no discharge stepwise diagnosis
When the sump pump motor runs but no water exits the discharge line, the situation calls for a systematic, step-by-step diagnostic approach to isolate mechanical, plumbing, and electrical causes.
Inspect the check valve for blockage or failure, verify impeller rotation and debris-clogged inlet, confirm discharge pipe for clogs or collapsed sections, guarantee proper priming and elevation, and test float/switch and electrical supply continuity.
Scenario: Water pooling near discharge outlet containment fixes
Several common causes can produce water pooling near a sump pump’s discharge outlet, and diagnosing the issue requires inspecting the discharge piping, outlet grading, and nearby containment features for blockages, backflow, or improper slope.
Check for clogged or crushed pipe, frozen sections, missing or damaged check valve, and soil compaction or low spots.
Correct slope, clear obstructions, repair fittings, and extend outlet to drain away.
Scenario: Intermittent flow or gurgling noises root causes and remedies
Investigate intermittent flow or gurgling noises by isolating common culprits in the discharge line and pump assembly; these sounds typically signal air entrainment, partial blockages, a failing or misinstalled check valve, or venting issues that allow suction and release cycles to occur.
Inspect and clear debris, guarantee downward pipe pitch, verify check valve orientation and tight seal, replace damaged valve, and test for trapped air by running pump and observing steady discharge.
Resources for Further Help
For complex failures, recurring backups, or any electrical or plumbing work beyond basic checks, a licensed plumber or sump pump specialist should be contacted.
Replacement parts and reputable installers can be located through manufacturer websites, local trade directories, and verified review platforms.
Trusted online guides, instructional videos, and local building code references provide step-by-step help and guarantee repairs meet safety and compliance standards.
When to contact a licensed plumber or sump pump specialist
Recognize situations that exceed routine maintenance and diagnostic steps and prompt professional intervention; persistent clogging, frequent short cycling, unusual noises, electrical faults, visible leaks in the discharge line, or failure to activate during high water events are all signs to contact a licensed plumber or sump pump specialist.
Professionals should handle complex wiring, damaged check valves, collapsed pipe sections, recurring backups, or cases requiring system replacement or warranty-covered repairs.
Where to find replacement parts and reliable installers
Locate replacement parts and reliable installers through a mix of manufacturer resources, local plumbing suppliers, and vetted service directories.
Manufacturers provide model-specific parts and authorized-service lists. Independent suppliers and hardware stores stock common fittings, PVC, and check valves.
Use licensed plumbing contractors with positive reviews and verifiable insurance for installations. Confirm part numbers, warranties, and installer credentials before purchase or scheduling.
Useful online guides, videos, and code references
Reliable online resources can guide homeowners through sump pump discharge line inspection, repair, and code compliance with step-by-step articles, demonstration videos, and official code references.
Trusted sources include manufacturer manuals, municipal plumbing codes, DIY channels, and industry associations; each offers procedures, safety tips, and code interpretations to support safe, compliant repairs.
- Manufacturer installation and troubleshooting guides
- Local building and plumbing code websites
- Instructional video tutorials from licensed plumbers
- Industry association standards and white papers
Conclusion
Regular inspection and prompt repair keep a sump pump discharge line functioning reliably, preventing basement flooding and costly damage. Could a kinked hose, frozen section, or clogged outlet be the small problem that saves a homeowner from a major headache? Following the checklist, safety steps, and seasonal maintenance minimizes surprises; budgeting for common parts and recognizing troubleshooting signs empowers timely fixes. When in doubt, consult a professional to guarantee proper, lasting performance.