How to Install an Anti-Siphon Valve: Step-by-Step Guide for Homeowners
To install an anti-siphon valve, follow these steps to ensure safe and effective operation. An anti-siphon valve prevents contaminated water from backflowing into your home’s drinking supply. Start by gathering the necessary tools, then shut off and depressurize the water line. Confirm the valve’s orientation and ensure it’s compatible with your pipes. Attach the valve using appropriate seals or solder, and secure the fittings according to the manufacturer’s torque specifications. After gradually re-pressurizing the system, check for leaks and cycle the valve to ensure it’s functioning correctly. For further details on each step, troubleshooting, and maintenance tips, continue reading.
What an Anti-Siphon Valve Is and Why It Matters
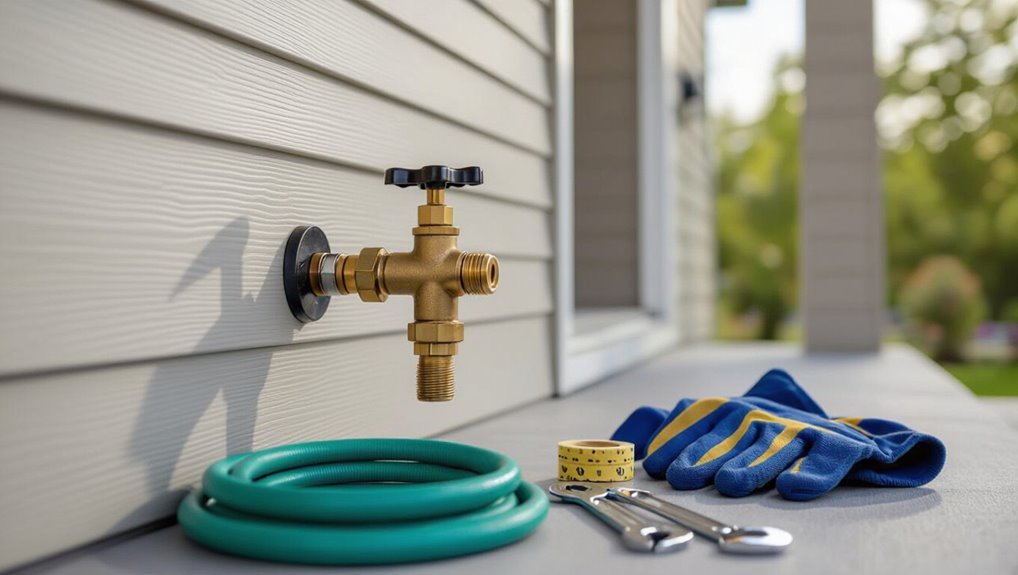
An anti-siphon valve is a device that prevents water from being drawn backward into the supply line by introducing an atmospheric break or automatic shutoff when negative pressure occurs.
It is commonly used on residential irrigation systems, outdoor hose bibs, and other plumbing fixtures to protect potable water.
Without an anti-siphon valve, backflow or contamination from chemicals, fertilizers, or wastewater can enter the household supply, creating health and safety hazards.
Definition and basic function of an anti-siphon valve
A device that prevents backflow, the anti-siphon valve keeps irrigation and outdoor plumbing systems from drawing contaminated water back into the household supply.
It uses atmospheric venting and a one-way mechanism to break siphon conditions, maintaining potable water safety.
Clear understanding of how to install anti siphon valve aids correct placement, secure seals, and reliable operation to prevent contamination.
Common applications in residential plumbing and irrigation
Many residential plumbing and irrigation systems rely on anti-siphon valves to prevent contaminated water from being drawn back into the potable supply.
They are commonly installed on outdoor hose bibs, lawn sprinkler mains, drip irrigation lines, and pool fill connections.
They protect irrigation controllers, garden hose attachments, and evaporative coolers, ensuring one-way flow and simplifying maintenance while meeting many local plumbing codes.
Risks of not using an anti-siphon valve (contamination, backflow)
Failing to install an anti-siphon valve allows contaminated water to be drawn backward into the potable supply during pressure drops, creating a serious public-health and property-risk hazard.
Without protection, pesticides, fertilizers, and stagnant irrigation water can contaminate household plumbing.
Backflow incidents may cause illness, costly pipe and appliance damage, regulatory fines, and loss of municipal water trust.
Prevention is straightforward and essential.
Tools, Materials, and Safety Precautions Needed
Before beginning, a clear list of required tools—wrenches, pipe cutters, thread seal tape, and a screwdriver—should be assembled.
The installer should confirm the correct anti-siphon valve type, necessary fittings, and sealants are on hand.
Appropriate safety gear and shutdown procedures, including turning off water supply and relieving system pressure, must be followed.
Required tools list
A concise list of tools, materials, and safety gear guarantees the anti-siphon valve can be installed correctly and safely.
The homeowner should prepare basic hand tools and safety equipment, ensuring efficiency and reduced risk during installation.
- Adjustable wrench
- Pipe cutter or hacksaw
- Teflon tape/pipe sealant (small roll)
- Screwdriver set
- Safety gloves and goggles
Materials and parts checklist (valve types, fittings, sealants)
Materials and parts must be selected to match the plumbing system and local code, ensuring a secure, leak-free anti-siphon installation.
The homeowner should gather appropriate components before starting.
- Anti-siphon valve (model rated for system pressure)
- Compatible fittings and adapters (brass, PVC, or CPVC)
- Thread seal tape and pipe dope
- Hose clamps and mounting hardware
- Replacement washers and check-valve cartridges
Safety gear and shutdown procedures before starting
Wear appropriate personal protective equipment—safety glasses, work gloves, and closed-toe shoes—and have basic tools nearby (adjustable wrench, pliers, pipe cutter, bucket, and rags) before proceeding.
Shut off main water supply and relieve line pressure. Verify electrical isolation if nearby. Confirm drainage path and use signage to warn others.
- Turn off water
- Open downstream faucets
- Drain remaining water
- Lockout/tagout if needed
- Wear PPE
Choosing the Right Anti-Siphon Valve for Your Home
Selecting an appropriate anti-siphon valve requires understanding the different types available and the typical applications for each.
Proper sizing must match the household water pressure and pipe diameter to guarantee reliable operation.
Compliance with local codes, permits, and any required certifications should be confirmed before purchase and installation.
Types of anti-siphon valves and where each is used
When choosing an anti-siphon valve for a home irrigation or plumbing system, homeowners should consider the common types—atmospheric vacuum breakers, pressure vacuum breakers, hose bib vacuum breakers, and reduced pressure zone (RPZ) assemblies—and the specific applications and limitations of each. Each type suits different backflow risks, installation locations, and maintenance needs.
| Type | Typical Use |
|---|---|
| Atmospheric VB | Lawn sprinklers, low-risk |
| Pressure VB | Irrigation lines, higher pressure |
| Hose bib VB | Outdoor faucets |
| RPZ | High hazard commercial-like situations |
Sizing the valve for water pressure and pipe diameter
Proper sizing of an anti-siphon valve requires matching the device’s flow capacity and pressure rating to the home’s supply pressure and pipe diameter to guarantee reliable operation without excessive pressure drop.
The installer measures static and dynamic pressure, notes pipe size and expected peak flow, then selects a valve with compatible inlet/outlet diameter and Cv (flow coefficient) to minimize turbulence and maintain system performance.
Local codes, permits, and required certifications
Because anti-siphon valves affect potable water safety and often intersect with municipal systems, homeowners must verify local plumbing codes, permit requirements, and any installer certification mandates before purchase or installation.
Research jurisdictional standards, approved valve models, and backflow prevention rules.
Obtain permits when required and hire licensed plumbers or certified backflow testers to guarantee compliance, inspections, and documentation for inspections or future property transfers.
Step-by-Step Installation Guide
The installation process begins with preparing the work area, shutting off the water supply, and draining the line to relieve pressure.
Next, any existing fittings are removed or a new pipe section is readied and the anti-siphon valve is positioned with correct orientation.
Finally, the valve is connected to the pipe using the appropriate method—threaded, soldered, or compression—followed by a pressure check.
Prepare the work area and shut off water supply
Clear the immediate area around the fixture and gather tools to secure an efficient, hazard-free start.
The installer locates and clearly labels the appropriate shutoff valve, notifies household members, and prepares a bucket and towels.
Power to nearby electrical devices is considered. Adequate lighting and stable footing are guaranteed.
Confirming the correct valve prevents unnecessary shutdowns and streamlines the procedure.
Drain the line and relieve pressure
With the supply shut off and tools staged, the installer moves on to draining the line and relieving residual pressure to prevent spray or water damage.
The installer opens downstream faucets and any bleed valves, allowing water to exit until flow ceases. A bucket and rag catch drips.
Pressure is verified by gently opening a test port; no forced fittings are loosened during this step.
Remove existing fittings or prepare new pipe section
Begin by evaluating the existing assembly to determine whether fittings must be removed or a new pipe segment prepared.
If removing fittings, loosen and extract couplings, unions, or adapters keeping threads and seals clean.
When preparing a new section, measure and cut straight, deburr, and dry-fit pieces.
Confirm pipe material and diameter match the valve specifications before proceeding to final connections.
Positioning and orientation of the anti-siphon valve
One should verify the valve’s orientation and mounting location before making any connections, ensuring the anti-siphon device will sit upright and level, with the vent port exposed to air and above the highest downstream outlet.
Position the unit where it is accessible for inspection and protected from physical damage and freezing.
Maintain recommended clearance around the vent and align inlet/outlet directions per manufacturer markings.
Connecting the valve to pipe (threaded, soldered, or compression)
Carefully connect the anti-siphon valve to the chosen pipe type, following the manufacturer’s instructions and local plumbing codes.
For threaded joints, align threads and tighten to recommended torque. For soldered copper, clean, flux, and heat evenly before soldering. For compression fittings, insert tubing fully and tighten nut to specified turns.
Verify alignment and check for proper valve orientation.
Sealing joints, applying tape/compound, and securing fittings
Prepare to seal and secure all joints to guarantee a leak-free installation by selecting the correct sealing material for the connection type—PTFE (Teflon) tape or pipe dope for threaded fittings, solder for copper sweat joints, and the manufacturer-specified sealant or ferrules for compression fittings.
Follow torque and curing recommendations to avoid overtightening or under-sealing. Wrap tape clockwise, apply compound sparingly, tighten to spec, and inspect fittings for proper alignment and full engagement.
Reopen water, check for leaks, and test valve operation
With the supply shutoff still accessible, gradually restore water to the line and observe the installation for immediate leaks and proper pilot flow.
Inspect all joints and fittings for drips, tighten as needed.
Cycle the anti-siphon valve several times to confirm smooth operation and correct pressure.
Monitor for slow leaks over ten minutes, then recheck connections and document any adjustments before finalizing.
Testing and Verifying Proper Operation
The installer performs simple functional checks to confirm the anti-siphon mechanism closes and prevents backflow under typical conditions.
Pressure and leak testing are then carried out to verify system integrity and correct sealing at joints.
Any signs of faulty installation—persistent leaks, failure to hold pressure, or erratic valve action—are identified and corrected immediately.
Simple functional tests to confirm anti-siphon action
Begin by observing the valve during normal operation and controlled conditions to confirm it prevents backflow: Run water, note steady flow and audible venting when downstream pressure drops.
Close downstream fixtures to create brief suction; the anti-siphon should admit air, stopping reverse flow.
Repeat at varying flow rates and orientations. Document consistent venting and absence of contaminant ingress as proof of function.
Pressure and leak testing procedures
Perform pressure and leak testing systematically to verify the anti-siphon valve maintains integrity under expected operating pressures and does not allow leakage or reverse flow.
Isolate the valve, pressurize to working and slightly above working pressure, monitor for pressure decay.
Inspect all joints, fittings, and the valve body for visible leaks.
Cycle multiple times, document readings, and confirm stable pressure before returning to service.
Signs of a faulty installation and immediate fixes
Following successful pressure and leak testing, attention shifts to recognizing indicators of a faulty installation so corrective action can be taken immediately.
Common signs include persistent dripping, loss of downstream pressure, sputtering sprinkler heads, and visible air in lines.
Immediate fixes involve tightening fittings, replacing damaged washers or seals, clearing debris from the valve, and re-testing; consult a professional if problems persist.
Maintenance, Troubleshooting, and Longevity
A clear maintenance plan outlines routine inspection intervals, basic cleaning steps, and seasonal checks to keep the anti-siphon valve functioning.
The section then identifies common problems—such as leaks, clogging, or sticking parts—and provides straightforward troubleshooting actions.
Guidance concludes with criteria for repair versus replacement based on damage, age, and cost-effectiveness.
Routine maintenance schedule and cleaning steps
Establishing a consistent maintenance schedule guarantees the anti-siphon valve remains functional and prevents backflow risks.
Inspections quarterly, gentle cleaning, and annual component checks extend service life.
Recommended steps include:
- Visually inspect for leaks and corrosion
- Flush debris with clean water
- Remove and clean removable screens
- Lubricate moving parts per manufacturer
- Replace worn seals and test operation annually
Common problems and how to troubleshoot them
Diagnose common anti-siphon valve issues by observing symptoms—leaks, reduced flow, constant drips, or failure to close—and correlating them with probable causes such as worn seals, clogged screens, mineral buildup, or damaged diaphragms.
- Inspect seals and O-rings for wear
- Clean or replace clogged inlet screens
- Remove mineral deposits with vinegar soak
- Test diaphragm movement and spring tension
- Verify proper installation and alignment
When to repair vs. when to replace the valve
After checking seals, screens, diaphragms, and installation to pinpoint common faults, determining whether to repair or replace an anti-siphon valve hinges on the severity, frequency, and cost-effectiveness of the fault.
Repair is suitable for isolated, inexpensive issues like debris or worn diaphragms; replacement is advised for repeated failures, corroded bodies, persistent leaks, or when repair costs approach new-valve price.
Cost Estimates and Time Requirements
Typical material costs for an anti-siphon valve installation range from modest DIY purchases to higher-end fittings, with professional labor adding a variable hourly or flat fee.
Installation time can be as little as one hour for an experienced DIYer with the right tools, while a licensed plumber may complete the job faster but adds scheduling and labor time.
The following section compares common price brackets and realistic time estimates for both DIY and professional approaches.
Typical material and labor cost ranges
Budgeting for an anti-siphon valve involves two main components: materials and labor.
Materials typically range from $15 to $80 depending on valve type, fittings, and quality. Basic kits sit lower; backflow-rated or specialty units cost more.
Labor for professional installation usually ranges $75 to $250 per hour or a flat fee of $100–$400, varying by region and complexity.
Estimated time to install for DIY vs. professional
For most homeowners, installing an anti-siphon valve takes between 1 and 3 hours for a straightforward outdoor hose or irrigation connection.
While more complex setups—multiple lines, buried piping, or retrofit to existing systems—can extend to half a day or longer.
A competent DIYer typically needs 1–4 hours; a professional completes routine installs in 1–2 hours, but complex jobs may require half a day or more.
When to Hire a Professional
When installation involves complex plumbing, changes to pressurized lines, or local permit requirements, a licensed plumber should be engaged.
Homeowners should prepare specific questions for contractors, such as licensing, insurance, warranty on work, and experience with anti-siphon valves.
Clear expectations about cost, timeline, and permit responsibility help determine whether to hire a professional.
Situations that require licensed plumbers or permits
Recognize that some anti-siphon valve installations exceed typical DIY scope and should be handled by a licensed plumber or require a permit.
Situations include major alterations to supply lines, work inside utility rooms or near backflow-sensitive systems, projects affecting multiple units or municipal water mains, and installations subject to local plumbing codes.
Complex or inspected jobs warrant licensed professionals and proper permits.
Questions to ask a contractor before hiring
Which questions should a homeowner ask before hiring a contractor to install an anti-siphon valve?
A concise checklist guarantees competence, compliance, and clear expectations.
- Are you licensed and insured for plumbing work here?
- Have you installed anti-siphon valves before?
- Can you provide references or photos of past work?
- Will you obtain necessary permits?
- What is the timeline and warranty for this job?
Practical Tips and Best Practices for Durable Installations
Durable anti-siphon installations require attention to weatherproofing and freeze protection to prevent cracking and malfunction.
They should also include measures to minimize contamination and backflow risks through correct placement, check valves, and routine testing.
Clear labeling and concise records of installation, maintenance, and inspections support compliance and simplify future troubleshooting.
Weatherproofing and protection from freezing
Because outdoor anti-siphon valves are exposed to rain, sun, and freezing temperatures, weatherproofing and freeze protection are essential to maintain function and prevent damage.
Install insulated valve covers, heat tape rated for outdoor plumbing, and weatherproof enclosures. Elevate valves off frozen ground, seal joints with appropriate outdoor-rated sealant, and schedule winterization: drain lines, shut off supply, and test operation before cold spells.
Preventing future contamination and backflow incidents
To minimize the risk of contamination and backflow, installations should combine correct component selection, proper installation techniques, and routine maintenance into a single, documented plan.
Regular inspections, timely replacement of worn parts, pressure testing, and installation of accessible test ports guarantee functionality.
Use certified backflow devices, maintain clear separation from potential contaminants, and educate occupants about shutoff locations and basic response procedures.
Documentation, labeling, and record-keeping for inspections
A clear, consistent system for documentation, labeling, and record-keeping guarantees that inspections and maintenance of anti-siphon valves are traceable and actionable.
Record installation date, model, serial number, installer, and test results.
Label valves with durable tags indicating next inspection due.
Store digital copies of logs, photos, and certificates accessible to homeowners and inspectors.
Retain records per local code and warranty requirements.
Conclusion
Like a neighbor who once left a hose running and returned to a flooded porch, a working anti-siphon valve prevents small mistakes from becoming big problems. Homeowners installing one gain backflow protection that, according to plumbing studies, reduces contamination risk by over 90%. Regular checks and correct installation mean reliable performance and peace of mind. When complexities arise, calling a licensed plumber guarantees safety and code compliance, protecting health and property.