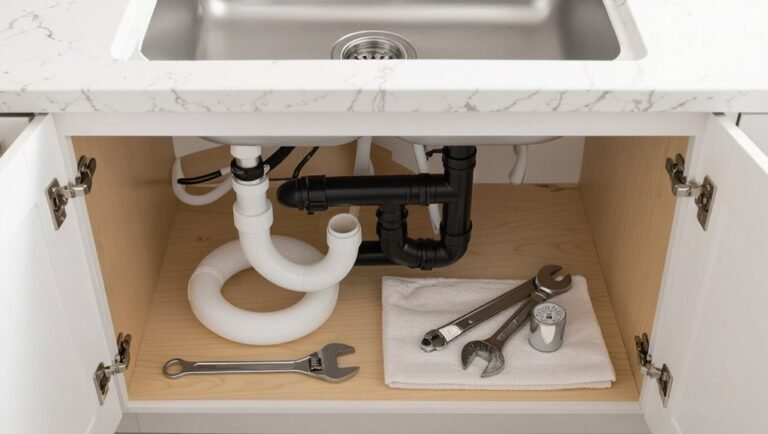
How to Install a Blanco Sink: Step-by-Step Guide for a Professional Finish
To install a Blanco sink professionally, start by selecting the right model and ensuring your cabinet and countertop measurements are accurate. Prepare your tools and turn off the water supply. Use the manufacturer’s template to mark the cutout for the sink. Dry-fit the sink in place, apply the appropriate sealant (for either undermount or drop-in installation), and secure it with clips or clamps evenly. Attach the faucet and any accessories, then reconnect the supply and drain lines, checking for leaks. Finally, ensure the sink is level and allow the sealant to cure for durability. For detailed techniques, troubleshooting, and maintenance tips, continue reading.
Preparing for a Professional Blanco Sink Installation
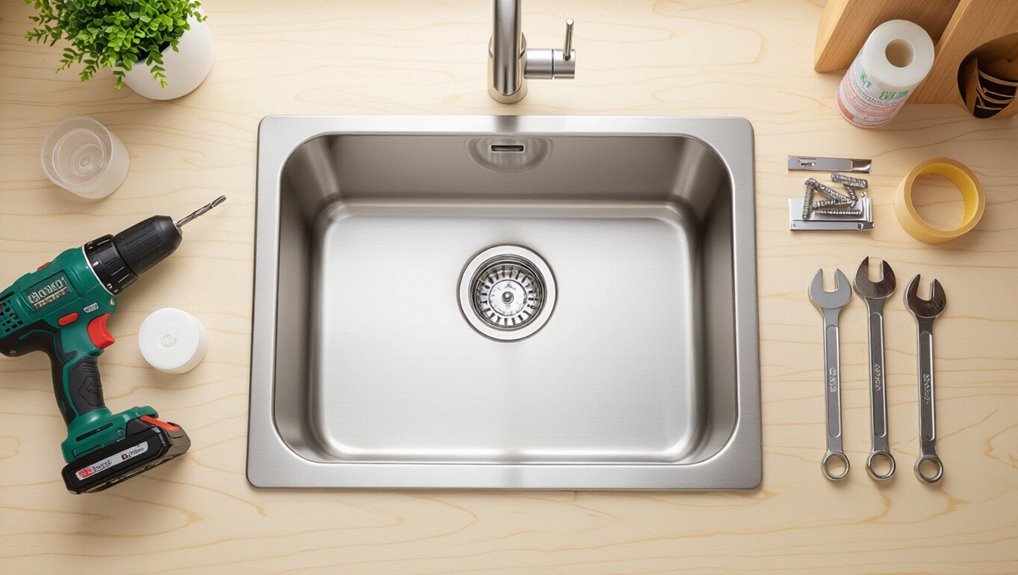
Before beginning a professional Blanco sink installation, the installer assesses model options to match kitchen layout and user needs.
A concise tools and materials checklist is prepared and cabinet and countertop measurements are verified for a precise fit.
Safety precautions and a cleared, well-lit workspace are established prior to any cutting or plumbing work.
Choosing the Right Blanco Sink Model for Your Kitchen
Which Blanco sink model best balances form and function depends on the kitchen’s layout, usage patterns, and aesthetic goals.
Selection considers bowl configuration, material (silgranit vs stainless), mounting style, and sound reduction.
The installer should assess cabinet size, faucet compatibility, and maintenance needs while planning how to install blanco sink.
Prioritize durability, warranty, and coordination with countertop thickness for a professional finish.
Tools and Materials Checklist
A concise, well-organized checklist certifies the professional installation of a Blanco sink proceeds efficiently and safely.
The installer compiles essential tools and materials before work begins to avoid interruptions and guarantee quality results.
- Adjustable wrench, basin wrench, plumber’s putty or silicone sealant
- Tape measure, level, pencil
- Jigsaw or router (for undermount/cutout adjustments)
- Supply lines, drain assembly, mounting hardware
Measuring and Verifying Cabinet and Countertop Compatibility
With tools and materials gathered, attention shifts to measuring and verifying that the cabinet and countertop will accommodate the Blanco sink model selected.
Measure cabinet width, depth and internal framing; confirm minimum cabinet size recommended by Blanco.
Verify countertop thickness, cutout dimensions and underside clearance for drain and mounting hardware.
Check plumbing location, support for sink weight, and rim overlap to guarantee proper fit and finish.
Safety Precautions and Workspace Setup
Before any cutting or plumbing work begins, the installer should establish a safe, organized workspace by isolating the area, ensuring adequate lighting and ventilation, and laying down protective coverings for cabinets and floors.
The installer must shut off water and electricity, secure tools, use PPE (gloves, eye and ear protection), keep a fire extinguisher nearby, and maintain clear access for materials and waste removal.
Understanding Blanco Sink Types and Mounting Options
Blanco sinks are offered in various materials and finishes—such as granite composite and stainless steel—that affect durability and appearance.
Installation choices include undermount, drop-in, and flush-mount designs, each with distinct pros and cons for sealing, countertop compatibility, and ease of installation.
Faucet and drain configurations should be planned to match the chosen sink type and countertop layout to guarantee proper fit and function.
Overview of Blanco Materials and Finishes
A clear understanding of Blanco sink materials and finishes helps homeowners choose the right balance of durability, appearance, and maintenance.
Blanco offers granite composite, stainless steel, and ceramic-like Silgranit options, each with distinct scratch, stain, and heat resistance.
Finishes range from matte to polished and color-matched mounting rims.
Care requirements and expected longevity vary by material and finish choice.
Undermount vs Drop-in vs Flush-mount: Pros and Cons
Homeowners choosing between undermount, drop-in, and flush-mount installations should weigh functional differences—water containment, countertop compatibility, and ease of cleaning—against aesthetic preferences and installation complexity. Undermount looks seamless and cleans easily but needs solid countertops; drop-in is simple and forgiving; flush-mount blends surfaces but requires precise countertop work.
| Type | Key Point |
|---|---|
| Undermount | Seamless, needs substrate |
| Drop-in | Easiest install, visible rim |
Drain and Faucet Configuration Options
After choosing between undermount, drop-in, or flush-mount styles, attention turns to how the sink will function day-to-day: drain placement, number of bowls, and faucet mounting options determine workflow and compatibility with countertops and accessories.
Consider center versus rear drains, single versus double bowls, and deck-mounted, wall-mounted, or integrated faucet holes.
Match drain size and garbage disposal alignment for efficient installation and maintenance.
Pre-Installation Steps: Countertop and Plumbing Preparation
Before cutting or fitting a Blanco sink, the installer measures and marks the countertop using the manufacturer’s template to guarantee accurate cutout dimensions.
The existing sink is removed and the underlying plumbing is inspected for leaks, corrosion, or misaligned connections that may require repair.
Cabinet supports and any needed reinforcements are adjusted to provide proper weight distribution and secure mounting for the new sink.
Marking Cutout Dimensions and Template Use
A clear, accurately marked cutout is essential to a successful Blanco sink installation; using the manufacturer’s template guarantees the hole aligns with the sink’s flange, drain location, and any faucet or accessory cutouts.
Place the template on the countertop, square to edges, transfer inner cut line with a pencil, verify measurements, mark support and clearance zones, then double-check before cutting.
Removing the Old Sink and Inspecting Plumbing
Disconnect plumbing and turn off water at the shutoff valves. Then open the faucet to relieve pressure and drain remaining water from lines and the trap.
Remove sink clips, cut sealant, and lift out the old sink. Inspect supply lines, shutoffs, P-trap and drain for corrosion, leaks or improper fittings.
Note measurements, replace damaged parts, and verify drain flange and tailpiece match the new Blanco sink.
Adjusting Cabinet Support and Reinforcements
With the old sink removed and plumbing inspected, attention turns to ensuring the cabinet will properly support the new Blanco sink.
The installer measures reveal weak areas; reinforcing strips or plywood panels are fitted to distribute weight. Fasteners secure braces to studs, and level checks confirm alignment.
Allow clearance for mounting clips and plumbing, sealing any gaps to prevent moisture damage.
Step-by-Step Blanco Sink Installation
The installation phase begins with a careful dry-fit and alignment check to confirm fit and clearances.
Next, the installer applies appropriate sealants and adhesives, then secures the basin according to its style—undermount, drop-in, or flush-mount.
Final steps include mounting the faucet, soap dispenser, and any accessories, followed by testing for leaks and proper operation.
Dry-Fit and Alignment Check
Place the Blanco sink into the countertop cutout without sealant to verify fit and alignment, ensuring the flange sits flush and the basin centers over the opening.
Inspect edge gaps, overhangs, and reveal symmetry. Confirm clearance for faucets and accessories.
Adjust position with protective shims as needed.
Check level front-to-back and side-to-side; document final placement before removal for sealing.
Sealing and Adhesive Application Techniques
Proceed to apply sealant and adhesive carefully, following manufacturer recommendations for type and bead size to guarantee a watertight, durable bond between the Blanco sink flange and the countertop.
Use continuous, even beads; avoid gaps. Tool immediately with a smooth motion to compress and shape the bead.
Remove excess with a damp cloth before skinning. Allow specified cure time under recommended conditions for full strength.
Securing an Undermount Blanco Sink
Begin securing the undermount Blanco sink by aligning its flange precisely under the countertop opening so the previously applied sealant forms a continuous contact layer.
Support the sink with temporary brackets or blocks.
Fasten mounting clips evenly around the perimeter, tightening incrementally to compress the sealant uniformly.
Remove supports, check level, and wipe excess sealant.
Allow adhesive to cure per manufacturer specifications before reconnecting plumbing.
Installing a Drop-in or Flush-mount Blanco Sink
For a drop-in or flush-mount Blanco sink, the installer sets the sink into the countertop cutout so the rim seats evenly and creates a continuous seal. The process requires verifying the cutout dimensions, applying a consistent bead of sealant or gasket material around the opening, lowering the sink straight down to avoid shifting the sealant, and clamping or fastening per the manufacturer’s specifications to guarantee an even compression without warping the countertop.
The installer wipes excess sealant, checks level, tightens clips progressively, and allows cure time before reconnecting plumbing.
Installing Faucet, Soap Dispenser, and Accessories
Careful attention to alignment and torque guarantees the faucet, soap dispenser, and other accessories perform reliably and seal properly.
Mount components in recommended order, using manufacturer gaskets and thread sealant where specified. Hand-tighten then torque nuts to specified values.
Verify cartridge orientation and handle operation before final tightening.
Trim excess tubing, secure mounting hardware, and confirm all escutcheons sit flush with the sink surface.
Connecting Drain, Garbage Disposal, and Water Lines
Proceed to connect the drain assembly, garbage disposal (if present), and water supply lines, following manufacturer torque and sealant specifications to guarantee leak-free joints.
Tighten slip nuts, install P-trap with proper slope, and mount disposal to sink flange per instructions.
Attach braided supply lines to shutoff valves, open valves, test for leaks, run disposal briefly, and recheck all connections.
Finishing Touches for a Professional Look
A professional installation is completed by neatly caulking seams, smoothing joints, and removing excess sealant to guarantee a watertight appearance.
The plumbing is then tested for leaks and proper drainage, with traps and connections inspected under running water.
Finally, the sink and surrounding surfaces are cleaned immediately to remove installation residue and protect the finish.
Caulking and Seam Finishing Techniques
Finish seams and joints with precision to guarantee the Blanco sink looks professional and remains watertight.
Apply a continuous bead of silicone caulk suited to the sink material, tool the joint smooth with a damp finger or caulk tool, and remove excess.
Allow full cure time per manufacturer instructions.
Clean adjacent surfaces before sealing and mask edges for straight, consistent lines.
Testing for Leaks and Proper Drainage
Begin by running a full water test to confirm the sink and drain assembly are leak-free and flow correctly: fill both basins, observe seams, tailpiece, and trap for drips while draining at full flow.
Check for slow drainage, airlocks, or gurgling.
Tighten fittings or adjust venting as needed.
Re-test until drains clear rapidly and no leaks appear.
Cleaning and Care Immediately After Installation
Wipe down the sink and surrounding countertop with a soft microfiber cloth and mild, pH-neutral cleaner to remove installation residue.
Then rinse with clean water and dry thoroughly to prevent mineral spotting.
Inspect seals and fasteners, retightening if necessary.
Apply manufacturer-recommended protective treatment to the surface, avoid abrasive tools, and advise occupants on proper daily maintenance to preserve finish and function.
Common Problems During Blanco Sink Installation and Solutions
Common installation issues include misaligned cutouts or poor sink fit, leaks at drain or supply connections, and countertop damage or support failure.
Technicians also frequently encounter undersized cabinets or cramped spaces that complicate plumbing and mounting.
The following section outlines causes and practical solutions for each of these problems.
Misaligned Cutout or Sink Fit Issues
A misaligned cutout or poor sink fit can compromise both the appearance and function of a Blanco installation, causing gaps, uneven seams, or stress on mounting hardware.
Remedies include verifying template alignment, trimming the countertop incrementally, dry-fitting the sink, and using shims or adjustable brackets for level seating.
Recut or replace warped substrate; seal perimeter with appropriate silicone to prevent debris intrusion.
Leaks at Drain or Supply Connections
After correcting fit and sealing the perimeter, attention shifts to the plumbing connections where leaks most frequently occur: the drain assembly and water supply lines.
Inspect gaskets, slip-nuts, and tailpieces for cracks or misalignment. Hand-tighten then use wrench to secure without over-torquing.
Apply plumber’s putty or silicone where specified, test under pressure, and retighten fittings if seepage appears.
Countertop Damage or Support Failure
When installing a Blanco sink, insufficient countertop support or incorrect cutting techniques can cause chips, cracks, or sagging around the cutout, compromising both appearance and structural integrity.
To prevent damage, verify substrate strength, reinforce with plywood or metal brackets, use proper cutting blades and backing, and apply edge sealant.
If failure occurs, replace damaged sections or add support joists before reinstalling the sink.
Dealing with Undersized Cabinets or Tight Spaces
Countertop repairs or reinforcements may solve some installation issues, but undersized cabinets and tight installation clearances present a different set of challenges that require measurement, planning, and sometimes modification.
The installer should verify cabinet dimensions, assess door and drawer interference, consider trim removal, internal reinforcement, or sink offsetting.
When necessary, recommend cabinet replacement or custom alterations to guarantee access, ventilation, and secure mounting.
Maintenance Tips to Preserve Blanco Sink Appearance and Function
Routine care preserves both the appearance and function of a Blanco sink, starting with simple daily cleaning and prompt stain prevention.
The text will outline recommended cleaners to use and products to avoid to prevent surface damage.
It will also cover long-term care, including sealant maintenance, common repairs, and relevant warranty considerations.
Daily Cleaning and Stain Prevention
Although daily care requires only a few simple steps, consistent attention prevents staining and preserves the Blanco sink’s finish.
Wipe after use with a soft cloth or sponge to remove residues, rinse thoroughly, and dry to avoid water spots.
Promptly remove spills from acidic foods and oils.
Use a nonabrasive pad for light scuffs and rotate care to maintain even wear.
Recommended Cleaners and Products to Avoid
After daily wiping and prompt spill removal, attention turns to which cleaners to use and which to avoid to protect the sink’s surface.
Use mild dish soap, non-abrasive cleaners, and a soft cloth or sponge.
Avoid bleach, harsh acids, scouring powders, and metal pads that can dull or scratch.
Rinse thoroughly and dry to prevent residue and water spots.
Long-term Care: Sealants, Repairs, and Warranty Considerations
Long-term care of a Blanco sink hinges on proactive protection and timely repairs: periodically inspecting sealants, addressing chips or stains early, and understanding warranty terms will preserve both appearance and function.
Reapply silicone or manufacturer-recommended sealant where gaps appear. Use approved repair kits for minor chips and consult certified technicians for structural damage.
Register the product, keep receipts, and follow warranty procedures to maintain coverage.
When to Hire a Professional vs DIY
The decision to hire a professional hinges on visible signs like complex plumbing modifications, structural countertop work, or intermittent leaks that suggest a licensed plumber or carpenter is required.
A clear comparison of costs and time—factoring in tools, materials, and potential rework—helps weigh DIY against paying for experienced installation.
Guidance on vetting credentials, checking references, and obtaining written estimates prepares the homeowner to hire a qualified installer when needed.
Signs the Project Requires a Licensed Plumber or Carpenter
Several clear indicators determine when a Blanco sink installation moves beyond a competent DIYer and requires a licensed plumber or carpenter.
Complex plumbing alterations, gas or structural modifications, compromised cabinetry, persistent leaks, inaccessible drain lines, or code-required permits signal professional involvement.
Additionally, lack of proper tools, time constraints, or uncertainty about waterproofing and warranty compliance justify hiring licensed trades to guarantee safety, durability, and code adherence.
Cost and Time Comparison: DIY vs Professional Installation
How much will time and money differ between tackling a Blanco sink installation independently and hiring a pro? The comparison shows DIY saves labor costs but may extend project time and risk mistakes; professionals cost more upfront, finish faster, and reduce rework risk. Consider skill level, complexity, and warranty needs when choosing.
| Aspect | Typical range |
|---|---|
| DIY | Low cost, longer time |
| Pro | Higher cost, shorter time |
How to Vet and Hire a Qualified Installer
Choose between DIY and professional installation by matching project complexity, homeowner skill, and tolerance for risk.
When hiring, verify licensing, insurance, and local code familiarity. Request references, recent photos of Blanco installations, and written estimates detailing labor, materials, and warranty.
Confirm timeline, permits, and subcontractor use. Favor installers with clear communication, positive reviews, and transparent change-order policies.
Quick Checklist and Final Inspection Before Use
Complete a brief, methodical checklist and perform a final inspection to confirm the Blanco sink is fully installed and ready for use.
The installer verifies seals, plumbing, mounting, and functionality, documenting any adjustments.
Final cleaning and drying prevent stains; user orientation follows.
- Check for leaks under full water pressure
- Confirm secure mounting and gasket seating
- Test drain speed and garbage disposal
- Inspect finish for scratches
Conclusion
Careful preparation guarantees a smooth Blanco sink installation; clear planning creates reliable results, and precise measuring produces seamless fits. Proper sealing prevents leaks, and correct fastening ensures lasting stability. Thoughtful finishing achieves a professional look, and routine maintenance preserves pristine appearance. When uncertainty arises, timely hiring of a professional prevents costly mistakes, and confident DIY saves money. Ultimately, attention to detail delivers enduring function, consistent beauty, and homeowner satisfaction.