How to Install a Wall-Mounted Toilet: Step-by-Step Guide for DIYers
Installing a wall-mounted toilet can enhance your bathroom’s aesthetics and functionality by saving space and simplifying cleaning. This step-by-step guide will walk you through the entire process, from planning and gathering tools to final installation and testing for leaks. Follow these instructions to successfully install your wall-mounted toilet with ease.
What a Wall-Mounted Toilet Is and Why Choose One
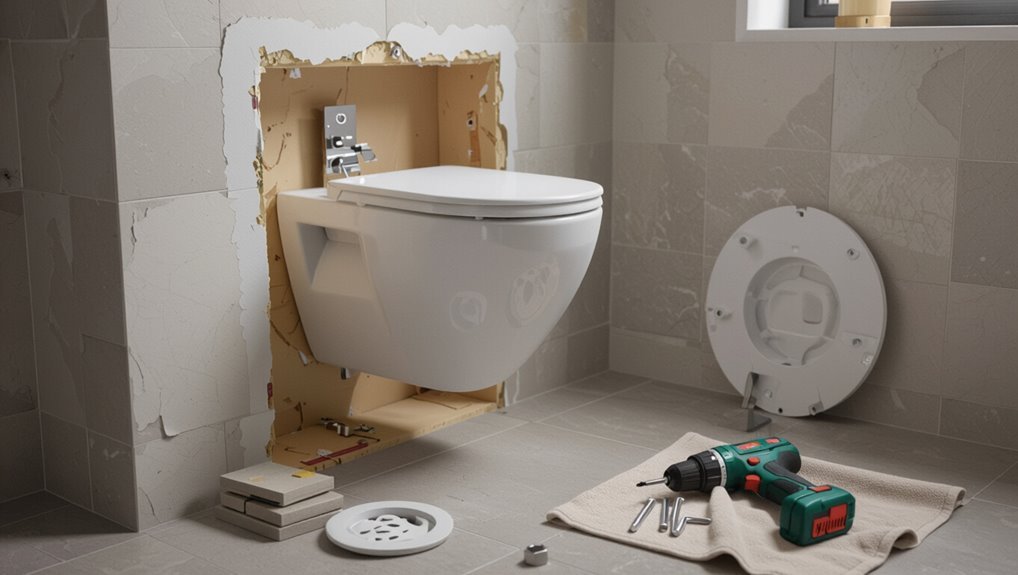
A wall-mounted toilet is supported by a concealed frame within the wall rather than sitting on the floor, which changes installation access, maintenance points, and bathroom aesthetics.
For DIYers, this configuration offers a modern look and easier floor cleaning but also presents challenges such as working with in-wall carriers, plumbing modifications, and potential structural reinforcement.
A basic overview of the required skill level, essential tools, and materials helps determine whether a homeowner can tackle the job or should hire a professional.
How wall-mounted toilets differ from floor-mounted models
Wall-mounted toilets differ from floor-mounted models primarily in mounting method and support structure: the bowl hangs from a concealed steel carrier anchored inside the wall, while floor-mounted bowls sit on and transfer load to the bathroom floor.
Installation access, plumbing placement, and wall reinforcement requirements diverge, affecting materials, tools, and planning.
Readers exploring how to install wall mounted toilet should note structural and routing differences.
Pros and cons for DIYers
Because installation involves hidden carriers, piping and wall reinforcement, choosing a wall-mounted toilet carries clear trade-offs for a DIYer: it offers space-saving aesthetics, easier floor cleaning, and adjustable bowl height, but demands structural work, precise plumbing/routing, and often specialized fixtures and tools that can push the project beyond casual skill levels.
Benefits include modern look and accessibility; drawbacks include cost, wall access, and potential permit needs.
Required skill level, tools, and materials overview
Several key skills and a specific set of tools and materials are required to install a wall-mounted toilet safely and effectively.
Competence in plumbing, basic carpentry, and reading technical diagrams is essential.
Tools: drill, stud finder, level, pipe wrenches, torque wrench, and saw.
Materials: in-wall carrier frame, compatible toilet, waste pipe, water supply fittings, anchors, sealant, and fasteners.
Planning the Installation
Before any demolition or purchase, the installer verifies local codes and permit requirements to guarantee compliance.
They then assess the wall type—drywall with studs, a stud wall, or masonry—to determine structural reinforcement needs and measure available space, rough-in dimensions, and drain location.
Finally, they choose a compatible in-wall carrier frame and toilet bowl that match the measurements and load requirements.
Checking local codes, permits, and building requirements
When planning a wall-mounted toilet installation, the installer must verify local building codes, plumbing regulations, and permit requirements to guarantee the project complies with safety, structural, and inspection standards; failure to do so can result in costly modifications, fines, or stopped work.
Check permit triggers, required licensed trades, inspection timing, allowable waste and venting distances, and seismic or accessibility mandates before ordering materials or altering structure.
Assessing wall type: drywall, stud wall, or masonry
After confirming permits and code requirements, the installer must determine the existing wall construction to select the proper carrier, anchors, and cut‑outs.
Inspect for drywall over wood or metal studs, double-stud backing, or solid masonry. Note stud depth and spacing, wall thickness, and any service runs.
Choose carriers rated for the substrate and plan reinforcement or blockwork for secure mounting.
Measuring space, rough-in dimensions, and drain location
Accurate measurements set the foundation for a reliable wall‑mounted toilet installation. Measure wall width, ceiling height, and clearances to fixtures and doors.
Determine rough‑in distance from finished wall to drain center and confirm floor pitch. Verify drain elevation and pipe route for proper slope.
Record measurements and mark centerlines on studs or masonry to guide precise carrier and waste alignment.
Selecting the right in-wall carrier frame and toilet bowl
With measurements and drain location established, attention shifts to selecting an in‑wall carrier frame and compatible toilet bowl that match those dimensions and the planned use.
Consider load rating, wall depth, and flange position. Compare bowl mounting patterns and trapway alignment. Verify manufacturer compatibility and warranty.
- Structural capacity and frame depth
- Bowl rough‑in and outlet alignment
- Flush system and warranty compatibility
Pre-Installation Checklist
Before beginning, the installer confirms a complete tools checklist and gathers all required materials and parts.
They verify plumbing connections and guarantee the wall structure can support the concealed carrier and user load.
If applicable, electrical and ventilation requirements are checked and arranged to meet code.
Tools checklist
A concise tools checklist guarantees the installer has every item needed for a safe, code-compliant wall-mounted toilet installation:
- Level, tape measure, stud finder for accurate mounting and framing.
- Drill with masonry and wood bits, adjustable wrench, socket set for secure fastenings.
- Screwdrivers, pry bar, utility knife, silicone gun, safety gear (gloves, goggles) for finishing and protection.
Materials and parts checklist
Checklist items guarantee the installer assembles every component required for a safe, code-compliant wall-mounted toilet installation.
The pre-installation materials and parts checklist lists required fixtures, fasteners, and consumables, ensuring nothing is omitted before work begins.
- In-wall carrier, tank, and mounting bolts.
- Wall flange, wax-free gasket, and trap adapter.
- Supply lines, shutoff valve, screws, anchors, and sealants.
Verifying plumbing and load-bearing support
Verify that existing plumbing alignments and structural support meet the requirements for a wall-mounted toilet installation.
Inspect waste outlet height, rough-in dimensions, and water supply location against the frame manufacturer’s specifications.
Confirm wall cavity depth, stud spacing, and backing can accept the in-wall carrier and live load.
Identify required reinforcements, accessible shutoffs, and any obstructing utilities before proceeding.
Preparing electrical and ventilation considerations (if applicable)
Before electrical or ventilation work begins, the installer should document all required power, lighting, and exhaust provisions and compare them to local code and the toilet/frame manufacturer’s guidelines.
Confirm circuit capacity for any heated seats, bidet features, or in-wall lighting.
Identify exhaust fan location and duct run to guarantee proper airflow.
Arrange qualified electrician or HVAC technician for permitted alterations and final inspection.
Removing an Existing Toilet and Preparing the Area
The procedure begins with shutting off the water supply and fully draining the toilet and connected lines to prevent leaks during removal.
Next, the existing bowl, tank, and surrounding finishes are removed to reveal the underlying structure.
Once exposed, studs, joists, and the waste pipe are inspected for damage and proper alignment before proceeding.
Safely shutting off water and draining the system
Shut off the home’s main water supply and isolate the toilet’s shutoff valve to prevent flow; confirm the valve is fully closed by turning the handle clockwise until it stops.
Open the toilet tank and bowl flush lever to drain residual water.
Open nearby faucets and a lowest-floor drain to relieve pressure.
Use a sponge and bucket to remove remaining water, wearing gloves and safety glasses.
Removing existing fixtures and finishes
Begin by removing any loose accessories—toilet seat, tank lid, and trim—then unbolt the toilet at its base and lift it straight up to avoid disturbing the flange or drainage pipe.
Cap the waste opening temporarily, clear residual water, and remove flooring or trim that conflicts with the new carrier.
Protect surrounding surfaces with drop cloths and label removed hardware for reuse or disposal.
Exposing and inspecting studs, joists, and waste pipe
Exposing the wall cavity and subfloor reveals the studs, joists, and waste pipe so they can be inspected for rot, damage, or improper anchoring.
The installer checks fastener integrity, wood moisture, and framing alignment, verifies waste pipe slope and support, and identifies obstructing utilities.
Any compromised members or misaligned piping are documented and repaired or reinforced before framing for the carrier and drywall installation.
Installing the In-Wall Carrier Frame
The installer positions the carrier frame against the studs, marks anchor points, and verifies alignment before fastening.
The frame is secured to studs or reinforced blocks, with the waste pipe and water supply connected to the factory fittings.
Final adjustments set the frame height for proper bowl mounting and seat clearance.
Positioning the carrier frame and marking anchor points
Position the carrier frame so its outlet and mounting plate align precisely with the finished wall layout and the rough-in plumbing; check that the bowl height, water inlet, and drain line match the project measurements before resting the frame against the studs.
Verify level and plumb, then mark anchor locations on studs and any required blocking.
Note bolt centers and service access openings for accurate drywall and fixture placement.
Securing the frame to studs or reinforced blocks
Secure the carrier frame firmly to the studs or pre-installed reinforced blocks using manufacturer-specified fasteners, keeping the frame plumb and at the exact height marked earlier.
Check alignment with a level, tighten bolts evenly, and use washers or mounting plates as recommended.
Verify lateral stability and that load-bearing connections penetrate the structural members fully before trimming excess fastener length and proceeding to enclosure.
Connecting the waste pipe and water supply to the frame
Begin by routing and rough-fitting the waste and water lines to the carrier frame openings, ensuring each connection matches the manufacturer’s inlet/outlet orientations and recommended pipe materials.
Verify proper slope on the waste line, cut pipes square, deburr, and test fit couplings.
Install shutoff valve and supply stub with compression or push-fit fittings.
Pressure-test the water connection before closing the wall.
Adjusting frame height for bowl mounting and seat clearance
Raise or lower the in-wall carrier frame to align the toilet bowl mounting plates with the finished-floor height and to guarantee adequate seat clearance.
Measure from finished floor to mounting bolts, set frame height per manufacturer specs (typically 15–19 inches).
Lock adjustable legs, verify level front-to-back and side-to-side, and confirm clearance for the seat, trap, and access panel before final anchoring.
Rough Plumbing and Leak Testing
With the carrier in place, the waste outlet and trap adapter are fitted to align with the building drain.
The water supply is then run to the isolation valve and connected to the carrier’s inlet.
Before finishing the wall, pressure testing and systematic leak checks are performed on both waste and supply lines to confirm watertight connections.
Installing waste outlet and trap adapter
Positioning the waste outlet and trap adapter requires precise alignment and secure connections to guarantee a watertight, code-compliant system.
The installer verifies wall carrier height, aligns outlet flange to in-wall drain stub, dry-fits the trap adapter, applies appropriate gasket or solvent-weld per pipe material, and secures fasteners.
Pressure tests and visual inspections confirm no leaks before closing the wall.
Connecting supply line and isolation valve
Connect the water supply to the wall-mounted toilet by routing the supply line from the building feed to the isolation valve location on the carrier or nearby stud.
Secure tubing with clamps or straps, allow service access, and install a quarter-turn isolation valve rated for potable water.
Use proper fittings, sealants or tape per code, and orient the valve for easy operation and future maintenance access.
Pressure testing and leak-check procedures
Begin pressure testing after all supply and waste connections are secured and isolation valves are installed.
The installer pressurizes the system to manufacturer-specified psi using a test pump or compressed air, monitors gauges for a set duration, and inspects visible joints for seepage.
Any drop in pressure or signs of leakage require tightening, resealing, or component replacement, followed by retesting until stable.
Building the Wall and Finishing Around the Frame
With the in-wall frame secured and plumbing tested, attention turns to selecting appropriate wallboard and moisture-resistant backer to protect the installation.
The writer outlines how to install drywall or cement board around the frame, cut accurate openings for bolts and the flush actuator, and create an access panel.
Options for tiling or other finishes around the flush plate and access door are then compared for durability and serviceability.
Choosing wallboard and moisture-resistant backer
Selecting the right wallboard and moisture-resistant backer is essential for a wall-mounted toilet installation, since the assembly concentrates weight and is exposed to high humidity.
Use cement board or greenboard rated for wet areas, and consider plywood or OSB backing where frame mount anchors bear load.
Guarantee materials resist mold, match local code, and allow secure fastening and long-term stability without compromising finish.
Installing drywall or cement board around frame
Install drywall or cement board so the wall surface is flush with the in-wall frame and provides a durable substrate for tile or other finishes.
Cut panels to fit around carrier, plumbing and supporting brackets. Fasten with appropriate screws to metal or wood studs, keeping screws slightly recessed.
Seal seams with tape and thinset or joint compound. Confirm access opening aligns with flush plate and service needs.
Tiling or finishing options for access panel and flush plate
Several practical options exist for finishing the access panel and flush plate that balance aesthetics, serviceability, and moisture resistance.
Install a removable tiled panel with discreet grout lines for continuity, use a framed hinged access door painted or clad to match wall finish, or fit a flush-mounted manufacturer-compatible cover.
Make certain silicone seals and corrosion-resistant hardware are used to maintain watertight integrity and ease of service.
Cutting precise openings for bolts and flush actuator
Measure and mark the exact bolt locations and actuator cutout on the finished wall surface, using the frame manufacturer’s template and a level to guarantee alignment.
Confirm measurements from studs and floor.
Score tile or drywall with an appropriate saw, then cut cleanly, supporting edges to prevent chipping.
Test-fit bolts and actuator plate, adjusting minimally for flush fit.
Seal gaps and install mounting hardware.
Mounting the Wall-Hung Bowl
The installer lifts the wall-hung bowl onto the carrier studs, checks alignment, and adjusts shims to achieve a level fit.
Mounting bolts are tightened to the manufacturer’s torque specifications and the flange is sealed while confirming a secure waste connection.
Finally, the seat is fitted and any soft-close mechanism is installed and tested.
Lifting and aligning the bowl to the carrier studs
Carefully position the bowl close to the carrier so its mounting holes align with the exposed studs and the waste outlet seats over the carrier spigot; this requires steady hands or an assistant to lift while sighting alignment.
Then slide the bowl forward until it fully mates with the carrier and the mounting bolts pass through the flange holes.
Verify even seating, confirm outlet engagement, and check that the bowl sits plumb and level before proceeding.
Securing bolts, torque specifications, and shimming
Once aligned, secure the bowl by threading the mounting nuts onto the exposed carrier studs and tightening them alternately to draw the flange evenly against the carrier.
Use a calibrated torque wrench and follow the manufacturer’s specified torque value (typically listed in the carrier manual) to avoid over- or under-tightening.
Install nylon or rubber washers as specified, verify even seating, and apply shims where needed to eliminate rocking before final torque.
Sealing the flange and ensuring correct waste connection
Begin by confirming that the carrier flange and waste outlet surfaces are clean, dry, and free of debris to guarantee a reliable seal.
Then fit the correct gasket or sealing boot specified by the carrier manufacturer, orienting it so the spigot seats fully into the waste pipe without twisting.
Tighten flange fasteners evenly, check alignment, apply plumber’s grease sparingly, and verify a watertight, level connection before finalizing wall-hung bowl installation.
Installing the toilet seat and soft-close options
With the flange sealed and the wall-hung bowl aligned and secured, attention turns to fitting the toilet seat and selecting a soft-close mechanism if desired.
Measure mounting hole spacing, choose a compatible seat, and install stainless steel or plastic fixings.
For soft-close, follow manufacturer instructions to attach damping hinges, test slow closure, and adjust hinge tension for smooth, silent operation and secure fitment.
Installing and Configuring the Flush Mechanism
Next, attention turns to installing the flush plate and connecting the actuator rod or linkage to the concealed cistern.
The technician configures dual-flush and water-saving settings to meet performance and conservation goals.
Finally, the flush is tested and any common issues—such as weak flushes, leaks, or misaligned actuators—are diagnosed and corrected.
Mounting the flush plate and actuator rod/linkage
Mounting the flush plate and connecting the actuator rod are the final mechanical steps before testing the concealed cistern: the plate secures the user controls while the actuator transfers button motion to the flush valve.
Align frame openings, attach mounting brackets, route linkage without kinks, set rod length per manufacturer specs, secure fasteners, snap plate into place, and verify smooth, unobstructed button travel before initial flush.
Adjusting dual-flush and water-saving settings
Begin by setting the cistern to its manufacturer-recommended baseline and identifying the dual-flush components: the small- and large-flush valves, adjustable fill valve, and any flow-restricting inserts.
Adjust small-flush volume via the valve screw or spacer, set large-flush stop position for full discharge, fine-tune fill level to recommended height, and install or modify flow-restrictors to meet local water-saving targets.
Testing flush performance and fixing common issues
Test the flush mechanism systematically by performing several full and reduced flushes while observing discharge, refill timing, and any leaks; note whether the small- and large-flush actions deliver the set volumes, whether the cistern stops filling at the recommended level, and whether the discharge is rapid enough to clear the trap on the first flush.
If issues appear, adjust valve stroke, float height, and seal seating; retest.
Final Testing, Inspection, and Maintenance Tips
A final series of checks confirms bowl load capacity and frame stability before regular use.
The installer inspects water flow, verifies an intact trap seal, and tests for leaks at all joints and connections.
Recommended routine maintenance tasks and service intervals are outlined to preserve performance and prevent issues.
Load and stability checks for mounted bowl
Verify the mounted bowl’s load capacity and lateral stability before finalizing the installation, using calibrated weights and measured force applications to simulate real-world use.
Check manufacturer-rated load limits, inspect anchorage bolts and carrier frame for deformation, and monitor deflection under incremental loading.
Confirm no audible creaks or movement, re-torque fasteners to spec, and document results for future maintenance.
Water flow, trap seal, and leak inspection procedures
Several key checks verify proper water flow, trap seal integrity, and absence of leaks before completing the installation.
Flush multiple times, observe bowl fill and discharge speed, and listen for gurgling indicating vent or trap issues.
Inspect all fittings, inlets, and waste joints for visible moisture.
Apply paper towel to suspect areas during pressurized tests.
Document findings and correct any leaks before finishing.
Routine maintenance tasks and recommended service intervals
Periodic maintenance guarantees long-term function and prevents costly repairs by addressing wear, mineral buildup, and seal degradation on wall-mounted toilets.
Recommended tasks: monthly visual leak check, clean flushometer and bowl to remove scaling, and exercise valves.
Every 6–12 months inspect seals, bolts, and inlet hoses; replace worn gaskets.
Annually service concealed tank components and schedule professional inspection every 3–5 years.
Common Installation Problems and How to Fix Them
Common installation problems include a misaligned bowl or incorrect mounting height, leaks at the waste or supply connections, and a noisy or weak flush.
Each issue requires targeted troubleshooting—adjusting frame mounts and shims for alignment and height, tightening or replacing seals and fittings for leaks, and inspecting the flush valve, fill valve, and air traps for performance problems.
The installer should also avoid common access-panel mistakes that hinder future maintenance by leaving sufficient clearance and using removable, secure panels.
Misaligned bowl or improper height corrective steps
When a wall-mounted toilet sits off-center or at the wrong height, the issue usually traces to frame alignment, carrier mounting, or incorrect stud spacing; diagnosing these sources quickly guides corrective steps that restore proper fit and function.
Verify carrier level and plumb, loosen mounting bolts, reposition carrier or shim between carrier and studs, adjust hanger brackets, then retighten and recheck alignment before reinstalling the bowl.
Leaks at waste or supply connections troubleshooting
Inspect the waste and supply connections first, since most leaks originate at the flange, trap adapter, supply elbow, or their seals.
Tighten fittings, replace damaged gaskets, and verify pipe alignment. If leakage persists, isolate source before full disassembly.
- Check gasket integrity and proper seat.
- Re-torque or replace compression fittings.
- Confirm drain slope and sealant coverage.
Noisy flush or weak flush diagnosis and fixes
After ruling out leaks at the waste and supply connections, attention should shift to flush performance. Noisy or weak flushes often stem from valve, carrier, or trapway issues rather than supply leaks.
Inspect fill and flush valve operation, check carrier mounting and wall frame alignment, clear partial trapway obstructions, verify correct pressure and fill height, and replace worn seals or a malfunctioning flush valve assembly.
Access panel and maintenance access mistakes to avoid
Although hidden tanks and recessed carriers create a sleek look, inadequate access panels or poor maintenance access planning quickly turn routine service into a costly teardown.
Install a properly sized, removable access panel aligned with the carrier frame. Avoid permanent finishes over service openings.
Guarantee shutoff valves, flush mechanisms, and inlet/outlet connections remain reachable.
Label and document access points for future technicians.
Cost Estimates and Timeframe for DIY Installation
Typical material and fixture costs for a wall-mounted toilet can range widely, from basic frames and bowls to premium models and finishing materials.
Estimated DIY time varies by experience—novices should plan several full days while experienced DIYers may complete the job in a weekend—whereas complex plumbing or structural work can add substantial time.
If scope includes major structural reinforcement, unfamiliar gas or sewer connections, or signs of extensive water damage, a professional should be called for safety and code compliance.
Typical material and fixture cost ranges
Budgeting for a wall-mounted toilet involves distinct line items: the in-wall carrier and tank system, the wall-hung bowl, flush actuator, plumbing fittings, and any framing or drywall repair. Typical ranges: carriers $200–$800, bowls $150–$900, actuators $50–$300, fittings and materials $50–$250. Regional variability affects totals.
| Item | Typical range |
|---|---|
| Carrier | $200–$800 |
| Bowl | $150–$900 |
| Actuator | $50–$300 |
| Fittings | $50–$250 |
Labor-equivalent time estimates for DIYers by experience level
After outlining material and fixture costs, an estimate of hours required helps DIYers translate price ranges into total project time.
Novices should budget 16–24 hours for demolition, framing, plumbing adjustments and finishing.
Intermediate DIYers typically need 8–12 hours.
Experienced DIYers often finish in 4–6 hours.
Include extra time for inspections, curing, and unexpected complications when planning schedules.
When to call a pro: red flags and safety considerations
Many DIYers can handle wall‑mounted toilet installations, but certain warning signs indicate a professional is warranted: severe structural reinforcement needs, hidden or corroded plumbing, complex in-wall carrier adjustments, uneven or load‑bearing wall complications, persistent leaks, or unfamiliar local code requirements.
Also call a pro for electrical work, gas lines nearby, or lack of proper tools and confidence to avoid costly mistakes or safety hazards.
Recommended Brands, Parts, and Where to Buy
The section outlines trusted carrier frames and compatible wall-hung bowls suited to varying budgets and bathroom layouts.
It highlights recommended flush plates and necessary hardware options to guarantee reliable operation and a finished look.
Practical buying tips cover warranties, part compatibility checks, and return policies to reduce installation risk.
Reliable carrier frames and compatible bowls
Selecting a reliable carrier frame and a compatible wall-hung bowl is the foundation of a stable, long-lasting installation. Professionals prioritize frames with proven load ratings, corrosion-resistant finishes, and standardized mounting patterns to guarantee compatibility with a wide range of bowls.
Recommended options include Grohe, Geberit, and Toto frames and matched bowls. Consider local suppliers, specialist plumbing stores, or online retailers.
- Verify load rating and mounting pattern.
- Match bowl bracket spacing.
- Choose corrosion-resistant finish.
Recommended flush plates and hardware
Although flush plates and hardware often receive less attention than carriers and bowls, they directly affect operation, durability, and aesthetics; recommended choices include dual-flush and pneumatic plates from Geberit, Grohe, and Villeroy & Boch, stainless or zinc alloy actuation rods, and service plates matched to the carrier frame model.
Also consider concealed cistern fittings, mounting brackets, replacement seals, and quality screws; buy through authorized dealers and major retailers.
Buying tips: warranties, compatibility, and return policies
After choosing compatible flush plates and hardware, attention should turn to warranties, part compatibility, and return policies that protect the investment.
Buyers should verify manufacturer warranty lengths, what’s covered, and service networks. Confirm spare-part availability and cross-compatible components.
Prefer vendors with clear return windows, restocking terms, and verified reviews. Consider certified dealers or major retailers for reliable aftermarket support and easy returns.
Conclusion
A new wall-mounted toilet sits like a suspended sculpture, its lines freeing the floor beneath. The installer steps back, tools set down, and the room breathes — pipes hidden, space opened. This project becomes more than plumbing: it is a crafted pause, a quiet uplift that reframes a bathroom’s purpose. With careful planning, steady hands, and routine upkeep, the fixture will hang secure and steadfast, a small architectural promise fulfilled.