How to Check a Pressure Tank: Step-by-Step Guide to Test, Adjust, and Maintain Pressure
To check a pressure tank effectively, follow these steps: isolate power, relieve system pressure, verify gauge accuracy, measure the air pre-charge at the Schrader valve, drain water to test the bladder, measure drawdown, and re-pressurize according to manufacturer specifications. Adjust the pre-charge to about 2 psi below the cut-in pressure, inspect for leaks or corrosion, and record your findings. This guide provides detailed procedures, diagnostics, and maintenance tips to ensure your pressure tank operates efficiently.
What a Pressure Tank Is and Why Regular Checks Matter
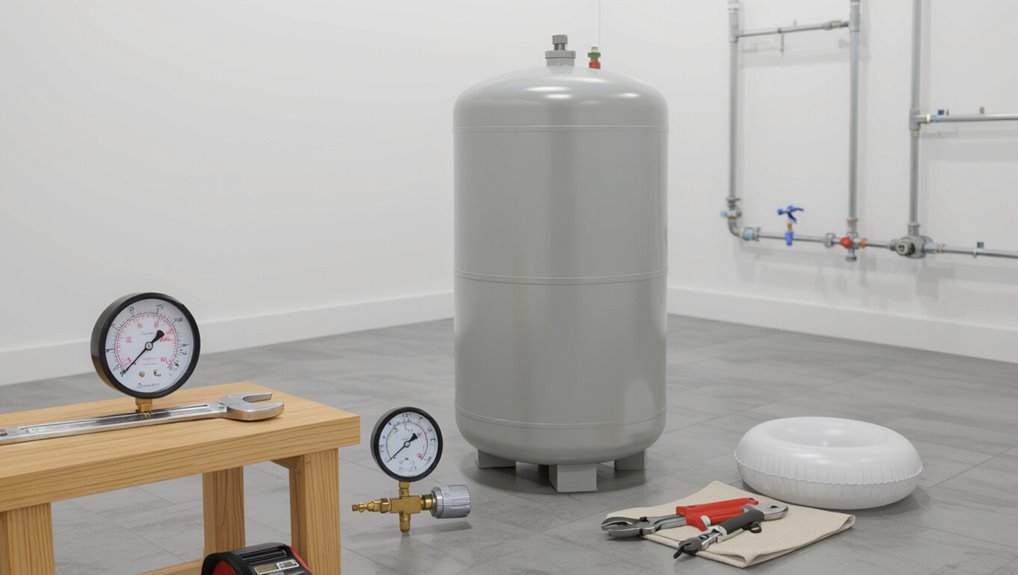
A pressure tank stores pressurized fluid or air to smooth system delivery and reduce pump cycling, with common types including well, potable water, boiler, and compressed air tanks.
Its condition directly influences system performance and pump lifespan by maintaining proper pressure and reducing wear.
Low pressure, rapid cycling, waterlogging, or visible leaks are common signs that a tank may be failing and needs inspection.
Purpose and types of pressure tanks (well, potable water, boiler, compressed air)
Pressure tanks serve as sealed vessels that store and regulate fluid or air pressure for a range of systems—from private wells and household potable-water setups to boilers and compressed-air networks.
They vary by application: well tanks balance supply, potable-water tanks prevent short cycling, boiler expansion tanks accommodate thermal expansion, and compressed-air receivers smooth pulses.
Routine inspections explain how to check pressure tank condition, fittings, and precharge.
How a pressure tank affects system performance and pump lifespan
Maintain steady pressure and the whole system runs more efficiently; a properly sized and charged tank reduces pump cycling, cushions pressure spikes, and preserves flow consistency.
Reduced cycling lowers motor wear, energy use, and start/stop stress on seals and bearings. Stable pressure improves appliance performance and prevents water hammer.
Regular checks guarantee bladder integrity, correct precharge, and ideal tank capacity to extend pump lifespan.
Common signs of a malfunctioning pressure tank
With steady pressure and fewer pump cycles established, attention turns to recognizing when the tank itself is failing. Signs include rapid pump cycling, pressure fluctuations, sputtering faucets, waterlogged tank (heavy, little air), visible leaks or corrosion, and frequent short runs.
Detecting unusual noises, decreased delivery, or inconsistent cut-in/cut-out points signals diaphragm/bladder rupture or air charge loss needing prompt inspection and service.
How to Prepare Before Testing a Pressure Tank
Before testing, the reader should review safety precautions and assemble required tools such as a pressure gauge, tire-style air gauge, wrench, and protective gloves.
Testing is recommended after seasonal temperature changes or if symptoms of tank failure appear, and should be performed under calm, dry conditions for accurate readings.
The procedure begins with locating and identifying the air valve, drain, pressure gauge, and determining the tank type (bladder, diaphragm, or steel).
Safety precautions and required tools
Several basic precautions and a short list of tools are essential to prepare for testing a pressure tank.
Wear safety glasses, work gloves, and hearing protection. Shut off power and isolate the tank, then relieve system pressure.
Required tools: tire or tank pressure gauge, adjustable wrench, pump or compressor, Schrader valve adapter, leak detector spray, and a flashlight.
Follow manufacturer safety instructions.
When to test: frequency and ideal conditions
Regularly checking a pressure tank helps catch pressure loss, bladder failure, or corrosion before they cause system damage.
Inspections should occur seasonally and after heavy use, power outages, or maintenance.
Test when the system is idle and drained of cycling activity; ambient temperature should be moderate to avoid false readings.
Record results to identify trends and schedule repairs promptly.
How to locate and identify tank components (air valve, drain, gauge, tank type)
Where is each essential connection located on the pressure tank and what does it look like?
The air valve (Schrader) sits atop or on the side near the top; a threaded drain spigot appears at the lowest point.
The pressure gauge mounts near the inlet/outlet fittings.
Tank type—bladder, diaphragm, or galvanized steel—appears from a label or by tapping: hollow resonance vs. solid-sounding.
Step-by-Step Guide to Testing a Pressure Tank
The procedure begins by ensuring the tank is isolated and power is turned off to prevent accidental operation.
Next, system pressure is released safely before checking and recording the pressure gauge readings.
Finally, the air charge is measured with a tire gauge or transducer and a portion of water is drained to confirm bladder or diaphragm function.
Step 1 Turn off power and isolate the tank
Shut off electrical power to the pump and close the inlet and outlet valves to isolate the pressure tank before any inspection or testing begins.
Confirm lockout of the power source and tag controls.
Verify valves are fully seated and note their positions.
Guarantee ancillary equipment (pressure gauges, pumps) is de-energized.
Document isolation steps for safety and future reference.
Step 2 Release system pressure safely
With power isolated and valves confirmed closed, attention turns to relieving pressure from the system before any hands-on inspection.
The technician opens a designated drain valve or faucet slowly, venting air and water until flow ceases and pressure stabilizes.
Pressure-relief devices are operated per manufacturer instructions.
Hands-on checks commence only after gauges read zero and no residual pressure is detected.
Step 3 Check the pressure gauge and record readings
Begin by inspecting the tank’s pressure gauge for accuracy and reading the current static pressure. Note the value, the gauge type (analog or digital), and any signs of damage or corrosion.
Record the reading, date, and operating conditions. Compare with expected system parameters and previous records.
Flag discrepancies, loose fittings, or erratic needle behavior for further inspection or replacement.
Step 4 Test air charge with a tire pressure gauge or pressure transducer
After recording the gauge reading, proceed to verify the tank’s air charge using a tire pressure gauge or a pressure transducer.
Attach the instrument to the air valve, guarantee no water leakage, and take a steady reading.
Compare the measured static air pressure to the recommended precharge (typically 2 psi below pump cut-in).
Note discrepancies and plan adjustment if necessary.
Step 5 Drain water to confirm bladder/diaphragm function
Drain several gallons from the tank to observe whether water is expelled smoothly and the air side remains pressurized, which confirms the bladder or diaphragm is intact and functioning.
If water gushes continuously or air bleeds out, the separator may be ruptured or leaking.
Repeat until clear behavior is seen.
Record anomalies and prepare for repair or replacement if inconsistent operation persists.
Step 6 Measure drawdown to assess usable capacity
Measure the drawdown by recording the pump-on and pump-off pressures and the volume of water delivered between those points; this quantifies the tank’s usable capacity and reveals whether the air charge and bladder are sized and functioning correctly.
The technician notes start/stop pressures, measures collected liters or gallons, calculates drawdown percentage versus tank rating, and compares results to manufacturer specifications to identify deficiencies.
Step 7 Re-pressurize and restart the system; verify pump cycling
Restore the tank’s air charge to the manufacturer’s specified pressure. Reopen the system valves and apply power so the pump can run; this prepares the system for functional verification.
Observe pump start/stop cycles, confirming cut-in and cut-out pressures match specifications. Listen for short cycling or extended runs.
Check for leaks and proper pressure recovery after each cycle. Record results and adjust precharge or controls if needed.
How to Adjust Tank Pressure Correctly
Determining the correct pre-charge pressure for the system is the first step, typically set a few psi below the pump cut-in pressure.
If air must be added, the technician uses a compressor or hand pump at the tank’s Schrader valve and follows a measured, incremental procedure, while excess air is released slowly and safely through the valve or a bleed port.
After adjustments, the pressure is rechecked under normal conditions to confirm proper operation.
Determining the correct pre-charge pressure for your system
Start by identifying the system’s cut-in pressure—the pressure at which the pump starts.
Then set the tank’s pre-charge to 2 psi below that value for single-pump systems (or follow the pump manufacturer’s specified offset for multi-pump setups).
Verify with a reliable gauge when the tank is isolated and the pump is off.
Account for temperature effects and adjust if system pressure settings change.
How to add air (compressor or pump) step-by-step
Begin by isolating the tank from the system and turning off the pump or compressor to guarantee no pressure changes during adjustment.
Use a tire-style gauge on the air valve to confirm pre-charge.
Attach a compressor or manual pump hose, adding short bursts of air while monitoring pressure.
Stop at target pressure, remove hose, reseal the valve, then restart the system and recheck under operating conditions.
How to release excess air safely
Release excess air only after isolating the tank and de-energizing the pump or compressor to prevent sudden pressure shifts.
Use the tank’s air valve or a pressure-relief valve, open it slowly, and vent in short bursts while monitoring a gauge. Stop when target precharge is reached.
Wear safety glasses, avoid standing over fittings, and guarantee tools and hands stay clear of vents.
Rechecking pressure after adjustment
How should the tank’s pressure be verified after adjustments?
The technician waits for stabilization, then uses a calibrated pressure gauge at the service port to confirm cut-in and cut-out targets.
Readings are compared to system specifications; if within tolerance, the valve cap is replaced and the system cycled to observe consistent operation.
Any deviation prompts repeat adjustment and recheck until stable, documented results are achieved.
Diagnosing Common Pressure Tank Problems
A brief inspection can reveal whether a tank is waterlogged, cycling too rapidly, losing air through valves, suffering bladder or diaphragm failure, or showing corrosion and structural damage.
Each problem has distinct signs—standing water at the air valve, frequent short pump cycles, hissing or pressure loss, loss of bladder integrity, and visible rust or pitting—and specific corrective actions.
The following sections outline how to identify each issue and decide between repair and replacement.
Waterlogged tank symptoms and causes
Many homeowners encounter a pressure tank that no longer maintains consistent water pressure due to a waterlogged condition, where the internal air cushion has been displaced by water.
Symptoms include reduced drawdown, frequent short fills, sputtering faucets, and tank heaviness.
Causes are failed bladder or diaphragm (in bladder tanks), air absorption over time, leaks, or improper precharge.
Diagnosis requires visual inspection and pressure testing.
Rapid pump cycling: root causes and fixes
Rapid pump cycling occurs when the well pump turns on and off in short, frequent bursts instead of running through normal on/off intervals, straining equipment and shortening pump life.
Common causes include an undersized or failed pressure tank, incorrect precharge, pressure switch misadjustment, or clogged inlet leading to rapid drawdown.
Fixes: verify tank volume and precharge, adjust or replace pressure switch, and restore proper tank sizing.
Air leaks and valve issues: detection and repair
After addressing short cycling by checking tank size, precharge, and the pressure switch, attention should turn to the tank’s air system and valves, since leaks or faulty valves often mimic other failures.
Inspect Schrader valve and caps, listen for hissing, apply soapy water to fittings, test pressure decay with a gauge, tighten or replace faulty valves, and repair pipe fittings or seals to stop air loss.
Bladder or diaphragm failure: signs and replacement considerations
A failed bladder or diaphragm typically presents as waterlogged behavior in the tank: the system loses its air cushion, causing the pump to short-cycle, reduced drawdown, and irregular pressure fluctuations.
Additional signs include audible sloshing, rapid on/off cycling, and decreased reserve capacity.
Replacement considerations: verify tank model, bladder access, cost versus new tank, follow manufacturer instructions, and guarantee proper precharge after installation.
Corrosion, rust, and structural problems
Inspecting a pressure tank for corrosion, rust, and structural issues begins with a visual and tactile survey of the exterior and accessible interior components.
Look for pitting, flaking paint, bubbles, welded seam cracks, and weak spots. Probe suspect areas gently, check fittings for galvanic corrosion, and assess mounting supports.
Severe deterioration or compromised integrity warrants immediate repair or replacement to prevent failure.
Maintenance Tasks to Prolong Tank Life
A concise maintenance routine helps extend a pressure tank’s service life by combining a routine inspection checklist with seasonal preventive tasks.
Attention to fittings and the gauge—tightening, replacing, or servicing them as needed—prevents small issues from becoming failures.
Recommended replacement intervals and lifespan factors (material, water quality, and usage) guide timing for component and tank replacement.
Routine inspection checklist
Several simple checks, performed quarterly or as recommended by the manufacturer, keep pressure tanks reliable and extend service life.
Inspect for leaks, corrosion, and dents. Verify pressure readings and bladder condition. Confirm fittings and valves are tight and operable. Check mounting and vibration isolation.
- Visual exterior inspection
- Pressure gauge and switch test
- Valve and fitting tightness
- Mounting and supports
Seasonal maintenance and preventive care
Plan seasonal maintenance around climate and usage patterns to prevent freeze damage, corrosion, and premature wear on pressure tanks.
Inspect insulation, drain and flush sediment, verify relief valve operation, and check air charge before cold and hot seasons.
Remove debris, control humidity in enclosures, apply corrosion inhibitors as needed, and document service dates to inform future maintenance and extend tank lifespan.
When to tighten, replace fittings, or service the gauge
Inspect fittings and the gauge regularly to catch leaks, corrosion, or inaccurate readings before they compromise tank performance.
Tighten loose connections snugly with appropriate tools; avoid over-tightening.
Replace fittings showing corrosion, cracks, or persistent leaks.
Service or recalibrate the gauge if readings drift, stick, or differ from a reference.
Document actions and retest pressure to confirm resolution.
Recommended replacement intervals and factors influencing lifespan
How long should a pressure tank last, and what determines when it needs replacement?
Typical lifespan ranges from 5 to 15 years depending on construction, water quality, usage cycles, and maintenance.
Corrosion, bladder failure, frequent cycling, leaks, or failed valves shorten life.
Regular inspections, pressure checks, corrosion control, and timely repairs extend service life; replace when performance or safety is compromised.
Tools, Parts, and Materials Checklist
A concise checklist of tools, spare parts, and materials helps guarantee effective pressure tank checks.
It should list essential testing and adjustment tools, commonly needed replacement parts, and consumables for routine work.
Guidance will also note which tasks are safe for a competent DIYer and which warrant a professional.
Essential tools for testing and adjustment
Several basic tools and a few specialized instruments are required to test and adjust a pressure tank effectively.
A concise kit guarantees safe, accurate checks and timely adjustments without improvisation. Inspectors rely on gauges, pumps, and wrenches to verify readings and restore settings.
- Handheld pressure gauge with adapter
- Tire-style pump or portable compressor
- Adjustable wrench and pliers
- Valve core tool and spare caps
Spare parts to keep on hand
Keeping a small, well-organized stock of spare parts guarantees quick repairs and minimizes downtime when a pressure tank needs service.
Essential spares include items for common failures and routine maintenance, stored with labels and basic instructions for fast replacement.
- Replacement pressure switch
- Tank air valve cores and caps
- Seals, gaskets, and O-rings
- Pressure gauge and fittings
When to call a professional vs. DIY
Having a stocked set of spares makes many repairs straightforward, but some tasks exceed typical homeowner skills or tools and warrant professional help.
DIY is appropriate for pressure checks, air precharge adjustments, and replacing simple valves.
Call a professional for persistent leaks, corrosion, tank bladder failure, electrical pump issues, or complex system diagnostics.
Prioritize safety, permits, and warranty considerations.
Comparison of Tank Types and Their Testing Differences
Different tank constructions—steel, fiberglass, and bladder/diaphragm—require distinct inspection points and testing methods, and tank size or capacity further alters test procedures. The following quick comparison highlights key differences technicians should consider when planning pressure checks. Attention to material and volume guarantees appropriate pressure ranges, safety margins, and diagnostic approaches.
| Tank Type | Testing Focus |
|---|---|
| Steel | Corrosion, weld integrity, hydrostatic pressure limits |
| Fiberglass | Structural delamination, impact damage, leak testing |
| Bladder/Diaphragm | Bladder integrity, precharge accuracy, valve checks |
| Size/Capacity | Pressure duration tests, pump cycling behavior, relief sizing |
Steel vs. Fiberglass vs. Bladder/Diaphragm tanks
When evaluating pressure tanks, material and internal design directly affect performance, inspection methods, and lifespan.
Steel tanks resist impact but corrode, requiring external inspection and periodic draining.
Fiberglass resists corrosion, needs surface checks for cracks and fittings.
Bladder/diaphragm tanks separate air and water, simplifying pressure checks and reducing waterlogging; inspect bladders for leaks and verify precharge.
Pressure tank sizes and capacity impact on testing procedures
Tank size and capacity directly influence how testing is conducted because larger vessels hold more water and require different safety, instrumentation, and procedural considerations than smaller units.
Testing protocols vary: small residential tanks need simple pressure checks and quick drain tests, while commercial or large-capacity tanks demand staged depressurization, calibrated gauges, flow monitoring, and safety relief assessments.
Documentation and personnel qualifications scale accordingly.
Troubleshooting Scenarios with Quick Solutions
The following scenarios present common pressure tank problems and concise corrective steps. Each entry focuses on quick diagnostics and immediate actions to restore proper operation. Readers can apply these targeted checks before calling for professional service.
- Pump cycles too often — check tank air charge, pressure switch settings, and bladder integrity.
- No pressure build-up — inspect well pump operation, check for blocked intake or valve failures.
- Sudden pressure drop — examine for leaks, pressure switch faults, and check tank rupture.
- Basic preventive checks — verify tank precharge, pressure gauge accuracy, and plumbing tightness.
Scenario: Pump cycles too often steps to fix
Inspecting frequent pump cycling reveals a common symptom of pressure tank or system issues that require quick diagnosis.
The guide recommends checking tank air charge, adjusting cut-in/cut-out settings, inspecting pressure switch contacts for wear, tightening or replacing loose fittings, and examining for waterlogged bladder.
If persistent, test system for leaks and consult a technician to prevent pump damage and restore proper cycling.
Scenario: No pressure build-up diagnostic steps
Begin by confirming that the pump runs but delivers little or no pressure.
Inspect inlet screens, suction line for leaks or blockages, and valve positions.
Verify pump priming and impeller condition.
Check pressure switch contacts, tubing, and electrical supply.
Test tank air charge at the Schrader valve; correct to manufacturer specifications.
Replace faulty check valve or damaged components as identified.
Scenario: Sudden pressure drop immediate checks
In many systems, a sudden pressure drop usually signals an acute leak, pump failure, or a rapid loss of tank air charge and requires immediate checks to isolate the cause.
Inspect visible piping and fittings for leaks, verify pump operation and power, check pressure switch and relief valves, confirm tank air charge, and temporarily isolate sections to pinpoint failure.
Act promptly to prevent damage.
Safety Reminders and Regulatory Considerations
Before performing checks, the author notes basic electrical and water safety practices to prevent shock, flooding, and equipment damage.
Attention is also drawn to local codes and permit requirements that may govern repairs or replacements.
Finally, guidance is given on lawful disposal or recycling of old tanks to guarantee environmental compliance.
Electrical and water safety best practices
Exercise caution around both electrical components and pressurized water when inspecting a pressure tank: treat power sources as live until verified off, depressurize the system before loosening fittings, and wear appropriate PPE to prevent shock or scald injuries.
Verify circuit isolation with a tester, secure lockout/tagout, use insulated tools, avoid wet conditions near electrical panels, and follow manufacturer safety instructions to minimize risks.
Local codes, permits, and proper disposal of old tanks
Although regulations and local requirements vary widely, anyone replacing or decommissioning a pressure tank should confirm applicable codes, permits, and disposal rules before work begins.
Authorities may require permits, licensed installers, or specific transport and recycling procedures.
Hazardous materials, contaminated tanks, and refrigerant-containing units need special handling.
Failure to comply can incur fines; documentation and receipt retention are recommended for legal protection.
Closing Checklist: Test, Adjust, and Maintain Pressure Tank Before Leaving Site
Complete a concise closing checklist to guarantee the pressure tank is safe, functional, and ready for normal operation before leaving the site.
Inspect for leaks, verify pressure settings, and confirm electrical and valve integrity. Document readings and actions, then notify the owner of status and next steps.
- Check external and plumbing seals
- Verify cut-in/cut-out pressures
- Test safety relief valve
- Record readings and report
Conclusion
After dutifully testing, adjusting, and tightening every valve as if the tank’s fate hinged on human competence, the inspector leaves with a checklist that screams caution yet smirks at inevitability. Ironically, the very precautions meant to guarantee uninterrupted service quietly admit that systems degrade, seals fail, and pressure betrays plans. Still, with routine checks and sensible adjustments performed, the tank will grudgingly behave—until the next scheduled reminder, when diligence repeats its necessary, humbling ritual.