
How to Winterize a Well Pump: Step-by-Step Guide to Protect Your Water System
To winterize your well pump and protect it from freeze damage, follow these essential steps: Inspect the wellhead, casing, pressure tank, gauges, and exposed pipes. De-energize the circuits, drain the lines, and blow them out. Add insulation, heat tape, or crankcase heaters as necessary. Seal any gaps around the cap and pitless adapter, and maintain trickle flows where appropriate. Conduct follow-up checks during cold snaps to ensure everything is secure. This concise plan will help you prevent costly repairs and ensure a reliable water supply throughout the winter.
Overview of Winterizing a Well Pump and Water System
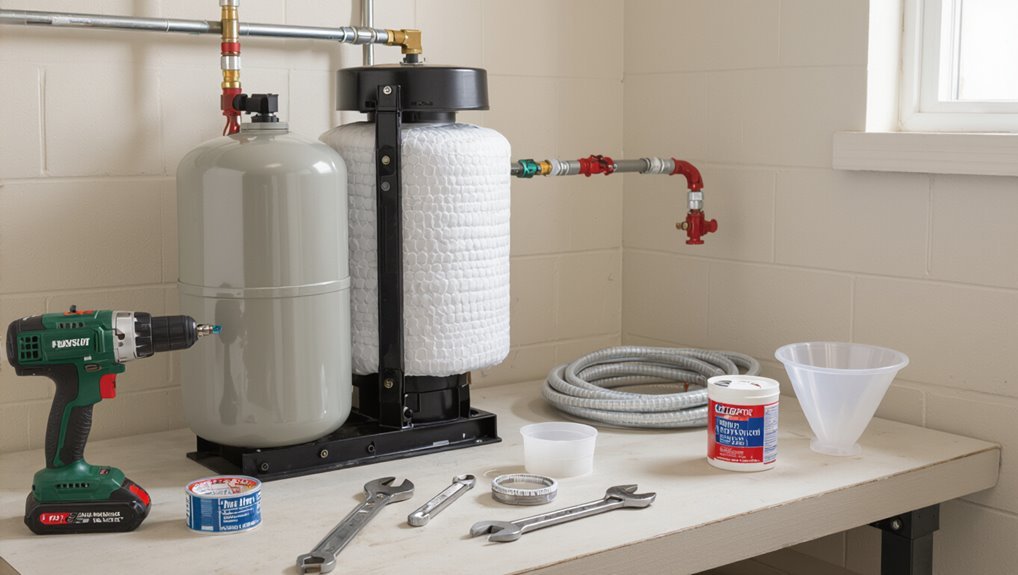
Winterizing a well pump protects water supply, prevents freeze damage to pipes and equipment, and reduces costly emergency repairs.
Indicators that a system needs winter protection include exposed pipes, intermittent pumping, reduced pressure, or history of freezing.
Timing depends on local climate and freeze risk, with colder zones requiring earlier and more thorough measures than milder regions.
Why winterizing a well pump matters for homeowners
Protecting a home’s water system from freezing temperatures prevents costly damage, service interruptions, and health risks.
Homeowners benefit from understanding how to winterize a well pump to avoid burst pipes, motor failures, and contamination from compromised seals.
Proactive measures reduce emergency repairs, preserve water quality, and extend equipment lifespan.
Planning seasonal maintenance minimizes downtime and unexpected expenses during cold months.
Signs your well system needs winter protection
Having established why seasonal care matters, homeowners should watch for clear indicators that a well system requires winter protection.
Signs include reduced flow or pressure, unusual noises from the pump, visible pipe frost or condensation, repeated short cycling, and surface water pooling near the wellhead.
Older insulation, exposed piping, and past freeze incidents also signal increased vulnerability needing preventive measures.
When to winterize based on climate zones and freeze risk
Timing depends largely on local climate and the site’s exposure: regions with regular subfreezing temperatures should begin preparations well before the first hard freeze, while milder zones may only need checks when forecasts predict extended cold snaps.
Winterize early in northern, high-altitude, or wind-exposed areas; schedule inspections after harvest or before seasonal storms.
Use freeze-risk maps and local advisories to set dates.
Safety Precautions and Tools Needed
Before beginning winterization, the writer notes that personal safety and electrical precautions are essential to prevent injury and equipment damage.
A concise checklist of tools and materials—gloves, eye protection, insulated tools, pipe insulation, and appropriate antifreeze—should be prepared.
Guidance is given on which situations require a professional, such as complex electrical work, deep-well systems, or signs of major damage.
Personal safety and electrical precautions
Because water and electricity create a serious hazard when working on a well pump, strict personal safety and electrical precautions are essential.
The operator should de-energize circuits, lock out and tag breakers, and verify power is off with a multimeter.
Wear insulated gloves and eye protection, avoid wet conditions, use nonconductive tools, and follow local electrical codes and manufacturer safety instructions.
Essential tools and materials checklist
A concise inventory of tools and materials helps guarantee safe, efficient winterization of a well pump.
The technician should gather items that enable isolation, drainage, protection, and basic repairs while minimizing risk and downtime.
- Insulated gloves, safety glasses, and nonconductive tools
- Submersible pump removal kit, wrenches, pipe cutters
- Frost-proof insulation, plumber’s tape, drain hose
When to call a professional
When should a homeowner call a professional for well pump winterization?
A professional is recommended if the system is complex, components are inaccessible, frozen or leaking, or if the homeowner lacks plumbing or electrical experience.
Call for pressure tank issues, contamination concerns, or local code requirements.
Professionals guarantee safe drain-down, antifreeze application, and reliable winter shutdown, reducing damage and liability.
Preparing the System: Pre-Winter Inspection
Before winter work begins, the system receives a thorough pre-winter inspection that covers the wellhead, casing, and cap for signs of damage or openings.
The technician checks pressure tanks, gauges, and control switches, identifies vulnerable pipes and exposed fittings, and tests pump operation.
Water quality is sampled to confirm there are no contamination issues that could complicate winterization.
Inspecting the wellhead, casing, and cap
Start by visually examining the wellhead, casing, and cap for signs of damage, gaps, or deterioration that could admit cold air, moisture, or pests.
Note cracks, loose fittings, corrosion, or missing seals. Verify cap fits securely and vents are unobstructed.
Document defects, photograph problem areas, and prioritize repairs or sealing to prevent freezing, contamination, and animal entry before winter conditions arrive.
Checking pressure tanks, gauges, and control switches
A thorough check of pressure tanks, gauges, and control switches guarantees the well system will maintain proper pressure and shutoff functions through freezing conditions.
Inspect tanks for dents, corrosion, and secure mounts. Verify gauge readings against normal operating range and replace faulty gauges.
Test pressure switch operation and adjust cut-in/cut-out settings if needed. Document findings and schedule repairs before winter.
Identifying vulnerable pipes and exposed fittings
With pressure components verified, attention shifts to the physical piping and exposed fittings that are most at risk from freezing and freeze-thaw damage.
Inspect exterior lines, risers, hose bibs, unions, and valve stems for exposure, cracks, or inadequate insulation.
Note buried pipe depths versus frost line, vulnerable bends and joints, and any nearby drafts.
Mark locations for insulating, wrapping, or relocating before cold sets in.
Testing pump operation and water quality
Verify pump operation and assess water quality to guarantee reliable performance through freezing months.
Inspect pressure switch and tank for correct cycling, listen for unusual sounds, and confirm pump primes and shuts off at set pressures.
Test water for bacteria, nitrates, and pH; document results.
Address abnormalities immediately—repair electrical issues, replace filters, or shock chlorinate—before temperatures drop.
Step-by-Step Winterization Process for Different Well Types
The following section outlines specific winterization steps tailored to common well and pump configurations.
It compares procedures for shallow/dug versus drilled/deep wells and differentiates care for pressure and submersible pumps as well as jet and surface pumps.
Readers will find concise, sequential actions for each type to protect components and maintain water quality through freezing temperatures.
Winterizing shallow and dug wells
For shallow and dug wells, attention to the wellhead seal and insulation is essential to prevent freezing and contamination.
The discussion will cover methods for properly sealing and insulating the wellhead and for protecting any exposed piping above and below grade.
Clear, practical steps for materials and installation will be outlined to guarantee reliable winter protection.
Sealing and insulating the wellhead
Begin by evaluating the wellhead’s current condition and location to determine the appropriate sealing and insulation approach.
Inspect for cracks, gaps, or degraded caps. Replace damaged caps and install a weatherproof, vented seal.
Apply rigid foam insulation or insulated well covers rated for ground contact. Secure against wind and rodents, guarantee vents remain clear, and verify a snug, watertight fit.
Protecting exposed piping
Protect exposed piping by evaluating its route, material, and vulnerability to freezing before selecting protection methods; shallow and dug wells often run near the surface, so exposed lines should be insulated, buried deeper where feasible, or enclosed in heated or insulated conduit to prevent ice damage and loss of service.
Use foam sleeves, heat tape with thermostat, and protective jackets; secure joins and slope lines to drain.
Winterizing drilled and deep wells
For drilled and deep wells, attention focuses on insulating the well cap and pitless adapter to prevent freezing at the headworks.
The drop pipe and electrical wiring should be protected with appropriate insulation and heat tape where permitted to maintain function and safety.
Proper sealing and support of these components reduces heat loss and minimizes risk of damage during cold weather.
Insulating the well cap and pitless adapter
Seal and insulate the well cap and pitless adapter to prevent freezing at their most exposed connection points.
Use closed-cell foam or specialized well-cap insulation to cover gaps and seal joints with silicone or waterproof tape.
Add rigid foam panels around the pitless adapter, ensuring access for future maintenance.
Secure insulation against wind and moisture, checking seals seasonally for integrity.
Protecting the drop pipe and wiring
With the well cap and pitless adapter insulated, attention shifts to the drop pipe and electrical conductors that run between the surface and the pump.
The drop pipe should be wrapped with closed-cell foam and sealed at joints; wiring needs weatherproof conduit and heat-traced cable where required.
Secure fasteners, check for chafing, and verify connections are dry and code-compliant before burying or closing access.
Winterizing pressure and submersible pumps
For pressure and submersible pumps, winterization begins with removing standing water from lines and housings to prevent freezing damage.
Compressed air is used to blow out remaining water from pipes and pressure tanks, while above-ground components are drained and isolated.
The following steps outline safety precautions and the proper sequence for each pump type.
Blowing out water with compressed air
Begin by shutting off the pump and power, then relieve system pressure by opening a downstream faucet or the pressure relief valve so trapped water can escape.
Using an air compressor with regulator and adapter, connect to the system’s service port. Apply short controlled bursts, advancing from closest fixtures to remote lines, until clear air flows.
Avoid overpressurizing; consult pump specifications.
Draining and isolating above-ground components
Drain and isolate all above-ground plumbing and pump components to prevent freeze damage and water loss during cold spells.
Shut supply valves, open drain ports, and remove or bypass pressure tanks where applicable.
Disconnect and elevate exposed piping, cap vents, and insulate remaining fittings with appropriate covers.
Verify all water is expelled and seals are secure before leaving the system unattended for winter.
Winterizing jet pumps and surface pumps
For jet and other surface pumps, winterization begins by draining the pump housing and any accessible priming ports to remove standing water that can freeze and cause damage.
Where local codes and pump materials permit, non-toxic propylene glycol antifreeze is then introduced into traps and exposed lines to protect low points.
The following steps outline safe draining, priming port care, and correct antifreeze application for these pump types.
Draining pump housing and priming ports
Before removing any fittings, the operator locates the pump housing and priming ports, confirms power is off, and relieves system pressure to prevent water spray or electrical hazard.
They open drain plugs and priming ports, allowing residual water to exit into a bucket or drain.
After flushing clear, ports are left open or loosely capped to guarantee complete drainage and prevent trapped water.
Adding antifreeze to trap and lines (when appropriate)
When appropriate for the system and local freeze risk, the operator introduces a non-toxic propylene glycol antifreeze into exposed trap(s) and above-ground service lines to prevent residual water from freezing and damaging components.
The operator measures required concentration, isolates potable piping, pumps antifreeze into traps and low points, checks seals, vents trapped air, and labels treated sections to guarantee safe, effective protection and future maintenance.
Insulation and Heat Options for Long-Term Protection
Effective long-term protection combines proper insulation, controlled heat, and weatherproof enclosures to prevent freezing and equipment damage.
Common insulation choices include foam pipe wrap, pre-formed split insulation, and insulating jackets for wellheads, while heat tape or heat cables with thermostatic controls provide targeted, energy-efficient warmth.
For exposed pumps and pressure tanks, building insulated boxes or enclosures with ventilation and access panels offers added protection and maintenance convenience.
Types of insulation for pipes and wellheads
Because pipes and wellheads face different exposure and heat-loss conditions, selecting the right insulation material and method is critical for long-term freeze protection.
Common options include closed-cell foam sleeves for aboveground pipes, mineral wool for high-temperature or irregular shapes, rigid foam boards for wellhead enclosures, and spray foam for gaps and joints.
Weatherproofing and UV-resistant coverings extend service life.
Using heat tape, heat cables, and thermostatic controls
Although passive insulation slows heat loss, active heating methods such as heat tape and heat cables are often necessary for reliable freeze protection in exposed or long runs of pipe and for wellheads.
Self-regulating cables adjust output with temperature; constant-watt options require thermostatic controls.
Proper installation, manufacturer guidelines, GFCI protection, and secure fastening prevent damage and guarantee safe, effective operation throughout winter.
Building enclosures or insulated boxes for external equipment
Construct a weatherproof enclosure or insulated box sized to accommodate the wellhead, pressure tank, and associated piping, using rigid foam, plywood, or insulated composite panels to create an airtight shell that minimizes convective heat loss.
Include removable access panels, sealed cable and pipe penetrations, and a moisture barrier.
Add passive insulation, optional thermostatically controlled heater or heat cable, and ventilation for condensation control.
Preventing Freeze Damage to Distribution Pipes
The discussion shifts to protecting distribution pipes from winter cold, starting with tracing and insulating interior supply lines to identify vulnerable runs.
It then addresses maintaining minimal heat and circulation—such as thermostatically controlled space heating or periodic water flow—to prevent standing water from freezing.
Finally, attention turns to seldom-used faucets and exterior spigots, recommending isolation, drainage, or insulating covers to avoid ice damage.
Tracing and insulating interior supply lines
Locate and map all interior supply lines from the well pump to fixtures and appliances, noting their routes through basements, crawlspaces, and wall cavities so insulation can be applied where it will be most effective.
Identify exposed, uninsulated, or poorly secured runs. Apply foam pipe insulation, heat-resistant tape, or closed-cell spray foam at vulnerable sections, sealing gaps at wall penetrations and around valves to prevent cold air ingress.
Maintaining minimal heat and circulation strategies
Several practical measures help maintain minimal heat and steady circulation to keep distribution pipes from freezing: small continuous heat sources (like low-wattage thermostatically controlled tape or a dedicated crankcase heater), strategic looped piping to promote convective flow, and controlled trickle flows that prevent stagnation.
Insulation, sealed access panels, and monitored thermostat setbacks guarantee consistent warmth; periodic checks confirm flow and heater operation to avoid cold spots.
Handling seldom-used faucets and exterior spigots
Inspect seldom-used faucets and exterior spigots for vulnerability to freezing, since stagnant water and exposed fittings are common failure points in distribution systems.
Drain and shut off interior supply lines to unused fixtures, open cabinet doors, and remove aerators where appropriate.
Install insulation, foam covers, or frost-proof spigots outdoors.
Periodically open fixtures to verify flow or apply low continuous heat to prevent ice formation.
Dealing with Power Outages and Emergency Measures
When power fails in cold weather, homeowners should employ temporary measures—such as insulating exposed pipes, circulating warm water, or using portable heat sources—to reduce freezing risk until power is restored.
If a generator is required to run the well pump, operators must follow safe connection practices, proper grounding, and load limits to prevent backfeed and equipment damage.
In cases where pipes begin to freeze, controlled thawing techniques and safety precautions should be used to avoid bursts and injury.
Temporary methods to prevent freezing during outages
Prepare for outages by assembling a few reliable, temporary measures that keep well components above freezing until power is restored.
Insulate exposed pipes with foam and heat tape on battery backup.
Apply temporary covers to vents and seals.
Circulate stored warm water periodically through lines.
Monitor temperatures with a battery-powered gauge and check insulation integrity until normal heating resumes.
How to safely use generators to keep pumps running
Operate a generator with caution to maintain well pump function during outages, ensuring fuel, ventilation, and electrical connections meet safety standards.
Position the unit outdoors away from doors and vents, use proper grounding, and follow manufacturer load limits.
Connect pumps via a transfer switch or qualified electrician to prevent backfeed.
Monitor fuel, oil, and runtime; shut down for maintenance as needed.
Emergency thawing methods and cautions
If a generator cannot be used or power is already out, attention turns to emergency thawing methods to restore frozen well pump components and supply lines safely.
Use gentle heat sources: hair dryers, heat lamps, warm towels; apply heat gradually from warmest point toward frozen sections.
Avoid open flames, high-amp devices, pressurized thawing, or rapid temperature shifts.
Monitor for leaks and call a professional if unsure.
Post-Winter Start-Up and Inspection
After thawing, the system should be restarted in a controlled, stepwise sequence to prevent pressure spikes and motor strain.
A careful inspection for freeze damage, cracked pipe fittings, and leaks follows before full operation is resumed.
Finally, water pressure, pump cycling behavior, and water quality should be tested to confirm the well is functioning normally.
Stepwise process to restart the well pump safely
Begin the restart sequence by visually inspecting the pump, pressure tank, piping, and control components for damage, leaks, or rodents before restoring power.
Then restore power, set the pressure switch to cutoff, open isolated valves slowly, and run the pump briefly to purge air.
Observe pressure gauge, listen for unusual noises, and confirm steady cycling.
Record readings and schedule professional service if anomalies persist.
Inspecting for freeze damage and leaks after thaw
With the pump running and initial checks completed, attention shifts to inspecting for freeze damage and hidden leaks that may have developed during thaw.
The technician examines visible piping, fittings, pressure tank and joints for cracks, water stains or pooling.
Inside the system, signs include air in lines or reduced flow.
Any damage is documented, isolated, and repaired promptly to prevent contamination or further failure.
Testing water pressure, pump cycling, and water quality
Start by running the pump through several complete cycles while monitoring pressure readings and flow to confirm the system responds predictably and reaches its designated cut-in and cut-out pressures.
Record cycling frequency to detect short cycling or delays.
Check faucets for steady flow and measure static and running pressure.
Collect water samples for bacterial, nitrate, and turbidity tests; address contamination promptly with treatment or professional remediation.
Common Problems, Causes, and Troubleshooting
Common winter failures include frozen pipes and ice-bound pump housings that interrupt flow and can crack components.
Technicians assess symptoms—no water, visible leaks, abnormal noises—to distinguish frozen lines from internal pump damage.
Decisions to repair or replace hinge on extent of corrosion, seal and impeller damage, and the projected cost versus remaining service life.
Diagnosing frozen pipes and frozen pump housings
Diagnosing frozen pipes and pump housings requires a methodical assessment of symptoms, temperature history, and visible signs of ice formation.
Inspect exposed lines, joints, and pump exterior for frost, bulging, or cracking. Check reduced or absent flow, rattling, and pressure drops.
Measure ambient and pipe temperatures. Isolate likely freeze points, document findings, and prioritize thawing and insulation where evidence indicates ice blockage.
Identifying pump failures caused by freezing
Having located likely freeze points and their symptoms, the next step is to identify specific pump failures that result from freezing.
Common failures include cracked housings, burst intake or discharge lines, stuck valves, damaged seals, and impeller deformation.
Signs include sudden pressure loss, unusual noises, leaks when thawing, and loss of prime.
Document findings and isolate the system for safe assessment.
Repair vs. replace: decision guidance
Decide whether to repair or replace a frozen well pump by weighing the extent of damage, the pump’s age and warranty status, and the long-term cost implications of each option. Assessment should prioritize safety, downtime, and future reliability. Minor mechanical damage and active warranty favor repair; extensive corrosion, recurrent failures, or obsolete models justify replacement.
| Factor | Guidance |
|---|---|
| Age | Replace if >15 years |
| Damage | Repair if minor |
Maintenance Schedule and Seasonal Checklist
A concise maintenance schedule helps guarantee the well pump remains reliable through changing seasons.
It typically includes an annual winterization checklist, routine tasks for spring, summer, and fall, and targeted inspections before freezing weather.
Clear recordkeeping of service dates, performed tasks, and parts replaced simplifies future maintenance and warranty claims.
Annual winterization checklist
Once each autumn, owners should follow a concise annual winterization checklist to protect the well pump and plumbing from freeze damage and guarantee reliable operation through the cold months.
The checklist prioritizes inspection, insulation, and emergency preparation:
- Inspect pump house, seals, and wiring for gaps or deterioration
- Insulate exposed pipes, valves, and pressure tank connections
- Stock antifreeze-safe supplies, backup power, and contact info for a plumber
Recommended maintenance tasks throughout the year
Establish a year‑round maintenance schedule that breaks tasks into seasonal checks—spring, summer, autumn, and winter—to guarantee consistent performance and early detection of problems.
Inspect pressure tank and wellhead seals each spring.
Test water quality in summer.
Clear vents and insulate exposed pipes in autumn.
Verify pump operation plus backup power before freeze onset.
Replace worn fittings as identified.
Recordkeeping tips for well service and winterization
Maintain concise, organized records to guarantee winterization and routine well service are traceable and actionable. Logs should note dates, performed tasks, technician names, parts replaced, and test results.
Store digital backups with timestamps and secure access. Include seasonal checklists, warranty info, and service intervals.
Review records before each maintenance cycle to identify patterns, anticipate repairs, and verify compliance with local regulations.
Cost Considerations and When to Hire a Professional
Typical DIY winterization supplies—insulation, heat tape, and basic plumbing materials—usually total a modest one-time expense, while hiring a professional incurs labor plus service fees that can be several times higher.
Professional service is often recommended for complex systems, deep or shared wells, evidence of existing damage, or when local codes require certified work.
Homeowners should weigh upfront costs against the risk and potential expense of repair from improper winterization.
Typical costs for DIY winterization vs professional service
Cost is a key factor when deciding whether to winterize a well pump personally or hire a professional:
DIY efforts often require only basic materials—insulation, heat tape, antifreeze for traps, and perhaps replacement seals—totaling roughly $30–$150 depending on system complexity.
In contrast, professional services commonly range from $150 to $600 or more to cover labor, diagnostics, and any necessary repairs.
Additional costs may include travel fees, specialized parts, and seasonal demand surcharges.
Scenarios where professional winterization is recommended
When should a homeowner call in a professional to winterize a well pump?
Complex systems, aging equipment, deep or artesian wells, limited access, or persistent leaks warrant professional attention.
Owners lacking tools, experience, or confidence should hire technicians.
Professionals are recommended when local regulations apply, when electrical or plumbing modifications are needed, or after recurring failures to guarantee proper insulation, drainage, and freeze protection.
Additional Resources and Local Considerations
Readers are encouraged to check local codes, permit requirements, and health department recommendations before beginning winterization.
Manufacturer guidelines for pumps and pressure tanks should be consulted to guarantee warranty compliance and correct procedures.
Links to technical resources and product manuals can provide step-by-step instructions and troubleshooting specifics.
Local codes, permits, and health department recommendations
Why might local codes and health department guidance shape a winterization plan? Local codes can require specific methods, backflow prevention, or permits for altering well systems.
Health departments may mandate disinfection, inspection, or reporting after service. Compliance guarantees legal protection, public safety, and potable water standards.
Before winterizing, consult local authorities to confirm required approvals, documentation, and any seasonal restrictions.
Manufacturer guidelines for pumps and pressure tanks
Manufacturer specifications for pumps and pressure tanks provide essential instructions that should govern any winterization work.
Manufacturers detail temperature limits, recommended antifreeze types and concentrations, pressure settings, drain and isolation procedures, and maintenance intervals. Following these guidelines preserves warranties, prevents equipment damage, and guarantees safe operation.
Deviations require documented approval from the manufacturer or a licensed technician to avoid liability.
Links to further technical resources and manuals
After consulting the pump and tank manufacturer’s specifications, owners should assemble authoritative references and manuals that reinforce those instructions and address local conditions.
Relevant resources include OEM manuals, regional plumbing codes, and seasonal maintenance guides. Collect digital copies, bookmarked links, and printed excerpts for quick access.
- OEM pump and pressure tank manuals
- State/local plumbing and well regulations
- Step-by-step winterization checklists
Conclusion
Proper winterization preserves well pump function and prevents costly freeze damage. Studies show that frozen plumbing causes over $1 billion in annual homeowner losses, highlighting prevention’s value. By following inspections, insulating exposed components, and applying the correct drain or heat strategies for the well type, homeowners greatly reduce risks. Regular seasonal checks and prompt troubleshooting maintain water access through cold months, while professionals can be engaged for complex systems or uncertain situations.
