How to Install a Water Filter Faucet: Step-by-Step Guide for Beginners
To install a faucet-mounted water filter, follow these straightforward steps: First, shut off the water supply. Next, remove the aerator from your kitchen tap and clean the threads thoroughly. Attach the correct adapter for your filter, then hand-thread the filter housing onto the tap. Lubricate the seals to ensure a proper fit and tighten it by hand. After installation, flush the system and check for leaks to ensure everything is secure. Remember to replace the filter cartridge regularly for optimal performance, and consult certification guidelines for information on contaminant removal. For more detailed steps, troubleshooting tips, and maintenance advice, continue reading.
What a Faucet-Mounted Water Filter Is and Why Install One
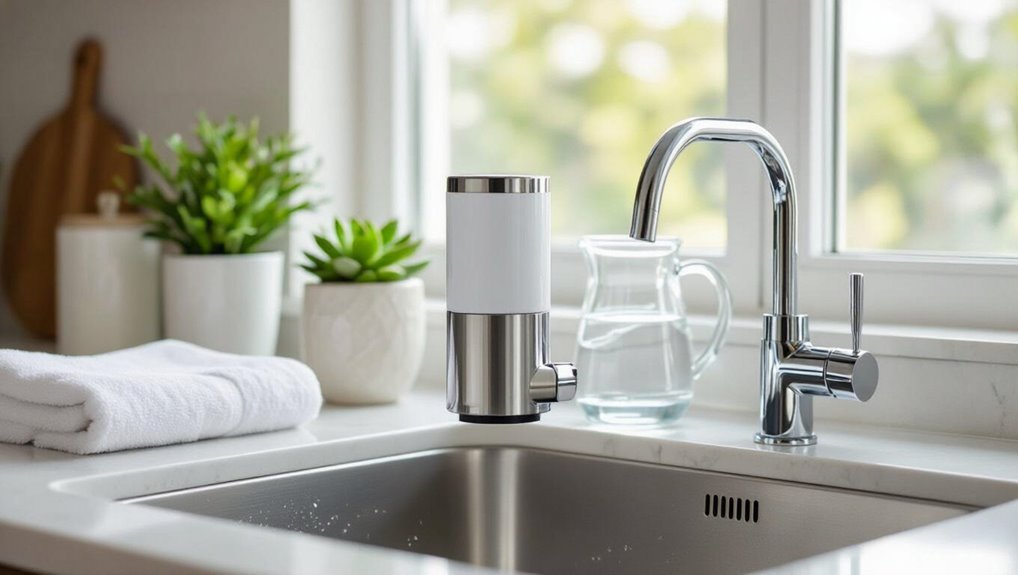
A faucet-mounted water filter attaches directly to the kitchen tap and uses cartridge media—typically activated carbon and sometimes ion exchange or KDF—to reduce chlorine, sediment, lead, and certain volatile organic compounds, with many models carrying NSF/ANSI certifications for specific claims.
It offers quick, low-cost point-of-use filtration and easy cartridge replacement, but it may not remove all contaminants that under-sink systems or reverse osmosis units can handle and can restrict flow or interfere with some faucet types.
Consumers should compare certified contaminant removal lists and weigh convenience against performance and capacity when choosing between faucet-mounted, under-sink, or pitcher filters.
How faucet-mounted filters work
Plumbing a compact filtration unit directly onto a kitchen faucet allows municipal or well water to pass through cartridge media that reduce contaminants, chlorine taste and odor, sediment, and sometimes heavy metals and microorganisms.
Water flow is diverted through activated carbon, ceramic, or composite layers; filtered output routes to the spout while unfiltered flow remains available.
Instructions for how to install a water filter faucet emphasize simple tool-free connections and cartridge replacement.
Common contaminants removed and certification standards
Remove common tastes, odors, and visible particles as primary benefits of faucet-mounted filters: most cartridges target chlorine, chloramine, sediment, and volatile organic compounds (VOCs), while higher-grade models also reduce lead, mercury, cysts (Giardia and Cryptosporidium), and some pesticides.
Certification by NSF/ANSI standards (42, 53, 401) verifies specific contaminant reductions; label claims should be checked against tested performance.
Benefits and limitations compared with under-sink and pitcher filters
Although compact and easy to install at the kitchen tap, faucet-mounted filters occupy a middle ground between under-sink systems and pitchers: they deliver immediate, filtered water for drinking and cooking without permanent plumbing changes, but offer more limited flow, capacity, and contaminant removal compared with larger under-sink units and less convenience and aesthetic integration than pitchers.
They are affordable and space-saving yet require frequent cartridge changes and fit constraints.
Quick Overview: Typical Installation Time and Required Tools
A brief estimate of the installation time and required skill level helps readers decide if they can tackle the job themselves or should hire a pro.
Typical faucet-mounted filter installs take about 15–45 minutes for someone with basic DIY experience.
A concise tools and materials checklist—adjustable wrench, plumber’s tape, rag, and the filter kit—prepares the reader to start.
Estimated time and skill level
Most installations take between 30 and 90 minutes, depending on sink configuration and rider experience.
A homeowner with basic DIY skills typically completes the job in under an hour; novices may need more time.
Moderate plumbing familiarity is helpful but not required.
Tasks demand attention to fittings and leak checks.
Professional help is recommended for complex or unfamiliar plumbing situations.
Tools and materials checklist
Checklist items cover timing, basic hand tools, plumbing fittings, and safety gear needed for a typical 30–90 minute installation.
The checklist lists essential parts, recommended tools, and prep steps so a beginner can assess readiness before starting.
- Adjustable wrench, basin wrench
- Silicone sealant, plumber’s tape
- Filter faucet assembly, hoses
- Shutoff valve access tools
- Safety glasses, gloves
Choosing the Right Faucet Water Filter
Selecting the appropriate faucet water filter begins with identifying the type—clip-on, adapter-based, or dual-flow—to guarantee compatibility with the existing spout and thread size.
Consider filter capacity and replacement frequency, since higher-capacity cartridges last longer but usually cost more upfront.
Balancing initial cost, ongoing replacement expenses, and the specific contaminants targeted will guide the best choice.
Types of faucet filters (clip-on, adapter-based, dual-flow)
Faucet-mounted filters come in three main designs—clip-on, adapter-based, and dual-flow—each balancing ease of installation, filtration performance, and faucet compatibility.
Clip-on units attach directly to the spout for quick use but offer limited media capacity.
Adapter-based systems replace or fit over the aerator, supporting larger cartridges.
Dual-flow models switch between filtered and unfiltered water, conserving filter life.
Matching filter to your faucet type and threads
After identifying the general design that fits usage needs—clip-on, adapter-based, or dual-flow—the next step is matching the chosen filter to the specific faucet style and thread size. Measure thread diameter and count threads per inch; note aerator type and spout shape. Use compatible adapters when needed; avoid forcing mismatched threads to prevent leaks.
| Faucet Type | Thread Size | Adapter Needed |
|---|---|---|
| Standard male | 15/16″ – 27 | Sometimes |
| Standard female | 55/64″ – 27 | Often |
| Pull-out/spray | Non-standard | Usually |
Filter capacity, replacement frequency, and cost considerations
Many factors determine the right balance between filter capacity, replacement frequency, and overall cost: contaminant load, household water use, and desired maintenance interval.
Higher-capacity cartridges reduce replacement frequency but cost more upfront. Lower-cost filters require frequent swaps and may increase long-term expense.
Calculate annual cost per gallon and consider certification, cartridge availability, and installation complexity to choose the most economical, effective option.
Preparing for Installation
Before beginning installation, the faucet and incoming water supply should be inspected for compatibility and signs of wear.
The water supply must be shut off and the sink area protected to prevent damage or spills.
Manufacturer instructions and safety notes should be read and followed closely to guarantee correct assembly and operation.
Inspecting your faucet and water supply
Inspect the faucet and water supply to confirm compatibility and identify any issues that could hinder installation: check whether the spout is removable or threaded, measure the distance from the mounting hole to nearby obstructions, verify the type of shutoff valve under the sink, and note water pressure and pipe materials (copper, PVC, PEX) that affect connector choice.
Record adapter needs, clearance, and any corrosion or leaks.
Shutting off water and protecting sink area
Once the main sink valve is located and labeled, the installer closes it tightly to stop flow to the faucet being worked on.
Cold and hot lines are checked; residual pressure is relieved. The sink area is cleared and protected before tools arrive.
- Place a bucket under connections
- Wrap fittings with towel
- Lay down a waterproof mat
- Use protective tape on surfaces
- Keep flashlight and pliers nearby
Reading manufacturer instructions and safety notes
While preparing to install the new faucet, the installer carefully reads the manufacturer’s instructions and all included safety notes to confirm required parts, tools, torque specifications, and any model-specific steps.
They verify warranty conditions, note warnings about electrical or water pressure hazards, and follow recommended sequences.
Any unclear points prompt contacting support before proceeding to avoid voiding warranty or causing damage.
Step-by-Step Installation Guide
The following steps guide the installer through removing the existing aerator, cleaning the faucet threads, and fitting any required thread adapters.
Next, the filter housing is attached and secured with the correct seals, O-rings, and washers to guarantee a tight connection.
Finally, the new filter is flushed and the assembly is inspected for leaks before regular use.
Removing existing aerator and cleaning threads
Before attaching the filter faucet, remove the existing aerator and inspect the spout threads to guarantee a clean, even surface for the new connection.
Use pliers with tape to prevent scratching, turn counterclockwise, and lift the aerator.
Clear debris and mineral deposits with a small brush and vinegar-soaked cloth.
Wipe threads dry and verify no remaining sealant or damage before proceeding.
Installing adapters or thread converters if needed
If the faucet threads appear mismatched after cleaning, proceed to select and install the appropriate adapter or thread converter so the new filter faucet will seat properly.
Verify thread type (male/female, metric/imperial) and size, apply plumber’s tape to seal threads, hand-start the adapter, then tighten with a wrench without overtorquing.
Confirm alignment before final tightening.
Attaching the filter housing to the faucet
Begin by aligning the filter housing with the faucet outlet so the inlet and outlet ports match the adapter or spout orientation; this initial positioning guarantees a straight, leak-resistant connection and prevents cross-threading when components are joined.
Gently thread the housing onto the adapter by hand, then tighten to manufacturer torque recommendations using an appropriate wrench, keeping the housing square and supporting the faucet to avoid strain.
Securing seals, O-rings, and washers
Secure the seals, O-rings, and washers carefully to affirm a watertight connection and prevent leaks.
Inspect each component for nicks, cracks, or debris before installation.
Lightly lubricate O-rings with manufacturer-recommended silicone grease to ease seating.
Position washers flat, align seals in grooves, and hand-tighten fittings initially.
Avoid over-tightening; verify components sit flush and move freely without binding.
Flushing the filter and checking for leaks
Open the cold-water supply slowly and run the faucet for the recommended time to flush trapped air and loose carbon fines from the new cartridge.
Observe flow for steady, clear water.
Inspect all connections, fittings and beneath the sink for drips.
Tighten any finger-loose fittings, replace faulty O-rings, and recheck.
Continue monitoring for several minutes to confirm no leaks remain.
Switching between filtered and unfiltered flow (if applicable)
How should the user switch between filtered and unfiltered flow when the faucet offers both options?
The user should identify the dedicated lever or knob, usually marked or positioned separately. Move it to the filtered position for purified water, to unfiltered for regular tap water.
Verify flow selection by observing water clarity and toggling slowly to prevent pressure shocks or valve wear.
Troubleshooting Common Installation Problems
The section outlines common issues that can arise after fitting a water filter faucet and how to address them.
It covers leaks at connections and their fixes, incompatible faucet shapes with suggested alternatives, and causes and remedies for low water pressure.
It also explains why filters may fail to engage or why flow diverters malfunction and how to resolve those problems.
Leaks at the connection and how to fix them
When a water filter faucet develops a leak at the connection, the cause is usually a loose fitting, damaged seal, or misaligned thread; identifying which one quickly narrows the repair steps and prevents water damage.
The installer should tighten fittings, replace worn O-rings or Teflon tape, realign threads, and retest.
Persistent leaks warrant hose inspection or professional assistance to avoid downstream damage.
Incompatible faucet shapes and alternative solutions
Many sink faucets present shapes that are incompatible with standard water filter fittings, including tall goosenecks, single-hole pull-down spouts, and unusually wide or square bases, which prevent secure mounting or proper clearance.
Alternatives include deck-mounted adapter kits, under-sink diverter valves, countertop filter housings, or installing a dedicated filtered faucet.
Select components by measurements and consult manufacturer compatibility charts before purchasing.
Low water pressure after installation
Check for flow restrictions immediately after installation, as reduced pressure often stems from clogged aerators, partially opened supply valves, or blocked cartridge housings rather than a faulty filter unit.
Inspect and clean the aerator, confirm supply valves are fully open, flush the filter per manufacturer instructions, and check tubing for kinks.
If pressure remains low, test cold and hot lines separately and consult the filter’s flow-rate specifications.
Filter not engaging or flow diverter issues
Diagnose filter engagement and flow diverter problems by isolating the mechanism and inspecting for common faults: misaligned cartridges, improperly seated O-rings, debris obstructing the diverter valve, or incorrect installation of adapter fittings.
Verify alignment, reseat or replace O-rings, flush debris, and confirm adapters match threads and seals.
Test engagement repeatedly; if failure persists, consult manufacturer guidance or replace the diverter assembly.
Maintenance and Filter Replacement
The guide explains how to recognize end-of-life signs for the cartridge, such as reduced flow, taste changes, or indicator alerts.
It then outlines a clear step-by-step replacement procedure and notes proper disposal or recycling options for spent filters.
Finally, it covers seasonal care and storage practices to protect the system during periods of nonuse.
How to tell when to replace the cartridge
How can one recognize when a faucet filter cartridge needs replacement? Signs include reduced water flow, persistent taste or odor, visible discoloration, and frequent pressure drops.
Manufacturer-recommended timelines and usage-based indicators (liters filtered or months) guide proactive changes. Monitoring performance and checking indicator LEDs or mechanical gauges, if present, helps guarantee timely replacement without waiting for complete failure.
Step-by-step cartridge replacement process
Begin by shutting off the cold-water supply to the faucet and opening the spout to relieve residual pressure; this prevents spills and guarantees a safe, dry workspace.
Unscrew the filter housing, remove the old cartridge, inspect seals and O-rings, and clean the housing.
Insert the new cartridge oriented correctly, lubricate O-rings if needed, reassemble, restore water, and check for leaks and proper flow.
Proper disposal and recycling of used filters
Dispose used water-filter cartridges responsibly to prevent contamination and recover recyclable materials when possible.
Local regulations and manufacturer instructions determine disposal routes; some cartridges are accepted by municipal recycling or special collection programs.
Remove residual water, seal cartridges in bags if leaking, and label as used.
For non-recyclable units, follow hazardous-waste guidance.
Consider manufacturer take-back or recycling partnerships where available.
Seasonal care and long-term storage tips
Prepare filters and faucets for seasonal changes and long-term storage by flushing, drying, and protecting components to prevent damage, mold, and bacterial growth.
Drain all water, remove and dry cartridges, and ventilate housings.
Store cartridges in airtight, labeled containers at recommended temperatures.
Apply food-grade lubricant to seals, cover exposed fittings, and record installation and replacement dates to guarantee timely maintenance upon reuse.
Safety, Health, and Performance Tips
The section highlights practical steps to protect health and system performance when servicing a water filter faucet.
It covers preventing cross-contamination during cartridge changes, checking manufacturers’ filtration claims and certifications, and when pre-treatment (such as sediment or softening) can improve filter longevity and effectiveness.
Readers are encouraged to follow verified procedures and industry standards to maintain safe water quality.
Avoiding cross-contamination during changes
When changing the filter cartridge, care must be taken to prevent bacteria, sediment, or contaminants from entering the filtered water line; use clean tools, disinfected hands or gloves, and a sanitized workspace to keep components sterile.
Additionally, isolate the filter from unfiltered lines, cap exposed fittings, replace seals or O-rings if damaged, and flush briefly after installation to clear any residual particulates.
Verifying filtration claims and certifications
Although many manufacturers advertise broad contaminant removal, verifying filtration claims and certifications guarantees the faucet performs as stated and protects users’ health.
Inspect product labels for NSF/ANSI standards or equivalent third‑party testing that match targeted contaminants (e.g., lead, chlorine, cysts).
Request test reports, confirm certification numbers on certifier websites, and prefer models with clear performance data and documented maintenance requirements.
Improving filter performance with pre-treatment (if needed)
If source water contains high levels of sediment, iron, hardness minerals, or organic matter, pre-treatment can extend cartridge life and maintain flow rate by removing these load‑bearing contaminants before they reach the faucet filter.
Options include sediment strainers, activated carbon pretanks, water softeners, and iron filters.
Select pretreatment based on water testing, verify compatible flow rates and pressures, and schedule maintenance per manufacturer guidance.
Cost, Warranty, and Buying Considerations
Typical upfront costs for a water filter faucet include the unit price and installation materials, while ongoing expenses cover replacement cartridges and occasional servicing.
Warranty terms and reliable customer support should be checked for length of coverage, what parts are included, and the process for claims or repairs.
If maintenance becomes frequent, replacement costs rise, or water quality needs exceed the faucet’s capacity, upgrading to a more robust filtration system may be warranted.
Typical upfront and ongoing costs
Cost considerations for a water filter faucet encompass purchase price, installation outlays, and ongoing filter-replacement and maintenance expenses.
Typical costs include initial unit price, optional plumber fees, replacement cartridges, ancillary parts, and energy or disposal costs.
- Basic faucet unit: $30–$200
- Professional installation: $0–$150
- Replacement filters: $20–$80/year
- Extra fittings: $5–$30
- Disposal/recycling: nominal fees
Warranty terms and customer support tips
Beyond purchase and upkeep expenses, warranty terms and customer support affect the total value and long-term satisfaction with a water filter faucet.
Buyers should verify warranty length, coverage details, and claim procedures. Reliable manufacturers offer clear documentation, responsive support channels, and accessible replacement parts.
Keep receipts and register the product to expedite service. Compare service reputations before deciding.
When to consider upgrading to a different filtration system
When should a homeowner move from a faucet-mounted filter to a whole-house or under-sink system? Homeowners should consider upgrading when water needs exceed faucet capacity, treatment targets contaminants beyond faucet capabilities, or long-term costs favor centralized systems.
Evaluate initial expense, replacement filter prices, warranty coverage, installation complexity, and vendor support.
Prioritize certified performance, scalable capacity, and clear maintenance terms before purchasing.
Real-World Installation Scenarios
The section outlines common installation challenges and practical solutions for atypical kitchen setups.
It covers mounting options for pull-out or spray-head faucets, strategies for low-clearance faucets and compact sinks, and non-permanent approaches suitable for rental properties.
Each scenario includes compatible fittings and simple workarounds to minimize modification while ensuring reliable filtration.
Installing on pull-out or spray head faucets
Handling pull-out or spray head faucets requires a few adjustments to standard under-sink water filter installations because the retractable hose and quick-connect fittings change how components route and attach.
Installers should identify spray hose path, avoid kinks, and use compatible quick-connect adapters.
Secure filter supply lines to accommodate retraction, test spray operation for interference, and verify leak-free connections before finalizing the setup.
Solutions for low-clearance faucets and compact sinks
Because low-clearance faucets and compact sinks limit vertical and horizontal space, installers must adapt layout and component choices to fit tight geometries without compromising serviceability or flow.
Use low-profile filter heads, slimline cartridges, and right-angle fittings.
Mount filters under-sink or beside sink with short, flexible tubing.
Guarantee access for cartridge changes, secure brackets to prevent vibration, and check flow rates after installation.
Installing in rental properties without permanent modifications
When space constraints require low-profile components and tight routing, installers should also consider non-permanent solutions suitable for rental units where modifications must be reversible.
Use countertop-mounted filters, clamp fittings, quick-connect hoses, and adhesive or magnetic brackets. Avoid drilling or permanent sealants.
Document original conditions, preserve removed parts, and obtain landlord approval when required to guarantee compliance and easy restoration upon move-out.
Quick Reference: Installation Checklist and Timeline
Start by gathering the necessary tools and parts—wrench, Teflon tape, tubing, mounting hardware, and the filter assembly—so the installation proceeds without interruption.
The checklist below pairs each item with its step and an estimated time to help plan the project.
- Shut off water: 5 min
- Mount faucet: 15–20 min
- Connect tubing and fittings: 10–15 min
- Install filter cartridge: 5 min
- Test for leaks and flush: 10–15 min
Conclusion
A faucet-mounted filter offers quick, inexpensive water improvement, and installers should feel confident after following the guide. Studies show that properly maintained point-of-use filters can remove up to 99% of chlorine and many sediment particles, underscoring their effectiveness for taste and basic contaminant reduction. With routine cartridge changes, basic tools, and attention to leak checks, homeowners typically achieve cleaner, better-tasting tap water without major plumbing work.