
How to Fix Black Water Coming Out of Faucet: Causes, Quick Fixes, and When to Call a Plumber
If you’re experiencing black water coming from your faucet, it typically indicates issues like sediment buildup, corrosion, or organic contamination. To address this problem, start by running multiple taps, both hot and cold, and clean the aerators. Flushing your water heater can also help clear discoloration. If you still notice particles, metallic flakes, or unpleasant odors, stop using the water immediately and consider getting it tested or inspected by a professional. For short-term solutions, flushing the system and changing filters may suffice, but persistent issues warrant calling a plumber.
Why black water is coming from your faucet right now
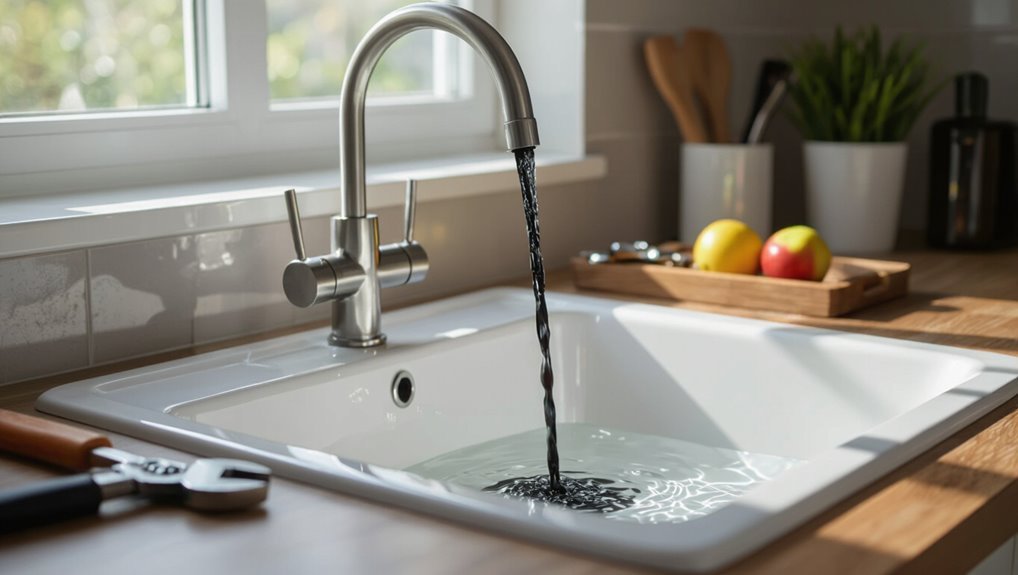
Visible clues such as loose black particles, metallic sheen, or oily film can indicate sediment, corrosion, or external contaminants.
The homeowner can test whether the issue is isolated by running multiple taps and checking the main supply line at the water meter or a hose bib.
Each cause carries different risks—corroded pipes may release heavy metals, while contaminated supply lines can harbor bacteria—so identification guides the appropriate safety response.
Immediate visible signs that the discoloration is from sediment, corrosion, or contaminants
Several quick observations can help determine whether black water is caused by sediment, corroded plumbing, or external contaminants.
Fine particles settling in clear containers suggest sediment; flaking, metallic flecks indicate corroded pipes; oily sheen or unusual odor points to contaminants.
Noting color intensity, duration, and particle behavior guides decisions on how to fix black water coming out of faucet or whether professional testing is needed.
How to safely check whether the black water is isolated to one faucet or affects the whole house
After noting particle type, odor, and persistence at a single tap, the next step is to determine the scope of the problem by checking other fixtures and the main supply.
Test hot and cold at multiple taps, bathtubs, and outdoor spigots.
Inspect the water heater, then the main shutoff after flushing a short time.
Record locations with discoloration and timestamp findings for technician review.
Health and safety risks associated with different causes of black water
Although many instances of black water stem from benign causes like pipe corrosion or rubber cartridge breakdowns, some sources pose clear health or property risks. Identifying the cause narrows whether concern should focus on aesthetic damage, plumbing failure, or contamination.
Mold, sewage, and chemical contamination carry infection and toxicity risks. Heavy metals and biohazards require immediate cessation of use, testing, and professional remediation.
Quick checks you can do before calling a professional
Before calling a professional, one should follow a simple shutoff-run-observe routine: shut the main or appliance valve, run both hot and cold for several minutes, and test water at different taps to note where and how long discoloration persists.
Comparing hot versus cold output and using basic household checks—filtering a sample through a paper towel, smelling for odors, or noting particle settling—helps distinguish mineral or sediment issues from organic or microbial causes.
If water appears odorous, oily, or remains black after flushing, or if skin contact or ingestion is a concern, stop using the supply for drinking, cooking, or appliances and seek expert help.
Step-by-step: shutoff, run, and observe (how long to run water, where to test)
Shut off the main supply, open cold taps at the lowest and highest points in the house, then run water for several minutes while observing color and odor changes; this sequence helps distinguish isolated fixture issues from system-wide contamination.
Record how long discoloration persists at each tap (typically 3–10 minutes). Test outdoors and at the meter.
Note recurrence after flow resumes to guide next steps.
Identifying source by testing hot vs. cold water
Once cold and outdoor taps have been checked, compare hot and cold water at the affected fixtures to narrow the source.
If only hot water is black, the water heater or its anode, sediment, or internal corrosion is likely.
If only cold is affected, supply lines, municipal service, or basement storage may be responsible.
If both are black, the issue is upstream of the heater.
Using simple household tests to distinguish mineral/sediment vs. organic/microbial causes
How can a homeowner quickly tell whether black water comes from mineral/sediment buildup or from organic/microbial sources?
Collect clear samples from hot and cold taps into glass jars; settle and observe.
Mineral/sediment often sinks and leaves gritty residue, may scratch glass.
Organic/microbial material may float, produce slimy film, odor, or discolor when exposed to air.
Test with diluted bleach: organic matter often clears.
When to avoid using the water (boiling, skin contact, appliances)
If discoloration, strong odor, or visible particles appear in multiple taps or persist after flushing, the water should be treated as potentially unsafe for drinking, cooking, bathing, or appliance use until the cause is identified.
Avoid boiling (may concentrate contaminants), prevent skin contact with sensitive individuals, and do not run dishwashers, washing machines, or ice makers.
Contact the utility or a plumber for testing and remediation.
Common causes of black water and how to identify each
Black water can originate from several distinct sources that require different fixes.
Corroded fixtures, valves, and rubber parts often shed dark particles, while filters, heaters, or mineral-rich supply lines release carbon, sediment, manganese, iron, or other buildup.
Organic contamination, biofilm, or disruptions in municipal mains—including breaks, maintenance, or hydrant flushing—produce black or discolored flow patterns that point to systemic or external issues.
Corroded plumbing fixtures, valves, and rubber components
Corrosion of fixtures, valves, and rubber components can introduce dark discoloration into household water by shedding metal oxides, degraded elastomer particles, and mineral-laden deposits.
Identifying these sources requires observing where the staining appears, checking for flaky or powdery residue on aerators and strainers, and inspecting rubber washers and valve seats for cracking, stickiness, or crumbling.
Localized blackening near a single faucet, visible flaking, or gritty particles point to fixture or valve failure.
Carbon or sediment from water filters and water heaters
Inspecting water filters and heaters often reveals two common sources of dark water: dislodged carbon from spent or damaged filter cartridges, and mineral or sediment buildup from water heater tanks and lines.
Black flecks or oily clumps near filter outlets indicate carbon. Sediment often appears as gritty, dark particles after flushing the heater.
Replace cartridges, flush tanks, and inspect housings for damage.
Manganese, iron, and other mineral buildup in supply lines
Examine supply lines for mineral deposits when water turns dark, since manganese, iron, and similar minerals commonly accumulate inside pipes and fixtures over time.
Signs include rusty or black flakes, metallic taste, and staining on fixtures.
Age, well water, or disturbed mains increase risk.
Flushing, mechanical cleaning, or replacing affected sections often resolves buildup; water testing confirms mineral concentrations and guides treatment.
Sewer or organic contamination and biofilm growth
Consider sewer backflow, septic failure, or dense biofilm growth when water turns black and has a sewage-like odor, oily sheen, or visible organic particulates.
Such contamination often follows drain backups, high groundwater, or compromised seals.
Confirm by testing for bacteria, chlorine demand, or odor persistence after flushing.
Remediation requires source repair, disinfection, pipe cleaning, and possibly professional sewage or septic services for safety.
Municipal water main breaks, maintenance, or hydrant flushing
When municipal distribution work or an unplanned main break disturbs settled sediments and dislodges biofilm inside pipes, customers downstream can see black or dark-brown water, often accompanied by sporadic staining on laundry and fixtures.
Flushing hydrants, valve repairs, or pressure changes mobilize rust, manganese, and organic films.
Identify by sudden onset, area-wide reports, utility advisories, and clearing after extended flushing.
Local well problems: pump, casing, or well water chemistry issues
Several common well-related problems can produce black or dark-brown tap water, typically stemming from pump failure, damaged casing, or chemical imbalances in the aquifer that mobilize iron, manganese, sulfides, or organic material.
Identify pump wear by intermittent discoloration and pressure loss; casing damage by sediment after heavy rain or well inspection; chemistry issues by lab tests showing high dissolved metals or organics, requiring treatment or well repair.
Quick fixes you can try yourself
Homeowners can try a few simple, low-cost actions before calling a professional to address black water from a faucet. These actions target common sources—sediment in lines or the heater, clogged aerators or cartridges, and contaminated filters—and include immediate safety steps for drinking and cooking.
If problems persist after these attempts, a plumber should inspect plumbing and municipal connections.
- Flush and aerate faucets and lines; clean aerators and faucet cartridges.
- Replace inline filters and filter cartridges; drain and flush the water heater safely.
- Use temporary water-use safety measures such as bottled water or boiling until water quality is confirmed.
Flushing and aerating faucets and lines
Start by running cold water from the affected faucet at full flow for several minutes to clear loose sediment and dislodge trapped air.
Remove and clean the aerator, rinsing debris and mineral buildup.
Open other faucets to create flow through the system, then flush mains by briefly turning off and on the supply.
Repeat until water runs clear and sputtering stops.
Replacing inline filters and filter cartridges
How often should inline filters be checked when black water appears? Inspect immediately and monthly thereafter until issue resolves.
Shut water, relieve pressure, remove housing, and examine cartridge for black residue, sediment, or rubber degradation.
Replace with manufacturer-specified cartridge, reseal O-rings, and reassemble. Run water to verify clarity.
Keep spare cartridges and document replacement dates for ongoing monitoring.
Draining and flushing the water heater safely
If black water persists after replacing inline filters, attention should turn to the water heater because accumulated sediment, corrosion, or degraded anode material can release dark particles.
Shut power/gas and cold-water supply, attach a hose to the drain valve, and direct discharge to a safe drain. Flush until water runs clear.
Inspect anode and drain valve; replace or call a plumber if unclear.
Cleaning aerators and faucet cartridges
Check the aerator and faucet cartridge for trapped debris or mineral buildup, since these small components commonly cause discolored flow even when the main supply is clean.
Remove aerator, soak in vinegar, brush, and rinse.
For cartridges, shut water, disassemble per manufacturer, inspect seals and screens, clean or replace parts.
Reassemble and test; persistent discoloration warrants a plumber.
Temporary water-use safety measures (bottled water, boiling)
While a discolored faucet flow is being evaluated, residents should immediately switch to safe alternate water sources; using bottled water for drinking and cooking and boiling tap water for at least one minute (rolling boil) before consumption are simple temporary measures that reduce health risks from possible contaminants.
Additional steps include avoiding ice from the tap, using bottled water for infant formula, and minimizing tap use until plumbing is inspected.
When a plumber or specialist is required
If discoloration, persistent odor, or household health symptoms occur, professional diagnostics are warranted.
A licensed plumber, water treatment specialist, or well contractor can identify causes using inspections, water sampling, and pressure or corrosion tests.
Expect recommendations such as pipe or valve replacement, system sanitization, or treatment upgrades based on the diagnostic findings.
Signs that indicate professional diagnostics (persistent discoloration, smell, health symptoms)
Frequently, certain warning signs signal that black water problems exceed basic troubleshooting and require a professional diagnosis.
Persistent discoloration after flushing, recurring black particulate, foul or chemical odors, visible staining on fixtures, skin or eye irritation after contact, and unexplained illness in household members all indicate potential contamination or systemic plumbing failure.
Prompt professional testing and remediation are advised.
Which specialists to call (licensed plumber, water treatment professional, well contractor)
Selecting the right specialist depends on the suspected source of the contamination: a licensed plumber addresses internal piping, fixtures, and municipal connection issues; a water treatment professional evaluates and installs filtration, softening, and disinfection systems; and a well contractor inspects, tests, and repairs private wells and pumps.
Choose a plumber for pipe corrosion or fixture deposits, a treatment pro for recurring quality problems, and a well contractor for private-source faults.
What to expect during a professional inspection and typical diagnostic tests
Begin with a systematic walkthrough: the technician will visually inspect fixtures, exposed pipes, water heater, and any visible sediment or staining.
Then, they will ask about when and where the discoloration occurs.
They will run cold and hot taps, collect water samples for turbidity and microbial tests, measure pH, iron and manganese levels, and assess pressure and flow patterns.
Results guide diagnostic recommendations.
Typical repair actions plumbers perform (pipe replacement, valve repair, system sanitization)
Once inspection findings and test results identify the source—corroded piping, failed valves, biofilm or sediment in the hot water tank—plumbers prescribe targeted repairs.
Typical actions include section or whole-pipe replacement with corrosion-resistant materials, valve repair or replacement, thorough tank flushing and descaling, chlorination and system sanitization, faucet and aerator cleaning, and post‑repair testing to confirm water clarity and safety before restoring normal service.
Long-term solutions and prevention strategies
Long-term prevention focuses on reducing corrosion and contamination through selective material upgrades and whole-house treatment systems.
Routine procedures—including scheduled water heater flushing, softener and filter maintenance, and regular testing or servicing of private wells—help detect problems before they produce black water.
Coordination with the local water utility is also important when issues stem from mains or supply infrastructure.
Upgrading plumbing materials to resist corrosion
Several durable upgrades can substantially reduce the risk of black water by replacing corrodible components with corrosion-resistant materials such as copper, PEX, stainless steel, or modern brass alloys; selecting the right material depends on water chemistry, local codes, and budget.
Replacing old pipes, fittings, and fixtures, using dielectric unions where dissimilar metals join, and choosing certified materials extends lifespan and reduces particulate corrosion.
Installing or maintaining whole-house filtration and water-softening systems
Upgrading to corrosion-resistant plumbing reduces particulate sources, but extensive protection often requires whole-house filtration and water-softening systems to address dissolved minerals, suspended solids, and biological contaminants that cause discoloration.
Proper system selection matches local water quality: sediment filters, activated carbon, and softeners reduce black discoloration risks.
Scheduled cartridge replacements, salt management, and professional annual inspections maintain performance and prevent recurrence.
Regular water heater maintenance schedule and procedures
A consistent water heater maintenance schedule is essential to preventing black water and extending appliance life.
Drain and flush the tank every six months to remove sediment, inspect and replace anode rods annually, check temperature/pressure relief valves, and verify thermostat settings.
Clean burners or heating elements and tighten fittings.
Document service dates and promptly address leaks or corrosion to prevent contaminants and failures.
Well maintenance and periodic water testing for private systems
Because private wells draw directly from local aquifers, regular maintenance and scheduled testing are essential to guarantee safe, clear water and to identify contamination before it affects household systems.
Homeowners should inspect well caps, seals, and pumps annually, shock-test after flooding, and perform lab testing for bacteria, nitrates, and metals every 1–3 years.
Document results and remediate promptly to prevent recurring black-water issues.
How to coordinate with your water utility for mains-related issues
Contact the local water utility promptly when black or discolored water appears, documenting the time, location, and symptoms to help them trace mains-related causes such as pipe breaks, sediment disturbances, or system flushing.
Provide access for inspections, follow advisories, keep records of communications, request boil or do-not-use notices if issued, and ask about infrastructure repairs, timelines, and preventive measures to reduce recurrence.
Cost considerations and decision guide
Costs and expected timeframes help determine whether a homeowner should attempt a DIY fix or hire a professional. The following table compares common solutions by estimated time, approximate cost range, and suitability. Use these benchmarks to weigh urgency, budget, and skill before choosing a path.
| Solution | Time to fix | Cost & Suitability |
|---|---|---|
| Flushing and filter change | 30–90 minutes | $10–$100; suitable for basic sediment/char issues |
| Pipe cleaning or parts replacement | 1–4 hours | $50–$400; suitable if corrosion or valve failure suspected |
| Professional inspection & repair | 2–6+ hours | $150–$1,000+; suitable for complex systems or supply-line contamination |
Typical cost ranges for DIY fixes vs. professional repairs
Weighing repair options requires a clear comparison of typical price ranges for DIY fixes versus professional services.
Common DIY fixes—cleaning aerators, replacing cartridges, flushing lines—cost $5–$50 in parts and tools.
Professional plumber rates typically run $75–$200 per hour plus $100–$400 for diagnostics or parts; full repairs or replacements often total $200–$1,200 depending on complexity and materials.
Comparison table of solutions, time to fix, cost, and suitability
After outlining typical DIY and professional price ranges, a compact comparison table helps homeowners match fixes to their budgets and skills.
| Solution | Time to Fix | Suitability |
|---|---|---|
| Aerator cleaning | 10–20 min | Low cost, DIY |
| Cartridge replacement | 30–60 min | Moderate skill or plumber |
| Pipe corrosion repair | Hours–days | Professional recommended |
How to document the problem and communicate effectively with a plumber or utility
Before a service visit, the homeowner should photograph discolored water at different times, collect a small sealed sample in a clean container, and note when and where the issue occurs and any recent plumbing or municipal events.
They should be ready to provide water source (hot/cold, specific faucets), household water treatment details, and recent changes like repairs or nearby construction.
Useful questions to ask include likely causes, recommended tests, expected timeline and costs, and whether the utility needs to be involved.
What photos, samples, and notes to collect before the visit
Several clear photos, a small set of water samples, and concise notes make it far easier for a plumber or utility to diagnose black water issues remotely.
Photograph affected faucets, stains, aerators, and plumbing access points.
Collect 250–500 ml samples in clean, labeled containers from initial and running flow.
Note time, odor, recent work, discoloration onset, and any pattern across fixtures.
Key questions to ask and information to provide to speed diagnosis
With photos, samples, and notes in hand, the homeowner should prepare a short list of targeted details to share with the plumber or utility to speed diagnosis.
Include: when discoloration began, affected fixtures, water appearance timeline, recent plumbing or municipal work, odor or texture, water source (well or mains), any filtration devices, and steps already taken.
Provide contactable access and sample labels.
Resources for testing and further help
For users facing black water, professional testing and certified help clarify causes and next steps.
Recommended lab analyses include microbial cultures, metals and corrosion markers, and organic/particulate screens to identify contaminants.
Local certified plumbers, water treatment specialists, and EPA or utility guidance provide actionable remedies and standards.
- Recommended laboratory tests: bacterial cultures, heavy metals (lead, iron, manganese), and organic/particulate analysis.
- Where to find help: state-certified plumbers and accredited water treatment professionals.
- Authoritative guidance: EPA resources and local utility water quality pages.
Recommended laboratory water tests and what they detect
A concise panel of laboratory analyses helps identify the cause of black water by detecting particulates, metals, organic material, and microbial contaminants.
Recommended tests include turbidity and total suspended solids (particulates), iron, manganese, lead and copper (metals), total organic carbon and petroleum hydrocarbons (organic), heterotrophic plate count and coliform/E. coli assays (microbial), and pH/conductivity for system context.
Where to find certified plumbers and water treatment professionals
Having laboratory results in hand, homeowners and facility managers should consult certified plumbers and water treatment professionals to interpret findings and implement fixes.
Seek licensed local plumbers via state licensing boards, utility referral lists, or trade associations (e.g., PHCC, ASSE).
For treatment systems, contact NSF-certified installers and accredited water treatment companies.
Verify credentials, ask for references, written estimates, and warranty details before hiring.
Links to EPA and local utility guidance on water quality
Reliable guidance on water quality from federal and local agencies helps homeowners interpret test results and identify next steps.
Links to EPA resources, state drinking water programs, and local utility advisories provide testing standards, contaminant fact sheets, and contact information for reporting issues.
Use official pages to verify certified labs, understand acceptable limits, and find remediation guidance.
- EPA drinking water pages
- State program portals
- Local utility advisories
Conclusion
Like a sudden eclipse in a familiar sky, black water at the tap signals unseen disturbance beneath the household calm. Readers are advised to run simple checks, consider likely causes—rust, biofilm, mineral buildup, or municipal work—and attempt safe, temporary fixes only when confident. When uncertainty, persistent discoloration, or health concerns arise, call a plumber or utility. Document findings, test if needed, and pursue long-term corrosion control to restore clear, trustworthy water.
