How to Find the Main Water Valve Fast: A Step-by-Step Guide for Every Home
To quickly stop flooding, locate and close your main water shut-off valve without delay. Begin by tracing the largest pipe that comes from the street to the meter. Inside your home, check basements, utility rooms, garages, or crawlspaces near where the water service enters. Outside, look for curb stops or meter boxes at the property line or on exterior walls. If necessary, use a meter key or channel-lock pliers, wear gloves, and ensure power is turned off in wet areas. Follow these step-by-step tips for safety and efficiency.
How to Locate the Main Water Shut-Off Valve Quickly
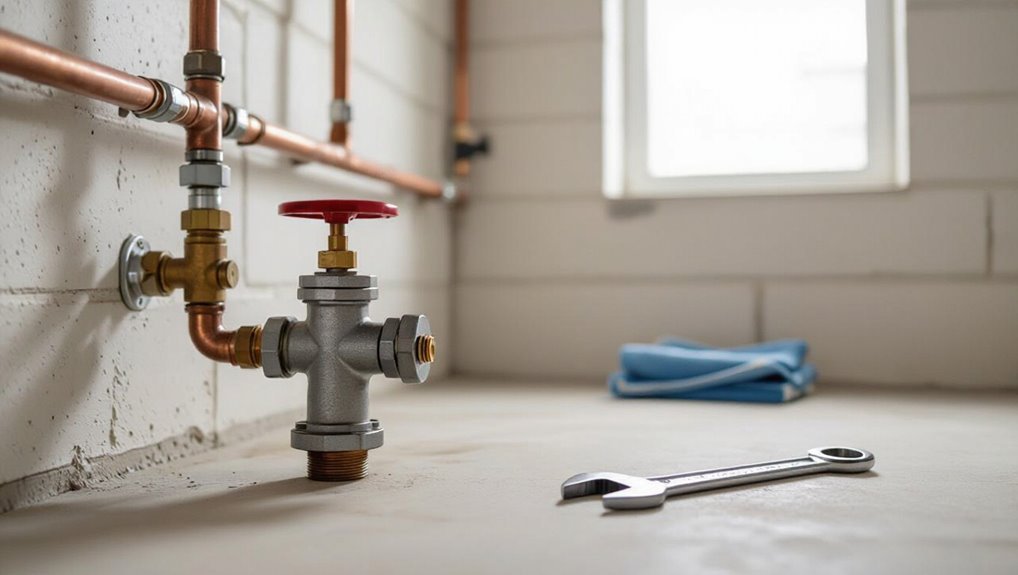
When a leak is suspected, the first priorities are to stop the water flow, turn off electricity to wet areas if safe, and contain the water with buckets or towels.
The main shut-off valve is usually located near the water meter, at the perimeter of the house in a basement, crawlspace, garage, or an exterior wall.
The following steps explain how to find and operate the valve quickly.
Immediate steps to take when you suspect a leak
Act immediately upon suspecting a leak: locate and close the main shut-off valve to stop water flow and limit damage.
Inspect visible pipes, listen for running water, and check water meter activity to confirm a leak.
If uncertain, turn off appliances and notify household members.
Know how to find the main water valve ahead of time, keep a wrench accessible, and call a plumber if needed.
One-sentence quick answer: where the valve usually is
After shutting off water to stop damage, a quick rule of thumb is that the main shut-off valve is usually located near where the water line enters the house—commonly in a basement, crawlspace, utility room, garage, or along an exterior wall near the street-facing side—sometimes inside a meter box at the curb for homes on municipal service.
If unclear, trace the largest pipe from the street to its first accessible valve.
Common Types and Locations of Main Water Valves
Main water valves commonly appear in two settings: inside homes—often in basements, utility rooms, or near the water heater—and outside, either at the house exterior or mounted on an exterior wall.
Some systems use a valve at the meter while others have a curb stop located near the property line for utility access.
Recognizing whether a property has a meter-based valve or a curb stop helps determine who is responsible for shutting off service.
Indoor main shut-off valves
Indoor main shut-off valves are commonly found in basements, where they are typically mounted on an interior wall or near the foundation entry point of the service line.
They may also be located in utility rooms or garages, often adjacent to the water heater or furnace for easy access.
In homes without basements, valves are sometimes installed in crawlspaces, positioned along the incoming pipe where it enters the structure.
Basement locations and typical mounting
Basements often house the primary shut-off valve where the water service enters the home, typically mounted on or near the foundation wall close to the water meter or where the incoming pipe drops from street level.
Valves are usually gate, ball, or curb-style bodies mounted on copper, PVC, or galvanized piping. They appear near meters, utility chases, or exposed piping runs for easy access and maintenance.
Utility room and garage placements
When a home’s water service enters through an attached garage or utility room, the shut-off valve is commonly mounted on the interior wall near the service entrance, often close to the water heater, laundry hookups, or electrical panel for centralized access.
It may be a ball valve with a lever or a gate/stop valve. Look low on the inlet pipe, behind appliances or near the meter.
Crawlspace installations
Many homes route their main water line through a crawlspace, where the shut-off valve is typically mounted along the incoming supply pipe near the foundation wall or under the sill plate.
Crawlspace valves are often gate or ball types, sometimes with extension handles. They may be behind insulation, beside HVAC ducts, or near the sewer cleanout; a flashlight and careful navigation usually reveal their location.
Outdoor main shut-off valves
Outdoor shut-off hardware is often found at the property line as a curb stop or inside a meter box near the street, providing access for utility crews and homeowners.
Some systems instead place the shut-off on an exterior wall or incorporate it into the hose bib assembly for convenient access.
Identifying which configuration a property uses helps determine where to look and what tools may be required.
Curb stop and meter box near the street
A curb stop and meter box near the street serve as the utility company’s primary access point for shutting off a home’s water supply at the property line.
Typically located in a roadside grass strip or sidewalk cutout, the metal or plastic box covers the water meter and curb key valve.
Utilities use a long key to turn the curb stop, isolating water before it enters the service line.
Exterior wall and hose bib setups
When present, an exterior wall shut-off or hose bib valve provides a convenient point to stop water before it enters the home’s interior plumbing.
Typically located on foundation walls near outdoor faucets, garages, or utility rooms, these valves use gate or ball mechanisms and require a wrench or key.
They may be capped, insulated, or labeled; accessibility and winterization affect usability and servicing.
Meter-based valves vs. curb stops
Although both serve as shutoffs for a property’s water supply, meter-based valves and curb stops differ in location, ownership, and access: meter valves sit inside or near the meter, usually on private property and accessible to the homeowner; curb stops lie near the street, owned by the utility and often under a sidewalk or grass strip, requiring tools or utility access.
| Type | Location | Typical Access |
|---|---|---|
| Meter-based | At meter/on property | Homeowner key |
| Curb stop | Near curb/street | Utility/valve key |
| Visibility | Higher | Often buried |
How to Identify Your Valve by Home Type
Identification of the main water valve varies with dwelling type, so recognizing common setups for single-family homes, townhouses and row homes, apartments and multi-family units, and mobile or manufactured housing helps locate it quickly.
Single-family properties often have an exterior or basement valve tied to the water meter, while townhouses and apartments may have shared or unit-specific valves in basements, utility rooms, or hallways.
Mobile and manufactured homes typically use an exterior shutoff near the skirting or at the supply line entry.
Single-family homes
Single-family homes typically have the main water shutoff located where the supply line enters the house, often in a basement, crawl space, utility room, or near the garage.
Exterior shutoffs may be found on an outside wall or in a covered box at the property line.
Homeowners should inspect entry points, follow the incoming pipe to its valve, label it, and guarantee unobstructed access for emergencies.
Townhouses and row homes
Many townhouses and row homes share similar plumbing layouts, so the main shutoff is often found where the water service enters the unit—commonly in a basement, utility closet, or garage—or on an exterior wall near the meter;
when units are stacked, the valve may be located on a lower floor or in a shared mechanical room.
Inspect near meters, service pipes, and labeled panels; check exterior meter boxes.
Apartments and multi-family units
Locate the main water shutoff in apartments and multi-family buildings by tracing where the service line enters the structure: in smaller apartment units it is often inside the unit—in a bathroom, kitchen closet, or utility cabinet—while in larger buildings shutoffs are frequently clustered in a shared mechanical room, basement, or locked hallway closet near the water meter.
Tenants should contact management for access or documentation.
Mobile homes and manufactured housing
Identify the main water shutoff in mobile homes and manufactured housing by first checking near the utility connections where the service line meets the structure—typically at a skirting access, underneath the home, or adjacent to the water heater.
Valves may be gate or ball types; follow the incoming pipe from the meter or pedestal.
Also inspect exterior utility boxes and crawlspace risers for isolation valves.
Step-by-Step: Finding and Accessing the Valve During an Emergency
Before attempting to locate or operate the main water valve, basic safety precautions—shutting off electricity to flooded areas and wearing gloves—should be followed.
Start by tracing the water line from the house water meter, then check common indoor locations quickly before inspecting exterior and street-side meter boxes.
If a box or valve is stuck, use appropriate tools and safe techniques to open it without forcing damage.
Safety precautions before handling the valve
When preparing to operate the main water valve during an emergency, the person should prioritize safety by shutting off power to nearby electrical circuits, wearing protective gloves and eyewear, and ensuring the area is well-lit and free of hazards such as standing water or loose debris.
They should also ventilate confined spaces, have a flashlight and phone handy, keep bystanders clear, and avoid slippery footing.
Step 1 Trace the water line from the house water meter
Follow the waterline visually from the house water meter toward the foundation, noting the pipe’s material, size, and direction as these clues indicate where the main shutoff is likely located.
Observe joints, bends, and where the line enters the structure.
Check for a visible valve, curb stop, or buried box nearby.
Mark the spot for quick access during emergencies.
Step 2 Check typical indoor locations quickly
One quick sweep of common indoor spots can usually locate the main shutoff in an emergency: check the utility room or basement near where the supply line enters the home, inspect the garage walls or near the water heater, look behind access panels in crawlspaces, and scan closets or areas adjacent to exterior walls where pipes penetrate the foundation.
If found, confirm valve type, verify clear access, and turn off slowly.
Step 3 Inspect the exterior and street-side meter box
A quick exterior inspection should include the area around the house foundation and the street-side meter box, since many main shutoffs and curb valves are located there; the homeowner or responder should scan for a rectangular or circular metal box at the property line, a pipe coming up near the foundation, or a marked access cover on the sidewalk.
Note visible labels, meter numbers, and any utility flags.
Step 4 Use tools and techniques to open stuck boxes or valves
If the meter box or curb valve resists movement, gather basic tools—a long screwdriver or meter key, lubricant such as penetrating oil, and a sturdy pry bar or channel-lock pliers—to carefully free the cover or stem; protective gloves and eye protection should be used to prevent injury from rust, debris, or sudden movements.
Apply penetrating oil, wait, work slowly to avoid breakage, and use controlled leverage to lift or rotate.
Step 5 Confirm the water is off and what to do next
Turn the valve fully clockwise and check multiple fixtures to confirm the supply is stopped before proceeding.
Verify cold and hot taps, outdoor spigots, and toilets; watch for drips and pressure loss. If water persists, reattempt shutoff, locate secondary shutoff, or contact the utility.
Once confirmed off, drain lines by opening faucets and note valve condition for repair or professional service.
Tools and Supplies to Keep Handy
A compact kit of essentials—flashlight, adjustable wrench, gloves, and a valve key—helps locate and operate the main water shutoff quickly.
A water meter or building map can speed identification in unfamiliar layouts.
If the valve is corroded, inaccessible, or leaks after being turned, a professional plumber should be called rather than attempting forceful repairs.
Essential tools for locating and turning the valve
Gathering a small set of reliable tools makes locating and operating the main water shutoff faster and safer. A flashlight, adjustable wrench, and valve key or long-handled screwdriver cover most situations.
Gloves protect hands; a marker labels the valve location for future reference. Keep tools together in an accessible kit near the entrance or utility area for immediate use.
- Flashlight
- Adjustable wrench
- Valve key
When to call a plumber instead of attempting DIY
After assembling a basic shutoff kit, homeowners should also recognize when the situation exceeds DIY scope and a licensed plumber is required.
Call a professional for persistent leaks, hidden pipe damage, gas line proximity, complex valve replacements, or unclear main locations.
Emergencies, water contamination, structural concerns, or failed repairs warrant immediate help.
A plumber prevents escalation, guarantees code compliance, and restores reliable shutoff function.
Signs the Main Valve Is Faulty and How to Test It
Visible leaks, reduced water flow, and a valve that won’t fully open or close are common symptoms of a failing main shut-off.
Simple checks—such as turning the valve slowly while observing pressure, listening for unusual sounds, and isolating fixtures to pinpoint loss of flow—can verify whether the valve is functional.
If tests indicate a problem, temporary measures like partially closing a secondary shut-off or using a hose clamp can limit damage until a permanent repair or replacement is performed.
Common symptoms of a failing shut-off valve
A failing main shut-off valve often reveals itself through specific, observable problems that signal diminished performance or imminent failure.
Homeowners may notice slow fills, inconsistent water pressure, leaks at the valve body or pipe joints, corrosion or mineral buildup, stuck or stiff operation, and unusual noises like banging or hissing.
Visible dampness, rust flakes, or unexplained water loss also indicate deterioration.
Simple tests to verify valve functionality
Perform a few simple tests to confirm whether the main shut-off valve functions properly and to distinguish predictable issues from sudden failures.
Check operation: fully shut then reopen, noting resistance, grinding, or looseness.
Inspect for leaks around stem and body.
Measure water flow before and after closure to verify cutoff.
Listen for hissing or banging indicating internal damage or air trapped in lines.
Temporary fixes vs. permanent repairs
When a main valve shows stiffness, persistent leaks, or fails to fully stop flow, temporary measures can limit damage but permanent repair or replacement is usually required.
Distinguishing between quick fixes (pipe clamps, rubber patches, or emergency shut-offs) and lasting solutions depends on the valve’s condition, age, and the results of functional tests.
Temporary fixes buy time; permanent repairs restore reliable shutoff, requiring replacement if corrosion or internal damage is evident.
Preventive Measures and Maintenance for Main Water Valves
A simple preventive routine helps keep the main water valve reliable and extends its service life.
The homeowner should follow a brief inspection checklist, lubricate and cycle the valve periodically, and winterize any outdoor components to prevent freezing.
Regular, concise maintenance reduces the risk of leaks and sudden failures.
Routine inspection checklist
Because routine inspections catch small problems before they escalate, a concise checklist helps guarantee the main water valve remains operable and leak-free. It should cover visual condition, accessibility, operation, sealing, and surrounding drainage.
The homeowner or inspector should verify condition, document findings, and schedule repairs promptly.
- Inspect for corrosion, cracks, and leaks.
- Confirm clear access and signage.
- Check seals, fittings, and nearby drainage.
Lubrication and exercising the valve
After completing the routine inspection checklist, attention should shift to lubrication and exercising the main water valve to maintain reliable operation.
Apply a suitable valve lubricant sparingly to the stem and operating nut, then cycle the valve fully open and closed several times to prevent sticking.
Record results and schedule repeat cycling every six months; replace the valve if resistance or leaks persist.
Protecting outdoor valves in winter
When outdoor main valves face freezing temperatures, insulating and winterizing them prevents pipe bursts and costly repairs.
Homeowners should drain exterior lines, fit valve covers or foam insulation, and wrap exposed pipes with heat tape where permitted.
Regular inspections guarantee seals remain tight and insulation intact.
Shutoff accessibility must be preserved for emergencies while maintaining protection against ice and cold damage.
Special Considerations and Exceptions
Some properties share service valves or have municipal service lines that alter where responsibility and access begin.
In multi-unit or complex homes, multiple shut-off points can exist for individual sections or appliances.
If the main valve is located on the municipal side of the meter, the homeowner may need to contact the utility for shut-off or repairs.
Shared valves and municipal service lines
Shared water services introduce unique complications because responsibility and access can fall between property owners and the municipal utility.
In such cases, the actual shutoff may be on the public side, within a meter box, or at a curb stop controlled by the utility.
Homeowners should verify ownership, consult municipal maps, or call the water department before attempting any work to avoid liability or service disruption.
Homes with multiple shut-off points
If a property contains multiple shut-off points, identifying the correct valve requires mapping the plumbing layout and noting which valves control specific sections—such as the whole house, individual floors, outdoor irrigation, or appliance branches.
Owners should label each shut-off, test them briefly to confirm coverage, keep a diagram near the meter, and prioritize the valve that isolates the entire supply for emergencies.
When the valve is on the municipal side of the meter
When the main shut-off sits on the municipal side of the meter, homeowners often cannot legally or practically operate it, so responsibility for emergency isolation falls to the water utility.
Homeowners should locate the meter, note the utility’s contact information, and document meter location and visible valve condition.
For urgent leaks, call the utility immediately; for nonurgent concerns, request inspection or valve relocation options.
Practical Scenarios and Quick Decision Guides
The guide presents clear actions for common emergencies, distinguishing when to close a localized fixture valve for a small leak versus the main shutoff for a major burst.
It outlines temporary containment measures if the main valve is inaccessible, such as turning off nearby fixtures, using shutoff clamps, and stopping water at the meter if possible.
Finally, it summarizes safe steps for restoring water after repairs, including gradual valve reopening and checking for residual leaks.
Small leak inside vs. major burst pipe which valve to shut
Assess the situation quickly to decide whether to isolate a single fixture or shut the main supply: a small interior leak—dripping faucet, a slow under-sink weep, or a toilet tank leak—usually calls for turning off the local shutoff valve at that fixture or the branch shutoff for that zone, while a major burst pipe, rapidly flooding room, or visible pipe rupture requires immediate closure of the home’s main shutoff to stop volume flow and prevent structural damage.
Then evaluate access to the appropriate valve and act promptly.
No access to main valve interim containment steps
If the main shutoff cannot be reached quickly, immediate interim steps should be taken to limit water flow and damage while arranging for professional help or access.
Close appliance and fixture valves, unplug and elevate electronics, and direct flow into buckets and trays.
Use temporary clamps, pipe repair tape, or shut individual branch valves.
Evacuate affected areas and document damage for responders.
After shutting off: how to safely restore water
Begin by confirming that all visible leaks are contained and that electrical hazards are addressed before any water is restored.
Then, reopen the main valve slowly while someone watches all affected fixtures and repair sites for leaks or pressure issues.
If pressure surges or leaks recur, shut the valve immediately and call a plumber.
Flush faucets briefly to clear air and discoloration.
Helpful Visuals and Reference Aids
Photographs or diagrams showing typical valve bodies and common handle types help homeowners quickly recognize the main shutoff.
Clear suggestions for marking the valve location on a simple floor plan—using consistent symbols and a labeled legend—make future shutoffs faster and less stressful.
Including both visual examples and a printable floor-plan template provides a practical reference for emergency preparation.
Typical valve shapes and handles to recognize

Recognizable valve shapes and handle types make locating a main water shutoff faster and more reliable: common forms include round wheel (gate) valves with circular spoked handles, lever-operated ball valves with a short straight or T-shaped lever, and multi-turn globe valves featuring raised stems and knurled knobs.
Also note curb stops (underground keys), angled stop valves under sinks, and compression fittings with hexagonal nuts.
Sample floor plan marking suggestions homeowners should use
A simple, labeled floor plan helps homeowners and emergency responders find the main water shutoff quickly; use clear symbols for the valve, water meter, and curb stop, and a bold color (red or orange) to mark the primary shutoff path from the street or meter to the house.
- Mark valve location, access route, and nearest exits.
- Note meter, curb stop, and shutoff type.
- Include scale, legend, and update date.
Conclusion
When water races where it shouldn’t, the reader now knows where to look, what to feel for, and how to act without hesitation. Still, the path to the shut-off can twist—basements, meters, crawlspaces hiding a silent lever. Keep tools ready, maps posted, and a steady hand. In the hush before a turn of the valve, preparation decides whether that trickle becomes a catastrophe or a stopped clock ticking toward calm.