How to Make a Compost Toilet: Step-by-Step Guide for DIY, Materials, and Maintenance
A compost toilet is an eco-friendly solution for managing human waste through aerobic decomposition. To create one, you’ll need to decide on a design—self-contained, double-vault, or urine-diverting—based on your household size and location. Essential materials include a sturdy housing, a seat, ventilation piping, and bulking carbon. The construction process involves assembling a measured platform, sealing the compost chamber, and installing ventilation. Regular maintenance is crucial and includes rotating the vault, balancing moisture, and ensuring safe curing before use. This guide will also cover selecting materials, obtaining permits, and detailed building steps to help you create an effective compost toilet system.
What a Compost Toilet Is and Why Build One
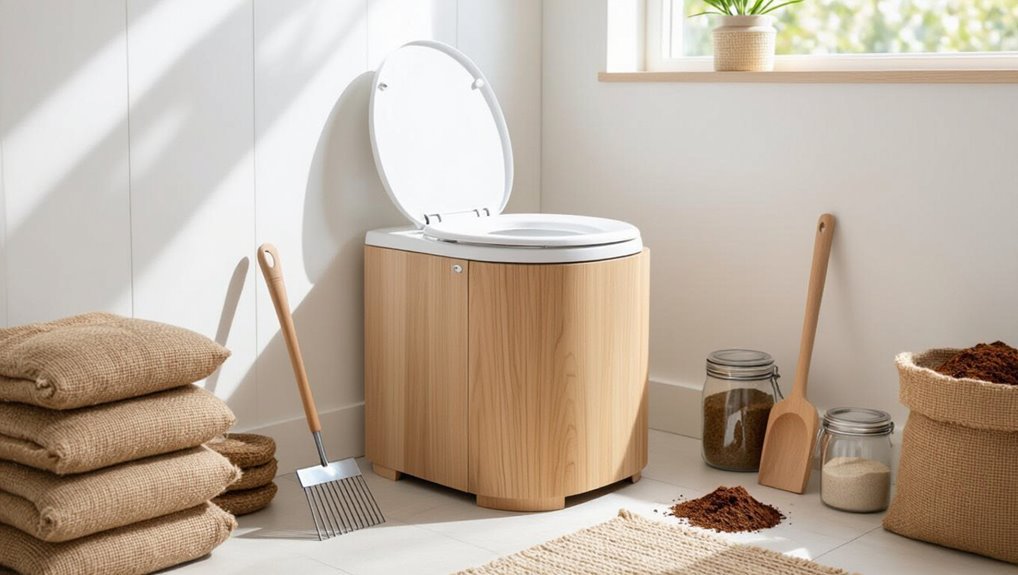
A composting toilet is a sanitation system that treats human waste through aerobic decomposition and moisture control rather than water-based flushing.
It is promoted for environmental benefits (reduced water use and nutrient recycling), lower long-term costs, and practical suitability for off-grid or resource-limited settings.
Common myths — such as unavoidable odor, pathogen risk when properly managed, or that it is only for remote use — are addressed by design, maintenance, and simple safety practices.
Definition and core principles of composting toilets
Compost toilets are sanitation systems that separate, decompose, and stabilize human waste through aerobic biological processes, producing a relatively safe, soil-like end product for non-food uses.
They rely on separation, ventilation, moisture control, carbon-rich bulking agents, and time to enable microbial breakdown.
Guidance on how to make a compost toilet emphasizes design that promotes aeration, odor management, pathogen reduction, and safe handling of finished compost.
Environmental, cost, and practical benefits
Many households and remote sites gain significant environmental, cost, and practical advantages by adopting compost toilets. They reduce water use, prevent sewage pollution, and return nutrients to soil.
Installation and operating costs are typically lower than septic or sewer connections. Maintenance requires simple routine checks and occasional compost removal.
Benefits include resilience in off-grid settings and reduced long-term infrastructure expenses.
Common myths and misconceptions
Although often treated as taboo or overly technical, several persistent myths about compost toilets stem from misunderstanding of biology, design, and maintenance.
They neither inherently smell nor spread disease when designed and managed properly. They are not universally illegal, nor are they automatic time-savers without regular attention.
Proper separation, ventilation, and carbon-rich cover materials guarantee safe, effective composting and nutrient recovery.
Types of Compost Toilets and How to Choose the Right Design
The section outlines the main compost toilet types—self-contained (batch), centralized or double-vault, and urine-diverting dry toilets—summarizing key advantages and drawbacks of each.
It then explains how household size, site location, climate, and local regulations influence the best design choice.
A concise comparison table follows to match typical use cases with each system.
Self-contained (batch) compost toilets pros and cons
When space, simplicity, and low maintenance are priorities, self-contained (batch) compost toilets offer an attractive option: they house the composting process within a single sealed unit that is periodically emptied after batches mature.
Advantages include compact installation, minimal plumbing, odor control when managed, and suitability for cabins or tiny homes.
Drawbacks are limited capacity, frequent emptying for high use, and potential temperature and moisture challenges.
Centralized/separate composting (double-vault) toilets pros and cons
Moving from compact self-contained units to systems better suited for higher or continuous use, centralized or separate composting toilets—commonly double-vault designs—store waste in alternating chambers so one vault can compost while the other is in service.
They offer larger capacity, reduced odor when managed, easier maintenance access, and continuous operation.
Drawbacks include greater footprint, higher construction complexity, periodic vault transfer labor, and potential pest access.
Urine-diverting dry toilets (UDDT) pros and cons
Because separating urine from feces dramatically reduces odor and moisture, urine-diverting dry toilets (UDDTs) channel liquid waste away to keep the composting chamber drier and more aerobic.
They offer faster pathogen die-off, reduced leachate, and smaller volumes to manage.
Downsides include more complex plumbing, need for user compliance, occasional salt buildup, and separate urine storage or treatment requirements.
Selecting based on household size, location, climate, and regulations
Separating urine from feces reduces odor and moisture, but choosing the right compost toilet involves more than waste-stream management; household size, site conditions, local climate, and regulations together dictate design, capacity, and maintenance needs.
Smaller households may use compact units with less frequent emptying; cold or wet climates need insulated, ventilated systems; zoning and health codes limit installation options and treatment requirements.
Comparison table of designs and typical use cases
A clear comparison of compost-toilet designs helps match system features to user needs, site constraints, and maintenance capacity. Below is a concise summary of common designs and typical use cases to guide selection.
| Design | Typical use case |
|---|---|
| Bucket/Batch | Small cabins, intermittent use |
| Urine-diverting | Waterless systems, nutrient recovery |
| Continuous composting | Permanent homes, regular use |
| Vermicomposting | Small volumes, odor control |
Legal Requirements, Permits, and Site Assessment
Before construction, the author notes that local regulations and permit requirements must be checked to guarantee legal compliance.
Site assessment should evaluate soil type, proximity to groundwater, and required setback distances to protect health and the environment.
Practical considerations such as accessibility, ventilation needs, and discreet aesthetic placement are then planned to meet both regulations and user needs.
Local regulations and permit considerations
Because composting toilets intersect public health, wastewater, and land-use rules, prospective builders must first identify applicable local, state, and national regulations and any required permits.
Research building codes, sanitation standards, and waste-handling approvals; contact health departments, planning offices, and permitting agencies.
Document permit criteria, inspection schedules, and fees.
Verify designs and maintenance plans meet legal conditions before construction to avoid fines or forced removal.
Assessing soil type, groundwater, and setback distances
Site conditions determine whether a composting toilet can be sited safely and legally: soil type, depth to groundwater, and required setback distances from wells, watercourses, and property lines all affect permitability and long‑term performance.
An evaluation should document soil percolation, seasonal high water table, and municipal setback requirements. Poorly draining soils or shallow groundwater often preclude systems or mandate engineered solutions and permits.
Accessibility, ventilation needs, and aesthetic placement
Consideration of accessibility, ventilation, and aesthetic placement is essential to guarantee a compost toilet meets legal requirements, serves all users, and performs hygienically over time.
Site selection should allow level access, clear paths, and privacy while meeting local codes.
Vent stacks require secure, screened airflow to prevent odors and vectors.
Design integrates discreet visual treatments to respect landscape and neighbor concerns.
Materials, Tools, and Costs Breakdown
The section lists essential materials for common compost toilet designs, from receptacles and venting to cover materials and composting medium.
It also outlines the basic tools needed for construction and maintenance, such as saws, drills, and sealants.
Typical cost ranges are presented with practical budgeting tips to help compare DIY versus prefab options.
Essential materials list for common builds
A clear inventory of materials and tools helps builders estimate costs and avoid delays when constructing a compost toilet.
The essential materials vary by design but commonly include structural lumber or plywood, a durable seat and lid, ventilation piping, a urine diversion system if desired, compostable cover material, fasteners, sealants, and odor-control media.
Typical cost ranges depend on local prices.
- Plywood or lumber
- Vent pipe and screen
- Compost cover material
Tools required for construction
Essential tools for building a compost toilet fall into cutting, fastening, finishing, and ventilation categories, each chosen to match the selected design and materials.
Basic hand and power tools, measuring and layout aids, and ventilation-specific items enable precise assembly and durable function. Safety gear is essential.
- Circular saw, jigsaw, drill/driver
- Screw, nail, and adhesive assortment
- Vent fan, ducting, and sealant
Typical cost ranges and budgeting tips
Costs vary widely depending on design choices, materials, and whether the builder sources new, reclaimed, or DIY components.
Typical basic DIY setups cost $50–$300; mid-range systems $300–$1,000; durable, commercial-grade units $1,000–$3,000+.
Budgeting should include materials, tools, sealing and ventilation, composting medium, and optional urine diversion.
Leave a contingency of 10–20% for unexpected expenses and replacement parts.
Step-by-Step Build: Simple Self-Contained Compost Toilet
The build begins with careful planning and precise measurements to guarantee a comfortable seat and adequate internal volume.
Construction then progresses through assembling the seat and housing, creating the compost chamber with an access door, and adding ventilation and odor-control features.
Finally, the system is prepared for use by arranging carbon cover material and setting up urine separation or diversion as appropriate.
Planning and measurements
Before cutting or assembling materials, accurate planning and measurements establish the framework for a functional self-contained compost toilet.
Determine overall dimensions, bench height, seat opening size, and internal bucket or liner capacity. Allow clearance for ventilation ducts and access panels.
Sketch scaled plans, list materials with dimensions, and double-check measurements to prevent costly adjustments during construction and guarantee proper composting volume and ergonomics.
Constructing the toilet seat and housing
Begin by assembling the seat platform and outer housing using the scaled plans and measured panels from the planning stage, ensuring all pieces align for a snug fit.
Fasten panels with corrosion-resistant screws and waterproof glue.
Cut and install a comfortable, removable seat ring.
Seal joints with silicone.
Add ventilation port and mount a lid with hinges.
Sand and finish surfaces for durability and hygiene.
Building the compost chamber and access door
Constructing the compost chamber and access door requires careful layout and sturdy materials to guarantee containment, airflow control, and easy maintenance.
The chamber should be sealed, insulated, and sized for desired capacity. Fit a hinged, gasketed access door for removal and turning, with internal baffles or partitions to separate fresh deposits from curing material.
Use rot-resistant wood or plastic and corrosion-resistant fasteners.
Installing ventilation and odor control
With the compost chamber and access door in place, attention turns to installing ventilation and odor control to maintain aerobic decomposition and user comfort.
Install a 4–6 inch vent pipe rising through the roof, include a screened inlet near the base, and add a small solar or 12V fan for airflow.
Seal joints, slope pipe for condensation, and position inlet away from wind-driven odors.
Adding carbon cover material and urine management
Add a layer of dry, carbon-rich material after each use and establish a simple urine diversion or containment strategy to keep the pile balanced and aerobic.
Use sawdust, dry leaves, or straw as cover. Fit a urine-diverting seat or place a sealed container for liquid collection.
Monitor moisture; add carbon when damp and empty or treat collected urine per local guidance.
Finishing touches and user instructions
Secure finishing touches and clear user instructions guarantee safe, odor-free operation and proper composting performance.
The build is sealed, vents secured, and lids fitted; signage indicates dosing, cover material, and urine diversion use.
Maintenance schedule lists emptying intervals, compost curing, and sanitation steps.
Users are instructed on hygiene, compost testing, and emergency odor control to ascertain longevity and regulatory compliance.
Step-by-Step Build: Double-Vault (Alternating) Compost Toilet
The double-vault alternating compost toilet requires careful planning of vault sizing, durable materials, and a stable foundation to guarantee long-term performance.
Construction must include secure sealing, a reliable switching mechanism or access hatches, and properly designed venting and leachate controls to prevent odors and overflow.
Clear operating procedures for rotating and resting vaults will secure safe composting and ease of maintenance.
Vault sizing and materials
Vault sizing and material selection determine both the capacity and longevity of a double-vault compost toilet; appropriately sized vaults prevent overfilling and guarantee sufficient residence time for pathogen reduction.
Vault volume is typically sized for household use (200–400 liters per vault annually).
Durable, nonreactive materials—concrete, rot-resistant timber, or high-density polyethylene—ensure structural integrity and ease of cleaning.
Ventilation and insulation choices affect decomposition.
Foundation, vault construction, and sealing
Begin by preparing a level, well-draining foundation that will support the weight of the structure and resist moisture intrusion.
Construct two robust vaults using rot-resistant timber, HDPE, or concrete, sized per usage estimates. Confirm interior surfaces are smooth.
Seal joints with waterproof sealant and durable gaskets. Provide an external apron and termite barrier.
Grade surrounding soil to divert runoff away from vaults.
Vault switching mechanism and access hatches
With foundations and watertight vaults in place, attention shifts to the switching mechanism and access hatches that allow alternating use and safe retrieval of compost.
A simple lever or sliding gate directs waste into the active vault while sealing the inactive one. Lockable, insulated hatches provide odor control and pest resistance.
Labels and a calendar assist rotation timing and maintenance access.
Venting, leachate control, and overflow prevention
Because odors, excess moisture, and occasional leachate compromise composting performance and user comfort, a clear strategy for venting, leachate control, and overflow prevention is essential.
Install a screened, upward vent pipe with solar or wind-assisted venting.
Slope vault bases to a sealed leachate collection sump with a drain or evaporation tray.
Include high-level overflow indicators and accessible cleanouts for inspection and maintenance.
How to operate and rotate vaults safely
Operate the double-vault system by designating one vault as active while the other rests and matures. Then swap them when the active vault reaches capacity or sufficient composting time has elapsed.
Use a clear schedule, label vaults, record fill dates, and keep lids sealed.
Wear gloves when transferring solids, aerate and monitor temperature, and allow at least six months of curing before using composted material.
Step-by-Step Build: Urine-Diverting Dry Toilet (UDDT)
The section outlines key steps for building a urine-diverting dry toilet, beginning with the design of an effective urine-diversion pan and its plumbing to reliably separate liquids.
It then covers construction of the fecal chamber and drying system, plus options for urine storage and treatment.
Finally, ventilation and fly-control measures are specified to maintain odor control and sanitation.
Designing the urine-diversion pan and plumbing
A well-designed urine-diversion pan and plumbing system separates liquid waste cleanly from solids, minimizes odors and splash, and directs urine to an appropriate storage or treatment container.
The pan should slope to a rear outlet, use smooth, nonabsorbent materials, and include a splash-reducing lip.
Plumbing requires odor-trap vents, durable piping sized for gravity flow, secure joints, and accessible inspection points for maintenance.
Construction of fecal chamber and drying system
With the urine-diversion pan and plumbing in place to keep liquids separate, construction moves on to the fecal chamber and drying system, which collect solids and promote rapid desiccation.
The chamber is airtight, ventilated, and sloped for airflow and leachate control.
Install a screened vent pipe with low-power fan, a removable collection container or rotating drum, and a cover to seal odors and pests.
Creation of urine storage/processing solution
Several practical options exist for storing and processing urine from a UDDT, ranging from simple sealed containers to engineered treatment tanks, each chosen based on volume, climate, and local regulations.
Options include sealed jerrycans with periodic removal, larger vented tanks with settling and dilution, and constructed reed beds or urine-diversion composting systems for nutrient recovery; material choice must resist corrosion and odors.
Ventilation and fly control specifics
Proper urine storage and processing reduce odors at the source, but effective ventilation and fly control remain central to maintaining a sanitary UDDT enclosure.
Install a continuous roof vent with a solar or electric fan creating slight negative pressure. Use fine-mesh screens on vents and collection openings, tight seals around lids, and insect traps.
Regular inspection prevents blockages, odors, and fly ingress.
Operation and Daily Use Guidelines
The operation section outlines clear user behaviors and a concise do/don’t list to guarantee consistent, sanitary use.
It covers management of bulking agents and moisture balance to promote effective composting and prevent clumping or runoff.
Practical odor-prevention practices are summarized to minimize smells and maintain a comfortable enclosure.
Proper user behavior and do/don’t list
Users should follow clear, consistent practices to keep a compost toilet hygienic, odor-free, and functioning efficiently:
- Do deposit only human waste and toilet paper; do not flush non-biodegradable items or feminine hygiene products.
- Do close the lid after use, minimize splashing, and report leaks or damage promptly.
- Don’t pour chemicals, bleach, or excessive water into the system; avoid strong-smelling cleaners.
Managing bulking agents and moisture balance
Following the do’s and don’ts about deposits and lid use, attention turns to managing bulking agents and moisture balance to keep decomposition active and odors controlled.
Users add dry carbon-rich materials—sawdust, straw, shredded paper—in measured doses after each use.
Maintain a crumbly, damp-but-not-sopping mix; adjust with more bulking agent if wet or small amounts of water if too dry.
Monitor and stir periodically.
Odor prevention best practices
Control odors by keeping routine habits simple and consistent: cover each deposit with a measured scoop of dry carbon-rich bulking agent, close the lid promptly, and ventilate the unit regularly.
Empty solids before saturation, avoid introducing excess liquids, and maintain proper airflow with a functioning vent and fan.
Clean seals, inspect for leaks, and monitor compost temperature to discourage anaerobic breakdown and persistent smells.
Composting Process, Monitoring, and Safety
The composting process in a toilet relies on microbial breakdown of solids aided by proper temperature, moisture, and aeration to promote aerobic decomposition.
Routine monitoring of heat, dampness, and oxygen levels helps identify issues like odors, slow breakdown, or excess ammonia and guides corrective actions.
To protect health, users should follow recommended curing times, handle material with gloves, and observe pathogen-reduction practices before final use or disposal.
How decomposition works in compost toilets
Composting toilets rely on aerobic decomposition, where microbes—bacteria, fungi, and invertebrates—break down human waste into stabilized organic matter under oxygen-rich conditions.
Proper balance of carbon-rich bulking agents, moisture, and temperature promotes efficient breakdown while minimizing odors and pathogens.
Decomposition proceeds through successive microbial communities, transforming nitrogenous compounds and reducing fecal pathogens over time.
Regular monitoring of structure, carbon input, and curing duration guarantees safe, finished compost.
Temperature, moisture, and aeration targets
Maintaining the right temperature, moisture, and aeration levels directly influences microbial activity and pathogen reduction established by the earlier discussion of decomposition.
Ideal composting occurs at 40–60°C for thermophilic breakdown; moisture should be 45–60% (damp but not soggy); and regular passive or active aeration prevents anaerobic odor and slows decomposition.
Balance these targets for safe, efficient pathogen kill and stable humus production.
Monitoring progress and troubleshooting common issues
Monitor composting progress regularly to guarantee conditions remain within target ranges and to detect issues early.
Inspect moisture, odor, texture, and temperature records; note deviations. Remedy excess moisture by adding dry bulking agents and improving ventilation.
For anaerobic smells, increase turning and aeration. If decomposition slows, verify carbon:nitrogen balance and adjust inputs.
Keep logs for trend identification and timely corrective action.
Pathogen reduction, safe curing times, and handling precautions
After addressing moisture, odor, texture, and temperature anomalies, attention should shift to pathogen reduction and safe curing times to guarantee end-product safety.
Compost should reach and maintain 55–65°C for several days or follow prolonged low-temperature curing: six months minimum for mixed wastes, twelve months for cooler climates.
Use gloves, masks, and tools; avoid direct contact, children, and food crops during handling and application.
Harvesting, Using, and Disposing of Finished Compost
Finished compost is judged safe by its appearance, odor, temperature history, and, where available, pathogen reduction records or testing.
Guidance specifies approved uses—such as landscape planting, ornamental beds, and soil improvement—and non-approved uses like direct application to food crops without further treatment.
Proper storage, additional maturation time, and recommended application methods help guarantee safe, effective disposal or reuse.
How to know compost is safe to use
How can one be certain compost from a toilet is safe to handle and apply?
Safety is indicated by consistent high temperatures during the thermophilic phase, reduced odor, uniform dark crumbly texture, and absence of visible pathogens or fresh waste.
Laboratory testing for fecal indicators and helminth eggs confirms safety.
Allow sufficient curing time, maintain moisture and aeration, and document treatment conditions before use.
Approved and non-approved end uses (landscape vs. food crops)
When composted human waste has met validated treatment standards and been documented for pathogen reduction, its end uses must be matched to that evidence:
Approved uses typically include non-food landscaping, ornamental plantings, reforestation, and soil amendment for lawns, following local regulations.
Non-approved uses generally include direct application to edible food crops, root vegetables, or any produce eaten raw, unless specific sanitary approvals permit otherwise.
Storage, maturation, and application methods
Properly stored compost requires a period of maturation under controlled conditions to stabilize nutrients and further reduce pathogens.
After harvesting, finished material should cure in a covered, ventilated area for several months, monitored for temperature and moisture.
Use only on non-food landscapes unless treated to regulatory standards.
Dispose of any suspect batches by deep burial or municipal organic waste streams per local rules.
Common Problems and How to Fix Them
Common problems with compost toilets include persistent odors, incorrect moisture balance, insect infestations, and structural or maintenance failures.
For each issue, the text will identify likely causes and provide clear, step-by-step remedies—such as adjusting cover material and ventilation for smells, correcting moisture with dry bulking agents or added water, sealing leaks, and installing screens or traps for pests.
Practical inspection and simple routine maintenance measures are emphasized to prevent recurrence.
Odor sources and stepwise solutions
Many factors can cause odors in a compost toilet, but most stem from imbalanced moisture, insufficient ventilation, or inadequate carbon cover; identifying the dominant source quickly directs the appropriate fix.
Inspect airflow, clear vents or add a fan, increase dry carbon material between uses, remove anaerobic pockets by aerating the pile, and adjust usage practices.
Monitor and repeat until neutralized.
Moisture problems: too wet or too dry
After addressing airflow and carbon balance to control odors, attention turns to moisture, since both overly wet and overly dry conditions quickly undermine composting performance.
Excess moisture causes pooling, anaerobic smell, and slowed decomposition; add dry bulking agents, improve drainage, and increase ventilation.
Conversely, dryness halts microbial activity; rehydrate evenly, add urine-diverting or moistening strategies, and restore carbon–nitrogen balance.
Fly and pest infestations
A few practical measures can prevent and control fly and pest infestations in compost toilets, which are typically attracted by exposed waste, moisture, and accessible entry points.
Regularly cover fresh deposits with dry carbon material, keep lids sealed, maintain negative airflow or screened vents, clean spills promptly, install fine-mesh insect screens, and inspect seals.
Promptly remove nearby attractants like food or standing water.
Structural leaks and maintenance failures
Several common structural issues—cracked liners, loose seals, improperly fastened vents, and deteriorating containment walls—can compromise a compost toilet’s integrity, leading to leaks, odors, and accelerated decomposition problems.
Inspect seals, fasten vents, replace cracked liners, and reinforce walls with rot-resistant materials.
Schedule routine checks, promptly repair water intrusion, and maintain proper ventilation to prevent moisture buildup and structural failure.
Maintenance Schedule and Long-Term Care
A clear maintenance schedule helps preserve composting efficiency and user comfort by outlining weekly and monthly checklists for chores like moisture control, turning, and emptying.
Annual inspections should identify worn seals, fan or vent issues, and recommended component replacements to prevent system failure.
Guidance for winterizing and operating in cold climates will address insulation, heating options, and strategies to keep microbial activity active.
Weekly and monthly maintenance checklist
Establishing a regular weekly and monthly maintenance routine keeps a compost toilet functioning efficiently and minimizes odors, pests, and operational issues.
Weekly tasks focus on moisture balance, cover material top-up, and quick odor checks.
Monthly tasks include rotating or mixing compost, inspecting vents and seals, and emptying leachate if present.
- Check moisture and add bulking material.
- Clean seats and vents.
- Rotate or mix compost monthly.
Annual inspections and component replacement guide
Periodic annual inspections and timely component replacement guarantee long-term performance and prevent costly failures in a compost toilet system.
Inspect structural integrity, seals, vents, and fans; check for odors, moisture, pest entry, and compost maturity.
Replace worn seals, degraded ventilation fans, and broken hinges.
Schedule annual filter and sensor checks, document findings, and plan replacements based on wear, usage, and manufacturer recommendations.
Winterizing and cold-climate operation tips
When temperatures drop below freezing, compost toilet systems require targeted adjustments to maintain microbial activity, prevent pipe and chamber freeze-up, and control odors.
Insulation, windproofing, and heat sources (low-watt thermostats, safe heat tapes) protect plumbing and pile.
Increase carbon bulking agents, reduce moisture, and limit fresh inputs.
Monitor internal pile temperature, vent performance, and emptying schedule to avoid freeze-related backups.
Cost-Saving Tips, Upgrades, and Eco-Friendly Additions
Practical cost-saving measures include using repurposed materials and simple low-cost alternatives for the structure and bedding components.
Optional upgrades—such as compost accelerants, passive or powered fans, and urine-separation/treatment kits—can improve performance if budget allows.
For greater sustainability, the toilet can be integrated with greywater systems and permaculture layouts to recycle nutrients and minimize waste.
Repurposed materials and low-cost alternatives
Salvaged and repurposed materials can dramatically reduce the cost of a compost toilet while lowering its environmental footprint. Builders often reuse pallets, reclaimed lumber, plastic barrels, and old toilet seats.
Simple low-cost alternatives maintain hygiene and functionality when properly prepared.
- Reclaimed wood for frame and bench
- Food-grade barrels for compost chambers
- Secondhand toilet seats and hinges
Optional upgrades: compost accelerants, fans, and urine treatment
Consider a few targeted upgrades to improve composting speed, odor control, and nutrient capture without large expense:
Compost accelerants (microbial inoculants or high-nitrogen additives) can jump-start decomposition.
Simple solar- or battery-powered fans enhance ventilation and reduce smells.
Basic urine-diversion or on-site treatment options concentrate nitrogen for later use or prevent leachate.
Choose compatible products, monitor moisture, and avoid chemical residues.
Integrating with greywater systems and permaculture
When designed together, a compost toilet, greywater system, and permaculture layout form a compact resource cycle that reduces waste, recycles nutrients, and lowers water and fertilizer costs.
Integration channels treated greywater to swales and mulch basins, uses compost and urine as targeted soil amendments, and sequences plants for nutrient uptake.
Proper separation, filtration, and seasonal routing prevent contamination while maximizing productivity and water savings.
Real-World Examples and Case Studies
The article presents concise case studies illustrating compost toilet use in a small cabin or tiny-house installation, an off-grid family home setup, and several community or public facilities.
Each example highlights design choices, waste management practices, and maintenance routines suited to its context.
Readers are invited to compare outcomes and practical lessons to inform their own projects.
Small cabin or tiny-house installation
Several recent tiny-house projects illustrate practical approaches to compost toilet installation in compact living spaces. Designers prioritized ventilation, odor control, and easy access to the compost chamber.
Systems used urine diversion, compact separating seats, and removable containers positioned beneath benches. Occupant reports highlight minimal maintenance, efficient cover-material use, and discreet integration with cabinetry, proving viability where space, weight, and simplicity are critical.
Off-grid family home setup
Moving from compact installations in tiny homes, larger off-grid family residences present different scale, management, and social-use challenges for compost toilets.
Designs often use multiple chambers, higher-capacity ventilation, and integrated greywater diversion. Families implement clear usage rules, scheduled maintenance, and pathogen-safe composting timelines.
Seasonal variations, odor control, and crop-safe end use require monitoring, recordkeeping, and occasional professional consultation for long-term reliability.
Community or public compost toilet examples
Community-scale compost toilets have been implemented in parks, campgrounds, schools, and city streets to address sanitation where conventional sewer connections are impractical or unsustainable.
Examples include municipal pilot projects in Scandinavian cities, campground systems using urine diversion and batch composting, school installations teaching hygiene and ecology, and community-run facilities in informal settlements.
Evaluations report reduced water use, lower infrastructure costs, and needs for maintenance training.
Quick Reference: Materials, Tools, and Dimension Cheat Sheet
A compact list of essential materials, tools, and suggested dimensions helps builders plan a safe, functional compost toilet before beginning construction. The cheat sheet below lists durable materials, common tools, and typical measurements for seat height, chamber volume, and ventilation. Use as baseline; adjust for local regulations and user needs.
| Item | Typical specification |
|---|---|
| Materials | Plywood, cedar, hardware, ventilation pipe |
| Tools | Drill, saw, tape measure, level |
Conclusion
The guide equips readers to design, build, and maintain a compost toilet that suits site, budget, and legal constraints. With clear material lists, step-by-step assembly, and routine care, the system turns waste into useful compost while conserving water and reducing environmental impact. Practical tips and case studies illuminate common pitfalls, so users can hit the ground running and avoid reinventing the wheel, ensuring a durable, low-cost sanitation solution for off-grid and sustainable living.