How to Tell if a Sump Pump Is Clogged: 9 Signs, Causes, and Quick Fixes
If you suspect your sump pump is clogged, look for these key warning signs: unusual noises like grinding or humming, high water levels in the basin, reduced or no water discharge, visible debris, foul odors, or if the pump runs continuously or cycles too often. Additional indicators include short cycling, failure to start, or weak water flow, which may suggest blockages or issues with the discharge line or check valve. Identifying these symptoms early can help prevent more serious problems. Continue reading for detailed causes, quick fixes, and inspection steps.
What a sump pump does and why clogs matter
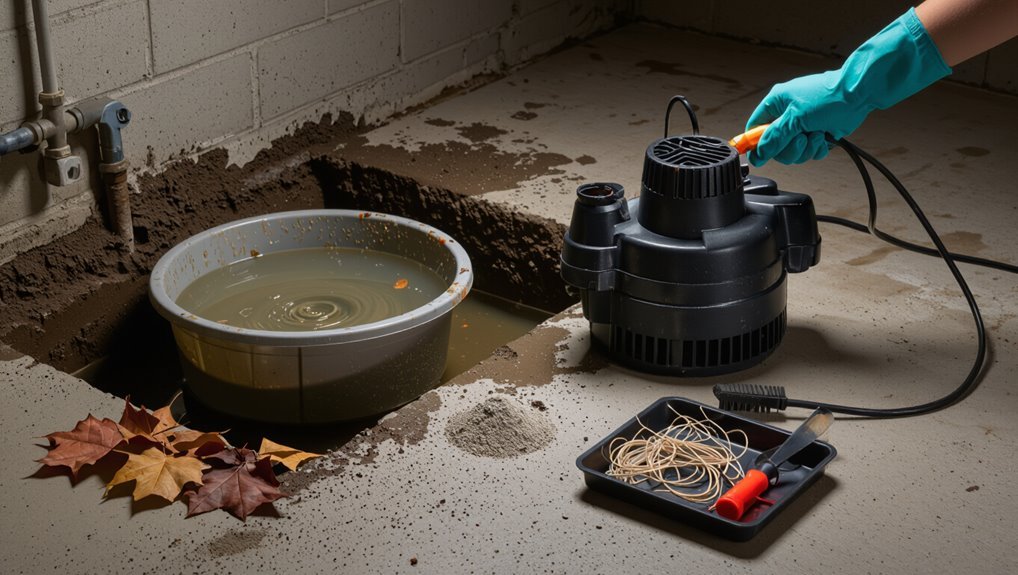
A sump pump system typically includes a basin, pump, float switch, discharge pipe, and sometimes a check valve to move groundwater away from a foundation.
When debris or sediment obstructs these components, flow is reduced and the pump may run inefficiently or fail to activate.
Reduced performance increases the risk of basement flooding and water damage, making prompt identification and clearing of clogs essential.
Basic components of a sump pump system
Sump pump systems consist of a few key components—pit, pump, float switch, discharge pipe, and check valve—that work together to remove accumulating groundwater from basements or crawlspaces.
Each part’s role is defined: pit collects water, pump moves it, float activates cycling, discharge directs flow, check valve prevents backflow.
Inspection focuses on these elements when determining how to tell if sump pump is clogged.
How clogs affect pump performance and basement safety
Having reviewed the pump, float, discharge pipe, and check valve, attention turns to how blockages disrupt their operation and threaten the basement.
Clogs restrict flow, causing reduced discharge, motor overwork, overheating, and premature failure. Intermittent cycling wears components and wastes power.
Backup risk rises; standing water invites mold, structural damage, and electrical hazards.
Prompt inspection and clearing preserve function and safety.
Quick checklist: Immediate signs your sump pump may be clogged
A quick checklist highlights three categories of immediate signs that a sump pump may be clogged.
Audible clues include grinding, rattling, or irregular motor noises;
visual clues cover high water levels in the basin, weak or erratic discharge, and visible debris around the intake.
Performance clues consist of frequent cycling, failure to start when water rises, or the pump running continuously without clearing water.
Audible clues: unusual noises to watch for
Several distinct noises can signal a clog in the sump pump: grinding, rattling, high-pitched whining, or intermittent humming that changes with water level.
Such sounds often indicate impeller obstruction, motor strain, or debris contacting housing.
Sudden squeals suggest bearing wear; rhythmic clunks point to a loose component.
Persistent unusual noise warrants immediate inspection to prevent motor damage and failure.
Visual clues: water levels, discharge behavior, and debris
Noisy indications often accompany visible signs that a sump pump is clogged, so visual inspection should follow any unusual sounds.
Check water level: persistently high or rising despite the pump suggests blockage.
Inspect discharge: weak flow, sputtering, or water pooling near the outlet indicate obstruction.
Look for debris, sludge, or fibrous material around the intake and impeller housing; clear or remove immediately.
Performance clues: frequent cycling, failure to start, or continuous running
Listen for patterns in operation: frequent on-off cycles, failure to start when water rises, or continuous running are clear performance clues of a clogged sump pump.
These symptoms indicate float switch obstruction, impeller blockage, or restricted discharge. Inspect for tangled cords, debris around the float, and buildup in the pump housing.
Immediate action prevents motor overheating, premature wear, and basement flooding.
9 detailed signs of a clogged sump pump
The following signs indicate a sump pump may be obstructed and warrant closer inspection.
These include water backing up in the basin, a pump that runs without discharging water, and noticeably reduced or absent flow from the discharge pipe.
Also watch for pumps that run continuously without clearing water and for frequent short cycles where the unit rapidly turns on and off.
Sign 1 Water backing up in the sump basin
Water pooling in the sump basin beyond its normal level is a clear, immediate indicator that the pump may be clogged. Observers will notice slow drainage, rising water lines between pump cycles, or persistent standing water despite power.
Debris, sediment, or a blocked intake can restrict flow, forcing water to accumulate. Prompt inspection and removal of obstructions are essential to prevent overflow and basement flooding.
Sign 2 Pump runs but no water is discharged
A pump that runs yet fails to expel water signals a different set of problems than visible pooling.
The motor may operate while impellers are clogged, check valves stuck, or internal seals compromised. Airlocks, a blocked discharge elbow, or a jammed float can permit cycling without discharge.
Inspect impeller, remove debris, verify check valve operation, and clear the discharge path.
Sign 3 Reduced or no water flow from the discharge pipe
Noticeably diminished or absent flow from the discharge pipe often indicates a clogged sump pump or blocked discharge line.
Observers may hear the motor running while little or no water exits, or see weak intermittent spurts instead of steady discharge.
Debris, ice, collapsed hose, or kinked piping commonly restrict flow.
Inspect the outlet, hose, and fittings for obstructions or damage, then clear or replace as needed.
Sign 4 Pump runs continuously without clearing water
Often the pump motor runs for long stretches without reducing the sump basin level, signaling that water is not being expelled despite the unit appearing to work.
Continuous operation may indicate a blocked impeller, clogged intake, or a stuck check valve allowing backflow.
Persistent running raises the risk of overheating and failure; immediate inspection of discharge, float, and inlet screen is advised.
Sign 5 Frequent short cycles (rapid on/off)
Why does the pump keep cycling on and off every few minutes?
Rapid short cycles indicate the pump is unable to move sufficient water before the float drops, often due to partial clogging, restricted discharge, or a stuck/imbalanced float.
This increases wear, overheats the motor, and shortens lifespan.
Inspect intake screen, clear debris, verify float travel, and test discharge for obstructions promptly.
Sign 6 Loud grinding, rattling, or humming noises
Several distinct noises—grinding, rattling, or a persistent hum—signal mechanical strain that often accompanies partial clogs in a sump pump.
Bearings, impeller contact, or motor load increase produce atypical sounds.
Consistent or worsening noise during operation indicates trapped debris or restricted flow stressing components.
Prompt inspection is advised to prevent motor damage; professional servicing may be necessary if sounds persist after basic cleaning.
Sign 7 Visible debris, sludge, or silt in the basin
While unusual noises can indicate internal strain, a direct and visible indicator of clogging is the presence of debris, sludge, or silt settled in the sump basin.
Accumulated sediment can obstruct the pump intake, impede float movement, and reduce flow. Routine inspection reveals leaves, grit, or organic muck; visible buildup correlates with slower drainage and increased risk of pump cycling issues.
Sign 8 Foul odors coming from the pit or discharge
How can a foul, persistent smell from the sump pit or its discharge reveal a clog? A buildup of stagnant water, organic debris, or trapped solids fosters bacterial growth and anaerobic decomposition, producing sour, rotten, or sewage-like odors.
Persistent smells indicate restricted flow or trapped detritus within the pump, float, or intake screen and warrant inspection, cleaning, or removal of the obstruction.
Sign 9 Tripped check valve or backed-up discharge line
A tripped check valve or a backed-up discharge line often signals that the sump pump cannot move water away effectively.
Indicators include standing water near the outlet, pulsating or labored pump operation, unusual cycling, or visible debris clogging the discharge pipe.
A stuck or reversed check valve permits backflow. Inspect the valve, clear obstructions, and test flow; replace faulty components to restore proper discharge.
Common causes of sump pump clogs
Clogs typically arise from debris buildup—silt, sand, leaves and other sediment—that blocks intakes and pumps.
Mechanical failures such as a broken or clogged impeller, a blocked intake screen, frozen or obstructed discharge piping, or a faulty check valve and fittings also restrict flow.
Incorrect installation or undersized discharge components further increase the risk of recurrent blockages.
Debris accumulation: silt, sand, leaves, and sediment
Debris accumulation—silt, sand, leaves, and other sediment—frequently obstructs sump pump intakes and housings, reducing flow and causing the unit to cycle inefficiently.
Fine particles settle, compacting around the pump base, while organic matter clogs access points. Heavy runoff or nearby landscaping increases buildup.
Regular inspection and removal of visible debris from the sump pit prevent impaired performance and premature motor strain.
Broken or clogged impeller and intake screen
Several common issues—damaged impeller blades, accumulated grime, or a blocked intake screen—directly reduce a sump pump’s ability to move water.
Broken impellers lower flow and create vibration; cloth, hair, or mineral buildup on the intake restricts suction.
These faults cause overheating, motor strain, and intermittent operation.
Inspection, gentle cleaning, or impeller replacement restores performance and prevents recurrent clogging.
Frozen or blocked discharge pipe
A frozen or obstructed discharge pipe prevents expelled water from leaving the sump pit, causing backups and forcing the pump to run longer or cycle constantly.
Debris, ice, sediment, or collapsed sections can block flow. Restricted discharge raises pit level, strains motor, and shortens lifespan.
Inspect exterior piping for kinks, clogging, or freezing; clear, insulate, or reroute lines to restore proper drainage and prevent recurrence.
Faulty or damaged check valve and fittings
One common cause of sump pump clogs is a faulty or damaged check valve and its fittings, which can allow discharged water to flow back into the pit or restrict outflow.
Worn flappers, cracked housings, loose unions, or corroded threads trap debris, create pressure imbalances, and force the pump to cycle excessively.
Inspect and replace compromised valves and seals promptly to restore proper flow.
Improper installation or undersized discharge components
Improper installation or undersized discharge components often cause restricted flow and frequent clogs in sump systems.
Incorrect pipe diameter, excessive bends, or poorly secured joints create turbulence, sediment buildup, and backpressure.
Long, narrow runs or inadequate outlet height allow debris accumulation and freeze risk.
Properly sized pipe, smooth routing, and secure fittings improve discharge efficiency and reduce clogging frequency.
How to inspect your sump pump safely
Before inspecting the sump pump, the homeowner should follow basic safety precautions such as shutting off power, wearing gloves and eye protection, and ensuring stable footing in the pit.
They should gather essential tools and materials—flashlight, multimeter, pliers, spare hose clamps, and a bucket—so the check can proceed without interruption.
A concise visual inspection checklist then guides the process: examine the power connection, look for debris in the pit and intake, inspect the discharge line and check valve, and note any signs of corrosion or leaks.
Safety precautions before any inspection
When preparing to inspect a sump pump, prioritize shutting off power at the circuit breaker and unplugging the unit to eliminate electrical hazard.
Wear rubber-soled shoes and insulated gloves to reduce shock risk and waterproof boots to protect against contaminated water.
Confirm adequate lighting and ventilation, avoid standing water when possible, keep bystanders and pets away, and use a buddy system or notify someone before entering confined, damp spaces.
Tools and materials to have on hand
With safety measures in place, gather the right tools and materials to inspect the sump pump efficiently and reduce time spent probing in a wet environment.
Essential items include waterproof gloves, rubber boots, safety goggles, a flashlight, a headlamp, a non-contact voltage tester, adjustable pliers, a screwdriver set, a small mirror, a wet/dry vacuum hose attachment, and a bucket for debris collection.
Step-by-step visual inspection checklist
How should the inspection proceed to identify visible issues quickly and safely? The observer should follow a concise checklist, prioritizing safety and clear documentation:
- Confirm power is off and unplug pump or switch breaker.
- Remove cover and inspect basin for debris, sediment, or blockages.
- Check float switch movement and impeller area for obstructions.
- Examine discharge pipe and check valve for leaks or clogs.
Quick fixes you can try right away
A few immediate actions can often restore a clogged sump pump without professional help. These include clearing debris from the basin and intake screen, flushing the discharge line and checking for blockages, and resetting or replacing the check valve.
It is also useful to test and adjust the float switch and employ temporary measures for frozen discharge pipes while arranging a permanent fix.
Clearing debris from the basin and intake screen
Begin by cutting power to the pump at the breaker or unplugging it to guarantee safe access to the basin.
The basin and intake screen should be inspected and cleared of sediment, leaves, and small debris to restore flow. Use gloves and a soft brush; lift the pump carefully if needed.
- Remove visible debris by hand
- Brush screen gently
- Rinse components with water
- Reposition and restore power
Flushing the discharge line and checking for blockages
Flush the discharge line to clear obstructions that commonly prevent a sump pump from moving water out of the basin.
Inspect the exterior run for kinks, crushed sections, or debris.
Disconnect the pipe at an accessible joint, then run water through it or use a plumber’s snake to dislodge clogs.
Reconnect, test pump operation, and verify uninterrupted flow away from the foundation.
Resetting or replacing the check valve
Several straightforward check valve actions can restore proper sump pump function without calling a plumber.
Inspect the valve for debris or reversed installation; disconnect discharge pipe, open coupling, and visually check or spin the flapper. Clean or reposition if stuck.
If damaged, remove and replace with a same-size, in-line check valve.
Reassemble, secure fittings, and test for one-way flow.
Testing float switch movement and adjustment
Check the float switch for free, unobstructed movement and correct adjustment before assuming a clog; a stuck or misaligned float is a common, easily fixed cause of pump failure.
Inspect for debris, entangled cords, or buildup restricting travel. Manually lift the float to confirm pump activation and set the trip height per manufacturer specs.
Reposition or replace the float if movement is impaired.
Temporary solutions for frozen discharge pipes
If the discharge pipe freezes, a few immediate, temporary measures can restore flow and prevent pump damage: apply warm (not boiling) water or a heat pack along the exposed section, wrap the pipe with an insulated blanket or towels soaked in warm water, and gently thaw accessible joints with a hair dryer on low heat while avoiding electrical hazards.
Monitor for recurrence, insulate exposed piping, and avoid chemical deicers that can corrode.
When to call a professional
If the pump fails to start, runs continuously, makes unusual noises, or leaks, professional repair or replacement should be considered.
A technician will inspect the motor, float switch, check valve, and discharge line, perform necessary repairs or replacement, and test system performance.
Typical service calls range from a couple of hours for simple fixes to a day for replacements, with costs varying from modest parts-and-labor to several hundred dollars for a new unit.
Signs that require expert repair or replacement
When should a homeowner call a professional rather than attempt a DIY fix?
Persistent failure to start, continuous cycling, burning smells, sparking, or visible motor overheating indicate serious electrical or mechanical faults.
Repeated backups despite cleaning, major corrosion, cracked housing, or a nonfunctional backup system also require expert repair or replacement.
Ignoring these risks further property damage and safety hazards.
What a technician will check and repair
After deciding a professional is needed, a technician will perform a systematic inspection to diagnose electrical, mechanical, and plumbing issues.
They test power, float switch, and control wiring; assess motor and impeller function; clear or replace clogged discharge lines and check valves; inspect basin integrity and debris buildup; verify automatic operation with simulated runoff; and recommend repairs, replacements, or preventive maintenance.
Estimated costs and timeframes for common fixes
Costs and timeframes for sump pump repairs vary with the problem’s complexity: simple fixes like cleaning a clogged discharge line or clearing debris from the basin typically take 30–60 minutes and cost $75–$200, while replacing a faulty float switch or check valve often requires 1–2 hours and $150–$400 in parts and labor.
| Issue | Typical time/cost |
|---|---|
| Debris cleaning | 30–60 min / $75–$200 |
| Discharge unclog | 30–60 min / $75–$200 |
| Float switch | 1–2 hr / $150–$300 |
| Check valve | 1–2 hr / $150–$400 |
Preventive maintenance to avoid future clogs
Preventive maintenance can greatly reduce the chance of future sump pump clogs through a combination of routine checks and targeted upgrades.
A regular maintenance schedule with seasonal inspections, plus additions like intake screens, alarm systems, and battery backups, helps catch problems early and maintain reliable operation.
Proper yard grading, gutter management, and debris control around the sump area further minimize debris entry and strain on the pump.
Regular maintenance schedule and seasonal checks
Routine maintenance establishes the baseline for a sump pump’s reliable operation.
Inspections should follow a clear schedule: monthly visual checks, quarterly float and discharge tests, and seasonal pre-winter and spring reviews. Records document findings and actions.
Recommended checklist includes:
- Clear debris from pit and screen
- Test pump activation and auto-switch
- Inspect discharge line for blockages
- Verify power and backup readiness
Upgrades that reduce clog risk (screens, alarms, backup systems)
Upgrade options can considerably lower the likelihood of sump pump clogs by addressing common entry points and failure modes.
Mesh or perforated intake screens block debris while maintaining flow.
Float and high-water alarms provide early warning of restricted discharge or malfunction.
Battery or water-powered backup pumps guarantee operation during power loss.
Durable check valves and raised intakes further reduce blockage risk and system stress.
Best practices for yard and drainage management
Good yard and drainage management starts with keeping water moving away from the foundation and minimizing debris that can enter the sump pit.
Regularly clean gutters and downspouts, extend downspouts away from the house, grade soil to slope away, maintain French drains and swales, trim vegetation, and remove sediment from surface drains.
Periodic inspections prevent clogs and reduce pump strain.
Troubleshooting scenarios and solutions
Common troubleshooting scenarios include a pump that runs but fails to remove water, a pump that will not start, and intermittent operation during storms.
For each, stepwise remedies address likely causes such as clogged intakes, stuck floats, electrical faults, and overloaded discharge lines.
The following section outlines concise diagnostic checks and corrective actions for each scenario.
Scenario: Pump runs but won’t remove water stepwise remedies
When a sump pump motor runs but water level hardly drops, several focused checks can identify the blockage or malfunction preventing discharge.
Inspect and clear the discharge pipe and elbow for debris or ice.
Verify the check valve orientation and operation.
Remove and examine the pump inlet screen and impeller for obstructions.
Make certain float moves freely and test with a bucket to confirm restored flow.
Scenario: Pump won’t start electrical and mechanical checks
Several straightforward electrical and mechanical checks can quickly determine why a sump pump fails to start.
First, confirm power: check outlet, breaker, and any GFCI. Inspect cord and plug for damage.
Test float switch movement and clean debris preventing travel. Manually lift float to observe activation.
Verify motor shaft spins freely and listen for humming that indicates seized bearings or jammed impeller.
Scenario: Intermittent operation during storms root causes
After ruling out basic electrical and mechanical failures, attention shifts to pumps that operate only sporadically during heavy storms.
Causes include float switch binding from debris, brief power surges or voltage drop under load, overwhelmed intake from excessive sediment, and check valve hang-ups causing backflow.
Inspect float movement, secure electrical connections, clear intake debris, and test check valve operation to isolate intermittent triggers.
Signs that indicate it’s time to replace the sump pump
When a sump pump reaches advanced age, experiences repeated failures, or shows clear declines in discharge rate and cycling frequency, replacement should be considered.
Evaluating replacement options requires matching required capacity and horsepower to the basement’s needs and noting useful features such as a battery backup or alarm.
Choosing the correct pump minimizes future clogging and guarantees reliable water removal.
Age, repeated failures, and declining performance indicators
Age alone does not always mandate replacement, but a sump pump showing repeated failures, slowed cycle response, or decreasing discharge volumes signals diminished reliability.
Persistent tripping, frequent resets, overheating, unusual vibration, or rising basement moisture despite operation indicate wear.
When maintenance no longer restores performance and downtime risk increases, replacement should be planned to prevent flooding and costly damage.
How to choose a replacement pump (capacity, horsepower, features)
How should a homeowner select a replacement sump pump to guarantee reliable protection? Consider capacity (GPH at head), horsepower matched to pit depth, thermally protected motors, and dual or battery backup features. Match pump specs to peak inflow and discharge height; prioritize solids-handling if debris is present.
| Factor | Recommendation |
|---|---|
| Capacity | GPH per head |
| Horsepower | Appropriate for head |
| Features | Backup power |
| Design | Solids-handling |
Maintenance log template and inspection checklist
A concise maintenance log template and inspection checklist helps track monthly and seasonal tasks such as float switch function, discharge line clearing, and battery backup condition.
The log should also record service call dates, technician details, performed repairs, and part replacements for warranty verification.
Clear, dated entries streamline future diagnostics and support warranty claims.
Monthly and seasonal tasks to record
When performed consistently, monthly and seasonal checks capture trends and expose developing issues before they escalate into failures.
A concise maintenance log records observations, dates, and actions for recurring review. Include a brief inspection checklist and note abnormalities, but avoid service-call specifics.
- Pump run test duration
- Float switch movement
- Discharge line clearance
- Power and backup status
What to note for service calls and warranty purposes
Details recorded for service calls and warranty claims should be precise, dated, and verifiable to support diagnostics and coverage decisions.
Include model and serial numbers, purchase and installation dates, installer contact, symptoms observed, date/time of failure, photos or video, prior maintenance entries, and any parts replaced.
Note technician name, service report number, and invoice.
Keep originals and backup copies for warranty validation.
Resources and further reading
The article directs readers to consult manufacturer manuals and reputable repair guides for model-specific troubleshooting and safe maintenance procedures.
It also recommends checking local codes and permit requirements related to sump pump discharge to confirm compliance.
These resources support informed repairs and proper installation decisions.
Manufacturer manuals and reliable repair guides
Manufacturer manuals and reputable repair guides provide the authoritative specifications, troubleshooting steps, and safety warnings necessary to diagnose and resolve sump pump clogs.
They clarify model-specific parts, recommended tools, and maintenance intervals, reducing misdiagnosis and hazard. Consult certified sources before attempting repairs.
- Model-specific diagrams and parts lists
- Stepwise troubleshooting procedures
- Safety and electrical precautions
- Recommended replacement components
Local codes and permits for sump pump discharge
When determining proper sump pump discharge, homeowners and contractors should consult local building codes and municipal ordinances, since regulations govern allowed discharge locations, prohibited connections to storm or sanitary sewers, and any required permits or inspections.
Compliance avoids fines, enforcement actions, and downstream flooding.
Verify setback requirements, prohibited easements, inspection schedules, and permit fees with local authorities; document approvals and maintain records for future transfers.
Conclusion
Careful consideration confirms that clogged components can cripple a sump pump’s capacity; consistent checks curb costly calamities. Homeowners should heed highlighted hints, habitually handle hazards, and hire help when heavyhanded hazards hinder hopeful homeholding. Preventive polishing, periodic probing, and prompt professional presence preserve pump performance. Clear communication, concise checklisting, and calm contingency planning create confidence. Ultimately, steady stewardship secures structural safety, safeguards spaces, and sustains system strength.