
How Toilet Fill Valve Works: Simple Explanation, Common Problems & Easy Fixes
A toilet fill valve is essential for refilling the tank after a flush. It opens when the water level drops and closes at a set height, using a float to sense the water level. Additionally, a refill tube directs water into the bowl, while an overflow tube prevents overfilling. Common issues include constant running, slow filling, noise, and leaks due to worn seals or debris. Most problems can be resolved by adjusting the float, cleaning the screens, or replacing seals. Detailed guidance on these fixes is provided below.
How a Toilet Fill Valve Works Simple Overview
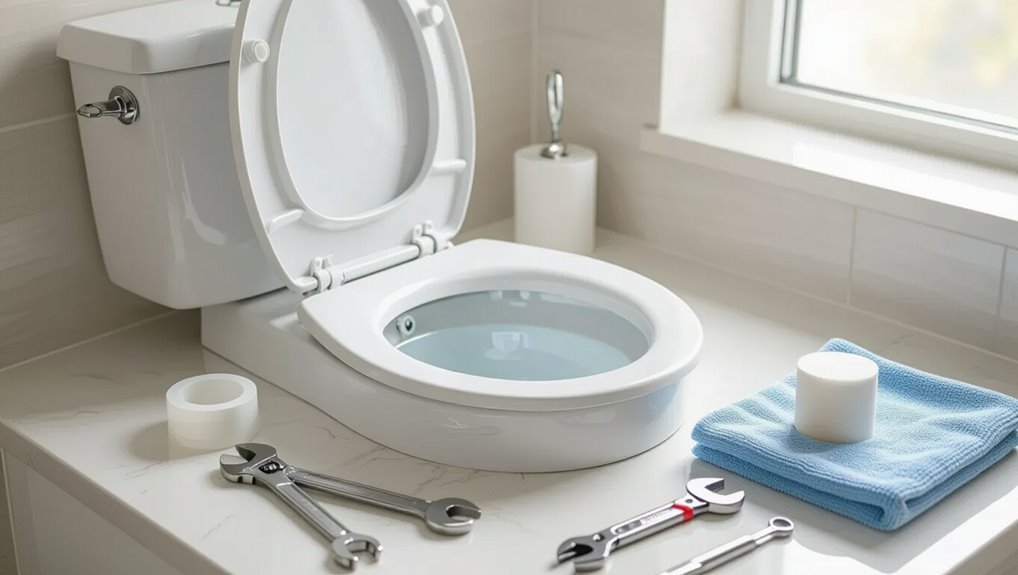
A toilet fill valve is the mechanism that controls water entering the tank after a flush, refilling the tank and restoring pressure for the next flush.
It opens when the tank level falls and closes automatically when the float or sensor detects the correct water height.
Common types include float-cup, float-ball, and electronic valve designs, which differ mainly in space requirements, adjustment method, and reliability.
What a fill valve is and its role in the toilet tank
The fill valve is the tank’s water-control device that admits water after a flush and shuts off when the tank reaches the correct level.
It regulates refill volume and maintains proper water height for reliable flushing. As a central component, it connects to the supply line, interacts with the float mechanism, and prevents overflow.
Understanding how the toilet fill valve works aids maintenance decisions.
One-sentence explanation of how it operates
Opens when the tank is emptied to let water flow in and closes automatically once a float senses the proper water level, thereby stopping the refill.
The mechanism converts water pressure into controlled flow via a valve body and float or diaphragm assembly; it maintains a preset level, prevents overfill with a shutoff action, and guarantees reliable refill cycles after each flush without user intervention.
Common types of fill valves and how they differ
After the float or diaphragm stops the refill at the set level, several common fill valve designs take over to regulate flow, each with distinct mechanics and installation traits.
Each type balances refill speed, noise, and adjustability differently; selection depends on tank height, water pressure, and repair preference.
- Float-cup: compact, adjustable, good for low-profile tanks
- Ballcock: older, simple, bulky
- Diaphragm/piston: quiet, fast, pressure-tolerant
Key Components of a Fill Valve and Their Functions
The fill valve consists of several parts that together control tank refill and water level.
Key components include the float mechanism (ball or cup) and its arm, the valve body with inlet and refill tube, and mounting parts such as the shank washer and locknut.
The overflow tube also connects with the fill valve to prevent overfilling and direct excess water to the bowl.
Float mechanisms (ball float vs. cup float) and operation
A toilet fill valve relies on a float mechanism to detect water level and control flow, with two predominant designs: the traditional ball float and the more compact cup float.
The ball float uses an arm-linked buoy to shut off supply as level rises; the cup float slides up the valve shaft for a shorter, adjustable stroke.
Each balances sensitivity, space, and repair simplicity.
Valve body, inlet, and refill tube
Essential parts inside the tank—valve body, inlet, and refill tube—work together to control water delivery and restore the bowl’s trap seal after each flush.
The valve body houses the mechanism regulating flow; the inlet connects to the supply line and admits pressurized water; the refill tube directs a small stream into the overflow tube to refill the bowl and maintain proper siphon height.
Float arm, shank washer, and locknut
Among the small but essential components, the float arm, shank washer, and locknut together guarantee reliable shutoff and a watertight tank connection.
The float arm links water level to valve action, allowing precise shutoff.
The shank washer seals the valve where it passes the tank wall, preventing leaks.
The locknut secures the assembly, maintaining alignment and pressure integrity.
Overflow tube and its interaction with the fill valve
The overflow tube directs excess water from the tank into the bowl and sets a fail-safe discharge height that the fill valve must respect. It prevents overflow by routing surplus water and provides a reference for adjusting fill-valve shutoff height.
Proper alignment guarantees correct water level, prevents continuous flow, and allows refill tube placement. Malfunctioning tubes or misadjusted valves cause siphoning or overfilling.
Step-by-Step: What Happens When You Flush
When the handle is pressed, water rushes from the tank and the sudden pressure change triggers the fill valve to close the main flow.
As the refill valve restores tank volume, the float rises to a set point and mechanically shuts off incoming water once the proper level is reached.
Simultaneously, a small refill tube directs water into the bowl to maintain trap seal and the valve timing guarantees precise water level regulation.
Immediate post-flush pressure and valve response
Flush initiated, the tank’s water surges toward the bowl and the sudden outflow creates an immediate drop in tank pressure that triggers the fill valve assembly.
The valve opens quickly, admitting mains water to restore level. Pressure equalizes as flow stabilizes; the refill rate depends on supply pressure and valve orifice.
Transient pressure fluctuations can cause noise or delayed seating if debris or wear impede quick response.
How the float senses water level and shuts off flow
After pressure stabilizes and the fill valve has opened, a float assembly monitors the rising water and mechanically or electronically signals the valve to close once the preset level is reached.
The float rises with the water; linkage or sensor translates position into valve action, compressing a seal or cutting power.
When the set height is achieved, flow stops and the tank remains ready for the next flush.
Role of the refill tube in bowl refill
A small refill tube directs a controlled stream of water from the fill valve into the toilet bowl’s overflow tube to restore the bowl’s water level and maintain the trap seal.
It prevents siphonage, balances bowl refill independently of tank refill, and guarantees enough water remains in the trap to block sewer gas.
Proper tube placement and secure connection preserve consistent bowl replenishment.
Timing and water level regulation
When the handle is actuated and the tank empties into the bowl, the fill valve senses the resulting drop in tank pressure and begins a timed sequence that governs refill flow and shutoff.
The valve’s internal float or pressure mechanism rises as the tank refills, closing the water inlet precisely when the preset tank and bowl water levels are reached to prevent overflow and guarantee consistent trap seal.
The timing controls refill rate, balances bowl refill via the refill tube, and uses adjustable stops or shims to set final levels, ensuring efficient flush cycles and preventing short-cycling or siphoning.
Common Problems with Fill Valves and How to Diagnose Them
Common fill valve problems include constant running water, slow tank refill, hissing or other noise, incorrect water level, and leaks at the base or around the shank.
Each symptom points to specific causes—worn seals or flapper issues for running water, restricted inlet or faulty valve for slow refill, and pressure or seat problems for noise.
Simple inspection steps—observing water level, listening for sounds, and checking the shank and tank base for moisture—help isolate the fault before repair or replacement.
Constant running water causes to check
Inspecting constant running water is the first diagnostic step for fill valve problems: persistent flow usually indicates a seal, float, or refill issue that prevents the valve from shutting off.
The inspector checks seal seating, float adjustment, and refill tube position to isolate the fault swiftly.
- Worn or warped seal causing leakage
- Float misalignment or puncture
- Refill tube improperly clipped or submerged
Slow tank refill likely culprits
Several frequent causes can slow a toilet tank’s refill: reduced water pressure, partially blocked inlet or valve passages, worn internal components, and a misadjusted float or refill tube.
Diagnosis involves checking house water supply pressure, inspecting and cleaning the fill valve inlet screen, removing debris from valve passages, examining diaphragms or seals for wear, and ensuring the float height and refill tube position meet manufacturer specifications.
Hissing or noisy fill what it indicates
After checking for slow refill causes, attention often turns to audible signs of trouble: a persistent hiss, whine, or vibration from the fill valve indicates abnormal flow or pressure conditions.
Such noise often signals worn internal seals, a partially clogged inlet seat, high incoming water pressure, or loose mounting.
Diagnosis involves isolating the valve, listening during refill, and inspecting or replacing the valve or relevant seals.
Water level too high or too low adjustment checks
A misadjusted fill valve can leave the tank waterline noticeably above or below the correct mark, causing running water, weak flushes, or constant refilling.
Inspect float height, float cup clip, or adjustment screw; compare to overflow tube top (water should be about 1 inch below).
Test by flushing and observing refill stop.
Note worn floats or bent arms that prevent proper shutoff.
Leaks at the base or around the shank inspection steps
Leaks at the base or around the shank indicate a compromise in the seal where the fill valve meets the tank and can lead to slow drips, puddling beneath the toilet, or water tracking into the cabinet.
Inspect tightness of the locknut, condition of the rubber gasket, and for cracks or corrosion.
Dry area, run water, and observe source. Replace gasket or reseat valve if leaking.
Easy Fixes and Maintenance Steps
The section outlines straightforward adjustments and repairs owners can perform on common ball and cup float systems, including how to set float height for proper tank fill.
It also covers replacing worn seals or washers, clearing mineral deposits and debris from the fill inlet, and the basic tools, parts, and steps to swap a complete fill valve.
Guidance is provided on signs that indicate when a professional plumber should be called instead of attempting a DIY fix.
How to adjust the float height (ball and cup types)
Proper float height guarantees the tank fills to the correct level and prevents overflows or weak flushes.
For ball floats, bend the arm gently or adjust the screw at the fill valve. For cup floats, slide the clip or turn the adjustment rod. Test by flushing and fine‑tuning until water reaches the marked fill line.
- Verify shutoff before adjusting
- Move small increments
- Recheck for leaks
Replacing a worn fill valve seal or washer
Begin by shutting off the water supply and flushing the toilet to drain the tank.
Then inspect the fill valve seal or washer for cracks, compression, or mineral buildup.
If damaged, remove the valve cap or assembly per manufacturer instructions.
Extract the old seal, fit a compatible replacement ensuring proper orientation, reassemble, restore water, and test for proper shutoff and leaks, adjusting as needed.
Cleaning mineral buildup and debris from the inlet
After replacing a worn seal, attention should turn to the inlet where mineral deposits and debris commonly restrict flow and prevent proper shutoff.
Shut off water, drain the tank, then remove the fill valve cap or inlet screen.
Soak parts in vinegar or a descaler, gently scrub with a soft brush, rinse thoroughly, reinstall, and test for proper flow and sealing.
Replacing the entire fill valve tools, parts, and quick procedure
Replacing a worn fill valve typically requires only a few basic tools—adjustable wrench, pliers, sponge, and a bucket—plus a compatible replacement valve kit and a new refill tube.
The homeowner should shut off the supply, drain the tank, disconnect the supply line, and remove the old valve nut to extract the unit.
Install new valve, hand-tighten locknut, reconnect supply, trim tube, adjust height, test for leaks.
When to call a plumber vs. DIY
While many fill valve issues can be resolved with basic tools and a few minutes of troubleshooting, homeowners should distinguish simple maintenance from problems that require a plumber’s expertise.
Easy fixes include cleaning or adjusting the float, reseating or replacing the refill tube, and tightening loose fittings.
On the other hand, persistent leaks, crumbling tank components, irregular water pressure, or repeated failures after replacement indicate professional service is needed.
Emergency flooding, unclear causes, or inaccessible shutoffs warrant calling a plumber immediately.
Comparing Popular Fill Valve Brands and Models
A concise comparison of popular fill valve brands and models highlights differences in durability, noise, installation ease, and price to guide selection. Recommendations vary for older toilets versus modern designs, with some valves offering adapter kits or adjustable heights tailored to each. The following quick reference summarizes key trade-offs.
| Feature | Notes |
|---|---|
| Durability | Metal vs. plastic components affect lifespan |
| Noise | Quiet-fill designs reduce tank refilling sound |
| Ease of installation | Tool-free or single-nut installs simplify replacement |
| Price range | Budget, mid-range, and premium options available |
| Best fit | Older toilets often need adaptable valves; modern toilets favor low-flow compatible models |
Durability, noise, ease of installation, and price comparison
Durability, noise, ease of installation, and price are the primary criteria that distinguish popular toilet fill valve brands and models; evaluating them together reveals trade-offs between long-term reliability, acoustic performance, user-friendliness, and upfront cost. Brands vary: some offer quiet, durable polymer units; others prioritize low price or tool-free installs. Table summarizes typical differences.
| Brand/Model | Durability | Noise/Ease/Price |
|---|---|---|
| Model A | High | Quiet / Moderate / High |
| Model B | Medium | Moderate / Easy / Low |
| Model C | Low | Noisy / Easy / Very Low |
| Model D | High | Quiet / Moderate / Mid |
Best choices for older toilets vs. modern toilets
After weighing durability, noise, installation ease, and price across brands, selection shifts when matching fill valves to the toilet’s vintage: older gravity-fed tanks often require valves with adjustable height, broader float ranges, and simpler fittings to accommodate nonstandard inlet locations and wear-prone components.
In contrast, modern toilets—especially those with pressure-assist or low-flow designs—benefit from valves engineered for precise refill volumes, compact profiles, and compatibility with manufacturer specifications.
- Older toilets: universal adjustable valves, metal shank options, easy-to-service parts
- Modern toilets: OEM-compatible or low-flow calibrated valves, compact plastic assemblies
- Hybrid choice: retrofit kits balancing adjustability with modern flow control
Water Efficiency and Fill Valve Settings
Fill valve settings directly influence flush strength and the volume of water used per cycle, so careful calibration balances performance with conservation.
Simple adjustments can reduce fill volume to meet low-flow targets while maintaining reliable flushes, and some valves offer preset options for efficiency.
Compatibility considerations are important for dual-flush and pressure-assisted systems, since those technologies require specific valve behaviors or components to achieve expected savings.
How fill valve settings affect flush performance and water use
How much water enters the tank and how quickly it stops are controlled by very small adjustments to the fill valve.
Those adjustments directly influence both flush power and total water use.
Raising water level increases flush force and bowl clearance but uses more water per cycle.
Lowering it saves water but can reduce clearing ability, possibly causing double flushes or weak siphon action.
Adjustments to meet low-flow or conservation goals
Balancing water level settings for conservation requires fine adjustments that reconcile reduced consumption with reliable flushing.
Technicians lower the float or adjust the fill-screw incrementally, testing flush performance and bowl refill between changes. Aim for the minimum waterline that maintains trap seal and clears waste.
Record settings and observe for repeated clogs; if problems persist, revert slightly higher or consult efficiency guidelines.
Compatibility with dual-flush and pressure-assisted systems
Compatibility with dual-flush and pressure-assisted toilet systems hinges on matching fill valve response and flow characteristics to each design’s refill timing and pressure dynamics.
Fill valves for dual-flush must allow rapid partial refill and precise shutoff for reduced-volume cycles.
Pressure-assisted bowls require valves that tolerate higher backpressure and faster fill pulses.
Incorrect matching causes overflow, weak flushes, or wasted water; choose compatible valves or adjustable models.
Troubleshooting Checklist and Quick Reference
A concise 10-step diagnostic checklist guides the reader through common fill valve symptoms and inspection points.
For quick action, the guide pairs each symptom with straightforward fixes—running, slow fill, and noisy operation each have targeted remedies.
This reference is designed as a fast troubleshooting aid before more extensive repair or replacement.
10-step diagnostic checklist for common symptoms
Use the following 10-step diagnostic checklist to quickly identify and resolve the most common toilet fill valve symptoms.
The technician inspects water supply, shutoff valve, float height, refill tube, valve seat, seals, debris, water pressure, chain/lever alignment, and tank overflow level to isolate cause and determine targeted action.
- Confirm supply and shutoff functionality
- Check float and refill tube positioning
- Inspect valve for debris and worn seals
Quick fixes by symptom (running, slow fill, noisy)
Refer to symptom-specific steps to quickly address the three most common fill valve issues—continuous running, slow refill, and loud operation—by targeting the likely causes identified in the 10-step diagnostic checklist.
Recommended quick fixes focus on seal replacement, debris removal, and pressure adjustments. Follow safety, shutoff, and test procedures after each repair to confirm resolution.
- Replace worn flapper or seal
- Clear inlet screen/debris
- Adjust float or pressure regulator
Parts and Tools You Might Need
A concise list of commonly needed replacement parts—such as refill valves, flappers, seals, and washers—helps prepare for routine toilet repairs.
Equally important are the recommended tools: adjustable wrench, pliers, screwdriver set, and a small bucket for draining.
This section will outline which parts to keep on hand and the basic tools required for safe, effective replacement.
Common replacement parts to keep on hand
Keeping a small stash of common fill valve parts and a few basic tools saves time and prevents minor toilet issues from becoming emergencies.
A concise kit enables quick swaps for leaks, running tanks, or slow fills without full replacements.
Recommended spare parts include:
- Replacement fill valve assemblies or rebuild kits
- Refill tubes and durable flappers
- Rubber seals and gasket sets
Recommended tools for repairs and replacement
Several basic hand tools and a few specialty items make most fill valve repairs quick and reliable.
The technician benefits from quality, compact tools and a small parts kit to minimize trips and downtime. Essential items support efficient diagnosis, removal, and precise installation without damaging fittings or seals.
- Adjustable wrench, slip-joint pliers
- Phillips/flat screwdrivers, utility knife
- Replacement valve kit, plumber’s tape
Safety, Cost Estimates, and Expected Lifespan
A brief overview compares typical part prices and professional repair fees for common fill valves.
It notes expected lifespans for plastic, brass, and diaphragm-style valves and factors that shorten service life.
Basic safety tips for working on the household water supply, such as shutting off the valve and relieving tank pressure, are highlighted.
Typical costs for parts and professional repair
Costs and safety considerations for toilet fill valve repair hinge on part quality, the complexity of the installation, and local labor rates.
Parts typically cost $5–$40 for basic to premium valves; seals and small components add $2–$10.
DIY saves labor but requires basic tools and care.
Professional service ranges $75–$250 depending on travel, diagnosis, and time; warranties vary.
Expected lifespan of different fill valve types
Lifespan expectations for toilet fill valves vary by design, materials, and water conditions, with plastic float valves typically lasting 3–7 years.
Refill valves with shrouded mechanisms 5–10 years, and metal-bodied or high-end diaphragm-style units often reaching 10–15 years when installed in moderate water quality.
Hard water, sediment, and corrosive conditions shorten service life; regular inspection and timely replacement optimize performance and cost-effectiveness.
Safety tips for working with household water supply
Several basic precautions should be observed before working on a household water supply to reduce risk and prevent damage.
Turn off the main valve, relieve pressure by opening faucets, and isolate the fixture.
Wear eye protection and gloves.
Use proper tools and check for leaks after restoring flow.
Budget minor repairs ($10–$75); replacements cost more.
Expect valves to last 5–15 years.
Conclusion
Quiet craftsmanship behind porcelain — a plastic valve whispers, then roars, guiding water like a patient conductor. Simple parts, stubborn problems: a tiny float rising beside a cavernous bowl, a seal sealing then failing. Routine checks turn anxiety into steady rhythms; a screwdriver’s small touch restores calm. Efficiency balances waste and thrift. Fragile mechanics meet household constancy, and with modest care, the fill valve’s discreet labor keeps the bathroom’s small storms peacefully stilled.
