How to Stencil a Table Top: Step-by-Step Guide for Perfect Results
Stenciling a table top is an easy and cost-effective way to give your furniture a fresh look with a custom design. Start by cleaning the surface, repairing any dents, and sanding it smooth. If necessary, apply a primer. Secure your stencil and use acrylic or oil paints, applying them in light, even strokes. Build up colors gradually, allowing each layer to dry. If you encounter minor bleed or alignment issues, you can fix them with fine sanding and touch-ups. Finally, seal the surface for added durability. Follow these steps for a beautifully stenciled table top!
Why Stenciling a Table Is Worth Doing
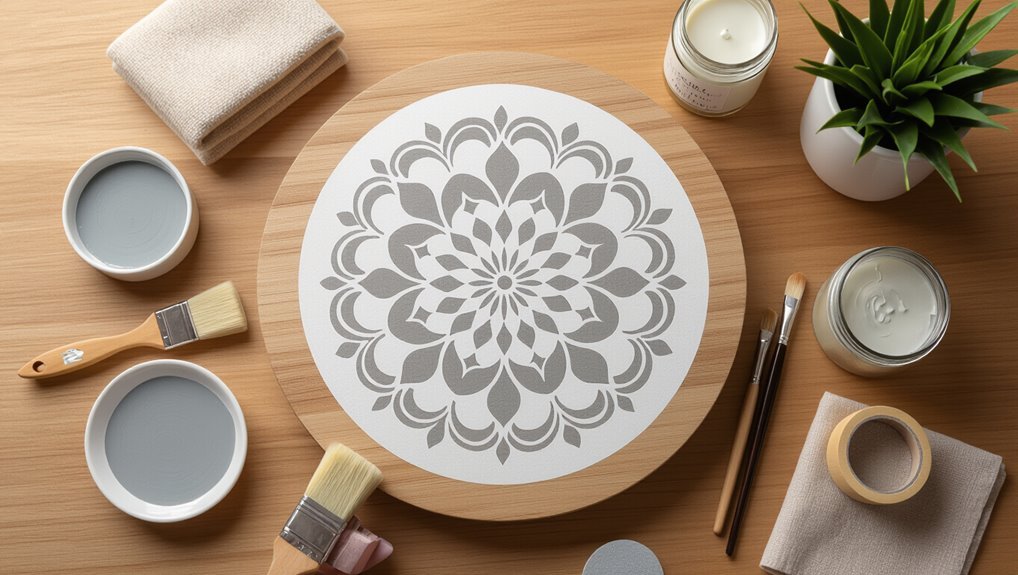
Stenciling offers a cost-effective, customizable alternative to full refinishing or expensive veneer work, allowing for bold patterning without complex skills.
It suits a range of tables—from rustic farmhouse and mid-century pieces to modern accent tables—because scale and motif can be tailored to the form.
Examples from current trends, such as geometric repeats, botanical motifs, and distressed finishes, illustrate how stenciling updates style while preserving structure.
Benefits of stenciling vs. other tabletop finishes
Creativity on a tabletop can transform a plain surface into a distinctive focal point with less time, cost, and technical skill than many alternative finishes.
Stenciling offers customizable patterns, minimal preparation, and easy corrections compared with complex techniques like marbling or inlay. For DIYers learning how to stencil a table top, it balances durability and visual impact while remaining accessible and budget-friendly.
Types of tables and styles that suit stenciling
A variety of table types—from compact side tables to expansive dining tables—lend themselves well to stenciling, each offering different visual and functional opportunities; small surfaces showcase intricate motifs, coffee tables benefit from bold central designs, and dining or console tables can carry repeating patterns that coordinate with room scale.
Durable woods, painted finishes, and vintage or modern frames all accept stencils, adapting to farmhouse, midcentury, and eclectic interiors.
Visual inspiration and common design trends
After considering which table type suits the space, attention naturally turns to the visual possibilities that make stenciling worthwhile.
It offers personalization, pattern repeatability, and surface revitalization. Common trends mix vintage motifs with modern geometrics, monochrome contrasts, or faded farmhouse looks.
- Personalized focal medallions
- Repeating geometric tiles
- Subtle distressed finishes
- High-contrast silhouettes
What You’ll Need: Tools, Materials, and Stencil Types
A clear list of essentials helps guarantee a smooth stenciling project, from brushes and foam pouncers to gloves and a respirator for safety.
Paints, primers, and clear finishes each serve specific roles in adhesion, durability, and appearance, while stencil material and adhesive choices affect edge crispness and repositioning.
A few optional supplies—texture paste, metallic accents, and sealers—enable advanced effects for a customized result.
Essential tools and safety gear
Several basic tools, a few materials, and appropriate safety gear are required before beginning a stencil project on a tabletop.
Gloves protect hands; masks prevent inhalation; goggles shield eyes. Proper tools improve results and reduce errors.
- Stencil brushes or foam pouncers
- Sandpaper and sanding block
- Low-tack painter’s tape or adhesive spray
- Nitrile gloves and N95 mask
Paints, primers, and clear finishes explained
With safety gear and the right tools in place, attention turns to choosing the paints, primers, and clear finishes that determine durability, appearance, and ease of application.
Water-based acrylics dry fast and clean up easily; oil-based paints offer richer depth but require solvents. Use a bonding primer for slick surfaces.
Finish choices—matte, satin, or glossy poly—protect and affect sheen and wear resistance.
Choosing the right stencil material and adhesive
Select stencil material and adhesive based on surface texture, paint type, and level of detail desired: thin Mylar or polyester sheets suit crisp, repeatable motifs on smooth tabletops; adhesive-backed vinyl works for durable, curved, or outdoor pieces; and reusable stencil film balances flexibility with longevity for intricate patterns.
Choose low-tack spray or repositionable adhesive for clean edges; secure edges with painter’s tape on textured or finished surfaces.
Optional supplies for advanced effects
When aiming for advanced effects, the crafter should gather specialty tools and materials—such as texture pastes, metallic or pearlescent paints, foam rollers of varying densities, fine-tipped brushes, and stippling sponges—to expand the stencil’s visual range.
Optional items like spray primers, clear sealers, and sanding pads help refine surface preparation and finish, while different stencil types (mylar for crisp lines, adhesive vinyl for contoured surfaces, and film for repeatable complex motifs) determine which accessories will deliver the best results.
Preparing the Table Surface for Stenciling
Before stenciling, the tabletop must be cleaned and degreased thoroughly, with visible grime removed step-by-step to guarantee paint adhesion.
Any dents, scratches, or uneven areas should be filled and leveled, followed by sanding with progressively finer grits appropriate to the material.
Finally, the need for and type of primer should be determined—wood, laminate, or previously painted surfaces each require different priming methods and products.
Cleaning and degreasing the tabletop step-by-step
Begin by clearing the tabletop of all items and loose debris so the entire surface is accessible; this makes it easier to assess stains, grease, and old finishes.
Wipe with a microfiber cloth.
Apply a mild degreaser or TSP substitute, scrub gently with a nonabrasive pad, then rinse thoroughly.
Dry completely with a lint-free cloth before sanding or priming for stenciling.
Repairing dents, scratches, and uneven areas
Assess the tabletop for dents, scratches, gouges, and uneven areas, noting depth and extent to determine appropriate repair methods.
Fill shallow imperfections with wood filler or putty, apply epoxy for deeper gouges, and press thin veneer or wood patches for missing sections.
Allow cures per product instructions, trim excess, and guarantee repaired spots are flush and stable before proceeding to priming and stenciling.
Sanding techniques and grit recommendations
Prepare the surface by sanding with a progression of grits to achieve a smooth, even profile that accepts primer and paint.
Begin with 120–150 grit to remove imperfections, follow with 180–220 grit for smoothing, and finish with 320 grit for a fine, uniform texture.
Sand with the grain, use light pressure, and clean dust between steps to guarantee stencil adhesion.
When and how to prime different tabletop materials
Because different tabletop materials absorb and react to coatings in distinct ways, selecting the proper primer is essential for adhesion and durability.
Wood, laminate, metal, and painted surfaces each require specific primer types and surface prep to guarantee the stencil stays crisp and the finish withstands use.
Choose oil- or shellac-based for raw wood, bonding primer for laminate, metal primer for steel, and scuff sand plus acrylic primer over existing paint.
Designing Your Stencil Layout and Choosing Colors
Before stenciling begins, precise measurements and planned placement guarantee the pattern sits correctly on the table.
Simple grid guides and centerlines are recommended to align stencil sections, and testing the design on scrap material confirms spacing and technique.
Color choices should balance contrast and harmony so the motif stands out while complementing the piece.
Measuring and planning the stencil placement
Accurate measurements and a clear layout plan guarantee the stencil design sits balanced and centered on the table top.
The installer measures length and width, marks reference points, and sizes the stencil to scale.
Consider edge distances, repeat patterns, and visual focal points.
Color choices are finalized here to test contrast and harmony before securing the stencil for painting.
Creating grid guides and centerlines
A simple set of grid guides and clear centerlines streamlines stencil alignment across the tabletop, providing precise reference points for positioning and repeating motifs.
Use a straightedge and pencil to mark light, removable lines from edge to edge, dividing the surface into equal sections.
Note intersections for motif centers, label axes for orientation, and test placement with a dry run before applying paint.
Color selection tips for contrast and harmony
With grid lines and center points marked, attention turns to selecting colors that balance contrast and harmony across the stencil layout.
Choose a dominant hue, add one contrasting accent for focal motifs, and introduce a subtle neutral to unify.
Consider finish differences—matte versus gloss—and lighting conditions.
Limit the palette to three tones to maintain cohesion and avoid visual clutter on the tabletop.
Mockups and test stenciling on scrap material
Begin by creating several small mockups on scrap wood or cardboard to confirm scale, color relationships, and stencil alignment before touching the tabletop.
Test full stencil repeats, edge treatments, and overlap techniques. Evaluate paint opacity, drying behavior, and adhesion on the chosen finish.
Adjust spacing, contrast, and hue combinations until the mockup matches the desired final look, then transfer measurements to the table.
Stenciling Process: Step-by-Step Instructions
The stenciling process begins with securely fastening the stencil to the tabletop to prevent shifting and minimize paint bleed.
Clear guidance on brush, roller, and sponge techniques will follow, along with methods for layered stencils and achieving clean multi-color effects.
Instructions will also cover appropriate drying times and the ideal moment for stencil removal to preserve crisp edges.
Securing the stencil and preventing bleed-through
Carefully align and secure the stencil to the tabletop to guarantee crisp edges and consistent placement; use low-tack painter’s tape or repositionable spray adhesive applied sparingly to avoid residue.
Press edges flat, especially around curves and cutouts. Seal stencil borders with a thin layer of base-color paint or clear medium to block seepage.
Work from center outward and remove stencil while paint is tacky to prevent dragging.
Best painting techniques for crisp edges (brush vs. roller vs. sponge)
With the stencil secured and edges sealed, attention shifts to the application method that will yield the sharpest edges. A stiff stencil brush patted vertically gives control and minimal bleed.
A mini foam roller provides even coverage on larger areas without overloading.
A dense sponge offers soft blending for subtle textures but risks edge softening; use light taps and minimal paint for best results.
Layered stencils and multi-color methods
Begin by planning the color sequence and stencil order to build each layer cleanly and predictably: start with the largest, lightest base shapes, mask and seal each layer as needed, then work toward darker or more detailed overlays, allowing proper drying time between passes to prevent smudging and color contamination.
Align registration marks, test on scrap, use thin paint applications, and employ masking for crisp multi-color joins.
Drying times and when to remove the stencil
Although drying times vary by paint type, temperature, and humidity, the stencil should generally remain in place until the paint is touch-dry to prevent smudging or seepage under the edges.
After touch-dry, lift the stencil slowly and evenly to check the impression. If tacky, wait longer; if bleed occurred, allow full cure, clean edges with a fine brush, then retouch as needed.
Advanced Effects and Variations
The section introduces techniques for enhancing stenciled tabletops with distressing, antiquing, and faux finishes that add depth and age.
It outlines the use of metallic paints, glazes, and washes to create sheen and subtle color variation.
It also suggests combining stencils with hand-painted details for personalized accents and refined changes.
Distressing, antiquing, and faux finishes over stencils
Layering distressing, antiquing glazes, and faux finishes over stencils lets an ordinary tabletop gain depth, character, and a convincing sense of age without sacrificing the original pattern’s definition.
Apply thin glaze coats, wipe selectively, and sand edges or raised stencil areas for natural wear.
Use color washes or subtle crackle mediums sparingly to enhance pattern contrast, then seal with durable topcoat for protection.
Using metallics, glazes, and washes
Introduce metallics, glazes, and washes as tools for altering a stencil’s visual weight and mood—metallics add sheen and focal highlights, glazes alter depth and color saturation, and washes unify or subdue contrasts.
Apply metallics sparingly on raised areas for subtle glow. Use translucent glazes to deepen tones and blend edges. Thin washes soften changes and tie motifs into the tabletop background.
Combining stencils with hand-painted details
Blend stencils with hand-painted details to elevate a tabletop from decorative to bespoke—stenciled shapes provide crisp structure while brushwork introduces organic variation, depth, and personality.
After stenciling, selectively add highlights, shading, or fine lines to suggest texture and light. Use small brushes, diluted paint, and controlled layering.
Balance repetition and spontaneity so motifs remain cohesive yet lively.
Sealing and Protecting the Finished Tabletop
After stenciling, the surface requires a protective topcoat chosen for the desired durability and sheen.
Options include brush or spray application of polyurethane or varnish and buffed-on wax for a softer finish, each with specific techniques.
Final curing times and routine maintenance determine long-term performance and should guide the choice and method.
Choosing the right topcoat for durability and sheen
When selecting a topcoat, prioritize the tabletop’s planned use—dining surfaces and worktops need tougher, more resilient finishes than occasional accent pieces.
Consider sheen: matte hides imperfections, satin balances durability and subtle luster, gloss offers maximum protection and easy cleaning.
Match finish to aesthetic, substrate, and maintenance needs.
Also factor UV resistance and solvent or water-based formulas for longevity and ease of care.
Application methods for polyurethane, varnish, and wax
Choose the appropriate application method for polyurethane, varnish, or wax based on the desired durability, appearance, and the tabletop material.
Apply polyurethane with a high-quality synthetic brush or foam applicator for smooth, even coats; consider spray for thin, fast layers.
Brush varnish with long, continuous strokes to avoid bubbles.
Rub paste or soft wax on with a cloth, buff to sheen with a clean pad.
Curing time and maintenance recommendations
Once the final topcoat—polyurethane, varnish, or wax—has been applied, attention shifts to curing time and maintenance to guarantee the stencil work remains protected.
Cure per manufacturer instructions (typically 24–72 hours for surface dry, 7–30 days for full hardness). Avoid heavy use until fully cured.
Clean with mild soap and a soft cloth; reapply wax or topcoat yearly in high-use areas to preserve finish.
Common Problems and How to Fix Them
Common stenciling issues are addressed here with practical solutions for common mistakes.
Techniques for removing paint bleed and sharpening edges are explained, along with methods to realign patterns and patch errors.
Guidance is also provided for repairing finish drips and eliminating bubbles to restore a smooth topcoat.
How to remove paint bleed and sharpen edges
Paint bleed along stencil edges can blur a crisp design and make a finished tabletop look amateurish; correcting it requires careful removal and sharpening rather than repainting the entire surface.
Lightly sand with fine-grit paper to remove raised bleed, then use a small angled brush or paint pen to redefine lines.
For tiny smudges, a cotton swab with solvent lifts pigment without damaging surrounding finish.
Fixing alignment mistakes and patching errors
Realigning a mispositioned stencil or patching a misplaced motif requires prompt, precise steps to prevent the error from setting into the finish.
Carefully lift stencil edges while paint is tacky, reposition using registration marks, and re-tape.
For small misplaced spots, let paint dry, sand lightly, apply matching base color, feather edges, then restencil or touch up with a fine brush for seamless correction.
Repairing finish drips and bubbles
Inspect the surface closely for runs, drips, or raised bubbles before the finish fully hardens; addressing them early makes removal easier and minimizes sanding.
If tacky, lift drips with a clean scraper or folded razor, then feather edges.
For cured defects, sand smooth with fine grit, clean dust, and reapply thin coats.
Light polishing blends repair into surrounding finish for a uniform appearance.
Time Estimates and Cost Breakdown
Typical timelines are shown by table size and stencil complexity, from a few hours for small, simple designs to multiple days for large or intricate patterns that require drying between coats.
A clear cost comparison contrasts budget-friendly supplies—basic stencils, economy paints, and standard sealers—with premium options like custom stencils, artisan paints, and high-end finishes.
This section outlines estimated hours and a side-by-side material cost breakdown to help readers plan.
Typical project timeline by table size and complexity
A clear timeline helps set expectations: small side tables generally take a single afternoon to prep, stencil, and finish, while medium dining tables typically require two to three days to allow for drying between coats, and large or highly detailed projects can stretch over a week when multiple sealant layers and intricate patterns are involved. Typical timelines:
| Size/Complexity | Timeframe |
|---|---|
| Small/simple | 4–6 hours |
| Medium/moderate | 2–3 days |
| Large/complex | 1+ week |
Budget-friendly vs. premium material cost comparison
Having outlined time expectations by project size, cost considerations become the next practical factor to weigh: budget-friendly materials—basic stencils, acrylic craft paints, and a water-based poly—cut upfront expenses and suit quick, low-risk projects, while premium options—precision laser-cut stencils, professional-grade paints, and high-build clear coats—raise material costs but reduce repeat work and improve longevity.
A simple cost-per-project estimate contrasts initial savings against long-term value.
Step-by-Step Project Example: Stenciling a Round Dining Table
The project example lists the exact materials needed, from stencil and paint to brushes and sealant.
A concise, timed step-by-step checklist guides preparation, stenciling, touch-ups, and drying intervals.
Key photos or diagrams accompany selected steps to clarify alignment, paint application, and final sealing.
Materials list for the project
Essential supplies are listed here so a crafter can gather everything needed before beginning: A concise materials list guarantees preparation and efficiency for stenciling a round dining table.
Items include surface prep, stencil tools, paint, and finishing supplies chosen for durability and compatibility with tabletop use.
- Sandpaper, cleaner, primer
- Stencil, painter’s tape, stencil brush
- Acrylic or enamel paint
- Clear sealer or topcoat
Sequential step checklist with timings
With materials assembled and the tabletop prepped, the following sequential checklist breaks the project into timed, manageable steps for stenciling a round dining table.
0–10 min: center and tape stencil.
10–30 min: apply base coat and let tack briefly.
30–60 min: stencil first pass.
60–90 min: touch-ups and second pass if needed.
90–120 min: seal and cure.
Photos or diagrams to follow at key steps
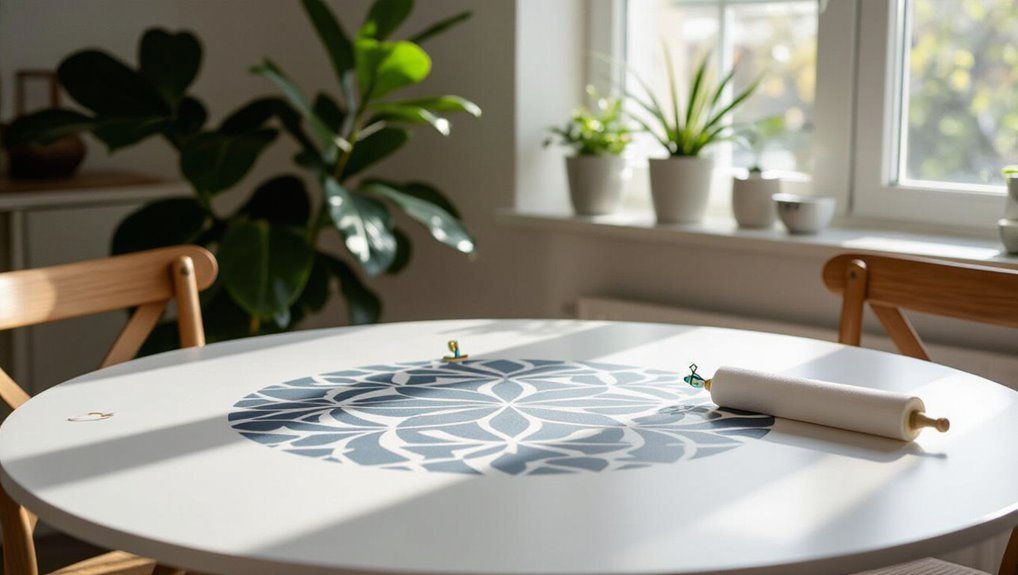
Where will visual guidance matter most during the stenciling process?
Photographs or diagrams accompany alignment, stencil placement, paint application, and edge cleanup.
Include close-ups of registration marks, a step showing adhesive or tape use, and a sequence for removing the stencil.
Before-and-after images and a detail of sealing the surface clarify expectations.
Label each image with concise captions and timing references.
Care, Maintenance, and Long-Term Tips
After the stencil and sealant cure, a regular cleaning routine with a soft cloth and mild cleaner preserves the design without abrading the finish.
For areas that show wear, spot-sanding and reapplying a thin coat of sealant restores protection and blends repairs.
Seasonal rotations, protective pads, and avoiding prolonged exposure to heat or moisture extend the tabletop’s appearance and durability.
Cleaning routine for stenciled tabletops
Establishing a simple, consistent cleaning routine preserves the crispness of stencil lines and the integrity of any topcoat.
Use a soft cloth or microfiber and mild, pH-neutral soap diluted in water. Wring thoroughly to avoid soaking. Blot spills promptly, avoid abrasive pads and harsh chemicals. Dry immediately.
Periodically inspect for dirt buildup at edges and clean gently to prevent abrasion and staining.
Refreshing worn areas and re-sealing
Longevity depends on timely attention to worn spots: when stencil edges dull or high-traffic areas show scuffing, gently abrade the affected zones with fine-grit sandpaper, clean away dust, and reapply matching paint or glaze in thin layers to restore pattern integrity before resealing.
After touch-ups cure, scuff lightly, remove residue, and apply a compatible clear topcoat in thin, even coats, sanding between coats for a seamless finish.
Seasonal and heavy-use considerations
Seasonal changes and heavy use demand routine adjustments to care routines to protect a stenciled tabletop: humidity and temperature swings can cause finish clouding, joint movement, or paint loosening, while frequent traffic accelerates abrasion and wear.
Inspect finishes seasonally, control indoor climate, use coasters and pads, rotate centerpiece placement, and apply touch-up paint or thin topcoat as needed to restore protection and prolong appearance.
Quick Troubleshooting Cheat Sheet
When a stencil project yields smudges, uneven paint, or registration errors, a short checklist helps identify causes and corrective actions quickly.
The cheat sheet lists common faults, immediate fixes, and preventive steps so the stenciler can restore crisp motifs and durable finishes without restarting.
- Blurring: blot excess paint, use dabbing motions.
- Bleeding: apply thinner coats, secure stencil edges.
- Misalignment: re-center, use registration marks.
- Flaking: sand, re-seal with compatible topcoat.
Conclusion
Stenciling a table transforms an ordinary surface into a signature piece, combining patience, precision, and creativity. Like a quiet choreography, each measured brushstroke and placement guides the design toward harmony. When tools are chosen deliberately, surfaces prepared properly, and layers built with care, the finished table endures both in beauty and function. With routine maintenance and occasional touch-ups, the stenciled tabletop continues to invite admiration and practical use for years to come.