How to Maintain a Water Heater to Prevent Leaks: Step-by-Step Maintenance Checklist
To prevent leaks in your water heater, regular maintenance is crucial. Follow this step-by-step checklist to ensure your unit remains leak-free. Monthly inspections should include checking for puddles, rust, loose fittings, and testing the temperature and pressure relief (TPR) valve. Every three months, tighten connections, examine the anode rod, and monitor system pressure. Once a year, drain and flush the tank, replace the anode rod, test or replace the relief valve, and insulate the water lines. Additionally, consider installing a drain pan, pressure regulator, and sediment filter for extra protection. Continue reading for detailed procedures and troubleshooting tips.
Why Regular Water Heater Maintenance Prevents Leaks
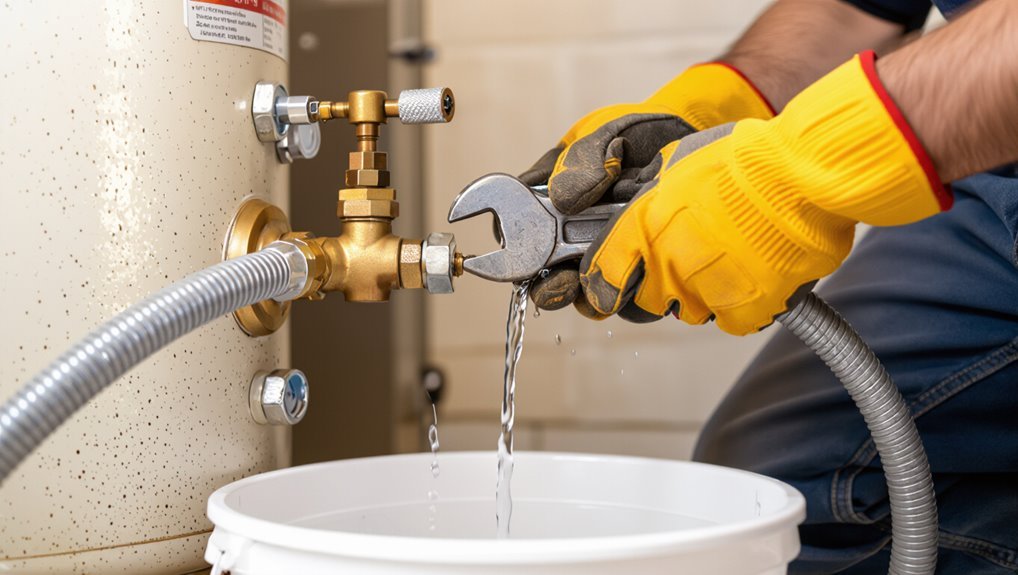
Leaks in water heaters commonly begin with corrosion of the tank, excessive pressure, or failing fittings and connections.
Early signs such as puddling, rust-colored water, hissing sounds, or a drop in pressure can indicate a developing leak.
Regular maintenance addresses these issues before they escalate, reducing repair costs, improving safety, and extending the unit’s lifespan.
How leaks develop in water heaters (corrosion, pressure, fittings)
Many common water heater failures begin with gradual metal deterioration, excessive internal pressure, or compromised connections; each pathway invites moisture escape that can escalate into significant leaks.
Corrosion attacks tanks and fittings, pressure stresses seams and valves, and loose or degraded joints fail.
Routine inspections, anode replacement, pressure-relief testing, and tightened connections illustrate how to maintain water heater to prevent leaks efficiently.
Common signs that a leak is developing
After outlining how corrosion, pressure, and loose fittings set the stage for failure, attention shifts to the early warning signs that a leak is forming.
Observable indicators include dampness or puddles near the tank, rust-colored water, mineral crusts around fittings, decreased water pressure, unexplained utility spikes, and hissing or dripping noises.
Timely detection focuses inspections on these clues.
Benefits of proactive maintenance (cost, safety, lifespan)
Proactive maintenance reduces repair costs, enhances safety, and extends a water heater’s service life by addressing wear before it becomes failure.
Regular inspections catch corrosion, sediment buildup, and minor leaks early, lowering replacement frequency and emergency repair expenses.
Safety risks—scalding, gas leaks, or ruptures—are minimized.
Predictable maintenance schedules optimize performance, efficiency, and resale value while reducing unexpected downtime.
Quick safety checklist before any maintenance
Before any maintenance, the homeowner should verify all water shut-off valves are closed and the unit’s power source—gas or electric—is safely disconnected.
Appropriate personal protective equipment and a cleared, well-lit workspace reduce risk during inspection and minor tasks.
If the issue involves gas lines, complex electrical work, or signs of major corrosion or leaks, a licensed professional should be contacted rather than attempting DIY repairs.
Shut-off valves and power sources (gas, electric)
When performing any water-heater maintenance, confirm that the cold-water shut-off valve is fully closed and that the unit’s power source is disconnected—either by turning off the dedicated circuit breaker for electric heaters or shutting the gas supply valve and extinguishing pilot lights for gas models—to eliminate the risk of flooding, electric shock, or fuel leaks.
Verify valve integrity, label the breaker, and confirm zero power with a noncontact tester before proceeding.
Personal protective equipment and workspace prep
Gather appropriate personal protective equipment and prepare a clear, well-lit workspace before any water-heater task begins.
Wear safety goggles, gloves, and non-slip footwear. Use a dust mask if sediment disturbs.
Guarantee stable access with adequate ventilation and a drip pan under connections.
Keep tools organized, a flashlight at hand, and a charged phone nearby.
Remove flammable materials from the area.
When to call a professional instead of DIY
How can one tell if a situation requires a professional rather than a DIY fix?
Severe leaks, gas smells, electrical faults, or persistent temperature/pressure issues indicate professional intervention.
If corrosion, tank damage, or unclear origins of noise or seepage occur, stop attempts and call a licensed plumber or HVAC technician.
Safety risks, lack of proper tools, or expired warranties also warrant professional service.
Monthly checks to catch early leak issues
Monthly inspections help identify small leaks before they become major failures.
Technicians or homeowners should routinely examine external fittings and the drain pan, watch for water or corrosion at the base, and confirm the TPR valve functions properly.
Prompt attention to any of these signs can prevent water damage and extend the unit’s service life.
- Inspect visible pipes, connections, and the pan
- Check for puddles, dampness, or rust around the tank
- Test temperature and pressure relief (TPR) valve operation
Inspect visible pipes, connections, and the pan
Inspecting the visible pipes, fittings, and the drain pan each month helps detect small leaks, corrosion, or loose connections before they escalate into major damage.
The reader should check joints, valves, hose clamps, and any flexible connectors for drips or green/white deposits.
Confirm the pan is unobstructed, draining properly, and free of standing water; tighten or flag issues for prompt repair.
Check for puddles, dampness, or rust around the tank
When checked regularly, the area around the water heater reveals early signs of trouble—small puddles, damp spots, or surface rust indicate escaping water or failing seals.
Inspect flooring, drip pan, and nearby walls for discoloration or mineral deposits.
Note musty odors and soft spots under the unit.
Document findings, photograph evidence, and schedule prompt repair if persistent moisture or corrosion appears.
Test temperature and pressure relief (TPR) valve operation
Lift the TPR valve lever briefly to verify it releases water and reseals properly.
The inspector notes any discharge, ensuring flow through the drain tube and not the tank base. If water continues, leaks, or valve sticks, mark for replacement.
Record date and observations in maintenance log.
Recommend replacement if corrosion, mineral buildup, or inconsistent operation is present to prevent pressure-related failure.
Quarterly maintenance tasks to reduce leak risk
Quarterly checks focus on components that commonly fail and lead to leaks, so routine attention can prevent small issues from becoming major repairs.
Technicians or homeowners should verify tightness of visible fittings and flexible connectors, assess the anode rod for corrosion and test it per recommended intervals, and monitor household water pressure while ensuring a pressure regulator is installed and functioning.
These simple actions reduce corrosion and stress that cause most tank and connection failures.
- Tighten accessible fittings and inspect flexible connectors
- Inspect anode rod condition (visual signs and testing frequency)
- Monitor water pressure in the home and install/inspect pressure regulator
Tighten accessible fittings and inspect flexible connectors
Check accessible fittings and flexible connectors every three months to reduce the chance of leaks and spot early signs of wear.
Technicians should visually inspect for corrosion, kinks, fraying, or mineral buildup. Using appropriate wrenches, gently tighten loose fittings—avoid over-tightening.
Replace any damaged flexible connectors and seals promptly. Document actions and monitor for recurring looseness at subsequent inspections.
Inspect anode rod condition (visual signs and testing frequency)
Why inspect the anode rod regularly? The anode rod prevents tank corrosion; visual checks reveal heavy pitting, thinning, or complete depletion.
Quarterly inspections identify wear before leaks start. If corrosion exceeds half the original diameter or significant sulfate buildup appears, replace the rod.
Routine testing and timely replacement extend tank life and reduce leak risk without addressing household water pressure issues.
Monitor water pressure in the home and install/inspect pressure regulator
Monitor water pressure regularly and verify the pressure-reducing valve (PRV) is functioning to prevent excessive stress on a water heater’s tank and fittings.
Use a gauge at an outdoor hose bib or near the main shutoff; ideal domestic pressure is 40–60 psi.
If readings exceed limits or fluctuate, adjust or replace the PRV.
Retest quarterly and after plumbing work.
Annual comprehensive maintenance checklist
An annual thorough checklist guides a full system shutoff and drain procedure, followed by flushing the tank to remove sediment buildup.
It also covers inspecting and replacing the anode rod and testing the TPR valve, with replacement if necessary.
Finally, the checklist includes checking and insulating both hot and cold water lines to improve efficiency and prevent heat loss.
Full system shutoff and drain procedure
Begin by cutting power to the heater and closing the cold-water supply valve to isolate the unit; this prevents accidental heating or refilling during the procedure.
Open a hot-water faucet to relieve pressure, attach a hose to the drain valve, and route it to a safe drain.
Open the drain valve slowly, monitor flow, and close when empty.
Reinstall fittings and restore supply and power.
Flushing the tank to remove sediment buildup
Flush the tank annually to remove accumulated sediment that reduces efficiency and can shorten the heater’s life.
With power/gas off and cold water supply closed, attach a hose to the drain valve and direct discharge to a safe location.
Open a hot faucet to admit air, open the drain valve until runoff runs clear, then close valves, restore supply, and restart the unit.
Inspecting and replacing the anode rod
Inspecting the anode rod annually protects the tank from corrosion by sacrificing the rod instead of the steel lining.
The technician shuts power and water, locates and removes the rod, and inspects for heavy pitting, thinning below 3/16 inch, or replacement of core wire.
If degraded, a compatible replacement is installed and secured; sealing and leak checks follow before restoring service.
Testing and replacing the TPR valve if needed
After the anode rod has been checked and replaced if necessary, the technician turns attention to the temperature and pressure relief (TPR) valve, a safety device that prevents tank overpressure and overheating.
The technician lifts the test lever to verify discharge, checks for steady flow and proper reseating, replaces any leaking or stuck valve with correct pressure-rated model, and documents results and date.
Checking and insulating hot and cold water lines
Begin by tracing the hot and cold supply lines from the tank to accessible fixtures, noting exposed sections, valves, and fittings for signs of corrosion, loose connections, or heat loss.
Measure pipe lengths, clean surfaces, and apply appropriate foam or fiberglass insulation with adhesive tape, sealing joints and valves without blocking access.
Recheck after insulation for drip evidence and secure mounting to prevent stress.
Examining the tank exterior and exhaust venting (gas units)
One should visually scan the tank exterior for rust, dents, leaks, and loose fittings. Then verify that the area around the unit is clear and dry.
For gas models, also examine the venting system for proper attachment, corrosion, blockages, or signs of backdrafting. Confirm vent joints and termination points are secure and unobstructed.
Document any corrosion, loose fittings, or seal failures, and recommend timely repairs or replacement to prevent moisture intrusion and combustion hazards.
Refill and controlled restart with leak verification
Restore water supply and initiate a controlled restart while closely monitoring for leaks and proper operation.
The technician opens the inlet, purges air at fixtures, restores power or gas per manufacturer instructions, and watches pressure relief and drain connections for seepage.
After reaching normal temperature, the unit is observed for several cycles; any persistent moisture, drips, or pressure anomalies prompt immediate shutdown and repair.
How to locate and diagnose different types of leaks
The section outlines methods to locate and diagnose common water heater leaks, starting with fitting and valve connections and simple fixes.
It then covers how to assess slow seepage from tank seams, distinguish condensation from true leaks, and evaluate faults in the TPR valve or drain.
Practical inspection steps and appropriate repair or replacement options are summarized for each leak type.
Leaks at fittings and valves detection and fixes
Many leaks at fittings and valves stem from loose connections, degraded seals, or corrosion; identifying the source requires systematic inspection of joints, valve stems, pressure-relief assemblies, and nearby pipe soldering.
Check for visible drips, mineral deposits, or wetness after drying.
Tighten fittings, replace deteriorated washers or valve cartridges, and apply appropriate thread sealant or replace corroded components.
Test under normal pressure.
Slow seepage from tank seams diagnosis and options
Inspect tank seams closely to distinguish slow seepage from surface condensation or nearby plumbing drips.
If moisture forms directly along welds or seam joins, dry area, mark spot, and monitor for recurring wetness.
Small pinhole leaks or corroded seams suggest internal corrosion; recommend prompt professional assessment.
Temporary patching is unreliable—tank replacement planning minimizes flood risk and liability.
Leaks from the TPR valve or drain causes and remedies
Several common leak sources around a water heater are the temperature-and-pressure-relief (TPR) valve and the drain/drain valve; each has distinct causes and diagnostic signs.
A dripping TPR suggests overpressure, thermal expansion, or valve failure—check pressure, expansion tank and replace valve if corroded.
Leaks at the drain valve stem from loose fittings, worn packing or damaged valve—tighten, reseal with new washer or replace.
Condensation vs. true leaks how to tell
After checking valves and fittings for obvious drips, the next step is distinguishing true leaks from routine condensation.
Inspect timing: condensation appears during rapid heating or high humidity and forms fine moisture on tank surfaces; true leaks produce steady pools, wet insulation, rust stains or persistent dampness.
Trace moisture to fittings, seams, and floor; use paper towel tests and monitor repeat occurrences to confirm source.
Repair options and when replacement is necessary
Repair options range from simple DIY fixes—tightening fittings, replacing valves, or sealing minor pipe leaks—to professional work such as welding, tank patching, or replacing major components.
The decision to repair or replace depends on factors like the unit’s age, extent of corrosion or damage, frequency of failures, and a cost comparison between repeated repairs and a new installation.
Clear signs that replacement is preferable include a leaking tank, extensive rust, or repair costs approaching the price of a new water heater.
DIY repairs: tightening, replacing valves, sealing small pipe leaks
Begin by evaluating the problem visually and by touch to determine whether a leak or loose fitting can be fixed with basic tools, a valve can be tightened or replaced, or the issue indicates a failing tank or corroded piping that requires professional replacement.
If minor, shut off water and power, tighten fittings, replace worn valve cartridges, apply thread sealant or pipe dope, and retest for leaks.
Professional repairs: welds, tank patching, major component replacement
When problems exceed what basic tools and sealants can safely address, a licensed technician evaluates whether welding, patching, or full component replacement is appropriate.
The professional inspects corrosion, assesses structural integrity, and recommends targeted interventions: welds for localized breaches, certified tank patches for minor failures, or replacement of heating elements, thermostats, anode rods, valves, or the entire tank when repairs compromise safety or longevity.
Signs the water heater should be replaced rather than repaired
If recurring failures, extensive corrosion, or leaks affect performance and safety, replacement is often the prudent choice rather than further repairs.
Additional indicators include persistent sediment buildup reducing capacity, multiple component failures, anode depletion, age beyond recommended service life, and visible tank breaches or rusting at seams.
When reliability, efficiency, or safety cannot be restored cost-effectively, replacement is warranted.
Cost comparison of repair vs. replacement
Comparing repair and replacement costs requires weighing immediate expenses against long-term value: minor component fixes—thermostats, heating elements, pressure valves—often cost a few dozen to a few hundred dollars and can extend service life, while major repairs or recurring failures can approach the price of a new unit, which typically ranges from several hundred for basic tank models to a few thousand for high-efficiency or tankless systems.
| Option | Typical cost |
|---|---|
| Minor repair | $50–$400 |
| Replacement | $400–$3,000 |
Preventive upgrades and accessories to minimize leaks
Preventive upgrades and accessories can substantially reduce the risk and impact of water heater leaks.
Practical measures include installing a drain pan with an automatic leak detector, adding water softeners or sediment filters to limit corrosion, and fitting pressure regulators and expansion tanks to control thermal expansion.
These interventions extend equipment life and minimize water damage when failures occur.
Installing a drain pan and automatic leak detector
Install a corrosion-resistant drain pan beneath the water heater and pair it with an automatic leak detector to contain minor leaks and trigger timely shutoff or alerts.
Position the pan on a level surface, route the drain to a safe outlet or floor drain, and test the detector periodically.
Choose detectors with battery backup and remote notification for rapid response and reduced water damage risk.
Water softeners and sediment filters to reduce corrosion
After placing a drain pan and leak detector, attention to water quality further reduces the risk of tank and plumbing corrosion.
Installing a water softener lowers mineral buildup that accelerates corrosion, while sediment filters capture grit that abrades tank linings and valves.
Regularly service and replace media and cartridges per manufacturer recommendations to maintain efficiency and extend heater life, reducing leak likelihood.
Pressure regulators and expansion tanks to manage thermal expansion
Many homes benefit from a pressure regulator and an expansion tank to control the pressure spikes caused by thermal expansion when water heaters heat closed-system water.
These components stabilize system pressure, protect tank fittings, valves and fixtures, and reduce leak risk.
Regular inspection guarantees regulator setpoint accuracy and expansion tank precharge.
Installation by a qualified plumber with correct sizing prevents failures and prolongs heater life.
Seasonal and special-case maintenance considerations
Seasonal and special-case maintenance covers steps that change with climate, absence, and unit type.
In cold regions, this includes winterizing to prevent freeze damage and insulating pipes and the tank. For extended absences, it means proper shutdown or vacation settings to avoid corrosion and flooding.
Different systems—tankless, hybrid, gas, and electric—require specific checks such as descaling for tankless, battery or ignition inspections for gas, and element testing for electric units.
Winterizing in cold climates to prevent freeze damage
Promptly addressing freeze risk preserves water heater function and prevents costly burst pipes in cold climates.
Insulate exposed pipes, jacket the tank, and install heat tape on vulnerable lines.
Maintain ambient temperature in the utility area above freezing and drain external lines.
For unoccupied properties, partially drain the tank and shut off water supply per manufacturer guidelines, ensuring valves operate freely.
Vacation or long-absence shutdown procedures
Before extended absences, owners should follow a clear shutdown routine to reduce energy use, prevent water damage, and avoid component degradation.
Turn the thermostat to vacation or low setting, shut off the water supply, drain a few gallons from the tank or open the drain valve briefly to relieve pressure, and inspect for leaks.
Leave power or pilot off if recommended by manufacturer.
Maintenance differences for tankless, hybrid, gas, and electric models
Different water‑heater technologies require distinct seasonal and special‑case checks to guarantee efficiency and longevity:
Tankless units need annual descaling and inlet filter cleaning;
hybrids require refrigerant and coil inspections plus filter changes;
gas models demand vent, burner, and pilot inspections plus combustion safety checks;
electric heaters need element and thermostat testing and periodic drain/flushing.
Adjust procedures for hard water, freezing climates, and high usage.
Troubleshooting flowchart for inspecting a suspected leak
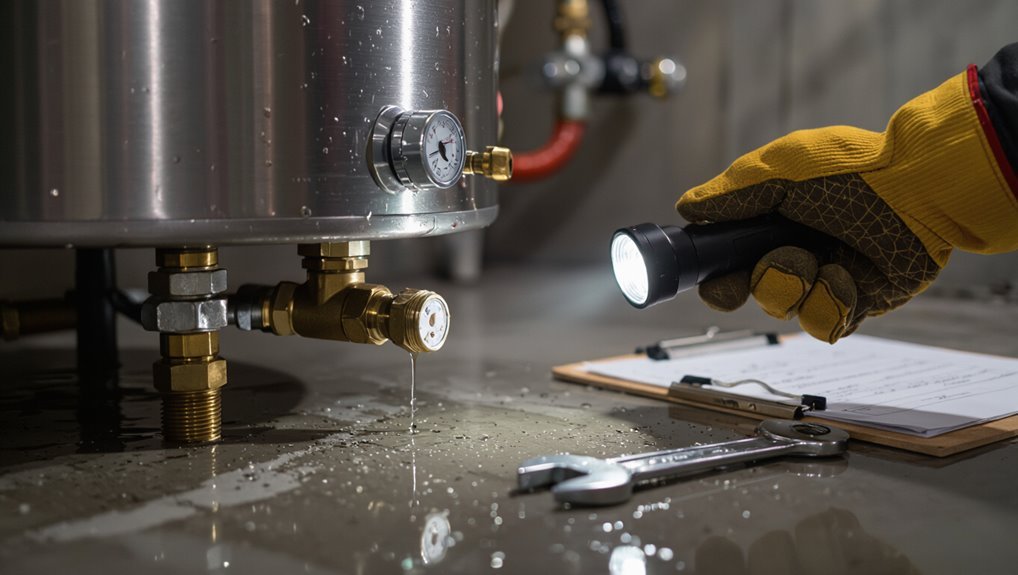
The troubleshooting flowchart directs the inspector to shut off power and water supply immediately if a major leak is confirmed.
Next steps include isolating the affected area, placing containers or absorbent material to limit further damage, and contacting a qualified technician.
The inspector should record photos, dates, and any service reports to support warranty or insurance claims.
Immediate actions if a major leak is found
If a major leak is discovered, immediate, decisive steps are required to limit water damage and guarantee safety.
Shut off the water supply at the cold-water valve, power the heater down (cut electricity or gas), and isolate surrounding areas to prevent electrical hazards.
Contain escaping water with buckets or towels, call a licensed plumber promptly, and evacuate if structural or electrical risks appear imminent.
Documenting issues for warranty or insurance claims
Begin documenting immediately upon suspecting a leak: photograph visible damage, record the date and time, note water flow origin and any odor or discolored water, and save meter readings or shutoff actions performed.
Then log serial numbers, model, purchase and service receipts, and prior maintenance records.
Create a clear timeline, retain originals, and forward copies to manufacturer or insurer promptly with concise incident notes and contact details.
Maintenance log template and schedule to prevent leaks
A concise maintenance log and a clear schedule help identify early signs of leaks and document corrective actions. The log should record inspection date, findings and any repairs or parts replaced, plus the technician’s name and photos when possible.
A recommended calendar differentiates homeowner monthly checks from landlord seasonal or annual professional service.
- Record after each inspection: date, inspector, visual findings, pressure/temp readings, drain valve test result, photos, and actions taken.
- Record after each service: service provider, parts replaced (T&P valve, anode rod, heating element), work performed, and follow-up recommendations.
- Frequency calendar: homeowner — quick visual and valve checks monthly, sediment flush and anode check every 6–12 months; landlord — documented professional inspection and maintenance every 6 months to 1 year depending on property and usage.
What to record after each inspection or service
Documenting each inspection or service guarantees a clear history of the water heater’s condition, interventions, and remaining risks.
The log should record date, inspector/technician name, visual findings, measured temperatures and pressures, actions performed (flushing, valve replacement, anode check), parts installed with serial numbers, next recommended check, photos if applicable, and any unresolved concerns or recommended follow-up.
Recommended frequency calendar for homeowners and landlords
With a clear inspection record in place, a simple calendar-based maintenance schedule helps homeowners and landlords prevent leaks and extend heater life.
Monthly: check pressure relief valve, drain small amount.
Quarterly: inspect anode rod, fittings, and visible corrosion.
Biannually: flush tank, test thermostat, clean burners/elements.
Annually: full professional inspection, replace anode if needed, update maintenance log.
Conclusion
Regular water heater maintenance markedly reduces leak risk; studies show that routine inspection and flushing can extend tank life by up to 50%, translating to fewer failures and costly water damage. Following a consistent safety checklist and scheduled monthly, quarterly, and annual tasks helps detect corrosion, a failing anode rod, or loose fittings before they become emergencies. Adopting preventive upgrades and logging maintenance guarantees reliability, lowers repair costs, and protects home infrastructure over the long term.