How to Measure for a Bathroom Faucet: Step-by-Step Guide to Ensure a Perfect Fit
To ensure a perfect fit for your bathroom faucet, start by measuring existing holes, including their spacing and diameters. Check the center-to-center distances and the thickness of the deck. Additionally, measure the spout’s reach and height to ensure water flows into the basin and that there’s enough clearance from backsplashes, mirrors, and walls. Record the lengths of supply lines, types of inlet threads, and valve sizes. Finally, identify the sink and faucet mount types (single-hole, centerset, widespread, wall-mount) for compatibility. Follow this step-by-step guide for accurate measurements, address any special cases, and perform final installation checks.
How to Measure for a Bathroom Faucet: Quick Essentials
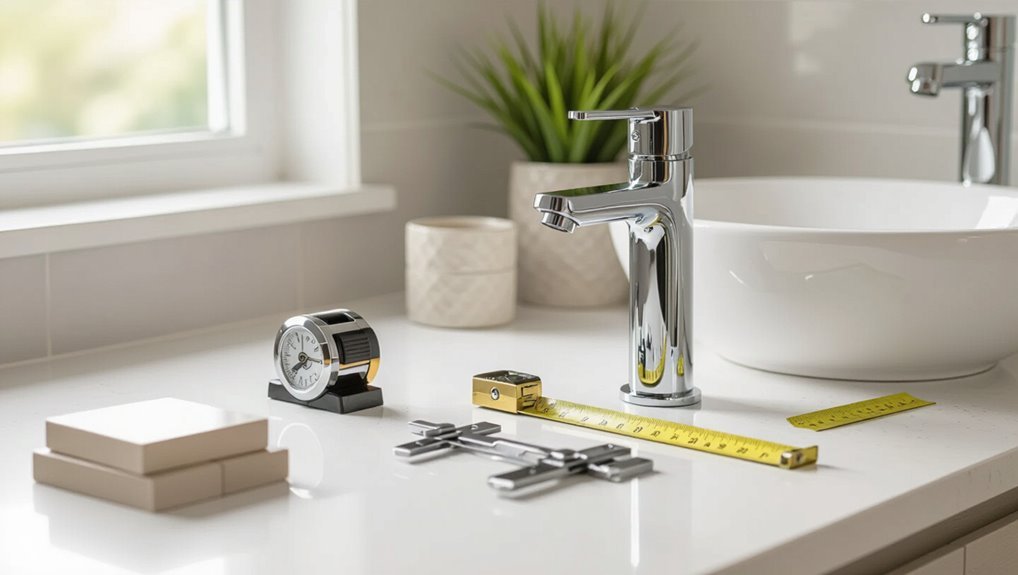
The essential measurements for faucet compatibility include hole count and spacing on the sink or countertop, the deck-to-spout distance, and the height needed to clear any mirror or backsplash.
Before measuring, one must gather a tape measure, a straightedge or ruler, and a flashlight for better visibility of mounting holes.
Accurate, concise measurements guarantee the replacement faucet will fit and function without unexpected modifications.
What measurements determine faucet compatibility
Measurements that determine faucet compatibility focus on three essentials: hole count and spacing in the sink or countertop, spout reach and height relative to the basin, and supply line connections (thread size and type).
The guide explains how to measure for a bathroom faucet by noting deck or sink hole diameter, center-to-center spacing, clearance to backsplash, spout projection for bowl coverage, and matching water supply fittings.
Tools you need before measuring
A few basic tools and a tape measure make accurate faucet measurements quick and reliable. A small flashlight, masking tape, pencil, and notepad help record dimensions and locate hidden mounts.
A combination square or straightedge guarantees alignment. For old installations, adjustable pliers and basin wrench check looseness.
A calculator or smartphone simplifies spacing math and verifies hole centers before purchase.
Identify Your Sink and Faucet Type
The next step is to identify the sink rim or countertop style—common options include drop-in, undermount, and vessel sinks—which determines clearance and mounting surface.
Equally important is the faucet mount type: single-hole, centerset, widespread, or wall-mount, each requiring different hole counts and spacing.
Matching sink style with faucet type guarantees proper fit and function.
Common sink rim and countertop styles (drop-in, undermount, vessel)
Recognizing whether a sink is drop-in, undermount, or vessel is essential because each style affects faucet placement, hole configuration, and clearance requirements.
Drop-in sinks have a visible rim sitting on the countertop. Undermount sinks attach below the countertop, offering a seamless edge.
Vessel sinks sit atop the counter, requiring taller faucets or deck/wall mounting and extra spout reach for proper clearance.
Faucet mount types (single-hole, centerset, widespread, wall-mount)
Faucet mount type determines how a fixture attaches to the sink or wall and dictates hole spacing, installation complexity, and compatible faucet styles.
Single-hole faucets require one opening; centerset combines spout and handles on a 4-inch base for three-hole sinks. Widespread separates spout and handles with 8–16 inches between centers.
Wall-mount faucets free countertop space but need plumbing within the wall and precise wall measurements.
Step-by-Step Measurement Process
A clear, ordered measurement routine guarantees the chosen faucet fits the sink and surrounding space.
The following checklist guides precise measurements that affect installation and operation. Each step targets a specific dimension to prevent mismatches or clearance issues.
- Measure the number of faucet holes and the spacing between them.
- Measure center-to-center distance for multi-hole faucet configurations.
- Measure deck thickness and the diameter of existing holes.
- Measure spout reach and height to confirm clearance over the basin.
- Measure distance to the backsplash and wall for full spout and handle movement.
Measure the number of faucet holes and spacing
Before taking any measurements, one should identify how many holes penetrate the sink or countertop and note their alignment—centered, widespread, or single—since this determines the compatible faucet styles.
Then record whether holes are exposed or capped, measure hole diameters, and check for additional features like deck plates or soap dispensers.
Photograph the layout for reference when shopping or consulting installers.
Measure center-to-center distance for multi-hole faucets
When measuring center-to-center distance for multi-hole faucets, the installer should use a tape measure or caliper to record the horizontal distance between the centers of adjacent holes, typically between the hot and cold handles or between an outer handle and the spout.
Measure straight across the sink deck, record each adjacent measurement, and verify symmetry.
Round to nearest millimeter or eighth inch for matching faucet specifications.
Measure deck thickness and hole diameter
After recording center-to-center distances, the installer next measures deck thickness and hole diameter to confirm the new faucet and any mounting hardware will fit correctly.
Using calipers or a tape, they measure deck depth from underside to top surface and record thickness.
They then measure existing hole diameter and any escutcheon size. These dimensions confirm compatible shank length, gaskets, and mounting nuts.
Measure spout reach and height for clearance
To guarantee the new faucet functions without obstruction, measure both spout reach and spout height precisely so the water stream clears the sink and surrounding fixtures.
Measure reach from the center of the faucet base to the spout outlet; verify it lands inside the basin.
Measure height from deck to spout outlet to confirm clearance for vessel sinks and accessories.
Record measurements for comparison.
Measure distance to backsplash and wall for spout and handle movement
Once spout reach and height are confirmed, attention turns to measuring clearance from the faucet to the backsplash and nearby walls to guarantee full spout and handle movement.
Measure horizontally from the spout centerline to the backsplash and side walls, and vertically from deck to backsplash.
Account for handle arc and any upward or sideward rotation.
Record minimal clearances for chosen faucet model.
Measure supply line locations and length requirements
Plumbing layout dictates where supply lines must connect, so measure their locations and required lengths before installing the faucet.
Identify hot and cold stub-outs, noting center-to-center spacing and distance below countertop. Measure from shutoff valves to faucet tailpieces, allowing slack for bends and connectors.
Record thread sizes and choose supply lines long enough to reach without strain, trimming or extending only as needed.
How to Record and Use Your Measurements
A concise measurement checklist helps shoppers match sink dimensions to faucet options.
Key dimensions—deck-to-spout distance, spout reach, and overall height—should be translated into specific faucet specifications.
Valve and supply fitting sizes are noted when changes to plumbing or replacement parts may be required.
Creating a measurement checklist for shopping
When preparing to shop for a bathroom faucet, the homeowner should compile a concise checklist of critical measurements—mounting hole spacing, deck thickness, spout reach and height, supply line lengths, and drain dimensions—so decisions can be matched directly to product specifications.
Record each value with units, note whether measurements are inside or center-to-center, photograph the sink area, list preferred finishes, and retain receipts for returns.
Translating sink measurements to faucet specs (deck-to-spout, reach, height)
Having gathered the checklist measurements, the homeowner must convert sink dimensions into specific faucet specs—deck-to-spout distance, spout reach, and spout height—to guarantee proper fit and function.
Measure from deck center to basin edge for deck-to-spout, from centerline to outlet for reach, and from deck to highest spout point for height.
Record values, compare to faucet specs, and verify clearance and splash radius.
When to include valve and supply fitting sizes
Proper documentation includes valve and supply fitting sizes whenever the installation involves hidden lines, nonstandard connections, or replacement parts that must match existing plumbing.
Record inlet diameters, thread types (NPT, BSP, compression), hose lengths, and stop valve dimensions.
Note material compatibility and clearance constraints.
These measurements prevent mismatches, streamline parts ordering, and guarantee installers can verify fit before finalizing the faucet selection.
Special Situations and How to Measure Them
Special situations require tailored measuring techniques to guarantee proper fit and function.
For vessel sinks and tall faucets, wall-mount installations, pedestal or console sinks with tight access, and retrofit replacements, measurements must account for height, reach, in-wall depth, stud placement, and existing hole patterns.
Clear, precise notes on these variables will guide selection and installation.
Measuring for vessel sinks and tall faucets
Several considerations come into play when measuring for vessel sinks and tall faucets, because the sink rim sits above the countertop and faucet height must clear it comfortably.
Measure rim height, spout reach to guarantee water lands near center of basin, and deck-to-spout clearance.
Confirm handle operation clears sink edge and mirror.
Account for countertop thickness and any accessory holes when selecting faucet height.
Measuring for wall-mount faucets (in-wall depth and stud locations)
Wall-mount faucets require measuring both the in-wall valve depth and nearby stud locations to secure installation and correct spout reach.
Measure from finished wall surface to valve face to confirm trim compatibility and spout projection.
Locate studs and plumbing runs to plan mounting brackets and reinforcement.
Record horizontal centerline height relative to basin rim and verify valve depth allows reliable sealing and access.
Measuring for pedestal and console sinks with limited access
When access behind or beneath a pedestal or console sink is limited, measuring requires a focused approach that captures faucet centerline, available clearance, and mounting options from accessible reference points.
Measure from basin center to edges, back splash, and floor; note underside clearance for supply lines and escutcheons.
Verify hole spacing visible on rim or from underside access panels and record depth to finished wall.
Measuring when replacing an existing faucet (retrofit considerations)
Moving from measuring under limited-access pedestal and console sinks, attention shifts to retrofits where an existing faucet dictates many measurements.
Document hole count, spacing, and deck thickness. Measure center-to-center distances, spout reach, and clearance to backsplash or mirror.
Note mounting type, supply line locations, and any corrosion or damage affecting fit.
Verify new faucet compatibility before purchase.
Compatibility Checks Before Purchase
Before purchasing a faucet, one should confirm that hole size, hole count, and deck thickness match the fixture specifications to guarantee proper fit. They should also verify that supply line fittings and valve types are compatible with existing plumbing to avoid unexpected adapters. The table below summarizes key checks to perform before finalizing a purchase.
| Check item | What to confirm |
|---|---|
| Hole count | Number of deck holes required by the faucet |
| Hole size | Diameter of each hole versus faucet specifications |
| Deck thickness | Maximum and minimum deck thickness supported |
| Supply fittings | Thread size and type of supply lines |
| Valve compatibility | Valve type (compression, cartridge, etc.) and connection style |
Cross-checking hole size, hole count, and deck thickness
Several key measurements must align to confirm a new faucet fits and functions properly: hole diameter, the number of holes on the sink or countertop, and the deck thickness. The installer compares sink hole sizes to faucet specs, verifies hole count for configuration, and ensures deck thickness falls within the faucet’s mounting range to secure a watertight, stable installation.
| Measurement | Purpose |
|---|---|
| Hole diameter | Fit faucet shank |
| Hole count | Match faucet configuration |
| Deck thickness | Confirm mounting reach |
| Tolerance | Allow for gaskets |
Matching supply line fittings and valve types
When matching supply lines and shutoff valves to a new faucet, check fittings, thread types, and valve style to guarantee a leak-free connection and proper water flow. The installer verifies compression vs. flare, thread size (1/2″ IPS, 3/8″ OD), and valve orientation. Confirm flexible line length and adapter needs before purchase.
| Item | Check |
|---|---|
| Fitting type | Compression/Flare |
| Thread size | 1/2″ IPS / 3/8″ OD |
| Valve style | Angle/Stop |
| Length/adapters | Flexible, needed? |
Common Measurement Mistakes and How to Avoid Them
Common measurement errors can lead to faucets that don’t fit or function properly, so recognizing and preventing these mistakes is crucial.
Careful measurement of spacing, clearances, and mounting details reduces returns and installation headaches. The following checklist highlights frequent pitfalls and practical checks to avoid them.
- Misreading center-to-center spacing between faucet holes, leading to mismatched mounts
- Ignoring backsplash clearance that can block handles or spray head movement
- Overlooking deck thickness and incompatible mounting hardware
- Failing to measure handle swing to guarantee full range of motion
- Not checking spray head reach relative to sink bowl placement
Misreading center-to-center spacing
How often do measurements for faucet installation fail because the center-to-center spacing was misread?
Installers may confuse hole-to-hole distances with overall fixture width or misidentify metric versus imperial markings. Misreading leads to incompatible faucets, drilling errors, or trim gaps.
Verifying with a reliable tape measure, measuring between hole centers twice, and noting units prevents costly mistakes and guarantees proper alignment.
Ignoring backsplash clearance
If backsplash clearance is overlooked, a new faucet can sit too close to or collide with the backsplash, restricting lever movement and creating awkward gaps.
Measure from the faucet’s rear base to the backsplash, account for handle swing and spout reach, and compare to product specs.
Verify clearance with any escutcheon or trim to prevent interference and guarantee full, unobstructed operation.
Overlooking deck thickness and mounting hardware
Many installations fail when the sink or countertop thickness and the specific mounting hardware are not measured before purchase.
Installers must verify deck thickness against faucet shank length and adapter compatibility; thin or thick decks may need extension kits or different mounting nuts.
Also check underside clearance for mounting plates, supply lines, and tool access to confirm secure fastening and watertight seals.
Failing to measure for handle swing and spray head reach
After confirming deck thickness and mounting clearance, attention must turn to handle swing and spray-head reach, two measurements that often get overlooked until the faucet is physically installed.
Installers should verify full handle rotation clearance to prevent collisions with mirrors or walls, and measure spray-head extension to guarantee it reaches the sink bowl without splashing.
Document these dimensions before purchase.
Practical Tips for a Perfect Fit
A few practical habits can prevent fit issues before purchase and installation.
Measure twice and mock up hole placement with tape, and opt for adjustable or flexible fittings when uncertain about alignment.
If measurements are complex or the installation involves hidden plumbing, a plumber should be consulted or a professional measurement requested.
Measuring twice and mocking up with tape
Measure twice before committing to holes: precise verification of sink, countertop, and faucet dimensions prevents misaligned spouts, awkward clearances, and costly rework.
After measuring, create a tape mockup showing hole centers, spout reach, and handle swing. Inspect sightlines, faucet-to-basin distance, and deck edge clearance.
Adjust marks as needed. Document final layout before drilling to guarantee fit and function.
Choosing adjustable or flexible fittings when uncertain
When the tape mockup still leaves questions about alignment or pipe access, opting for adjustable or flexible fittings can save time and headaches.
These fittings accommodate misaligned mounting holes, slight height differences, and awkward supply line angles.
Choose braided stainless flex lines and swivel adapters rated for plumbing pressure.
Confirm connection types and lengths, and prefer certified components to guarantee leak-free, durable performance.
When to consult a plumber or measure for professional installation
How should one decide between DIY measuring and calling a professional?
The article recommends consulting a plumber when plumbing is complex, pipes are old or corroded, wall or sink modifications are needed, or local codes require licensed work.
For confident DIYers, measure when installations are straightforward, mounting holes align, and supply lines match.
Safety, code compliance, and time constraints guide the choice.
After Measurement: Installation Prep Checklist
After measurements are confirmed, attention turns to preparing for installation by gathering parts, tools, and documentation.
The installer checks manufacturer specifications and templates against the sink and mounting holes to guarantee compatibility.
Final on-site checks verify water shutoff access, supply line condition, and workspace clearance before beginning work.
- Gathered parts and tools: faucet, supply lines, mounting hardware, basin wrench, plumber’s tape
- Verify manufacturer specifications: hole spacing, deck thickness limits, flow and pressure requirements
- Confirm template alignment with sink holes and countertop cutouts
- Inspect existing supply lines, shutoff valves, and drain connections for wear or incompatibility
- Clear and light the workspace, and place a bucket and towels under the sink for any water residue
Parts and tools to have ready
A compact checklist lists the essential parts and tools required for faucet installation, ensuring the job proceeds without unexpected trips to the hardware store.
Include faucet assembly, supply lines, mounting hardware, silicone or plumber’s putty, and gaskets.
Tools: adjustable wrench, basin wrench, plumber’s tape, screwdriver set, utility knife, bucket, flashlight, and cleaning cloths.
Verify shutoff access and workspace clearance.
Verifying manufacturer specifications and templates
Always consult the faucet manufacturer’s specifications and any included templates before beginning installation to confirm hole spacing, deck thickness limits, and required clearance for handles and spouts.
Compare template dimensions to measured sink or countertop holes, verify mounting hardware and gasket placement, note minimum clearance for spray hoses and supply lines, and guarantee compatibility with existing water supply connections and mounting surface.
Final on-site checks before installation
One set of final on-site checks guarantees the installation proceeds without delays: confirm that the measured hole locations match the faucet template, verify that the countertop or sink thickness falls within the faucet’s specified range, and inspect the mounting hardware, gaskets, and supply lines for completeness and correct sizes.
Additionally, verify shutoff valves operate, clear debris from holes, and confirm access under the sink for tool clearance and hose routing.
Conclusion
After meticulously measuring sink holes, spout reach, and clearance like a ritual, the homeowner discovers that faucets, unlike relationships, actually require accurate dimensions to fit. Ironically, decades of bathroom life offered intuition but not millimeters; now the paper tape is the oracle. With measurements in hand and compatibility checked, the installation promises to be less drama and more precision—assuming no surprise pipes, stubborn plumber jokes, or mysteriously vanishing washers interfere.