
How to Tell If Your AC Is Leaking Refrigerant or Just Water: 9 Clear Signs and Fixes
To determine if your AC is leaking refrigerant or just water, look for specific signs. Refrigerant leaks typically produce hissing sounds, leave oily residue, create ice on coils, result in weak cooling, emit chemical smells, and lead to higher energy bills. In contrast, water issues manifest as clear, odorless pooling, increased drainage during humid conditions, and dripping that stops when the unit is off.
Use a flashlight, basic tools, and simple soap or dye tests for further investigation, and remember to turn off the power to avoid electrical hazards. Follow the step-by-step inspection tips and fixes to address the problem effectively.
How to Quickly Tell if Your AC Is Leaking Refrigerant or Just Water
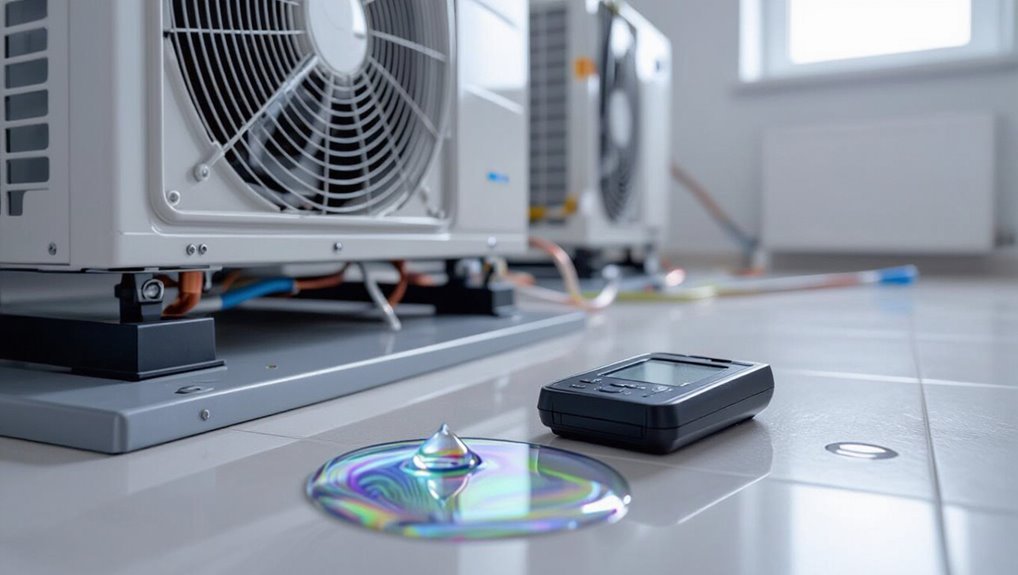
Signs such as hissing sounds, rapid loss of cooling, oily residue, or ice on the evaporator coil point toward a refrigerant leak.
Clear dripping from the condensate pan, water near the drain line, and normal seasonal humidity-related sweating usually indicate standard condensation or drainage.
Quick checklist: listen for hissing, check cooling performance, look for oil/ice versus clear drainage, and call a technician if refrigerant loss is suspected.
Immediate symptoms that indicate a likely refrigerant leak
When an air conditioner is losing refrigerant rather than simply producing condensation, several immediate and distinctive symptoms typically appear:
Homeowners asking how to tell if ac is leaking refrigerant or water may notice weak cooling, ice forming on evaporator coils or refrigerant lines, hissing or bubbling noises, and unexplained increases in electric bills.
Persistent warm airflow and the system short-cycling also strongly suggest a refrigerant leak.
Immediate symptoms that indicate normal water drainage or condensation
Although some dripping from an air conditioner can appear alarming, clear differences distinguish routine condensation from a refrigerant leak: normal drainage is typically clear water pooling near the condensate pan or drain line, increases during humid conditions or heavy cooling cycles, and stops when the unit is off.
In contrast, refrigerant-related leaks produce oily residue, persistent wetness regardless of humidity, and accompanying performance issues.
Normal signs include cool, intermittent clear runoff, no odor, and no cooling loss.
One-sentence quick checklist for homeowners
Use this simple checklist to distinguish a refrigerant leak from normal water: oily residue or a sweet chemical smell, continuous wetness even when the unit is off, diminished cooling or hissing sounds, visibly icy coils, and evaporator drip that’s cloudy or colored rather than clear.
Homeowners should note patterns, check both indoor and outdoor units, document symptoms, and call a certified technician for suspected refrigerant issues.
How Refrigerant Leaks and Water Drips Differ: The Basics
Refrigerant is a pressurized chemical that cycles through an air conditioner to absorb and release heat, while water around a unit usually comes from normal condensation or a clogged drain pan.
Refrigerant leaks are often invisible, may produce oily residue or a faint chemical odor, and can cause cooling loss and frost on lines; water leaks are clear, odorless, and linked to moisture stains or pooling.
Recognizing these physical and smell differences helps determine whether the issue is a sealed-system failure or a drainage problem.
What refrigerant is and how AC systems use it
A colorless, odorless fluid circulates through an air conditioning system to absorb heat from indoor air and release it outside; this working substance is a refrigerant.
It cycles between liquid and vapor phases through the compressor, condenser, expansion device, and evaporator.
Proper charge and sealed lines guarantee efficient heat transfer; leaks reduce cooling, raise pressures, and can damage the compressor without producing visible water.
Why water appears around AC units (condensation and drain issues)
While refrigerant circulates invisibly to move heat, visible moisture around an air conditioner most often stems from normal condensation and drainage problems rather than a refrigerant leak.
Cold evaporator coils condense humid air; collected water should drain through a condensate line or pan.
Clogs, misaligned pans, frozen coils, or improper slope cause overflow, pooling, or drips requiring cleaning, repair, or pump maintenance.
Key physical and smell differences between refrigerant and water
Mistaken leaks are common: liquid from an HVAC system will usually be water from condensation, not refrigerant, and the two can be told apart by simple physical and olfactory clues.
Water is clear, odorless, and pools near drains or drip pans.
Refrigerant may evaporate quickly, feel oily or cold, produce a sweet or chemical smell, and coincide with cooling loss or hissing sounds.
9 Clear Signs Your AC Is Leaking Refrigerant
When evaluating whether an air conditioner is losing refrigerant, several observable clues tend to appear around the system.
The most common signs include:
- Hissing sounds from refrigerant lines or coils
- Decreased cooling performance or longer run times
- Ice forming on the evaporator coil or refrigerant lines
- Oily residue or greasy spots near connections
- An unusual chemical or sweet smell near the unit
These indicators, especially in combination, point to a likely refrigerant leak that warrants professional inspection.
Sign 1 Hissing sounds from refrigerant lines or coils
If a faint hissing or sharp whistling emerges from refrigerant lines or around the evaporator and condenser coils, it can indicate refrigerant escaping through a narrow breach.
Technicians note that hissing often accompanies oily residue, frost buildup, or bubbling at joints. Such sounds merit prompt inspection and pressure testing; ignoring them risks system damage and environmental release of refrigerant.
Sign 2 Decreased cooling performance or longer run times
A noticeable decline in cooling capacity or the need for the system to run much longer than usual often signals refrigerant loss.
Reduced refrigerant lowers evaporator efficiency, causing higher indoor temperatures and extended cycle times as the compressor struggles.
Energy bills may rise.
Professional technicians can detect pressure drops, locate leaks, and recommend repair plus proper refrigerant recharge to restore performance and efficiency.
Sign 3 Ice forming on evaporator coil or refrigerant lines
Persistent longer run times and higher indoor temperatures can lead technicians to inspect other physical signs on the system, such as frost buildup.
Ice on the evaporator coil or refrigerant lines indicates low refrigerant pressure causing evaporator temperatures to drop below freezing. This restricts airflow and reduces cooling capacity.
Technicians diagnose leaks, repair piping or components, then recharge the system to restore proper pressure and thaw ice.
Sign 4 Oily residue or greasy spots near connections
When oil stains or greasy spots appear around service valves, pipe joints, or compressor fittings, they often signal refrigerant escaping and carrying lubricant with it.
Technicians note localized oily residues as reliable leak indicators—particularly where fittings or brazed joints are present.
Regular inspections reveal developing patches; cleanup followed by dye tests or electronic leak detection confirms source.
Prompt repair prevents compressor damage and efficiency loss.
Sign 5 Unusual chemical or sweet smell near the unit
How might a faint, sweet or chemical odor near an air conditioner indicate a refrigerant leak? A distinct sweet or chloroform-like scent often signals escaping refrigerant.
Technicians note this odor around coils, fittings, or the compressor. Unlike mildew smells, this chemical aroma suggests refrigerant vapor presence and warrants immediate inspection and repair due to toxicity and system performance impact; avoid DIY handling.
Sign 6 Rapid pressure drop or frequent low-pressure trips
A sudden drop in system pressure or repeated low-pressure shutdowns commonly indicates refrigerant loss in an air conditioner.
Technicians observe gauge readings falling quickly during operation or frequent compressor lockouts on low-pressure protection. These symptoms point to leaks in lines, fittings, or evaporator coils.
Diagnosis requires pressure testing, leak detection (electronic or dye), and repair before safe refrigerant recharge and system restart.
Sign 7 Higher-than-normal energy bills without temperature change
Noticeably higher energy bills without a corresponding change in thermostat settings or indoor temperature often signal refrigerant leakage.
The system works harder and longer to reach setpoints as cooling efficiency drops, raising compressor and fan runtimes.
Persistent unexplained consumption increases, paired with marginal cooling performance, suggest a professional refrigerant inspection.
Prompt repair prevents further efficiency loss and potential compressor damage.
Sign 8 Visible bubbles or foam when using leak-detection solution
Higher-than-expected energy use can prompt an inspection that reveals more direct evidence: applying a leak-detection solution to refrigerant lines can produce visible bubbles or foam where gas escapes.
Technicians watch joints, fittings and coil seams; persistent bubbling pinpoints active leaks. Small beads that form and grow indicate pressurized refrigerant, not plain condensation.
Marking and repairing those spots prevents system damage and efficiency loss.
Sign 9 Refrigerant gauge readings outside normal ranges
Pressure readings on refrigerant gauges provide a clear diagnostic signal when an air conditioner is leaking.
Technicians compare measured high‑ and low‑side pressures to manufacturer specifications; deviations—low suction or unusually high discharge—indicate loss or overcharge, restriction, or compressor issues.
Consistent abnormal readings across operating conditions warrant leak investigation and repair, as refrigerant imbalance impairs cooling efficiency and can damage system components.
9 Clear Signs It’s Just Water or Condensation
The next section distinguishes routine condensate issues from refrigerant leaks by listing practical, observable cues.
Readers can quickly check for these signs before calling a technician:
- Clear, odorless dripping from the condensate pan or drain
- Water pooling under the indoor unit after heavy use or high humidity
- No ice on the coils but continuous moisture on the unit exterior
- Clogged condensate drain line, sometimes audible as gurgling
- Rust or mineral deposits around the drain area
Sign 1 Clear, odorless dripping from the condensate pan or drain
A few droplets pooling under the indoor unit usually indicate normal condensate rather than a refrigerant leak.
Clear, odorless dripping from the condensate pan or drain is common when humidity condenses on evaporator coils. The liquid is water; it lacks oily sheen or chemical smell.
Inspect for blocked drain lines or a misaligned pan and clear clogs or reseat the drain to restore normal flow.
Sign 2 Water pooling under indoor unit after heavy use or humidity
After prolonged operation on humid days, water may appear beneath the indoor unit without indicating a refrigerant problem.
Condensate can overwhelm the drip pan or a partially clogged drain, causing temporary pooling. This usually coincides with high indoor humidity and heavy runtime.
Inspect the drain line, clean the pan, and clear blockages; if water stops after maintenance, refrigerant issues are unlikely.
Sign 3 No ice on coils but continuous moisture on exterior
How can persistent dampness on an outdoor unit’s casing be distinguished from a refrigerant leak? Observers note no ice buildup on coils, only steady surface moisture after runtime or in high humidity.
Condensation forms where warm air meets cool metal; refrigerant loss usually causes temperature drops and frost.
Check for wetness patterns, ambient humidity, and normal drain behavior before suspecting a leak.
Sign 4 Clogged condensate drain line visible or audible gurgling
When water cannot drain properly from the evaporator pan, it often backs up into the condensate line, producing visible pooling around the indoor unit or a distinctive gurgling sound as trapped air and water try to pass an obstruction.
A clogged drain typically indicates condensation issues, not refrigerant loss. Clearing the line or cleaning the pan usually stops leaks; persistent gurgling warrants professional inspection.
Sign 5 Rust or mineral deposits around drain area
A clogged condensate line often leaves visible water and sound cues, but rust or white mineral crusts around the drain area are another strong indicator that the issue is condensate rather than refrigerant.
Corrosion forms where persistent moisture contacts metal, and mineral buildup appears on plastic or concrete. These deposits localize near drains and pans, distinguishing condensation problems from oily, spread-out refrigerant leaks.
Sign 6 Intermittent leaks tied to high-humidity days
Why do drips often show up only on muggy days? High ambient humidity increases condensate production on evaporator coils.
Drain pans or lines may struggle with sudden volume, causing brief overflow or seepage. These intermittent wet spots correlate with weather, not system pressure.
If cooling remains strong and leaks vanish in drier conditions, condensation is the likely culprit rather than refrigerant loss.
Sign 7 Proper cooling performance despite the leak
Continued strong cooling output while a leak is present reliably indicates the issue is water or condensation rather than refrigerant loss.
When temperatures remain lower and cycle times are normal despite visible dripping, the system’s charge and pressure are likely intact.
Technicians and homeowners should inspect drain lines, clogged pans, or excessive humidity first before suspecting refrigerant, which would degrade performance.
Sign 8 No oily residue or chemical smell
Homeowners can often distinguish water or condensation leaks from refrigerant leaks by noting the absence of oily residue and chemical odors. Clear, odorless drips that leave no greasy film point to moisture rather than refrigerant escape.
Technicians look for oil stains, metallic or sweet smells, and visible oil around fittings when refrigerant is present. Clean, scentless dampness usually indicates condensation or normal drainage issues.
Sign 9 Drain pan overflow or misalignment issues
When a drain pan becomes clogged, cracked, or shifted out of position, water that should exit through the condensate line can pool and overflow, creating obvious puddles beneath the indoor unit.
Such visible pooling, along with misaligned pans that tip toward the wrong side or sit unevenly, strongly indicates a condensation or drainage problem rather than a refrigerant leak.
Regular inspection and clearing of the pan and line prevent repeat overflows.
How to Inspect Your AC Safely Before Calling a Pro
Before contacting a technician, the homeowner should gather basic tools and safety gear—gloves, safety glasses, a flashlight, and a multimeter—and inspect both indoor and outdoor units for visible leaks, clogged drains, or damaged insulation.
A calm, step-by-step visual check includes following condensate lines, looking for oil stains around fittings, and confirming the condensate pan and drain are clear.
If electrical odors, significant refrigerant pooling, corroded lines, or uncertain wiring are found, the homeowner should shut the system down and call a professional.
Tools and safety gear homeowners should use
A few basic tools and protective items can make a preliminary AC inspection both safer and more effective for a nonprofessional.
Essential items include safety glasses, work gloves, a flashlight, and a multimeter for basic electrical checks.
A small mirror, screwdriver set, and a coil brush aid visual access and light cleaning.
A dust mask protects against debris and mold spores.
Step-by-step visual inspection of indoor and outdoor units
To begin a safe, focused inspection of both indoor and outdoor AC units, the homeowner should follow a clear sequence that prioritizes power isolation, visual checks for leaks or corrosion, and documented observations for a technician.
- Turn power off and confirm breaker position.
- Inspect indoor drain pan, coils, and condensate line.
- Check outdoor unit for oil stains, frost, or bent fins.
- Photograph findings and note locations.
- Record odors, sounds, and timestamps.
When to avoid DIY inspection and shut the system down
When hazardous signs appear—sparking, burning odors, visible refrigerant hissing, pooled water threatening electrical components, or rapidly rising indoor temperatures—homeowners should immediately power down the system and stop further DIY checks.
Only qualified technicians should then assess refrigerant leaks, electrical faults, compressor failures, or frozen coils.
Unplugging power isolates hazards; do not attempt refrigerant recovery, electrical repairs, or pressurized component work without certification and proper equipment.
DIY Tests to Differentiate Refrigerant vs Water (Simple and Safe)
The homeowner can perform a few safe DIY checks to distinguish refrigerant leaks from water issues before calling a technician.
Simple steps include applying UV dye or commercial leak-detection spray to suspected joints, using a soap-bubble test on accessible line connections, and inspecting the evaporator coil with an ice-and-temperature check for signs of refrigerant loss.
They should also verify the condensate drain and trap for clogs or standing water, which indicate drainage problems rather than a refrigerant leak.
Dye or leak-detection spray test procedure
Introduce a dye or leak-detection spray to distinguish refrigerant leaks from ordinary water by following a simple, low-risk procedure that requires minimal tools.
Turn off power, apply UV-reactive dye into the system per product instructions or spray suspicious joints and fittings.
Restore operation briefly, inspect with a UV lamp for colored trails.
Clean residue and document findings for technician follow-up.
Bubble test for accessible line connections
A simple bubble test helps identify refrigerant leaks at accessible line connections without specialized equipment: Mix mild dish soap and water, apply to fittings, joints, and valve stems.
Watch for continuous bubbling while the system runs; steady bubbles indicate pressurized gas escaping. Small, intermittent bubbles may be dirt or condensation.
Rinse after testing. If bubbles appear, contact a certified HVAC technician for repair.
Ice and temperature-check method for evaporator coil diagnosis
Several quick checks using ice and temperature readings can help distinguish whether an evaporator coil issue stems from refrigerant loss or simply water/icing problems.
Place ice wrapped in cloth over sections of the coil, measure surface temperature before and after; sustained extreme cold or rapid frost spread suggests low refrigerant, while localized ice that melts quickly with heat indicates drainage or airflow faults rather than a refrigerant leak.
How to check the condensate drain and trap for blockages
Check the condensate drain and trap for blockages by visually inspecting the drain line, flushing it with water, and testing the trap for proper flow; these simple steps distinguish water-management failures from refrigerant-related issues without specialized tools.
Remove visible debris, run water through the pan and line, and observe continuous outflow. If flow is obstructed, clear the trap or use a wet/dry vacuum to restore drainage.
When You Need an HVAC Technician Immediately
If water is pooling near electrical components, there is a strong odor of refrigerant, or the system stops cooling abruptly, immediate professional service is warranted.
A technician will inspect with gauges, leak detectors, and pressure and temperature tests to determine whether refrigerant loss, blocked drains, or component failure is to blame.
Homeowners should ask which leak-detection methods were used, whether refrigerant will be reclaimed or replaced, and for an estimate of repair options and timelines.
Situations that require emergency professional service
Recognize certain signs that demand immediate HVAC technician intervention to prevent safety hazards, extensive damage, or system failure.
Emergency service is required if there is chemical odor suggesting refrigerant, hissing from lines, rapidly dropping cooling performance, ice buildup on coils, pooling fluid near electrical components, or repeated compressor short-cycling.
Prompt professional response minimizes health risks, fire potential, and costly component replacement.
What technicians will diagnose (tools and tests they use)
After noting symptoms that require immediate attention, a technician will systematically evaluate the system using specialized tools and targeted tests to pinpoint leaks and related failures.
- Electronic leak detector to locate refrigerant traces
- UV dye and lamp for visual confirmation
- Refrigerant pressure gauges to assess system charge
- Thermometer and probe for temperature differentials
- Nitrogen pressure test for service port and evaporator integrity
Questions to ask your technician about refrigerant leaks and repairs
When contacting an HVAC technician about a suspected refrigerant leak, homeowners should come prepared with concise, focused questions that clarify the diagnosis, repair options, costs, and long‑term implications.
Ask:
Is the leak confirmed and where is it?
Is repair or component replacement needed?
What refrigerant type and quantity will be used?
What warranty and follow‑up testing apply?
Expected timeline and total estimate?
Typical Repairs, Costs, and Timeframes
Typical repairs for refrigerant leaks often involve locating and sealing the leak, replacing damaged lines or components, and recharging refrigerant. Costs commonly range from a couple hundred to over a thousand dollars depending on severity.
Water-related fixes usually include clearing or replacing clogged drain lines, repairing cracked pans, or reinstalling condensate pumps. These typically cost from under $100 for simple clogs to several hundred for parts and labor.
Repair complexity—from a quick line clean to major component replacement—directly influences turnaround time, which can be a same-day job or require several days for parts and more extensive work.
Common fixes for refrigerant leaks and expected cost ranges
Many refrigerant leaks can be repaired without replacing the entire system, and common fixes range from quick sealant treatments to component replacements; costs and timeframes vary by severity, refrigerant type, and labor rates. Typical options include dye detection and sealant (fast, low cost), patching lines, replacing valves or evaporator coils (moderate), or compressor replacement (major).
| Repair | Typical time/cost |
|---|---|
| Sealant/dye | 1–3 hours / $100–$400 |
| Line repair | 2–6 hours / $200–$800 |
| Valve/coil | 3–8 hours / $400–$1,500 |
| Compressor | 4–10 hours / $800–$2,500 |
Common fixes for condensate/water issues and expected cost ranges
After outlining refrigerant repair options, attention shifts to condensate and water-related issues that can also disrupt HVAC performance and indoor comfort. Common fixes include drain unclogging, condensate pump replacement, pan repair, line insulation, and float switch servicing. Typical costs range from $75 to $450; most jobs finish within a few hours.
| Repair | Cost range | Typical duration |
|---|---|---|
| Drain unclog | $75–$150 | 0.5–1 hr |
| Pump replace | $150–$300 | 1–2 hr |
| Pan repair | $100–$350 | 1–3 hr |
| Line insulation | $50–$120 | 0.5–1 hr |
| Float switch | $80–$450 | 0.5–2 hr |
How repair complexity affects turnaround time
Because repair tasks vary in scope and required expertise, turnaround times can range from under an hour for simple maintenance to several days for complex component replacements.
Routine tasks—drain unclogs, condensate pump swaps, filter changes—typically finish quickly and cost little.
Refrigerant recovery, compressor or coil replacements require permits, parts, and skilled technicians, increasing labor, materials, and scheduling complexity.
Health, Safety, and Environmental Concerns
Exposure to leaking refrigerant can cause headaches, dizziness, nausea, and respiratory irritation, so prompt identification and removal from the area is advised.
Condensate leaks also create conditions for mold growth and structural water damage, which can worsen indoor air quality and cause long-term repairs.
Proper recovery and disposal of refrigerants must follow regulations to protect the environment and require certified technicians.
Health risks of refrigerant exposure and symptoms to watch for
When refrigerant escapes from an air-conditioning system, it can pose acute and chronic health risks depending on the type, concentration, and duration of exposure.
Short-term effects include dizziness, headaches, nausea, eye and throat irritation, and breathing difficulty. High concentrations risk loss of consciousness or asphyxiation.
Long-term or repeated exposures may affect the nervous system, heart rhythm, and respiratory health; seek medical evaluation if symptoms occur.
Mold and water-damage risks from condensate leaks
One common consequence of a clogged or broken condensate drain is persistent moisture accumulation, which creates ideal conditions for mold growth and progressive water damage to building materials.
Mold colonies can form within days, degrading drywall, insulation, and structural wood while releasing spores that worsen indoor air quality.
Prompt detection, drying, and repair limit deterioration and reduce remediation costs.
Proper disposal and environmental regulations for refrigerant handling
Persistent moisture and mold from condensate leaks can prompt homeowners to attempt DIY fixes that disturb refrigerant lines. Handling refrigerants improperly poses health, safety, and environmental hazards and is regulated by law.
Certified technicians must recover and recycle refrigerants, follow EPA (or local) regulations, document disposal, and avoid venting. Violations incur fines and environmental harm; proper service prevents ozone depletion and greenhouse impacts.
Preventive Maintenance to Avoid Both Refrigerant and Water Problems
A concise seasonal maintenance checklist helps homeowners prevent refrigerant and water leaks by scheduling coil cleaning, filter changes, and condensate drain inspections.
Between professional tune-ups, owners should monitor unusual noises, reduced cooling, standing water, and ice formation as early warning signs.
Consider upgrades such as improved drain pans, float switches, and more durable refrigerant lines to reduce the likelihood of future leaks.
Seasonal maintenance checklist for homeowners
When seasons change, homeowners should follow a concise preventive checklist to reduce both refrigerant leaks and water-related issues in their air conditioning systems.
Regular actions include filter replacement, drain line clearing, outdoor coil cleaning, refrigerant level inspections by a pro, and verifying proper insulation and seals.
- Replace filters quarterly
- Clear condensate drains
- Clean outdoor coils
- Schedule refrigerant checks
- Inspect insulation and seals
Signs to monitor between professional tune-ups
After following the seasonal checklist—filter changes, drain clearing, coil cleaning, and professional refrigerant inspections—homeowners should watch for a handful of clear signs between service visits that indicate developing refrigerant or water problems.
Monitor unexplained drops in cooling performance, ice on evaporator coils, persistent condensate odors, pooled water near the unit, hissing noises, and sudden humidity rises; document occurrences and schedule prompt inspection.
Upgrades and modifications that reduce future leaks
Because small upgrades can prevent larger failures, homeowners should consider targeted modifications that reduce both refrigerant and condensate leaks before problems arise.
Recommended improvements include replacing aged line sets and fittings with corrosion-resistant materials, installing insulated drain pans and overflow switches, upgrading to sealed-service access ports, and fitting high-quality condensate pumps.
Routine pressure testing and professional brazing complete a proactive leak-reduction strategy.
Cost-Saving Tips and Warranty Considerations
Homeowners should check warranty and insurance documents to determine whether refrigerant leaks or water damage repairs are eligible for coverage before authorizing work.
Technicians can advise whether recovering refrigerant or replacing a failing component is more cost-effective based on leak severity, part availability, and long-term reliability.
Simple energy-saving adjustments—thermostat setbacks, improved insulation, and regular filter changes—can reduce system strain and lower the likelihood of future leaks and costly repairs.
When repairs may be covered under warranty or insurance
When might warranty or insurance cover an AC leak repair? Coverage depends on cause, contract terms, and timing.
Manufacturer warranties often cover defective components; extended plans may include labor.
Homeowner insurance rarely covers mechanical failure but might cover damage from sudden accidents.
Proof of maintenance, receipts, and prompt professional diagnosis improve approval chances; always review policy exclusions and warranty fine print before authorizing repairs.
When to consider refrigerant recovery vs full component replacement
How should one decide between recovering leaked refrigerant and replacing the affected component outright?
The choice hinges on leak severity, component age, repair cost versus replacement, and warranty status.
Small, isolated leaks on newer, warrantied parts favor recovery and repair.
Large leaks, repeated failures, or obsolete components justify full replacement to guarantee reliability, efficiency, and long-term savings.
Energy-saving adjustments to reduce strain on the system
Although minor at first glance, simple energy-saving adjustments can markedly reduce system workload and slow refrigerant loss by keeping pressures and temperatures within ideal ranges; examples include raising thermostat setpoints a few degrees when away, sealing duct leaks, installing a programmable thermostat, and keeping filters clean to maintain airflow.
Additionally, scheduling seasonal tune-ups, insulating refrigerant lines, using ceiling fans, and avoiding oversized cycling preserves efficiency, lowers costs, and helps maintain warranty conditions.
Visual Guides and Diagrams to Help You Identify the Issue
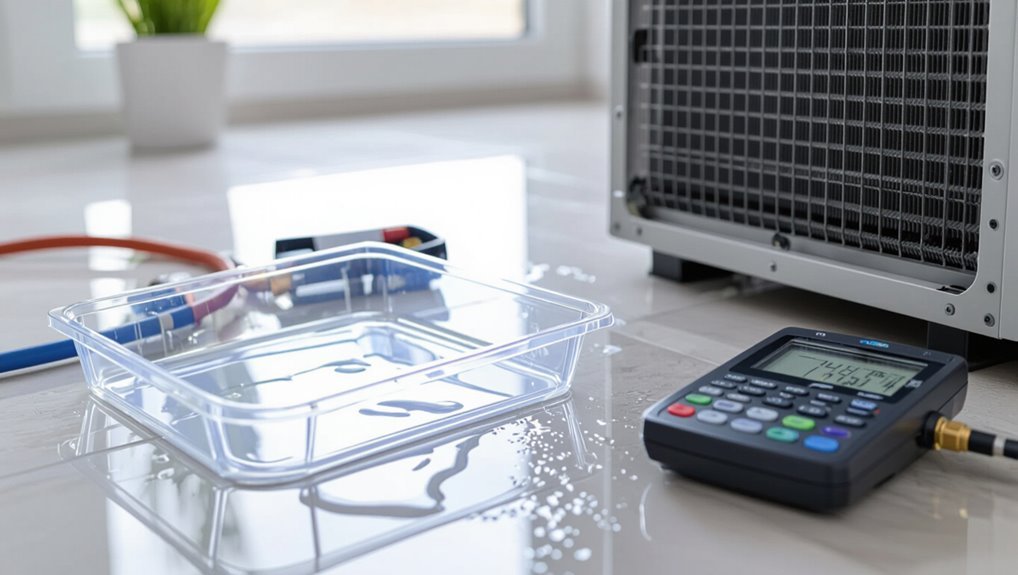
A clear diagram marking common leak locations—such as evaporator coils, condensate pan, and line connections—helps readers pinpoint likely sources.
Paired photo examples distinguish oily refrigerant stains from plain water damage to aid visual diagnosis.
These visuals enable quicker assessment and better-informed decisions about repairs or professional inspection.
Diagram of common leak locations on an AC system
Several key areas on an air conditioning system commonly develop refrigerant or water leaks, and a clear diagram helps pinpoint these spots quickly.
The labeled schematic highlights: outdoor unit connections and compressor, refrigerant line joints, evaporator coil, service ports, condensate pan, drain line and trap, and indoor air handler seams.
Color-coded markers distinguish probable refrigerant versus condensate sources for rapid inspection.
Photo examples of refrigerant oil stains versus water damage
After reviewing the schematic of common leak points, photographic examples clarify how refrigerant oil stains and water damage appear in real systems.
Images show oily, dark brown-to-black residues near fittings, compressor seals, and tubing for refrigerant leaks.
Water damage appears as mineral deposits, rust, or pale discoloration near drain pans, condensate lines, and under evaporator coils.
Captions note source and suggested inspection steps.
Step-by-Step Action Plan for Homeowners After Identifying a Leak
Upon detecting a leak, the homeowner should distinguish between refrigerant and water/condensate sources and take appropriate immediate precautions—shutting off the system for refrigerant suspicions and clearing drains or catching water for condensate issues.
A prompt inspection by a qualified technician is recommended to assess safety, identify the cause, and provide an estimate for repair.
After repairs, a timeline for verification and routine maintenance should be established to confirm the fix and prevent recurrence.
Immediate steps to take for suspected refrigerant leaks
If a homeowner suspects a refrigerant leak, they should act quickly but calmly to minimize risk and prevent further damage.
Turn off the AC, ventilate the area by opening windows and doors, avoid smoking or using open flames, and evacuate occupants and pets if a strong chemical odor or symptoms occur.
Contact a licensed HVAC technician immediately for inspection and repair.
Immediate steps to take for suspected water/condensate leaks
While refrigerant leaks demand immediate evacuation and a technician’s attention, water or condensate leaks typically pose a different set of risks and can often be managed by the homeowner in the short term.
Turn off the AC, unplug power if safe, collect standing water, clear the condensate drain and pan, check and replace clogged drain lines or float switches, and monitor for recurring moisture.
Follow-up timeline: inspection, repair, verification, and maintenance
After securing the immediate area and stopping active water flow, the homeowner should follow a concise timeline for inspection, repair, verification, and ongoing maintenance to guarantee the leak is fully resolved and risks of recurrence are minimized.
Within 24–48 hours schedule a professional inspection; authorize prioritized repairs within a week; verify system pressure and drainage after repairs; set quarterly checks and annual maintenance to prevent relapse.
Conclusion
When suspecting an AC problem, homeowners must act promptly to protect comfort and equipment. Could ignoring a small drip today mean a costly repair tomorrow? By distinguishing refrigerant leaks from simple condensation, following safety inspection steps, and pursuing preventative maintenance, occupants can minimize risk and expenses. Timely professional help, attention to warranties, and routine care keep systems efficient and extend service life—so small signs are treated seriously before they escalate.
