How to Check the Dip Tube in a Water Heater: Step-by-Step Inspection and Replacement Guide
To check the dip tube in your water heater, follow these steps:
- Turn Off Water and Power: Shut off the cold water supply and disconnect the power to prevent any accidents.
- Relieve Pressure: Open a hot water faucet in your home to relieve pressure in the tank.
- Drain Partially: Drain some water from the tank to make inspection easier.
- Remove Cold Inlet Fitting: Unscrew the fitting connected to the cold water inlet.
- Inspect the Dip Tube: Look for cracks, soft spots, or signs of melting. If necessary, carefully pull the tube out for a better inspection.
- Replace if Damaged: If the dip tube is damaged, replace it with an OEM or compatible tube of the correct size.
- Refill the Tank: Close the drain valve and refill the tank with water.
- Purge Air: Open a hot water faucet to purge any trapped air in the system.
- Test for Leaks: Check all connections for leaks and ensure the hot water recovery is functioning properly.
This guide will help you effectively inspect and replace your water heater’s dip tube, ensuring consistent hot water supply.
What a Dip Tube Is and Why It Matters in a Water Heater
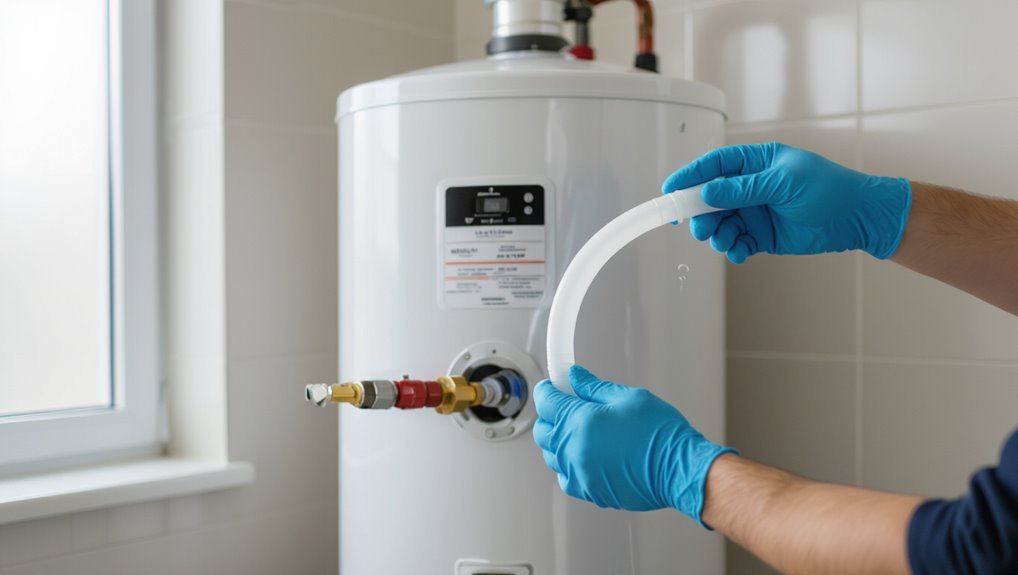
The dip tube directs incoming cold water to the bottom of a tank-style water heater so hot water can be drawn from the top.
A cracked or broken dip tube can mix cold and hot water, reduce available hot water, and increase energy use.
Low hot-water output, fluctuating temperatures, or unusually fast cold recovery are common signs it may be failing.
Function of the dip tube in tank-style water heaters
A dip tube is a long, narrow pipe that directs incoming cold water to the bottom of a tank-style water heater.
This ensures that colder water does not mix immediately with already heated water at the top. It promotes stratification, maximizes available hot water, and maintains heater efficiency.
Understanding this aids in evaluating how to check dip tube in water heater and when replacement is warranted.
Common problems caused by a damaged or broken dip tube
Recognizing how a dip tube routes cold water to the tank bottom helps explain why damage to it produces distinctive performance issues.
A compromised dip tube causes rapid hot-water depletion, temperature fluctuations, reduced recovery efficiency, and increased energy use.
Sediment disturbance and premature corrosion risk arise from improper inflow patterns.
These faults degrade appliance lifespan and raise operating costs until the tube is repaired or replaced.
Signs that the dip tube may be failing
Several clear signs indicate a dip tube may be failing, and catching them early prevents bigger issues.
Users may notice lukewarm water despite thermostat settings, reduced hot water duration, and fluctuating temperatures.
Increased sediment or cloudy water, unusual noises from the tank, and uneven hot water distribution between fixtures also suggest deterioration.
Prompt inspection avoids energy waste and costly repairs.
Safety Precautions Before Inspecting the Dip Tube
Before beginning any inspection, the technician gathers necessary tools and replacement parts, including a wrench, screwdriver, bucket, and replacement dip tube.
They shut off the water supply and disconnect power according to the heater type, turning off the circuit breaker for electric units or closing the gas valve and pilot for gas units.
They also vent pressure and follow manufacturer and local safety guidelines to prevent leaks, scalding, or gas hazards.
Tools and materials needed for inspection and replacement
A concise set of tools and safety gear is essential for inspecting or replacing a water heater dip tube to prevent injury and damage. Necessary items include protective gloves, eye protection, and a flashlight.
Recommended tools:
- Adjustable wrench and pliers
- Screwdrivers and tubing cutter
- Replacement dip tube, Teflon tape, and plumber’s grease
How to shut off power and water to the heater safely
With tools and protective gear prepared, the next step is to shut off the heater’s power and water to prevent scalding, electrical shock, or flooding.
Turn the circuit breaker off or remove the fuse for electric units, and close the cold-water supply valve.
Open a hot faucet to relieve pressure and drain a small amount.
Verify no power and no incoming water before proceeding.
Precautions for gas vs. electric water heaters
Because gas and electric water heaters involve different hazards, the inspection approach must be tailored to the unit type: gas models require attention to combustion, ventilation, and gas isolation, while electric models demand verification of power disconnection and insulation.
For gas units, check for pilot/gas valve shutdown and proper venting.
For electric units, lock out/tag out the breaker and confirm absence of voltage before touching elements.
Quick Way to Tell if the Dip Tube Is Faulty
A simple flow-rate and temperature test can quickly indicate whether the dip tube is functioning by comparing hot-water delivery against expected output.
Consistently low flow or only lukewarm water during prolonged taps often points to a broken or dislodged dip tube mixing cold inlet water with heated water.
Cloudy water that clears after standing is a separate sign to note but, when combined with weak hot flow, reinforces the likelihood of a dip tube problem.
Flow-rate and temperature tests to detect dip tube issues
Several simple tests using flow rate and temperature measurements can quickly suggest whether a water heater’s dip tube is damaged or missing.
Measure hot water flow at a faucet after running cold for a minute; low volume suggests improper cold inlet routing.
Use a thermometer at the tap: rapid temperature drops during steady flow indicate cold water mixing from a compromised dip tube.
How to interpret cloudy or lukewarm water symptoms
Flow-rate and temperature checks often point toward dip-tube problems, but visual clues at the tap can provide a quicker, user-friendly indication.
Cloudy water that clears after standing suggests aeration from cold-water mixing rather than sediment; persistent cloudiness with weak hot flow implies cold-water bypassing the heater.
Lukewarm output during high demand strongly indicates a fractured or detached dip tube directing cold to the top.
Step-by-Step Visual Inspection of the Dip Tube
The inspector begins by partially draining the tank to lower the water level below the cold inlet.
Next, the cold water inlet or its fittings are removed to expose the dip tube for an initial in-place check for breaks, disintegration, or chewed ends.
If damage is suspected but not fully visible, the dip tube is removed for a closer, hands-on inspection.
Draining the water heater partially to access the cold inlet
Begin by turning off the water supply to the heater and shutting off its power source to guarantee a safe draining process before accessing the cold inlet.
Open a nearby hot faucet to relieve pressure, attach a hose to the heater’s drain valve, and direct water to a suitable drain.
Partially open the drain valve until water level drops below the cold inlet, then close valves and restore pressure as needed.
Removing the cold water inlet or fittings to reach the dip tube
Loosen and remove the cold-water inlet fittings to expose the dip tube, taking care to support the piping and catch any residual water; wear gloves and eye protection and have a towel ready for small spills.
Use proper wrenches to avoid rounding fittings. Work slowly, noting orientation and any seals or unions for reassembly.
Place removed parts on a clean surface and dispose of old seals.
Inspecting the dip tube in place for breaks, disintegration, or chewed ends
Inspect the exposed dip tube carefully for visible cracks, soft or crumbly sections, and ragged or missing ends that indicate chewing or deterioration.
Note any splits along its length, peeling or flaking material, and irregular edges.
Lightly run a finger along accessible portions to detect softness or brittleness.
Record locations and severity of damage to determine whether repair or replacement is necessary.
When to remove the dip tube for closer inspection
Judgment guides the decision to remove a dip tube for closer inspection: when visible signs of damage, unexplained cold-water delivery, sediment buildup at the outlet, or persistent water quality issues are present, removal is warranted to confirm internal condition.
Removal is also advised if routine inspection is inconclusive, if the heater is old, or after animal/rodent evidence to verify rupture, blockages, or material degradation.
How to Remove and Examine the Dip Tube
The procedure for removing the dip tube differs by inlet type: threaded fittings require unscrewing the inlet assembly while push-fit connections are released with a collar or quick-disconnect method.
Once removed, the dip tube should be checked internally and externally for fractures, erosion, soft spots, or melted plastic and run a flashlight through the lumen to reveal hidden damage.
If significant corrosion, sediment-clogging, cracks, or deformation are found, replacement of the dip tube is recommended.
Step-by-step removal procedure for threaded and push-fit inlets
Begin by shutting off the water supply and power to the heater, then relieve tank pressure by opening a hot faucet; this guarantees a safe, dry work area for removing either threaded or push-fit inlet dip tubes.
- For threaded inlets, loosen the fitting with a wrench and unscrew the dip tube straight out.
- For push-fit, depress the collar and pull the tube free.
- Inspect connection seals.
How to inspect for internal fractures, erosion, or melted plastic
Once removed, the dip tube should be examined immediately for signs of internal fractures, erosion, or melted plastic, since these defects can impair water flow and contaminate the tank.
Inspect visually along the entire length, feeling for soft spots, pinholes, and thinning.
Shine a light through the tube to reveal hairline cracks and deformities.
Note any softened or misshapen sections for documentation.
When corrosion or sediment buildup indicates replacement
Any visible pitting, heavy encrustation, or persistent sediment accumulation on the dip tube signals that removal and replacement should be considered.
Corrosion compromises flow and directs cold water improperly. If scraping reveals deep grooves, flaking, internal narrowing, or mineral bridges that resist cleaning, replacement guarantees performance and prevents contamination.
Replace with manufacturer-compatible tubing and flush the tank to remove residual debris.
Choosing the Right Replacement Dip Tube
When selecting a replacement dip tube, consideration should be given to material options—such as plastic (PVC or CPVC) or stainless steel—and their compatibility with water chemistry and heater specifications.
Accurate measurement of the tube’s length and inner/outer diameter guarantees a proper fit and effective operation.
The replacement should also match the heater model and inlet type to maintain warranty and avoid installation issues.
Material options (plastic, CPVC, PVC, stainless steel) and compatibility
Select a replacement dip tube based on material compatibility with the heater, water chemistry, and local plumbing codes. Plastic is common and economical; CPVC resists heat and some chemicals; PVC is less suitable for hot water; stainless steel offers corrosion resistance for aggressive water. Consider manufacturer recommendations and code requirements.
| Material | Strength | Suitability |
|---|---|---|
| Plastic | Low | General |
| CPVC | Medium | Hot water |
Measuring length and diameter for correct fit
Measure both the length and inner diameter of the existing dip tube to guarantee a correct replacement: length determines how far the cold inlet reaches into the tank to prevent short-cycling, while diameter must match the inlet fitting for a secure, leak-free connection.
Record overall length from connection end to tip, and measure inner diameter with calipers or a precise gauge; note any tapering.
Matching replacement to heater model and inlet type
Having recorded the dip tube’s length and inner diameter, the next step is to match a replacement to the heater’s model and inlet type to guarantee proper fit and function.
Consult the manufacturer’s parts list or model plate for compatible dip tube part numbers.
Confirm inlet threading (NPT, BSP) and material compatibility (PVC, CPVC, polyethylene).
Purchase OEM or equivalent-quality aftermarket parts.
Step-by-Step Dip Tube Replacement Guide
The following section outlines a concise, practical sequence for replacing a water heater dip tube, beginning with draining the tank and setting up a safe work area.
It covers removing the old tube, cleaning the cold-water inlet, and fitting the chosen replacement—noting differences between threaded and push-fit types.
Finally, it explains refilling the tank, purging air, and restoring power or gas with safety checks.
Draining the tank and preparing the work area
Turn off the water supply and power source, then attach a garden hose to the tank’s drain valve and run it to a suitable outdoor drain or bucket.
Open a hot water faucet to relieve pressure, then open the drain valve and allow the tank to empty.
Clear workspace, gather tools, place absorbent rags, and guarantee ventilation and stable footing before proceeding.
Removing old dip tube and cleaning the inlet
Begin by loosening and removing the cold-water inlet fitting to access the dip tube; this allows inspection of the tube’s condition and creates clearance for extraction.
Withdraw the old dip tube gently, avoiding fragmenting brittle sections. Inspect for cracks, detachment, or erosion.
Clean the inlet port with a brush and damp cloth, removing sediment and mineral buildup.
Verify the area is dry and debris-free.
Installing the new dip tube securely (threaded vs. push-fit)
Install the replacement dip tube by choosing the correct connection method—threaded or push-fit—matched to the heater’s inlet and the new tube’s design.
For threaded fittings, apply appropriate plumber’s tape and tighten securely without over-torquing.
For push-fit types, verify tube end is fully seated and check the retaining clip or collar engagement.
Confirm alignment and support to prevent stress on the joint.
Refilling, purging air, and restoring power or gas safely
After the dip tube is secured, refill the tank slowly. Open the cold-water shutoff to allow water in while keeping a nearby hot faucet open to vent trapped air. This prevents pressure spikes and lets the installer observe steady water flow, indicating the tank is full and air is purged.
Close the faucet, check for leaks, restore power or relight the pilot per manufacturer instructions, and monitor operation.
Testing After Replacement
After reinstalling the dip tube, the technician checks fittings and the tank area for leaks while running water to confirm consistent flow.
They verify that hot water temperatures have improved and that cold water is properly routed to the bottom of the tank by testing faucets at several fixtures.
If leaks persist, flow is uneven, or temperatures remain low after a brief monitoring period, the technician retests connections and recommends calling a professional if issues continue.
How to check for leaks and proper water flow
Begin by restoring the water supply and opening a nearby hot faucet to allow air to escape and the tank to refill;
observe the inlet and outlet connections, the dip tube area (if accessible), and the drain valve for any signs of weeping or active leaks.
Listen for hissing, feel fittings for moisture, and inspect hose and T&P areas.
Confirm steady hot-water flow from the faucet and no pressure drops.
Verifying temperature improvement and cold water routing
With the supply restored and leaks ruled out, the technician should confirm that the replacement dip tube has corrected the cold-water routing and restored normal hot-water temperatures.
Measure outlet temperature at several fixtures after system stabilization. Compare readings to set thermostat values.
Check for delayed heating or cold spots indicating misrouting. Verify consistent flow and absence of persistent mixing at taps.
When to retest or call a professional
When should a technician retest the system or escalate to a professional?
After dip tube replacement, the technician should retest immediately for leaks, proper cold-water routing, and temperature recovery under typical load.
If abnormalities persist—continued cold layering, leaks, unusual noises, or failed pressure/temperature readings—the technician should escalate to a licensed plumber or manufacturer support for advanced diagnostics or warranty-covered repair.
Troubleshooting Related Issues
If hot water issues persist after inspecting or replacing the dip tube, other causes should be considered.
Sediment buildup can obstruct flow and mimic dip tube failure, while corrosion on inlet fittings or threads can cause leaks and reduced performance.
Additionally, unresolved problems may stem from unrelated components such as a faulty thermostat or heating element.
Sediment buildup affecting dip tube performance
Sediment accumulation at the bottom of a water heater can obstruct the dip tube’s ability to deliver cold inlet water to the tank’s lower heating zone, causing short cycling, reduced hot water capacity, and uneven temperatures.
Regular flushing removes grit that can clog or abrade the dip tube, restores proper flow patterns, and helps diagnose whether poor performance stems from blockage rather than dip tube fracture.
Corrosion of inlet fittings or threads
Corrosion of inlet fittings or threads can weaken connections, cause leaks, and interfere with the proper seating of the dip tube, leading to loss of cold-water delivery and temperature fluctuations.
Inspect fittings for rust, pitting, or damaged threads. Tighten or replace corroded fittings, using appropriate thread sealant and compatible materials.
Guarantee a secure, leak-free connection so the dip tube remains correctly positioned and functional.
Problems not fixed by replacing the dip tube (thermostat, heating element)
While damaged inlet fittings or threads can impair dip tube performance, replacing the dip tube will not resolve all hot-water issues.
Persistent temperature problems often originate from a malfunctioning thermostat or a failing heating element. The thermostat may misread or fail to switch power, and heating elements can burn out or scale.
Diagnose electrical continuity and temperature control before assuming dip tube replacement will restore proper hot-water delivery.
Maintenance Tips to Prolong Dip Tube Life
Regular tank flushing to remove sediment, combined with proper water treatment or filtration, helps prevent premature dip tube wear.
Routine inspections at recommended intervals can catch early signs of cracking, blockage, or disintegration.
Attention to these maintenance steps reduces the likelihood of dip tube failure and maintains heater performance.
Flushing the tank regularly to reduce sediment
Flush the water heater tank at least once or twice a year to remove sediment that can accumulate around the dip tube and shorten its lifespan.
Regular flushing prevents blockage, improves heat transfer, and reduces corrosion risk.
- Turn off power and water supply.
- Drain to remove settled sediment.
- Refill and restore power, checking for leaks.
Using appropriate water treatment and filtration
Removing sediment from the tank helps protect the dip tube from abrasive buildup, but water quality itself also plays a major role in component longevity.
Installing a sediment pre-filter, scale-reduction systems, or water softeners where appropriate reduces mineral accumulation and corrosion.
Routine testing for hardness, pH, and chloride informs treatment choices.
Proper filtration extends dip tube life and improves overall heater performance.
Recommended inspection intervals and signs to watch for
Periodically inspecting the dip tube—typically every 6 to 12 months depending on water quality and heater usage—helps catch early wear, cracking, or detachment before performance declines.
Look for reduced hot water volume, irregular temperatures, sediment in taps, rumbling noises, or visible cracks during inspection.
Increase frequency in hard water areas, after repairs, or when water chemistry changes; document findings and replace when deterioration appears.
When to Hire a Professional Plumber
If the dip tube shows complex damage, is attached with welded fittings, or the water heater is gas-powered, a professional plumber should be consulted.
Homeowners should also weigh repair versus replacement costs and expect a service visit to include diagnosis, parts assessment, and an estimate.
Clear communication about labor, parts, and safety procedures helps set realistic expectations.
Complex damage, welded fittings, or gas heater concerns
Recognize that certain problems exceed routine DIY inspection: extensive corrosion, warped or welded fittings, damaged dip-tube connections, or any issue involving a gas burner or gas lines require a licensed plumber.
A professional assesses structural tank integrity, safely handles welded or seized components, and isolates gas hazards.
Attempting repairs without certification risks injury, code violations, and further damage; engage qualified service for these conditions.
Cost factors and what to expect from a service visit
Several factors influence the cost of a plumber’s visit for dip-tube or related water-heater work, including the extent of corrosion or damage found, the type and age of the heater, parts required (replacement dip-tube, gaskets, anode rod), labor time, and whether the unit is gas or electric.
Typical expectations:
- Diagnosis and estimate.
- Parts replacement and testing.
- Safety checks and warranty notes.
Conclusion
To summarize, the dip tube’s role in delivering hot water is clear: neglect can turn small problems into a mountain to climb. Regular inspection and timely replacement keep performance humming and extend tank life. If corrosion, cracking, or cold water mixing is evident, replace the tube or call a pro. With basic tools and precautions, homeowners can address most issues, but persistent or complex symptoms warrant licensed-plumber intervention to avoid costly damage.