How to Remove Plastic Bolts From a Toilet Seat: Easy Step-By-Step Fixes
To remove plastic toilet-seat bolts, you’ll need basic tools and a careful approach. Start by flipping up the seat caps, then use pliers to hold the nut beneath while turning the bolt with a screwdriver. If the bolts are stuck, apply penetrating oil. For stripped heads, try locking pliers or rubber grips, or carefully drill out the shaft. If the bolts break, cut them flush and extract the remnants, making sure to protect the porcelain. Finally, install corrosion-resistant replacements, and remember to tighten them properly and check regularly for durability. The guide provides detailed step-by-step options and additional tips for success.
What to expect when removing plastic toilet-seat bolts
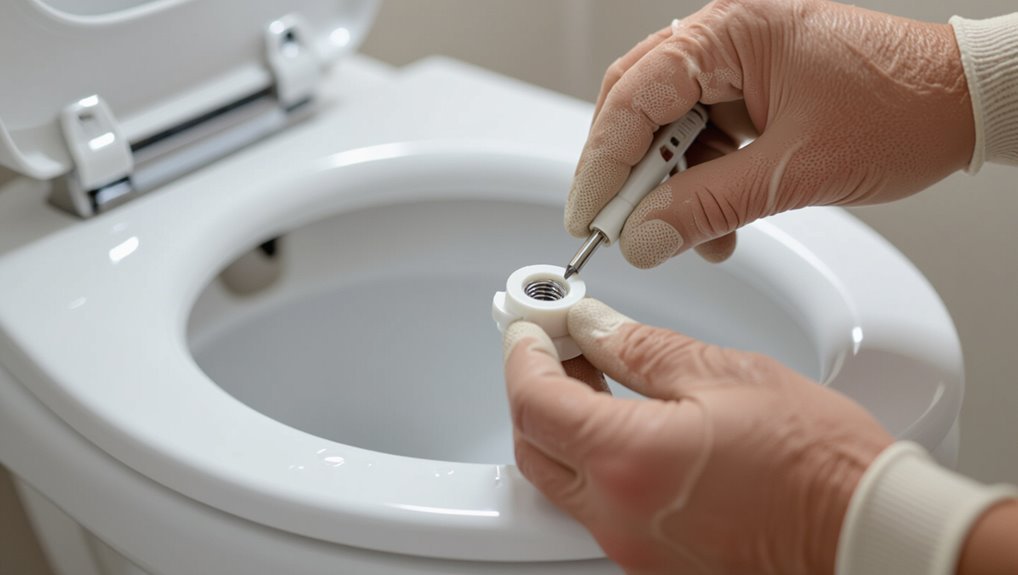
The section outlines why plastic toilet-seat bolts commonly seize or break, such as corrosion, overtightening, and plastic fatigue.
It also lists the typical tools and materials—pliers, screwdrivers, penetrating oil, and replacement bolts—needed for removal.
Finally, it highlights basic safety precautions and recommended protective gear like gloves and eye protection.
Common reasons bolts get stuck or damaged
Expect common problems such as corrosion, stripped threads, and seized nuts when removing plastic toilet-seat bolts. Exposure to moisture, cleaners, and age often weakens plastic parts and causes deformation or brittleness.
Additional causes include overtightening, cross-threading, mineral buildup, hairline cracks, and UV degradation. Improper installation or repeated adjustments can warp fittings, making removal of how to remove plastic bolts from toilet seat more difficult.
Typical tools and materials needed
Necessary hand tools and a few household supplies make most plastic toilet-seat bolt removals straightforward: a set of screwdrivers (flat and Phillips), adjustable wrench or socket set for the nuts beneath the bowl, needle-nose pliers for gripping stripped heads, and a utility knife or razor for cutting corroded plastic.
- Screwdrivers
- Adjustable wrench/socket
- Needle-nose pliers
- Utility knife/razor
Safety precautions and protective gear
Caution guides the work: removing plastic toilet-seat bolts can produce sharp edges, sudden slips, and exposure to cleaning residues or wastewater, so appropriate precautions and protective gear are advised.
Wear nitrile gloves, safety glasses, and non-slip shoes. Use a dust mask if debris or mold is present.
Guarantee adequate lighting, secure the lid, keep tools organized, and ventilate the area to minimize chemical fumes and odors.
Quick solution: Fast method to remove a loose or accessible plastic bolt
For a loose or easily reachable plastic bolt, the quick method begins by holding the exposed nut beneath the bowl with pliers while turning the bolt head clockwise or counterclockwise as needed.
Use the correct-size screwdriver or socket and apply firm, even pressure to prevent cam-out and avoid stripping the bolt.
If resistance is felt, stop and switch to penetration oil or a better-fitting tool to protect the fastener.
Step-by-step actions for bolts with exposed nuts
Begin by positioning a wrench or adjustable pliers on the exposed nut beneath the toilet bowl while holding the plastic bolt head above with a screwdriver; this stabilizes the assembly and prevents the bolt from spinning as the nut is loosened.
Turn the wrench counterclockwise to back off the nut, then lift the bolt and seat away.
Inspect threads and replace hardware if damaged.
How to avoid stripping the bolt during quick removal
After loosening the nut beneath the bowl and holding the bolt head steady with a screwdriver, one quick way to remove a loose or easily reached plastic bolt without stripping it is to back it out slowly while maintaining axial pressure to keep the screw head engaged.
Using a screwdriver that fits the bolt head exactly and turning it steadily minimizes cam-out. If resistance increases, stop and reassess alignment or use penetrating lubricant.
Methodical removal: For tight or recessed plastic bolts
When bolts sit under caps or deep within the hinge, the procedure begins by carefully prying off covers and exposing the fastener.
Appropriate tools—needle-nose pliers, an adjustable wrench, or the correct-size socket—should be selected to grip and turn the plastic without cracking it.
If the bolt resists, a few drops of penetrating lubricant applied and allowed to soak can loosen corrosion or grime before attempting removal.
How to access bolts hidden under caps or covers
Locate the small plastic caps or covers that conceal the toilet seat bolts, then pry them up carefully with a flathead screwdriver or a thin putty knife to expose the fasteners beneath.
Lift each cap gently to avoid cracking. Clean debris or mineral buildup around the openings.
If caps resist, work incrementally from one edge, using a thin tool to release clips without forcing or damaging the surrounding porcelain.
Using pliers, adjustable wrench, and socket tools safely
Use pliers, an adjustable wrench, or a socket wrench to grip and turn stubborn or recessed plastic bolts with steady, controlled force.
Select appropriately sized tools, protect plastic with tape or a cloth, and apply gradual pressure to avoid cracking.
Reverse direction if slipping occurs, reposition tools as needed, and work patiently.
Finish by inspecting for damage and cleaning threads before reassembly.
When and how to use penetrating lubricant
Apply a penetrating lubricant to loosen tight or recessed plastic bolts before forcing tools onto the fasteners.
Allow several minutes for the lubricant to penetrate threads and crevices. Use a straw applicator for accuracy, apply sparingly, and wipe excess.
Reapply once if resistance remains.
After loosening, proceed with pliers or a wrench, working gently to avoid stripping or cracking the plastic.
Removing stripped or rounded plastic bolts
When plastic bolt heads are stripped or rounded, several mechanical and thermal options can restore purchase or allow removal.
Practical approaches include gripping techniques (locking pliers, rubber grips, or tape), carefully drilling the shaft with appropriate bits to extract the fastener, and applying heat or cold to change the plastic’s properties while observing safety cautions.
The following section outlines step-by-step drilling recommendations, grip methods, and temperature-based tactics with warnings to prevent toilet or personal damage.
Techniques to grip and turn rounded heads (pliers, rubber, tape)
Grasping a rounded, stripped plastic bolt head requires creating extra friction or purchase so pliers, rubber, or tape can turn what the screwdriver cannot.
Use locking pliers for a firm bite, protecting plastic with a rubber strip or folded cloth to prevent crushing.
Alternatively, wrap the head tightly with adhesive tape or a rubber band, then grip with pliers or a screwdriver for controlled turning until loosened.
Drilling out the bolt: step-by-step and recommended drill bits
Begin by securing the toilet seat and surrounding area.
Select a variable-speed drill and a 1/8″ or 3/16″ high-speed steel bit; for hardened plastic, use a carbide-tipped bit.
Center-punch the bolt head, drill slowly with light pressure, clear debris, then increase bit size if needed.
Once weakened, extract remnants with pliers or a screwdriver, inspecting threads for replacement.
Using heat or cold to loosen plastic bolts and cautions
If drilling fails to free a stripped or rounded plastic bolt, applying controlled heat or cold can soften or contract the plastic to loosen it.
Use a hairdryer or heat gun on low, or apply ice packs briefly; test frequently. Protect surrounding porcelain, seals, and skin.
Avoid overheating, flames, or excessive force that can crack plastic or ceramic. Work slowly and reattempt removal.
Dealing with rusted metal components attached to plastic bolts
When metal washers or nuts have rusted onto plastic toilet seat bolts, a rust remover or a vinegar soak can help loosen corrosion for easier removal.
Care should be taken to protect the porcelain by applying treatments with a cloth or small brush and avoiding pooling solutions on the bowl.
After loosening, rinse the area thoroughly and dry to prevent further damage.
Applying rust remover and soaking procedures
Apply a penetrating rust remover to the exposed metal and allow it to soak according to the product instructions, taking care to protect surrounding plastic with painter’s tape or a rag.
After soaking, gently agitate with a nylon brush or old toothbrush to loosen corrosion, reapply if needed, then wipe residue with a clean cloth.
Repeat until metal moves freely or replacement is warranted.
Preventing damage to porcelain while treating rust
Several simple precautions protect porcelain from scratches, stains, and etching while treating rusted metal components attached to plastic bolts.
Use nonabrasive pads, soft cloths, and plastic scrapers. Mask surrounding areas with painter’s tape and paper. Rinse chemical residues promptly and neutralize acids with baking soda solution.
Work in small sections, avoid prolonged contact, and test solvents in an inconspicuous spot first.
Permanent removal options when the bolt shaft remains in the toilet
When the plastic bolt shaft breaks off inside the toilet, permanent removal often requires cutting the remaining stub flush with the porcelain using a suitable rotary tool or hacksaw with a metal-cutting blade while protecting the bowl and wearing eye protection.
After trimming, the recessed remainder can sometimes be reached and pulled from beneath the bowl using long-nose pliers or a small reciprocating saw or flexible shaft extractor.
The discussion that follows outlines recommended tools, safe cutting technique, and methods for accessing and extracting remnants from the underside of the toilet.
Cutting the bolt flush: tools and safe procedure
Cut the exposed portion of a broken plastic toilet seat bolt flush with the porcelain using the right tool and steady technique to prepare for permanent removal of the remaining shaft.
Use a Dremel with a cutting wheel or a rotary cutting disc rated for porcelain, wear eye and respiratory protection, clamp access with tape to prevent slips, work slowly, cool the area, and inspect for smoothness.
Extracting bolt remnants from the underside of the bowl
After the exposed head has been ground flush with the porcelain, attention shifts to the remaining shaft lodged inside the bowl’s mounting hole. Removal from beneath the toilet requires different tools and access.
From below, one or two people should loosen nuts, cut or drill the shaft with a rotary tool, extract fragments with needle-nose pliers or an easy-out, and replace deteriorated anchors before reassembling the seat.
How to replace plastic toilet-seat bolts correctly
Selecting the correct replacement bolts or kits guarantees fitment and material compatibility with the toilet and seat.
Proper torque during installation prevents loosening or cracking while avoiding overtightening that can damage plastic.
Adding anti-corrosion coatings or anti-rotation features increases longevity and reduces the need for future repairs.
Choosing the right replacement bolts and kits
Several common bolt types—plastic threaded bolts with wing nuts, nylon bolts with metal washers, and stainless-steel conversion kits—cover nearly all toilet-seat replacements.
Matching the bolt style to the hinge design is essential. Select corrosion-resistant materials and appropriate lengths; include matching nuts and washers. Consider kit compatibility, ease of access, and aesthetic finish.
- Measure hinge spacing
- Choose material
- Verify length
- Confirm kit contents
Proper torque and tightening to avoid future issues
Once the correct bolts and kit are confirmed, attention turns to proper torque and tightening to prevent loosening, cracking, or damage to the seat and toilet.
Tighten bolts uniformly, alternating sides to seat hinges evenly. Apply moderate hand or low-torque driver pressure—avoid overtightening.
Check alignment, then secure until snug with slight resistance.
Reinspect after a few uses and retighten if minor loosening appears.
Installing anti-corrosion or anti-rotation features
Begin by preparing the replacement kit and workspace: the installer should gather corrosion-resistant bolts or stainless-steel replacements with nylon or rubber seals, thread-locking compound or anti-seize where appropriate, and anti-rotation washers or keyed nuts designed for toilet hinges.
Install sealed bolts, apply minimal thread compound, fit anti-rotation washers or keyed nuts, align hinge, and tighten to recommended torque to prevent loosening and corrosion.
Troubleshooting uncommon problems
Occasionally the mounting holes or hinge areas show cracks or other damage that prevent secure fastening and may require repair or replacement of the seat or toilet.
Misalignment after installing new bolts can result from uneven hinges, warped seats, or incorrect bolt placement and should be checked methodically.
If repairs are beyond basic hand tools or if the bowl itself is damaged, a professional plumber or a qualified repair service should be consulted.
Cracked mounting holes or damaged hinge areas
Inspect the toilet seat hinge and mounting area for spreading cracks, rounded holes, or fractured plastic that prevent secure fastening.
If damage is minor, reinforce with epoxy or a plastic-repair kit, clamping until cured.
For severely compromised mounts, replace the hinge assembly or install a metal-reinforced mounting plate.
Test stability before regular use and avoid overtightening fasteners afterward.
When the seat won’t align after replacement
When a replaced toilet seat sits crooked or refuses to line up with the bowl, the cause is usually a mismatch between hinge geometry and mounting points, loose or uneven fasteners, or leftover debris interfering with seating.
Inspect hinge alignment, verify correct seat model, tighten nuts evenly while holding the seat centered, clean mounting surfaces, and adjust or shim hinges if minor offsets persist until the seat rests squarely.
When to call a professional
If uneven hinges, persistent wobble, or stubborn alignment issues persist after basic fixes, it may be time to contemplate professional help.
A plumber or experienced handyman can assess hidden corrosion, cracked mounting flanges, warped bowls, or seized anchor nuts requiring specialized tools.
Seek a pro when repairs exceed homeowner skill, when water damage or brittle plastic is evident, or when replacement might risk further damage.
Maintenance tips to prevent future bolt problems
Routine care can prevent most bolt issues and prolong seat life.
Suggested tasks include a simple inspection schedule, basic cleaning, targeted lubrication, and quick tightening when needed:
- Inspect bolts monthly for corrosion or looseness.
- Clean around hinges with mild detergent.
- Apply a small amount of silicone lubricant to moving parts.
- Tighten or replace worn plastic bolts promptly.
Regular inspection schedule and simple upkeep
A simple, regular inspection schedule and a few basic upkeep tasks greatly reduce the risk of stripped or seized plastic bolts on a toilet seat.
Inspect bolts monthly for looseness, cracks, or corrosion. Tighten gently when needed, replace damaged washers or nuts promptly, and guarantee hinges align.
Record replacements and monitor for recurring issues to address mounting or material choices before failures occur.
Best practices for cleaning and lubrication
Monthly inspections naturally lead to targeted cleaning and lubrication practices that keep plastic bolts functioning and prevent seizure.
Use mild detergent and a soft brush to remove grime, rinse thoroughly, and dry.
Apply a silicone-based lubricant sparingly to threads and hinge points; avoid petroleum products that degrade plastic.
Recheck quarterly, tighten as needed, and replace any worn components to maintain smooth operation.
Comparison of bolt materials and long-term durability
A brief comparison of common bolt materials helps readers choose the best option for longevity and maintenance. The table below summarizes key advantages and drawbacks of plastic, stainless steel, and nylon bolts for toilet seats. This focused overview supports informed replacement or upgrade decisions.
| Material | Pros | Cons |
|---|---|---|
| Plastic | Corrosion-resistant; inexpensive | Can become brittle; prone to stripping |
| Stainless steel | Very durable; resists corrosion | Higher cost; may require anti-theft caps |
| Nylon | Lightweight; resists chemicals | Less strong than metal; can deform under heat |
Plastic vs. stainless steel vs. nylon: pros and cons
Compare plastic, stainless steel, and nylon bolts by weighing corrosion resistance, strength, and cost to determine the best fit for a toilet seat’s expected use and environment.
Plastic bolts are cheap, corrosion-proof but brittle and prone to stripping.
Stainless steel offers superior strength and longevity, resists rust, costs more.
Nylon balances flexibility, corrosion resistance, moderate strength and lower cost, suitable for light to medium use.
Conclusion
Tools and patience align like sun and wrench: removing plastic toilet-seat bolts proves simpler than feared when one method fits the problem. Quick twists free loose bolts; careful prying reaches recessed ones; drilling rescues rounded heads; penetrating oil and gentle heat loosen rusted metal. Replacing bolts restores stability, and regular checks prevent repeat failures. Coincidentally, as bolts, washers, and tools come together, the quiet constellation of parts completes a dependable seat.