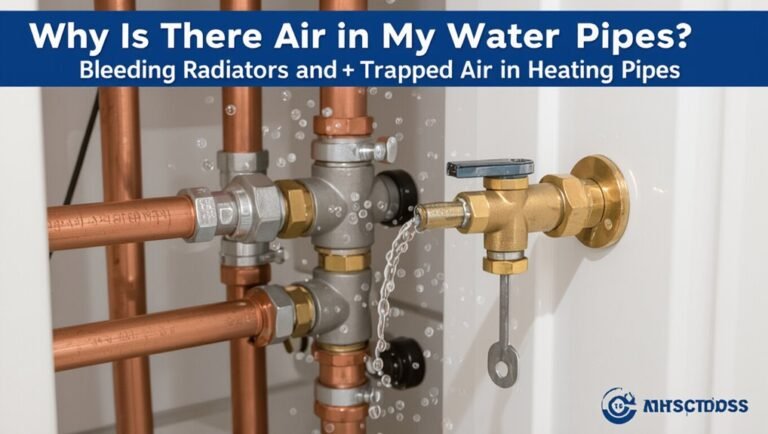
How to Fix Whistling Water Pipes: Simple DIY Repairs to Stop the Noise Fast
Whistling water pipes can be easily fixed by addressing high pressure, partially closed valves, worn faucet parts, or vibrating pipes. To stop the noise quickly, measure the water pressure (ideal range is 45–60 psi), adjust or replace a faulty pressure reducing valve (PRV), and secure any loose valves or cartridges. Additionally, pad or re-hang any vibrating pipes with cushioned clamps or insulation. Don’t forget to clean any mineral buildup in fill valves and faucets. Most repairs require simple tools and matched replacement parts, and the following steps will guide you through diagnostics and repairs, as well as when to seek professional help.
Why Your Water Pipes Are Whistling: Common Causes
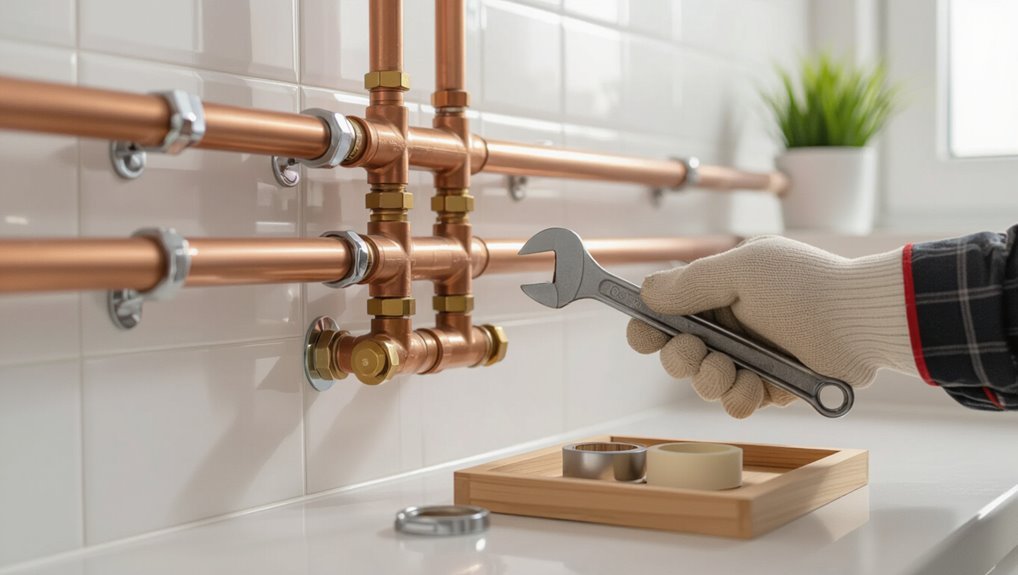
Whistling in water pipes usually traces back to a few common sources: excessive or fluctuating water pressure, worn or improperly seated valve and faucet components, and pipe-specific problems like vibration, loose straps, or constricted fittings.
Appliances and fixtures such as toilet fill valves, pressure regulators, and aging faucets can also introduce or amplify high-frequency noise.
Identifying which category applies narrows the corrective steps needed.
Pressure-related causes: high water pressure and pressure fluctuations
Pressure-related issues are a common source of pipe noise, arising when water moves through plumbing at velocities or pressures that cause vibrations.
High home water pressure or sudden pressure fluctuations can produce whistling, especially in long runs or narrow fittings.
Diagnosing pressure problems is key to how to fix whistling water pipes: measure pressure, install or adjust a pressure-reducing valve, and add expansion tanks.
Valve and faucet issues: worn washers, loose packing nuts, and partly closed valves
1 common mechanical culprit for high-pitched pipe noise is faulty valves and faucets: worn washers, loose packing nuts, or valves that are not fully open can create turbulent flow and vibration that produce a whistle.
Inspecting and replacing deteriorated washers, tightening packing nuts, and fully opening service valves often eliminate the tone.
Minor faucet repairs are typically straightforward DIY fixes.
Pipe-specific issues: pipe vibration, loose straps, and narrow fittings
Investigate the pipes themselves when noise persists after valve and faucet checks.
Vibrating pipes can rub framing or other pipes, transmitting a high-pitched whistle. Loose straps or hangers allow movement; tighten or add insulated clamps.
Narrow or partially obstructed fittings increase flow velocity and cause whine; clean, replace, or enlarge restrictive sections.
Secure and isolate piping to eliminate vibration-induced noise.
Appliance and fixture contributors: toilet fill valves, pressure regulators, and old fixtures
When quieter problems have been ruled out, attention shifts to appliances and fixtures that can introduce high-frequency whistles into the plumbing system.
Faulty toilet fill valves often vibrate as tanks refill; worn pressure-reducing valves create hiss under high inlet pressure; aged faucets and shower cartridges develop narrow passages that whistle.
Inspecting and replacing these components typically resolves persistent, fixture-related noise.
Quick Ways to Stop a Whistling Pipe Right Now
The section outlines immediate temporary fixes to quiet a whistling pipe, such as wrapping the pipe, tightening simple fittings, or using foam to dampen vibration.
It explains how to safely shut off the water supply and relieve system pressure to stop the noise and prevent damage.
It also identifies warning signs that require calling a professional right away.
Immediate temporary fixes to quiet the noise
Apply quick, temporary steps to stop a whistling pipe until a permanent repair can be made.
Pad vibrating sections with cloth or foam to dampen sound, secure loose straps or hangers with zip ties, and wrap small pipe sections with plumber’s tape to reduce air gaps.
For localized valves, gently tighten packing nuts a quarter turn.
Monitor for leaks and schedule a proper fix.
How to safely turn off water and relieve pressure
After temporary padding and tightening have been used to quiet a whistling pipe, shutting off the water and relieving system pressure is the safest immediate step to stop the noise and prevent damage.
Locate and close the nearest fixture shutoff or the main valve. Open faucets lowest to highest to drain lines and release air.
Check pressure-reducing valve and bleed remaining pressure slowly before repairs.
When to call a professional immediately
When should a homeowner call a professional immediately? If whistling accompanies visible leaks, sudden pressure loss, burst pipes, gas odor, or persistent noise after valve adjustments, contact a licensed plumber at once.
Emergency signs include water damage, exposed corroded piping, or electrical contact.
Professionals assess structural risk, shut off systems safely, and perform urgent repairs to prevent flooding, mold, or further deterioration.
Step-by-Step DIY Repairs for Whistling Pipes
Before beginning repairs, a clear list of tools and materials is presented to guarantee efficiency and safety.
Typical items include adjustable wrenches, pipe tape, replacement washers or cartridges, pipe insulation, and a basin wrench or plumber’s tape for threaded fittings.
Safety gear such as gloves and eye protection is also recommended.
Tools and materials you’ll need
To tackle whistling water pipes effectively, gather a compact set of reliable tools and materials that address the most common causes: a wrench set and adjustable pliers for valve and fitting adjustments, a screwdriver set for access panels and trim, plumber’s tape (PTFE) for sealing threads, pipe thread sealant for metal joints, silicone or plumber’s putty for small leaks, a pipe wrench or basin wrench for stubborn fittings, and a flashlight or headlamp for inspecting tight spaces.
Additional essentials include replacement washers, valve packing, hose clamps, a tube cutter for copper or PEX, emery cloth, and safety gloves and goggles to protect hands and eyes during repairs.
##
Now the focus shifts to practical repair steps that can stop a whistling pipe at its source.
Consider these prioritized actions to diagnose and fix the problem:
- Identify which pipe or fixture is whistling.
- Tighten loose fittings and secure rattling pipes.
- Replace worn faucet washers and cartridge seals.
- Adjust or replace noisy shutoff and angle stop valves.
A final measure is to inspect and, if needed, install or adjust a pressure-reducing valve to eliminate persistent high-pressure whine.
Step 1 Identify which pipe or fixture is whistling
Which part of the plumbing is actually producing the whistle?
The observer listens at fixtures, valves and exposed pipes while water runs, isolating sounds by turning nearby taps on and off.
Note whether the noise occurs only with hot or cold water, during flow start or steady flow, and whether it follows a specific valve.
Mark suspected sections for targeted inspection.
Step 2 Tighten loose fittings and secure rattling pipes
Begin by shutting off the water supply to the affected line and relieving pressure by opening a nearby tap; this prevents movement and makes loose fittings easier to detect.
Inspect joints, unions and mounting brackets, then tighten nuts and screws with appropriate tools.
Add pipe straps or insulation where pipes rub against framing to stop vibration.
Recheck under low pressure for remaining noise and secure as needed.
Step 3 Replace worn faucet washers and cartridge seals
After tightening fittings and securing pipes, attention turns to the fixtures themselves; worn washers and seals inside faucets are a common source of persistent whistling.
Faucets should be shut off, cartridges or valve stems removed, and old rubber washers, O-rings, and seals inspected.
Replace parts with matching sizes or manufacturer replacements, reassemble, and test flow.
Proper seals eliminate vibration-induced noise.
Step 4 Adjust or replace noisy shutoff and angle stop valves
Inspect shutoff and angle stop valves next, since they commonly produce high-pitched whistles when partially closed, corroded, or internally worn.
Tighten packing nuts slightly to stop minor leaks and noise. If noise persists, fully shut water, remove valve, and replace with a new compression or quarter-turn shutoff.
Test operation and check for leaks before restoring full supply.
Step 5 Install or adjust a pressure-reducing valve (PRV)
Install or adjust a pressure-reducing valve (PRV) to lower excessively high water pressure, a common cause of whistling pipes.
A PRV near the main shutoff lets one set system pressure (typically 45–60 psi). Adjust gradually and recheck with a gauge.
Replace a malfunctioning PRV. If unsure, consult a plumber to ascertain correct sizing, installation, and local code compliance.
Step 6 Add or replace pipe insulation and strap clamps to reduce vibration
Secure pipe insulation and properly spaced strap clamps to dampen vibrations that cause whistling and reduce wear.
Use foam or rubber sleeves sized to the pipe, wrapping seams and securing with tape.
Position clamps every 4–6 feet on horizontal runs, closer near bends and fixtures.
Replace worn clamps with cushioned models to prevent metal-on-metal contact and further noise transmission.
Step 7 Clean or replace toilet fill valves and other noisy fixtures
Begin by checking toilet fill valves and other fixtures for mineral buildup, worn seals, or loose components that commonly produce whistling.
Shut water, remove or disassemble the valve, and clean deposits with vinegar or a soft brush.
Replace damaged diaphragms, seals, or the entire fill valve if noises persist.
Test operation and adjust water pressure to eliminate residual whistling.
How to Diagnose Different Whistling Sounds
A high-pitched whistle often signals high-pressure flow or a small obstruction, while a low-pitched tone can indicate larger vibration or loose components.
Timing matters: intermittent whistling points to an issue tied to specific fixtures or valves, whereas a constant sound suggests a persistent problem in the main line or supply.
Simple tests — isolating fixtures, turning valves on and off, and listening at different points — help pinpoint the source.
High-pitched vs low-pitched whistle: what each indicates
How to tell a high-pitched whistle from a low one matters because each points to different causes and urgency levels: sharp, thin tones usually indicate fast-moving water through a narrow opening (such as a partially closed valve or mineral buildup), while deeper, throbbing whistles often stem from pressure fluctuations, loose fittings, or larger pipe resonance.
High pitches suggest restricted flow; low pitches denote systemic pressure or mechanical looseness.
Intermittent vs constant whistle: timing clues for diagnosis
When does a whistle come and go versus persist continuously matters because timing narrows the likely causes: intermittent whistles often point to cycling equipment (like pumps or thermostatic valves), temperature-related expansion, or flow changes from appliances, while constant whistles more commonly signal steady issues such as a partially closed valve, persistent pressure imbalance, or fixed obstruction.
Observing patterns—only during use, after shutdown, or continuously—guides probable sources.
Using simple tests to pinpoint the source (isolate fixtures, listen points)
Observing whether a whistle is intermittent or constant narrows likely causes and suggests targeted tests to locate it.
The homeowner isolates fixtures by shutting valves one at a time, noting when the noise stops. Listening at supply lines, shutoff valves, and appliance inlets with a stethoscope or screwdriver pinpoints vibration.
Repeat tests for hot and cold lines to confirm source before repair.
When Parts Need Replacement: What to Buy and How to Choose
When replacement is necessary, attention should focus on matching washers, cartridges, and seals to the faucet make and material to guarantee a tight, durable fit.
For persistent high pressure or noise, selecting a pressure-reducing valve sized to the system and paired with compatible fittings prevents new leaks or flow restrictions.
Pipe clamps and insulation should be chosen in corrosion-resistant materials (stainless steel or nylon-coated clamps, closed-cell foam insulation) appropriate for the pipe type and environment.
Choosing the right washers, cartridges, and seals
Select replacement parts that match the faucet’s design and dimensions to guarantee a reliable fix.
Inspect old washers, cartridges, and seals for size, material, and wear patterns. Choose OEM or trusted-brand equivalents with compatible measurements and temperature/chemical resistance.
Verify stem type and cartridge model before purchase.
Keep spare O-rings and seat washers; proper fit prevents leaks and eliminates whistling without repeated repairs.
Selecting a pressure-reducing valve and compatible fittings
Install a pressure-reducing valve (PRV) sized to the plumbing system to lower excessive mains pressure—the primary cause of persistent pipe whistling—while ensuring noise reduction and component longevity.
Select a brass or stainless PRV with adjustable range, flow capacity matching peak demand, and a reliable internal spring.
Choose compatible threaded or sweat fittings, pressure-rated unions, and a shutoff for maintenance; verify valve orientation.
Recommended materials for pipe clamps and insulation
Choose durable, vibration-damping pipe clamps and high-R-factor insulation that resist moisture and compression to guarantee long-term noise suppression and thermal protection.
Stainless steel or rubber-lined clamps minimize metal-on-metal contact; cushioned brackets reduce resonance.
Closed-cell foam or elastomeric insulation prevents water absorption and maintains R-value.
Match clamp size to pipe diameter, select corrosion-resistant finishes, and prioritize easy installation for reliable, maintenance-free performance.
##
Causes of whistling pipes often trace to a few specific issues: high water pressure, partially closed valves, mineral buildup in faucets or pipes, and worn or loose components such as washers or cartridges.
- Inspect valves and tighten packing nuts.
- Check and replace worn washers/cartridges.
- Clean aerators and remove mineral deposits.
- Test water pressure and adjust the regulator if needed.
Preventive Measures to Keep Pipes Quiet Long-Term
A brief routine maintenance checklist can help prevent whistling by identifying loose fittings, worn washers, and sediment buildup before they become noisy.
Regular monitoring and occasional adjustment of home water pressure will keep flow within safe ranges that minimize pipe vibration.
When fixtures are old or corroded, timely upgrades to quieter modern valves and faucets reduce the chance of future noise.
Routine maintenance checklist to prevent whistling
Regular inspections and simple upkeep can keep pipes quiet and prevent small issues from becoming noisy emergencies.
Inspect visible pipes, secure loose brackets, tighten fittings, and replace worn washers.
Flush fixtures to clear debris, check valve operation, and clean aerators.
Look for corrosion or leaks and address promptly.
Schedule annual professional checks for hidden problems and document maintenance dates for consistency.
How to monitor and adjust home water pressure
Monitor home water pressure with a simple gauge and periodic checks to prevent the high-pressure surges that cause whistling pipes and stress on fittings.
Measure at the main line; ideal residential pressure is 40–60 psi. If readings exceed this, adjust or install a pressure-reducing valve (PRV) and retest.
Log readings seasonally and after municipal work to catch changes early.
Upgrading old plumbing fixtures to reduce future noise
Upgrading aging faucets, valves, and fixtures reduces the mechanical vibration and turbulence that often lead to whistling pipes.
Replacing worn washers, corroded cartridges, and loose mounting hardware with modern, pressure-balanced components minimizes flow disruption.
Choosing quieter, higher-quality fixtures and properly securing supply lines prevents future noise.
Periodic inspection and timely replacement guarantee long-term performance and a consistently silent plumbing system.
Troubleshooting Chart for Common Scenarios
A concise troubleshooting chart guides users through common whistling-pipe scenarios by matching symptoms to likely causes and corrective actions.
It lists symptom (steady whistle, intermittent squeal, only when tap open, during pump cycle), probable cause (loose washer, high pressure, air in line, faulty pump), quick checks (inspect valve, measure pressure, bleed lines, test pump) and recommended fixes.
##
When whistling occurs in different patterns, a clear set of checks helps isolate the cause and guide repairs. The following table summarizes typical scenarios, likely causes, and straightforward fixes to try. Readers can use it to prioritize targeted inspections before calling a professional.
| Scenario | Likely Cause | Suggested Fix |
|---|---|---|
| Whistle when any tap opens | High pressure, loose washer, or narrowed valve | Adjust pressure, replace washer, tighten/clean valve |
| Whistle only on hot or cold side | Faulty cartridge, stuck sediment in that supply line | Inspect/replace cartridge, flush line |
| Whistle after appliance use | Appliance valve or check valve failure, air/pressure surge | Service appliance valve, install/replace check valve or arrestor |
Scenario: Whistle when any tap is opened likely causes and fixes
If pipes emit a whistle whenever any tap is opened, the issue most often stems from high water velocity, loose fittings, or worn internal components such as washerless cartridge valves and pressure-reducing valves.
Inspect main shutoff and pressure regulator, tighten brackets and fittings, replace worn cartridges or PRV diaphragms, and add or clean washers where present.
Persisting noise may require professional pressure assessment.
Scenario: Whistle only on hot or cold side targeted checks
Whistling that occurs only on the hot or only on the cold side points to a supply-specific problem rather than a whole-house issue.
The homeowner should isolate valves and fixtures on the affected side, check supply shutoffs, inspect flexible hoses and faucet cartridges for wear, and examine water heater connections for hot-side noise.
Replace faulty cartridges, tighten fittings, or clean mineral buildup to resolve the whistle.
Scenario: Whistle after appliance use appliance-related solutions
Some whistles appear only after appliances run, indicating the noise originates from appliance connections, internal valves, or sudden pressure changes in supply lines.
Technicians check supply hose fittings, inlet screens, and built‑in valves for wear or debris.
Installing water hammer arrestors, tightening loose connectors, replacing faulty solenoid valves, or adding a pressure regulator usually eliminates post‑cycle whistling without extensive plumbing work.
Safety and Permits: When Repairs Require a Pro
Certain plumbing tasks—such as installing or replacing pressure-reducing valves (PRVs), altering main water lines, or performing work that affects multiple units—generally require a licensed plumber.
Local building codes often mandate permits for PRV replacement or major modifications, so homeowners should check municipal requirements before proceeding.
When hiring a pro, one should verify license and insurance, ask for references and written estimates, and confirm familiarity with local code and permit processes.
Plumbing tasks that typically require a licensed plumber
Many plumbing jobs are suitable only for a licensed professional due to safety, code, and liability concerns.
Complex tasks include main water line repairs, sewer line work, gas pipe interventions, water heater replacement, backflow device installation, and extensive repiping.
Licensed plumbers handle pressure regulator replacement if tied to broader system changes, guarantee proper testing, and provide warranty, insurance, and compliance documentation.
Local code and permit considerations for replacing PRVs or major work
Because pressure-reducing valve (PRV) replacement and other major plumbing alterations can affect public safety and system performance, they are frequently governed by local building codes and permit requirements.
Homeowners should verify applicable codes, obtain required permits, and follow inspection processes.
Permits guarantee proper materials, installation standards, and documented pressure settings.
Failure to comply can result in fines, voided warranties, or safety hazards.
How to vet and hire a qualified plumber
When a plumbing issue exceeds basic DIY skills or requires permits and pressure adjustments, hiring a licensed professional protects safety and guarantees code compliance.
Verify licenses, insurance, and local permit familiarity. Seek referrals, read recent reviews, and request itemized estimates.
Confirm experience with pressure-reducing valves and pipe noise. Insist on written contracts, warranties, and proof of inspection or permit closure before final payment.
Cost Estimates and Timeframes for Typical Repairs
Typical whistling pipe repairs range from quick, low-cost DIY fixes—replacement washers, pipe straps, or minor re-seating that take an hour or two and cost under $20–$50—to mid-range jobs like pressure-reducing valve (PRV) replacement or valve work that usually require a few hours and parts priced from $100–$400.
More extensive professional repairs or full pipe replacement can run from several hundred to several thousand dollars and may take a day to multiple days depending on scope.
The following sections break down expected parts, labor time, and typical price ranges for each category.
Low-cost DIY fixes: parts and time required
Homeowners can often resolve whistling pipes with a few inexpensive parts and basic tools.
Typical fixes include tightening loose fittings, replacing worn washers or faucet cartridges ($2–$20), adding foam pipe insulation ($5–$15), and securing straps or clamps ($3–$10).
Most tasks take 15–90 minutes depending on access and skill. Minimal plumbing knowledge and common hand tools are usually sufficient.
Mid-range repairs: PRV replacement and valve work
Addressing whistling caused by pressure issues often requires mid-range repairs such as replacing a pressure-reducing valve (PRV) or servicing main shutoff and zone valves.
Typical tasks include PRV replacement, valve cleaning, packing gland adjustment, and re-seating.
Expect moderate parts cost and one to three hours for DIY-capable homeowners; complex valve banks may take longer and require careful isolation and draining.
Professional repair and replacement cost ranges
Repair and replacement costs for whistling water pipes vary widely depending on the cause, component complexity, and local labor rates.
Simple fixes like tightening fittings or replacing washers typically cost $50–$150 and take under an hour.
PRV or valve replacements range $200–$600, requiring 1–3 hours.
Major pipe repairs or sections replaced can run $500–$2,500 and span a day or more.
Useful Tools, Parts, and Resources
A concise list of tools, spare parts, and authoritative references helps streamline diagnosis and repair of whistling water pipes.
Recommended items include pressure gauges, pipe wrenches, valve seat reamers, and sealant materials, with reliable parts from brands such as Milwaukee, SharkBite, and Honeywell noted for quality.
Curated links to step-by-step videos and manufacturer guides will be provided to support correct procedures and part selection.
Recommended tools for diagnosing and fixing whistling pipes
Gather essential tools and parts before diagnosing whistling pipes to streamline the process and avoid repeated trips to the hardware store.
Essential items include an adjustable wrench, pipe wrench, screwdriver set, pliers, flashlight, and tape measure.
Add plumber’s tape, thread sealant, and replacement washers or valves.
A pressure gauge and hose bib tester help confirm pressure issues; a small mirror aids visual inspection in tight spaces.
Reliable parts brands and model suggestions
With tools and basic parts on hand, selecting reliable brands and specific models reduces repeat work and failures when addressing whistling pipes.
Recommended components include ball valves from Apollo/Conbraco, pressure-reducing valves by Watts or Honeywell, braided stainless supply lines by SharkBite, and Oatey or RectorSeal compression fittings and thread sealants.
Choose parts rated for local water pressure and compatible pipe materials.
Links to how-to videos and manufacturer guides
Where can reliable guidance be found when tackling whistling pipes? Trusted sources include manufacturer installation manuals, product support pages, and official how-to video channels from brands like Moen, Delta, and Milwaukee.
Independent tutorials from licensed plumbers on YouTube and government or utility websites offer safety and code context.
Bookmark PDFs, subscribe to reputable channels, and verify model-specific instructions before starting repairs.
##
Diagnosing the source of a whistling pipe requires a systematic check of fixtures, valves, and visible piping to isolate where the vibration or pressure change originates.
The writer recommends focused inspection steps and simple fixes.
- Check faucet aerators and showerheads.
- Inspect shutoff and mixing valves.
- Listen along exposed pipes.
- Test pressure-reducing valves and water hammer arrestors.
Conclusion
Like a sudden whistle threaded through a quiet house, pipe noise signals an annoyed system asking for attention. The reader is left equipped with quick fixes, diagnostic clues, and clear next steps—repair, replace, or call in a pro—so the sound can be soothed. Armed with the right tools and a cautious hand, they can hush the pipes themselves or know when to hand the baton to a licensed plumber, restoring harmony to the home’s hidden waterways.