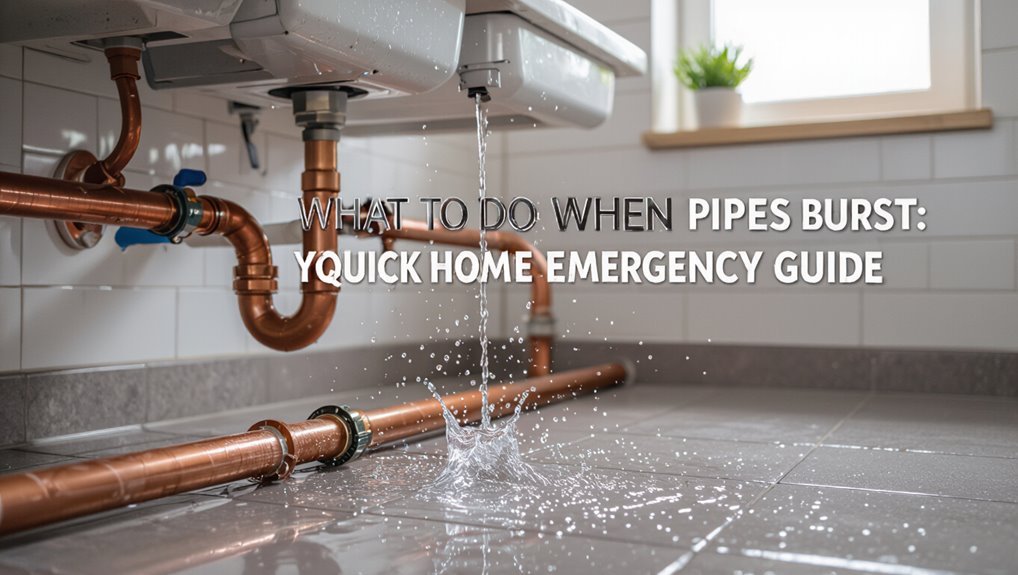
What To Do When Pipes Burst: Quick Home Emergency Guide
When pipes burst, the first step is to shut off the main water valve immediately to stop the flow of water. Next, turn off power to the affected areas and ensure that people stay clear of wet zones to avoid hazards. Use towels, buckets, and tarps to contain the water, and remove any valuables to a dry place. Isolate the damaged section of the pipe and, if it’s safe, apply a temporary clamp or epoxy to minimize further damage. After that, call a plumber for a permanent repair. Begin drying the area and document any damage for insurance purposes. Continue reading for detailed step-by-step actions, safety tips, and repair options.
Stop the Water Right Now (Main Shutoff)
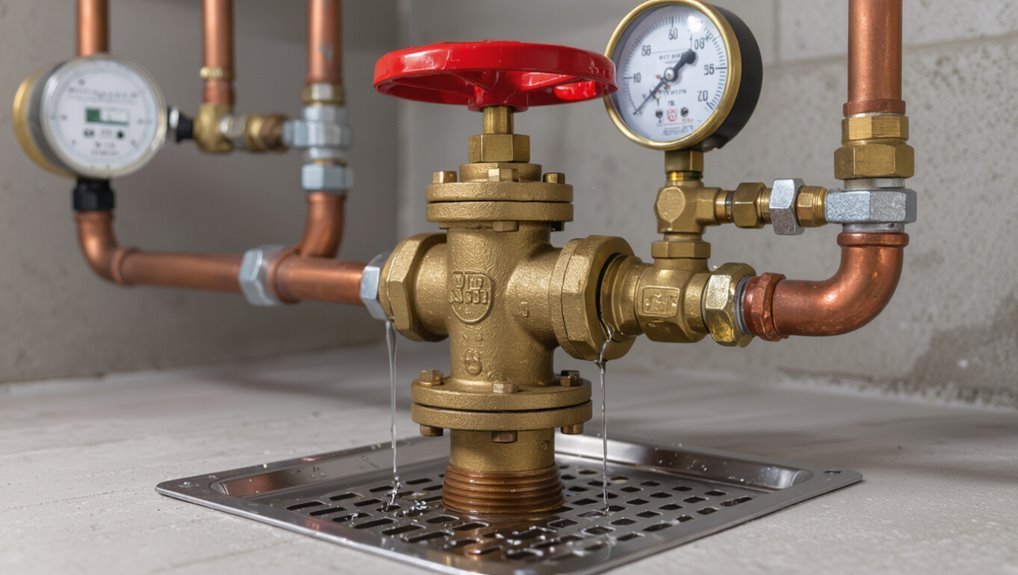
Locate and turn the main shutoff valve immediately to stop water flow into the building; this prevents further flooding and limits damage until repairs begin.
The homeowner should know the valve’s location in advance—basement, crawlspace, or exterior meter—so action is swift. Turn clockwise or use a wrench if stiff, then open faucets to drain remaining water from pipes.
Notify occupants and keep clear of pooling areas. Call a licensed plumber to assess and repair the break.
Record visible damage with photos for insurance. Refrain from restoring water supply until the repair is complete and pressure tested.
Turn Off Electricity to the Affected Area
One clear step after shutting off the water is to cut power to the affected area to eliminate the risk of electrical shock or fire.
A breaker panel should be located and individual circuits for the flooded rooms switched off; if unsure, the main breaker can be turned off.
Care should be taken to avoid standing in water while touching the panel.
If power lines or outlets are submerged, contact the utility company or an electrician before restoring power.
Document which breakers were off for later restoration.
After electricity is off, use battery-powered lights and wait for a professional inspection before re-energizing circuits.
Move People and Valuables Out of Harm’s Way
Occupants should be moved out of the affected area immediately to avoid injury from slipping, electrical hazards, or structural damage.
Priority should be given to children, elderly, and anyone with mobility issues.
Irreplaceable items such as passports, hard drives, photographs, and important documents should be retrieved quickly and placed in a dry, safe location.
Remove People Immediately
Evacuate all people from affected areas immediately, prioritizing children, elderly, and those with mobility limitations, and guide them to a predetermined safe location away from water and electrical hazards.
A designated household leader should issue clear, calm directions and check each room systematically.
Assist anyone who needs help moving, using safe paths and avoiding slippery floors, exposed wiring, or pooled water.
Account for everyone at the assembly point and notify emergency services if anyone is missing or injured.
Keep people together and warm, limit re-entry until professionals declare it safe, and document any injuries for responders.
Protect Irreplaceable Items
When possible and safe, move irreplaceable items—passports, family albums, hard drives, jewelry, and critical documents—away from affected areas to higher, dry locations or take them to the predetermined assembly point; prioritize items that cannot be replaced and those needed for immediate recovery or identification.
A swift inventory list guides action: note location, owner, and condition.
Use waterproof containers or resealable bags for electronics and papers.
Label boxes with contact information and contents.
If removal is impossible, elevate items on tables or shelves and shield them with plastic.
Assign one person to oversee valuables and communicate status to household members and responders.
Contain the Leak: Towels, Buckets and Tarps
With a fast-moving leak, immediate containment limits damage and stabilizes the scene for repairs; use towels to blot and absorb, buckets to catch drips, and tarps to divert flowing water away from valuables and electrical sources.
The responder quickly assesses flow paths, places absorbents under run-off, and positions containers beneath steady streams.
Tarps secure belongings and channel water to drains or outdoors.
Replace saturated towels and empty buckets to prevent overflow.
Prioritize safety: keep electrical devices elevated and unplugged if dry.
Document placements for restoration crews and maintain clear access for forthcoming isolation and repair steps.
- Towels: blot, layer, replace
- Buckets: position, monitor, empty
- Tarps: cover, angle, secure
- Safety: elevate, unplug, document
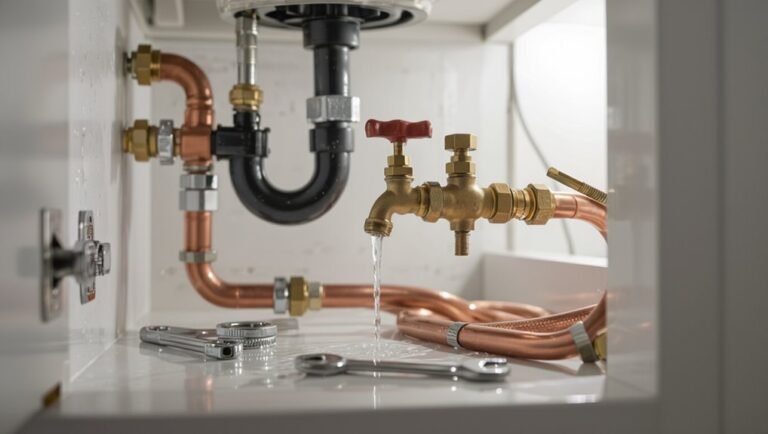
Locate and Isolate the Burst Pipe Section
Before shutting off water, the responder quickly locates the burst section by tracing visible leaks, listening for running water, and inspecting nearby fixtures, valves, and exposed piping.
Once identified, the responder isolates the section by closing the nearest shutoff valve—main, fixture, or zone—confirming flow stops by retesting taps and observing pressure gauges when available.
If valves are corroded, the responder documents their condition and closes the next upstream control to prevent further damage.
The responder notes pipe material, access route, and surrounding hazards, then informs occupants and prepares for professional repair, ensuring electricity to wet areas is handled safely.
Temporary Fixes for Burst Pipes: Clamps & Patches
After the water supply is shut off to limit damage, a temporary clamp can be fitted over the rupture to stem flow.
If a clamp is unavailable or the leak is small, epoxy putty or specialized repair tape can be applied as a short-term seal.
These measures are interim only and should be followed by a professional repair or pipe replacement.
Shut Off Water Fast
Act quickly to stop water flow when a pipe bursts: locating the nearest shut-off valve and turning it off is the fastest permanent remedy.
The homeowner should remain calm, trace the main supply line, and shut the closest valve—often by a basement, crawlspace, or exterior access.
If unsure, use the main shut-off at the meter.
Confirm flow has stopped by opening a faucet to relieve pressure.
After isolation, document the location and condition for repair professionals.
Preserve safety by avoiding electrical contact with standing water and by notifying occupants.
- Find nearest shut-off valve
- Turn valve fully off
- Open faucets to drain
- Call a plumber
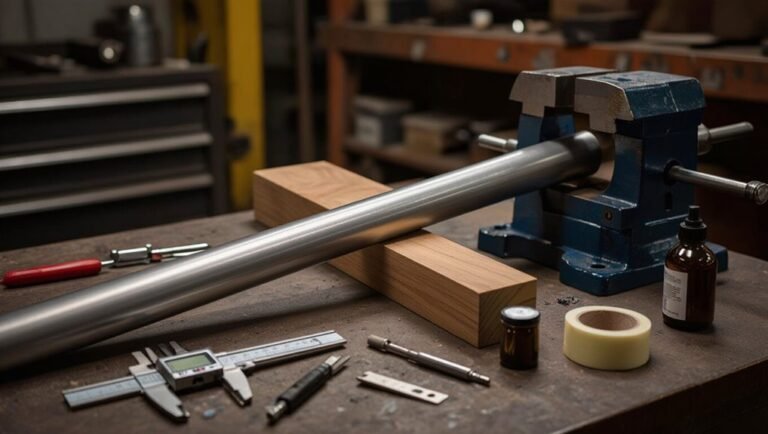
Apply Temporary Clamp
With a burst pipe isolated, a temporary clamp can halt leaking long enough for a proper repair to be arranged. A clamp with a rubber saddle compresses the breach; tighten gradually until flow stops. Select a clamp sized to the pipe, clean the surface, position the rubber pad over the leak, then tighten bolts evenly. Monitor for drips and corrosion. Clamps are meant as interim solutions; schedule a permanent repair promptly and avoid pressurizing the line. If a clamp won’t seal or pipe fragments, stop and call a professional.
| Advantage | Note |
|---|---|
| Quick | Immediate reduction of water loss |
| Reversible | Keeps pipe accessible for repair |
Use Epoxy Or Tape
Apply epoxy putty or waterproof repair tape to temporarily seal small cracks or pinhole leaks when a clamp is impractical or the breach is narrow.
The technician or homeowner should dry and clean the area, roughen smooth metal or plastic, and follow product instructions for curing time.
Epoxy hardens into a durable patch; tape conforms to odd shapes and resists pressure briefly.
Both are stopgaps until proper repair.
Monitor the seal and relieve system pressure when possible.
Replace the patched section or call a plumber promptly to prevent failure, corrosion, or hidden damage.
- Prepare surface thoroughly
- Knead or activate material
- Apply firmly and smooth
- Allow full cure before pressurizing
Should You Call an Emergency Plumber Now?
Should a homeowner call an emergency plumber now, the deciding factors are the rate of water loss, risk to people or property, and ability to isolate the leak.
Immediate professional help is warranted when water flow is uncontrolled, flooding affects living spaces, electrical hazards exist, or structural elements are soaked.
If the main shutoff stops the flow and damage is limited, a scheduled repair may suffice.
Consider time of day, weather, and renter/owner responsibilities; landlords should be notified.
When in doubt about hidden damage, contamination, or repeated failures, prioritize an emergency call to limit escalating costs and safety risks.
Take Photos and Notes for Insurance
After controlling the leak or calling a plumber, homeowners should document damage thoroughly for insurance purposes. Photographs and concise notes create a clear record of affected areas, timestamps, and visible loss. Capture wide shots, close-ups, and affected personal property before cleanup. Note time discovered, actions taken, and contractor contact details. Store originals digitally and back them up.
- Photograph wide room views showing extent of damage.
- Photograph close-ups of fixtures, flooring, and personal items.
- Record concise notes: discovery time, steps taken, and service calls.
- Back up images and notes to cloud storage for insurer access.
Shutoff-to-Restart: How to Turn Water Back On Safely
Before restoring water, the homeowner must confirm repairs are complete, valves and appliances are secure, and any temporary patches have been removed to prevent repeat leaks.
The main shutoff is reopened slowly to avoid pressure surges.
Open a cold faucet at the lowest point to purge air and debris, then a highest-level fixture to allow full flow.
Inspect visible joints, meters, and appliances for leaks during gradual pressurization.
If pressure spikes or new leaks appear, close the main immediately and call a plumber.
Finally, cycle water-using appliances off, then restart them one at a time after confirming stable supply.
Dry Out the Space Quickly to Prevent Mold
After shutting off the water and restoring safety, attention shifts to drying the area to prevent mold growth.
Wet materials like soaked drywall, insulation, carpets, and padding should be removed promptly to eliminate moisture sources.
Increasing airflow with fans and open windows accelerates evaporation and reduces the window for mold to establish.
Remove Wet Materials
To minimize mold growth and structural damage, immediately remove soaked carpeting, soaked padding, upholstered furniture, and any porous building materials that cannot be thoroughly dried within 24–48 hours.
The homeowner should wear gloves and a respirator, bag and label contaminated items, and document losses for insurance.
Salvage nonporous furnishings after cleaning and disinfecting.
Cut out drywall and insulation back to visibly dry edges.
Prompt removal reduces hidden moisture pockets and microbial growth.
Coordinate disposal with local regulations and avoid storing wet items in living spaces.
Seek professional assessment when contamination or structural compromise is suspected.
- Wear PPE and document items
- Bag and label waste
- Remove contaminated building materials
- Clean salvageable nonporous items
Increase Airflow
With windows and doors opened to create cross-ventilation and portable fans positioned to move air out of the affected area, increased airflow speeds moisture evaporation and reduces the chance of mold colonization.
Technicians or homeowners should place fans to draw damp air toward exits, elevating air exchange.
Dehumidifiers complement airflow by lowering relative humidity, accelerating drying of structural elements and belongings.
Monitor moisture with a hygrometer and focus on hidden cavities, behind baseboards and under flooring.
Continue airflow until readings stabilize below 60% and materials feel dry.
Safety precautions include electrical shutoff for wet areas and avoiding mold exposure without protective gear.
Clean and Sanitize Water‑Soaked Materials
When water infiltrates a structure, prompt removal and thorough cleaning of soaked materials prevents mold growth and structural damage.
The affected area is isolated; porous items such as carpeting, insulation, and soaked drywall are removed quickly. Nonporous surfaces are scrubbed with detergent, rinsed, and dried. A disinfectant solution is applied to inhibit microbes. Salvageable textiles are laundered at high heat or professionally cleaned.
Contents are documented with photos before disposal. Drying is monitored with moisture meters and fans.
Safety gear—gloves, masks, and eye protection—is worn throughout.
- Remove porous materials
- Clean nonporous surfaces
- Disinfect and launder
- Document and monitor
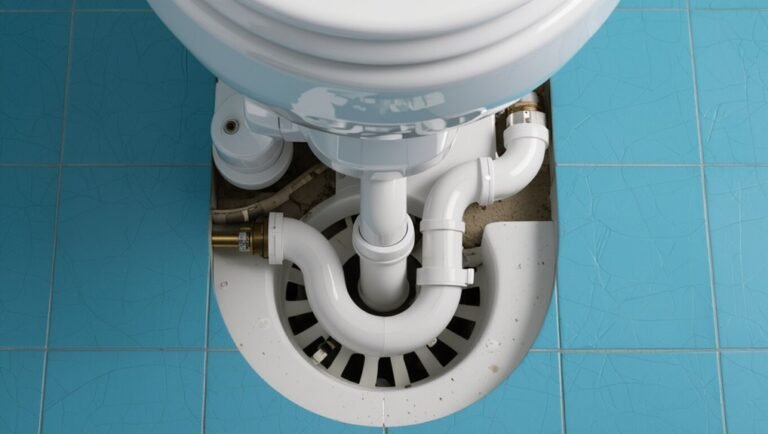
Check Ceiling, Floor Joists and Wall Framing
After porous materials are removed and surfaces cleaned, the structural elements receive a focused inspection for water damage.
Inspectors examine ceilings for sagging, staining, or softened drywall indicating prolonged exposure.
Floor joists are checked for swelling, splitting, rot, or separated fasteners that compromise load transfer.
Wall framing is evaluated for moisture pockets, delamination, or mold growth along studs and plates.
Probing with a moisture meter and selective removal of small sections helps reveal hidden deterioration.
Any compromised members are marked, temporarily supported if needed, and documented for repair or replacement by a qualified contractor to restore structural integrity.
Check HVAC, Wiring & Appliances for Water Exposure
During the inspection, attention turns to HVAC systems, electrical wiring, and appliances to identify water intrusion that can create fire, shock, or mold hazards.
Technicians assess visible dampness, corrosion, and pooling near units, breakers, outlets, and cords.
Power should remain off until a qualified electrician evaluates damage.
HVAC drip pans, condensate lines, and furnace bases are checked for contamination.
Appliances like washers, dryers, dishwashers, and water heaters receive visual and odor inspections.
Document findings with photos and notes for contractors and insurers.
- Inspect HVAC components for rust and wet insulation.
- Examine junction boxes and outlets.
- Check appliance seals and bases.
- Photograph and log damage.
Decide: Repair or Replace the Damaged Pipe
The assessor evaluates the extent of the pipe damage to determine whether a localized repair will suffice or a full section replacement is required.
Pipe age and material are weighed as factors that influence long-term reliability and cost-effectiveness.
The decision balances immediate repair feasibility against the risk of recurrent failures from aging infrastructure.
Assess Damage Extent
In evaluating whether a damaged pipe should be repaired or replaced, focus first on the nature and location of the damage: small pinholes or localized cracks often lend themselves to patching or sleeve repairs, while large ruptures, extensive corrosion, or damage at joints typically indicate replacement.
The assessor documents leak size, water flow, and visible corrosion, considers surrounding material damage, and notes accessibility for repair. Temporary fixes may suffice for isolated faults; pervasive deterioration or multiple compromised sections require replacement.
- Inspect leak size and pattern
- Check joint and fitting integrity
- Assess surrounding structural impact
- Determine accessibility for repair
Consider Pipe Age
Frequently, pipe age is the decisive factor when choosing repair versus replacement: older systems—especially those past manufacturer-recommended service life or showing age-related materials like galvanized steel or lead—are better candidates for replacement because age accelerates corrosion, joint failure, and hidden weaknesses that repairs may not address.
The technician evaluates visible corrosion, frequency of leaks, and water quality complaints. If failures are recurrent, extensive, or involve brittle materials, full replacement minimizes future risk and often reduces long-term cost.
For newer, localized damage, targeted repair can suffice. Homeowners should balance immediate expense against projected reliability and resale considerations.
Types of Permanent Pipe Repairs and Materials
Among the permanent solutions for burst pipes are full-section replacement, welded or brazed joints, epoxy and polymer lining, mechanical couplings, and trenchless relining techniques, each chosen based on pipe material, access, and long-term performance requirements.
The detached observer notes that selection hinges on pipe composition (cast iron, copper, PVC, PEX), failure mode (corrosion, fracture, joint failure), and structural constraints.
Materials vary: copper or stainless for welded repairs, HDPE or PVC for replacements, and cured-in-place polymers for linings.
Mechanical couplings and flange kits offer targeted fixes without excavation.
- Full-section replacement
- Welded/brazed joints
- Epoxy/polymer lining
- Mechanical couplings
Repair Costs & Typical Timelines
Estimated repair costs for burst pipes vary by damage severity, material, and whether repairs are temporary or permanent.
Typical repair timelines range from a few hours for simple patching to several days for section replacements or extensive water damage restoration.
The following section compares common cost ranges and expected timeframes to help with planning and budgeting.
Estimated Repair Costs
Repair costs for burst pipes vary widely depending on severity, location, and materials involved; a simple section replacement in an accessible area may cost a few hundred dollars, while extensive pipe bursts that require wall demolition, water mitigation, and system upgrades can run into the thousands.
Typical cost drivers include labor rates, permit fees, replacement materials, and secondary repairs for mold or structural damage.
Insurance coverage and deductible levels also affect out‑of‑pocket expenses. Homeowners should obtain multiple quotes and prioritize licensed professionals to avoid hidden costs.
- Minor repair: section replacement, minimal access
- Moderate: localized drywall repair, valve replacement
- Major: wall/ceiling demolition, extensive plumbing
- Full replacement: repiping, system upgrades
Typical Repair Timelines
For homeowners facing a burst pipe, expected repair timelines vary by severity and scope: minor fixes such as replacing a short section of pipe in an accessible area often take a few hours to a day, localized repairs that include drywall or valve replacement typically require one to three days, major jobs involving demolition, drying, and structural repairs can extend from several days to two weeks, and full repiping or system upgrades may take one to three weeks or longer depending on permit timelines and contractor availability.
| Job Type | Typical Duration | Notes |
|---|---|---|
| Minor leak | Hours–1 day | Quick patch or section replace |
| Localized repair | 1–3 days | May include drywall repair |
| Major repair | Several days–2 weeks | Demolition, drying time |
| Full repipe | 1–3+ weeks | Permits, inspections required |
How Home Insurance Usually Covers Burst‑Pipe Damage
Typically, homeowners’ insurance covers sudden and accidental damage from burst pipes, including water damage to structure and belongings.
The insured party should promptly stop the leak, document damage, and notify the insurer to begin a claim.
Coverage often pays for water extraction, structural repairs, and replacement of damaged personal property, subject to policy limits and deductibles.
Exclusions commonly apply for neglect, gradual leaks, or lack of maintenance; flood and sewer backup may require separate endorsements.
Policyholders should keep receipts, photos, and inventory lists to support claims and cooperate with adjusters for timely resolution.
- Immediate mitigation steps
- Documenting damage
- Covered vs excluded causes
- Claims paperwork and cooperation
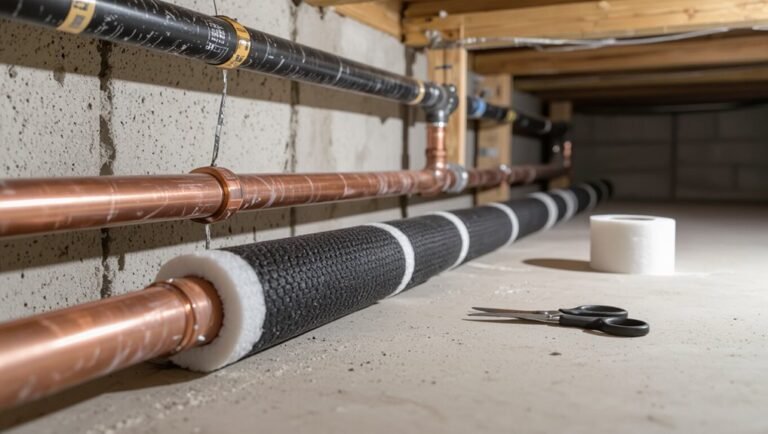
Prevent Future Bursts: Insulation, Maintenance & Seasonal Checklist
Regularly scheduled insulation and maintenance substantially reduce the risk of future pipe bursts by keeping pipes within safe temperature ranges and identifying vulnerabilities early.
Property owners should insulate exposed pipes, seal drafts, and install heat tape where necessary.
A quarterly inspection routine checks for corrosion, loose fittings, and minor leaks; document findings and schedule repairs promptly.
Before cold seasons, drain exterior lines, service outdoor faucets, and set programmable thermostats to maintain minimal heat during absence.
After storms, recheck vulnerable areas.
Maintain clear access to shutoff valves and keep emergency contact information handy.
Consistent, simple steps prevent most repeat failures.
Conclusion
Like a weathered captain steering a ship through sudden ice, the homeowner moves with steady hands — shuts the valve, trims the power, and blankets soggy cargo with towels — learning that haste and clear maps spare a vessel from ruin. Repairs are the shipwright’s craft; insurance, the harbor. With insulation as hull and seasonal checks as lookout, future storms are met not with panic but with practiced calm and quiet confidence.