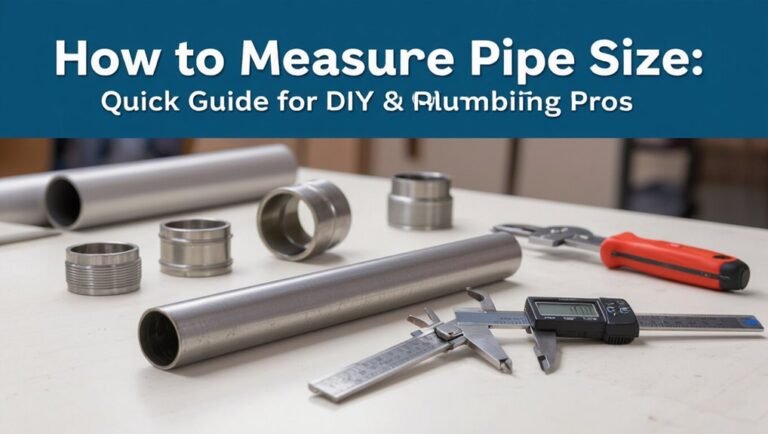
DIY Pipe Projects: Creative Industrial Home Decor Ideas Using Pipes
DIY makers can create sturdy and stylish industrial home decor using DI and black-iron pipes. These materials allow for the construction of modular items like shelving, clothing racks, room dividers, lighting frames, and table bases without welding. For moisture-prone areas, choose galvanized pipes, while black-iron or DI is suitable for indoor projects. It’s important to match the thread type and wall thickness to the intended load. Basic tools needed include cutters, dies, vises, and safety gear. This guide provides examples, measurements, finishes, and step-by-step tips for executing your projects effectively.
What Is DI Pipe and Why Makers Use It

In many maker workshops, DI (drawn and iron) pipe refers to malleable black steel pipe prized for its strength, uniform threading, and industrial aesthetic.
Makers choose it for durability, load-bearing capacity, and predictable fit with threaded fittings, enabling modular assembly without welding.
Its dark finish complements industrial decor and accepts paint or wax patinas.
Readily available sizes and standardized threads simplify sourcing and replication.
While heavier than some alternatives, DI pipe resists deformation under tension and supports shelving, tables, and lighting frames.
Its combination of structural reliability and visual character makes it a practical material for functional, long-lasting DIY projects.
DI Pipe vs Black Steel & Galvanized: Which to Use
Comparing DI (drawn and iron) pipe, generic black steel, and galvanized pipe helps makers choose the right balance of strength, appearance, and corrosion resistance for a project.
DI pipe offers uniform wall thickness and cleaner threads, favored for visible industrial finishes and structural reliability indoors.
Black steel is economical and common for dry applications but can rust if exposed.
Galvanized pipe resists corrosion from moisture, making it better for humid areas or outdoor use, though its zinc coating alters appearance and complicates painting.
Selection depends on exposure, desired finish, and budget; prioritize corrosion protection where moisture or longevity is a concern.
Common DI Pipe Sizes and DIY Fittings
The section outlines the standard DI pipe diameters typically used in residential and light commercial projects, from 1/2 inch to 4 inches.
It also summarizes common DIY fittings—couplings, elbows, tees, and adapters—and notes their material and connection differences.
Practical considerations for choosing sizes and fittings for simple repairs and small installations are briefly introduced.
Standard Pipe Diameters
Several common diameters of ductile iron (DI) pipe dominate residential and light-commercial DIY projects, typically ranging from 3/4 inch to 6 inches for fittings and up to 12 inches for larger runs.
Standard sizes follow nominal pipe size (NPS) conventions; exterior measurements differ from inside diameters depending on wall thickness.
Smaller gauges favor 3/4, 1, 1-1/4, and 1-1/2 inches for shelving, lighting, and rails.
Midrange sizes—2, 3, and 4 inches—support heavier structures and visible industrial aesthetics.
Larger 6–12 inch pipes appear in oversized tables or statement pieces.
Compatibility with supply and cutting tools guides selection.
Common DIY Fittings
Among common DIY fittings for ductile iron pipe, elbows, tees, flanges, couplings, and caps form the core vocabulary builders use to shape projects. The piece describes typical sizes, material choices, and functional roles: elbows change direction, tees split runs, flanges join components, couplings extend length, and caps finish ends. Selection depends on planned load, visible finish, and join method (threaded, welded, or gasketed). Practical advice favors matching pressure rating and wall thickness to project needs. The concise table below contrasts function, typical size range, and common finish for quick reference.
| Function | Size range | Common finish |
|---|---|---|
| Elbow | 1–4 in | Black |
| Tee | 1–6 in | Galvanized |
| Flange | 2–8 in | Painted |
How to Choose DI Pipe for Your Project
Choosing the right DI pipe begins with comparing material types—cast iron, PVC, and ductile iron each offer different strength, corrosion resistance, and cost profiles.
Next, sizing and threading must match the system’s flow requirements and compatible fittings to assure a leak-free connection.
Careful selection of both material and thread standard prevents premature failure and simplifies installation.
Material Type Comparison
When selecting ductile iron (DI) pipe for a project, engineers and contractors weigh material properties, installation needs, and lifecycle costs to match pipe type to application.
Comparison focuses on DI, steel, PVC, copper, and galvanized options. DI offers high strength, impact resistance, and corrosion coatings; steel provides strength but requires corrosion protection; PVC is lightweight, corrosion- and chemical-resistant yet less impact-tolerant; copper excels for sanitary uses and heat resistance but costs more; galvanized steel is economical but prone to internal corrosion over time.
Choice depends on pressure, exposure, longevity targets, maintenance capacity, and budget constraints.
Size And Threading
How should designers match ductile iron (DI) pipe size and threading to a project’s hydraulic and mechanical requirements? Designers evaluate flow rate, pressure, and head loss to select nominal diameter and wall thickness; larger diameters reduce velocity and noise but occupy more space.
Threading choices—tapered (NPT) for sealed joints, straight with gasketed couplings for mechanical restraint—depend on leak tolerance and assembly method.
Consider external loads, vibration, and corrosion allowances when specifying class and wall grade. Match fittings and valves to the pipe’s thread standard.
Verify compatibility with existing systems and local codes to assure safe, durable, and functional installations.
Tools for Working With DI Pipe
Begin by assembling a compact set of purpose-built tools that make cutting, joining, threading, and aligning DI (ductile iron) pipe safe and efficient. Essential items include a mechanical pipe cutter or abrasive cutoff saw for clean ends, a pipe vise or sturdy clamps to stabilize sections, and a threading machine or dies sized to match pipe threads.
Include reamers and deburring tools to remove burrs, torque wrenches for consistent fittings, and alignment jigs or magnetic levels for accurate runs. Lubricants and anti-seize compounds protect threads. Portable lifting straps or slings aid handling of heavier DI lengths.
Safety Basics for Cutting and Threading Pipe
Before cutting or threading ductile iron pipe, assess hazards and plan controls to protect operators and bystanders; identifying pinch points, flying debris, noise, dust, and heavy loads allows selection of appropriate PPE, guards, and work positioning.
Operators should wear eye protection, hearing protection, cut-resistant gloves, and respirators when grinding or threading; secure pipe in proper vises or stands; keep bystanders clear.
Use tool guards, sharp cutters, and appropriate lubricant to reduce kickback and heat.
Inspect tools and work area before starting and stop for damage or unusual vibration.
- PPE selection and fit
- Pipe securing methods
- Tool maintenance
- Dust and debris control
How to Measure and Plan a DI Pipe Layout
Before cutting or fitting, the installer measures the work area to record accurate distances and elevations.
A clear layout is sketched showing pipe runs, joints, and connection points.
The plan includes required clearances for access, insulation, and thermal movement.
Measure Your Space
A clear measurement plan is essential for laying out a DI pipe system: catalog room dimensions, note fixed obstacles (doors, windows, studs, vents), and mark where fixtures and connections must sit.
The practitioner measures wall heights, floor lengths, and ceiling clearances, recording precise distances and any out-of-plumb surfaces.
Measurements should use a tape and laser for cross-checks; note material allowances and required clearances around fixtures.
Photographs with dimension annotations help later references. Dimensions must be converted to pipe and fitting increments to minimize cutting.
- Measure and record all linear distances.
- Note fixed obstructions and clearances.
- Verify level and plumb points.
- Photograph with annotations.
Map Your Layout
With measurements and obstacle notes in hand, the practitioner converts raw data into a scaled plan showing pipe runs, fittings, and fixture locations.
A grid or graph paper helps translate dimensions to scale; digital sketch tools can speed revisions.
Mark entry and exit points, support positions, and bracket mounting studs.
Indicate each connection type—elbow, tee, flange—and note lengths between fittings to pre-cut stock accurately.
Label elevations for vertical segments and annotate where concealed joins or visible seams will appear.
Finally, review the schematic against the physical site, adjust for practicality, and produce a cut list with quantities and part numbers.
Account For Clearances
Effective DI pipe layouts require deliberate allowance for clearances around runs, fittings, and access points to make certain functionality, maintenance access, and code compliance. The planner measures pipe diameters, valves, and fixture connections, then adds working clearances for tools and hands.
Vertical and horizontal spacing prevents interference with walls, cabinets, and electrical lines. Documentation of clearances on the layout makes certain installers follow the plan and inspectors see compliance. Consider future changes by leaving extra room near junctions and supports to accommodate thicker insulation or larger fittings without rework.
- Measure pipe OD plus tool clearance.
- Note valve and access swing.
- Maintain code distances to combustibles.
- Allow space for insulation and future upgrades.
Cut, Deburr, and Clean DI Pipe Step‑by‑Step
Before cutting, the installer confirms pipe layout, measures twice, and marks cut points clearly to make certain the run fits without excess stress.
Using a proper pipe cutter or mitre saw with a metal blade, straight, square cuts are made.
Deburring follows: inside and outside edges are filed or reamed to remove burrs that impede thread engagement or create leaks.
Cleaning uses a wire brush, cloth, and solvent to remove scale, oils, and debris.
Final inspection checks for smooth edges, true ends, and cleanliness.
Components are then staged for assembly, ensuring reliable joints and neat appearance without distortion.
Choosing Fittings and Joins for Furniture Work
When planning pipe‑based furniture, the maker must weigh threaded versus slip joints for strength, adjustability, and ease of assembly.
Material compatibility—mixing galvanized, black iron, stainless, or brass—affects corrosion, finish, and joining options.
Appropriate fastening and sealing methods (thread tape, locknuts, adhesives, or set screws) guarantee stability and leak‑proof connections where needed.
Threaded Versus Slip Joints
In comparing threaded and slip joints for pipe‑based furniture, the choice hinges on strength, adjustability, and ease of assembly: threaded fittings provide rigid, load‑bearing connections ideal for frames and legs, while slip (push‑fit or set‑screw) joints allow faster assembly, repositioning, and cleaner lines at the cost of reduced torque resistance.
Threaded joints resist shear and twisting, suit permanent builds, and conceal joins with caps; slip joints speed prototyping, simplify disassembly, and permit micro‑adjustments. Selection depends on intended application, expected loads, and willingness to sacrifice permanence for flexibility.
- Load capacity versus ease
- Assembly speed
- Long‑term stiffness
- Serviceability
Material Compatibility Choices
Across different metals and materials, compatibility drives durability and appearance: steel, stainless steel, galvanized, brass, and iron each require matching or appropriately adapted fittings to prevent corrosion, galvanic reactions, and mechanical failure.
Designers select fittings with similar electrochemical properties or use dielectric isolates when dissimilar metals meet. Consider load, finish, and indoor humidity: stainless resists rust but can gall with hardened steel; galvanized pairs well with mild steel but may flake if welded improperly.
Brass offers aesthetic contrast yet can accelerate corrosion when mated to aluminum. Test sample assemblies and document material pairings to guarantee long-term stability and consistent appearance.
Fastening And Sealing Methods
For furniture projects, selecting fastening and sealing methods balances structural strength, aesthetics, and serviceability: threaded pipe fittings, flanges, set-screw couplers, and adhesive or mechanical seals each offer distinct trade-offs in load capacity, adjustability, and appearance.
- Threaded fittings provide strong, serviceable connections; tighten for stiffness, disassemble for repairs.
- Flanges offer secure mounting to surfaces and clean visual terminations; choose matched bolt patterns.
- Set-screw couplers allow adjustable alignment but require periodic inspection for slippage under dynamic loads.
- Adhesives and sealants fill gaps and prevent corrosion; use compatible chemistries and avoid overapplication that hides defects.
Sealing DI Pipe Joins (Thread Sealant, Epoxy)
Proper sealing of ductile iron (DI) pipe joins prevents leaks, corrosion, and premature joint failure by ensuring an airtight, watertight bond between mating surfaces.
For threaded connections, use compatible thread sealant tapes or pipe dope rated for ferrous metals; apply evenly and avoid overwrapping which can prevent full thread engagement.
For gap filling or permanent bonds, select epoxy compounds formulated for metal with good shear strength and corrosion resistance; prepare surfaces by cleaning, de-greasing, and roughening.
Allow recommended cure times and temperature ranges.
Inspect joints after curing and pressure-test assemblies to verify integrity before installing into decorative or functional projects.
Quick Protective Finishes for DI Pipe
For quick protective finishes on DI pipe, consideration is given to fast-curing clear coats that preserve appearance and add moisture resistance.
Equally important are rust-inhibiting primers that bond to metal and prevent corrosion beneath a topcoat.
The combination of a primer plus a quick-drying clear coat offers rapid protection suitable for small projects and touch-ups.
Quick-Drying Clear Coats
Several fast-drying clear coats offer immediate protection for DIY pipe projects, balancing quick cure times with durable, transparent finishes. They seal surfaces against moisture and fingerprints, preserve raw or finished metal appearance, and enable faster handling between assembly steps. Selection depends on desired sheen, indoor use, and ventilation.
- Polyurethane spray — tough, clear film; satin or gloss options; good for high-contact pieces.
- Acrylic lacquer — very fast cure; thin, non-yellowing finish for delicate aesthetics.
- Water-based clear coat — low odor, quick drying, environmentally friendlier.
- Clear enamel spray — durable, abrasion-resistant for utilitarian designs.
Rust-Inhibiting Primers
When metal pipe will be exposed to moisture or humid indoor environments, a rust-inhibiting primer provides a fast, protective barrier that bonds to bare steel and slows oxidation.
These primers, available in brush-on and spray formulations, adhere to cleaned, degreased surfaces and create a stable base for topcoats. Zinc-rich and phosphate-based options offer differing corrosion resistance and compatibility with paint.
Application requires temperature, humidity, and surface prep attention for optimal film formation. Drying times vary; light sanding between coats improves adhesion.
For DIY pipe projects, a quality rust-inhibiting primer extends lifespan and preserves the intended industrial aesthetic.
Industrial Finishes: Paint, Patina, Wax
Industrial finishes—paint, patina, and wax—transform raw pipe into a purposeful aesthetic, balancing protection with industrial character. Choices affect appearance, corrosion resistance, and maintenance; selection depends on desired sheen, authenticity, and indoor exposure.
Paint offers color and durable coverage; use appropriate metal formulations. Patina creates aged tones and texture, achieved with chemical treatments or controlled oxidation for vintage appeal. Wax provides low-luster protection, sealing patina or bare metal while allowing touch-up.
Consider compatibility: some patinas require sealing; paint may hide welded seams; wax needs reapplication. Testing on scrap metal guarantees expected results before committing to visible pieces.
- Paint: color and protection
- Patina: controlled aging
- Wax: seal and subtle sheen
- Test: verify outcome
Prep and Finish Checklist Before Assembly
After selecting the desired finish—paint, patina, or wax—and confirming compatibility with the pipe material, a concise prep and finish checklist guides the work before assembly.
Inspect pipes for rust, dings, and threading issues; straighten or replace damaged sections.
Degrease surfaces with solvent, then sand or scuff to promote adhesion.
Mask threaded ends and interior surfaces if threading or clear passage is required.
Prime bare metal where appropriate and allow full cure time.
Apply chosen finish in controlled temperature and ventilation; follow manufacturer dry times between coats.
Remove masking, protect finished surfaces during assembly, and label parts for efficient construction.
Simple DI Pipe Shelving : Materials & Steps
On a basic level, simple DIY pipe shelving requires a small set of common materials—pipe sections, fittings (flanges, elbows, tees), wood shelves, fasteners, sealant or thread tape, and mounting hardware—and a clear sequence of steps: measure and plan the layout, cut and thread pipe to length if needed, prepare and finish metal and wood components, assemble dry to check fit, attach shelves, and securely mount the unit to studs or anchors.
The creator selects pipe diameter and shelf depth, measures spacing for load, prefinishes wood, test-fits pipes, then final-assembles and anchors. Tools include wrench, drill, level, and pipe cutter.
- Measure and plan
- Prepare materials
- Dry-assemble components
- Mount and secure
Floating Pipe Shelf With Reclaimed Wood Tutorial
Using reclaimed wood and black iron pipe fittings, the floating pipe shelf blends rustic texture with minimalist support to create a sturdy, wall-mounted display that appears to hover without visible brackets.
The tutorial outlines measuring wall studs, cutting and sanding a reclaimed plank, and staining or sealing for protection. Pipe flanges and nipples are assembled into hidden support arms that screw into studs, then the plank is slid over the uprights and secured with set screws or small bolts from beneath.
Final steps include leveling, touch-up, and styling suggestions. Safety notes stress stud anchoring and load limits for reliable, long-lasting installation.
DI Pipe Clothing Rack You Can Build in an Afternoon
The section outlines the materials and tools needed to assemble a sturdy industrial-style clothing rack using pipe fittings and basic hardware. It then provides a concise step-by-step assembly guide that a reader can follow to complete the project in an afternoon.
Finally, it offers practical styling and placement tips to integrate the rack into various room layouts.
Materials And Tools Needed
A concise list of materials and tools makes assembling a DIY pipe clothing rack straightforward and efficient.
Required materials include black iron pipes (various lengths), flanges, tees, elbows, and pipe caps, plus wood for the base or shelf and appropriate fasteners.
Optional finishes: rust-inhibitor spray or clear coat.
Safety items: gloves and eye protection.
- Pipes and fittings sized for desired height and width.
- Wooden plank (pre-cut) and mounting hardware.
- Hand tools: pipe wrench, tape measure, level, and screwdriver.
- Finishing supplies: sandpaper, paint or sealant, and protective gear.
Step-By-Step Assembly
With materials laid out and tools at hand, assembly begins by verifying pipe lengths and dry-fitting all fittings on the floor to confirm alignment and balance. Next, tighten base flanges to the uprights, attach crossbars, then secure top and middle supports. Use a level after each major connection. Thread joints with pipe sealant where friction fit is insufficient. Sand rough edges and wipe dust before final tightening. Test stability by applying gradual weight. Adjust feet or add felt pads to protect flooring. Final inspection checks for wobble and evenly seated fittings.
| Step | Action |
|---|---|
| 1 | Dry-fit parts |
| 2 | Secure bases |
| 3 | Attach crossbars |
| 4 | Test stability |
Styling And Placement Tips
While practical function guides the rack’s construction, thoughtful styling and placement turn it into a purposeful part of the room; selecting a location with balanced light and traffic flow guarantees garments remain accessible without crowding pathways.
The rack complements décor when height, color, and materials align with the room’s scale. Use coordinated hangers and limited palette to reduce visual clutter. Anchor with a rug or shelf for shoes and accessories. Rotate seasonal items to maintain freshness and avoid overloading.
- Place near natural light but away from direct sun.
- Keep 18–24 inches clearance from walls.
- Match pipe finish to fixtures.
- Limit to a curated wardrobe.
Coffee Table Base Using DI Pipe: Plans & Cuts
For a sturdy, industrial-style coffee table base using DI pipe, precise measurements and well-organized cuts set the foundation for a clean assembly.
The plan specifies four vertical legs, two long stretcher pipes and two short stretcher pipes to form a rectangular frame.
Calculate lengths to account for flange and coupling depths, then mark cut points clearly.
Use a pipe cutter or mitre saw with a metal blade, deburr ends, and test-fit threaded connections dry before final tightening.
Square the frame on a flat surface, verify dimensions, and apply thread sealant or lock compound where required for long-term rigidity.
Modular DI Pipe Room Divider You Can Customize
The modular DI pipe room divider offers interchangeable panel and frame options to suit varying room sizes and styles.
Its assembly relies on simple fittings that allow sections to be added, removed, or reconfigured without special tools.
Adjustment points in the design provide height and spacing control for precise alignment and stability.
Modular Design Options
Atop a simple framework of black iron pipe and flanges, a modular DI pipe room divider becomes a toolkit of customizable elements—adjustable shelf heights, interchangeable panels, and add-on hooks—that allow users to tailor partitioning, storage, and display to specific spatial needs.
Components snap, slide, or bolt into place so configurations change without permanent alteration.
Materials range from reclaimed wood and perforated metal to woven textiles for varied opacity and texture.
Scalable sections permit expansion or reduction.
Hardware finishes and bracket styles create cohesive aesthetics across rooms.
- Shelf modules
- Panel types
- Accessory mounts
- Section sizes
Assembly And Adjustment
Beginning with a clear plan and labeled parts, assembly proceeds through a few repeatable steps: base and upright frames are secured, modular shelf tracks and panel brackets are aligned, and accessories are fastened where needed.
Technicians follow measured spacings and level references, tightening joints incrementally to maintain square geometry.
Sliding panels hang from adjustable brackets; tension stops prevent sag.
Final alignment uses shims or threaded couplings for plumb correction.
Removable sections use quick-release fittings for reconfiguration.
Safety checks include torque verification and floor anchoring where necessary.
Users document positions and torque settings to simplify future adjustments or expansions of the modular divider.
Bathroom Towel Rack With DI Pipe
Using industrial-style black DI pipe, a bathroom towel rack combines durability with minimalist design to create a functional focal point. It mounts securely to studs or anchors, resists moisture, and supports multiple towels without warping. Simple elbow and flange fittings enable varied lengths and multi-rail configurations. Finish options include matte black paint or clear sealant to prevent rust while preserving the industrial look.
- Measure wall spacing and stud locations before ordering pipe.
- Choose pipe diameter for desired load and visual scale.
- Preassemble dry-fit components, then tighten on the wall.
- Seal joints and test stability before regular use.
Wall‑Mounted Pipe Lamp Frame for Edison Bulbs
The section outlines the basic materials and tools needed to build a wall‑mounted pipe frame suitable for Edison bulbs, including pipe fittings, a mounting plate, and basic electrical supplies.
It then summarizes clear steps for assembling the pipe structure and securely mounting it to a wall.
Finally, it offers concise bulb and wiring tips to guarantee correct socket selection, safe wiring practices, and proper grounding.
Materials And Tools
A concise kit of fittings, pipe sections, and a few basic tools will cover most wall‑mounted pipe lamp frames designed for Edison bulbs.
Components focus on black iron or galvanized pipe, flange bases, tees, elbows, and a bulb socket rated for the bulb’s wattage. Include braided cloth or PVC‑sheathed lamp wire, a grounded plug or switch, and heat‑resistant electrical tape.
Protective finish like matte clear coat prevents rust.
Safety gear—gloves, eye protection, and a dust mask—completes the list.
- Pipes and fittings (black iron/galvanized)
- Edison socket and wiring
- Flanges and mounting hardware
- Safety gear and finish
Assembly And Mounting
When positioned and measured carefully, the pipe lamp frame goes together quickly: assemble the chosen flanges, tees, elbows, and pipe sections dry (without sealing) to confirm fit and desired projection, then mark mounting points on the wall levelly and at stud locations where possible.
After reassembling with thread sealant or locktite where needed, tighten fittings snugly but avoid overtightening that can crack fittings.
Use appropriate anchors when studs are unavailable.
Make sure the frame sits flush and supports weight; shim or adjust flanges for uneven surfaces.
Final mounting screws should be long grade-appropriate fasteners, torqued evenly to prevent rack or twist.
Bulb And Wiring Tips
With exposed Edison bulbs and open pipework, wiring choices should prioritize safety, accessibility, and the lamp’s vintage aesthetic.
The frame should route conduit visibly but neatly, using metal-clad cable or decorative cloth-covered wire.
Junctions need secure boxes and strain reliefs; bulbs require compatible sockets and heat-resistant fittings.
Grounding is crucial; test continuity before finalizing.
Consider a switch position that preserves silhouette and allows bulb replacement without disassembly.
Use dimmable LED Edison-style bulbs for warmth, lower heat, and longevity while retaining filament appearance.
- Choose decorative yet certified wiring.
- Install proper junction boxes.
- Make reliable grounding.
- Use dimmable LEDs.
Floor Lamp With DI Pipe: Wiring and Safety Notes
Starting from the basic layout and advancing to final connections, the wiring and safety considerations for a floor lamp built from black iron pipe require careful planning to guarantee code compliance and user safety.
The lamp should use UL-listed components: cord, socket, switch and strain relief.
Internal conductors must be insulated, routed to avoid sharp edges, and secured with bushings where they pass through fittings.
Grounding the metal pipe via a bonded ground screw prevents shock.
Wires must match fixture amperage and be protected by a correctly rated plug or hardwired junction box.
Test with a multimeter and consult local electrical codes or a licensed electrician.
Heavy‑Duty Pipe Curtain Rod That Holds Drapes
For a heavy‑duty curtain rod that reliably supports drapes, the builder should prioritize pipe diameter, wall thickness, and secure mounting over decorative finish alone.
Choices favor 1/2″ black steel for light panels, 3/4″ or 1″ for heavier drapes, and schedule 40 or higher for stiffness.
End caps, flanges, and threaded nipples simplify assembly; wall studs or toggles assure load distribution.
Measure span, account for sag, and add center support for long runs.
Finish with heat‑resistant paint or clear coat to prevent rust.
Install level and test with full fabric weight before finalizing.
- Select appropriate pipe size and schedule
- Use heavy flanges and stud anchors
- Add center bracket for spans over 5 ft
- Seal finish to prevent corrosion
DI Pipe Planter Stands for Indoor Plants
Build a sturdy, customizable planter stand from black iron pipe by selecting pipe diameter and fittings that match the plant size and weight. The design balances form and function: raised height improves drainage and display, while modular joints allow disassembly and resizing. Measurements, footpads, and rust‑resistant finishes guarantee stability and protect floors. Simple layouts include single pot risers, tiered shelves, or tripod legs. Tools required are basic: pipe cutter, thread sealant, wrench. Safety includes securing tall stands and checking load limits. The table below summarizes common configurations and recommended pipe choices.
| Configuration | Recommended Pipe |
|---|---|
| Single pot riser | 1/2″–3/4″ |
| Tiered shelf | 3/4″–1″ |
| Tripod stand | 1/2″–1″ |
| Large planter base | 1″–1.25″ |
Small DI Pipe Wine Rack for Tight Kitchens
A compact wine rack fashioned from black iron pipe offers a space‑saving storage solution that complements the industrial look of pipe planter stands while addressing the constraints of small kitchens.
Constructed from short pipe sections, elbows, and flanges, the design holds bottles horizontally to preserve corks and fits under cabinets or in narrow nooks.
Finishes range from raw black to matte clear coat for durability.
Installation is simple, requiring wall anchors and basic tools.
Maintenance is minimal: wipe metal and check fasteners.
- Bottle capacity: 4–6 depending on layout
- Mounting: wall or backsplash
- Materials: black iron pipes, flanges, anchors
- Tools: wrench, drill, level
DI Pipe Desk Legs and Workbench Frames
Attention to measuring and layout guarantees pipe desk legs and workbench frames fit and bear loads correctly.
Choosing appropriate joint types and fittings determines strength and ease of assembly.
Proper finishing and bracing improve corrosion resistance and long-term stability.
Measuring And Layout
Before cutting or threading any pipe, precise measuring and careful layout determine whether desk legs and workbench frames will be square, level, and stable.
The planner marks floor and tabletop positions, establishes overall height, and records flange and coupling allowances.
Squareness is verified with diagonals; levelness uses a spirit level or laser.
Allow for final adjustments and mounting tolerance.
Transfer measurements to pipe stock, noting thread length and end fittings, and label each piece.
Dry-assemble components when possible to confirm fit before finishing.
- Measure overall dimensions and clearances.
- Check squareness with diagonal measurements.
- Verify level at multiple heights.
- Label and dry-fit components.
Joint Types And Fittings
In selecting joints and fittings for DI pipe desk legs and workbench frames, function dictates choice: flanges and tees provide rigid, load-bearing connections for vertical members, while elbows and couplings permit layout flexibility and alignment adjustments.
Choice depends on load paths, access, and modularity. Floor flanges anchor legs; tee fittings create cross-bracing and support shelves. Elbows allow corners without welding; couplings join pipe lengths or permit disassembly.
Slip-on fittings speed assembly; threaded fittings offer stronger, maintenance-friendly joints. Specialty fittings—swivels, adjustable feet adapters, and mounting plates—expand utility.
Properly matched pipe schedules, thread types, and torque guarantee reliable performance.
Finishing And Stability
Considering finishing and stability together guarantees that DI pipe desk legs and workbench frames remain both durable and safe under load.
Attention to surface treatment, secure connections, and proper anchoring prevents corrosion, wobble, and premature failure.
Protective coatings, threadlocker on fittings, and rubber feet improve longevity and user safety.
Weight distribution and cross-bracing address shear and torsion, while periodic inspection maintains performance.
- Choose coating: powder coat, spray paint, or clear lacquer for corrosion resistance.
- Tighten and seal joints; use threadlocker where vibration occurs.
- Add cross-braces or gussets for lateral rigidity.
- Fit adjustable rubber feet or floor anchors for leveling.
Pipe Bench With Wooden Seat: Step‑by‑Step
Assembling a sturdy pipe bench with a wooden seat requires clear measurements, durable fittings, and a systematic build sequence.
Begin by measuring desired bench length and height, then cut pipes and purchase flanges, elbows, and nipples to match.
Assemble base frames on a flat surface, ensuring right angles and level feet.
Sand and finish the wooden seat board before attaching; predrill holes to prevent splitting.
Secure the seat to the top flanges with bolts or screws, checking alignment.
Tighten all fittings, verify stability, and add felt pads to protect flooring.
Inspect periodically and retighten as needed.
DI Pipe Pot Rack for Kitchen Storage
After constructing a bench from pipe and wood, attention can shift to overhead storage using the same fittings and finishes: a DIY pipe pot rack provides sturdy, industrial-style suspension for cookware while maximizing kitchen space.
Materials include black iron pipe, flanges, nipples and S-hooks; measurements depend on span and load.
Mounting to ceiling joists guarantees safety; finish with clear matte sealant to resist humidity.
Design options range from single-bar racks to rectangular grids.
Regular inspection of hardware prevents failure.
Installation suits those comfortable with basic drilling and plumbing-thread assembly, offering functional display and easy access to frequently used pots.
- Measure span and load
- Select pipe sizes and flanges
- Locate and mount to joists
- Add hooks and finish
Pet‑Friendly DI Pipe Bed Frame Plans
For pet owners who want durable, stylish sleeping space, a pipe bed frame offers a sturdy, customizable base that withstands active animals and heavy use.
Plans typically specify black steel pipe, flanges, tees and elbows to create low-profile platforms or raised frames with bolted joints.
Measurements adapt to pet size; add crossbars for mattress support and rubber feet to protect floors.
Finish with non-toxic paint and smooth fittings to prevent snags.
Optional features include removable cushions, integrated toy storage, and a detachable canopy for shade.
Assembly requires basic tools: wrench, tape measure, and occasional pipe thread sealant for snug connections.
Garage & Workshop DI Pipe Shelving Systems
In a garage or workshop, DIY pipe shelving systems provide a rugged, modular storage solution that balances load capacity with reconfigurability.
Pipes and flanges form frames that resist heavy tools and bins, while adjustable shelf heights accommodate varying item sizes.
Designs emphasize stability: anchored bases, cross-bracing, and proper flange-to-stud mounting.
Finishes can be raw steel for industrial appeal or powder-coated for corrosion resistance.
Assembly uses standard fittings and common hand tools, enabling upgrades or reconfiguration as needs change.
Safety considerations include weight distribution and secure wall anchoring to prevent tipping.
- Plan load ratings and shelf spacing
- Anchor flanges to studs
- Add cross-bracing for rigidity
- Use corrosion-resistant finishes
Combining DI Pipe With Wood or Glass: Joinery Tips
Combining pipe frames with wood or glass shelves blends industrial strength with refined surfaces, but it changes joinery and support requirements. Careful measurement, load rating, and edge protection prevent stress points. Wood requires flange spacing and anti-slip pads; glass needs rubber cushions, thicker panes, and bracket clamps. Pre-drill holes in wood; use stainless or brass hardware to avoid staining. Consider expansion gaps and periodic retightening. Test each shelf under expected weight. Visualize connections with this simple table:
| Material | Fastener | Note |
|---|---|---|
| Wood | Screws + flange | Pre-drill |
| Glass | Clamps + pads | Use tempered glass |
Budget Guide: Cost Per DI Pipe Project & Savings
Starting with a clear parts list and a simple sketch gives the most reliable estimate of a DI pipe project’s true cost. The writer outlines typical line items: pipes, fittings, flanges, finishes, and fasteners. Salvage and bulk-buying lower per-unit prices; specialty finishes raise costs. Small projects often cost under $30, shelving or lamp builds $30–$120, larger furniture $120–$400 depending on scale and hardware. Unexpected extras like replacement fittings or paint should be budgeted. For accurate savings, compare new vs. reclaimed materials and factor reuse of tools and leftover stock.
- Materials: pipes, fittings, flanges
- Hardware: screws, anchors, adhesives
- Finishes: paint, sealant, patina
- Contingency: spare parts, minor replacements
Time, Tools, and Difficulty Estimates Per Build
After estimating costs, the next practical step is to map time, required tools, and difficulty so builders can match projects to skill and schedule.
Each build should list realistic time ranges (prep, assembly, finish), a concise tools list (wrench sizes, pipe cutter, threading tools, drill, safety gear), and a difficulty rating (beginner, intermediate, advanced). Time estimates account for drying or curing where applicable.
Tool suggestions prioritize multipurpose items to reduce expense. Difficulty aligns with skills like accurate measuring, cutting, and threading.
Clear estimates enable informed planning, prevent overcommitment, and improve project success.
Common Mistakes With DI Pipe and Fixes
Why do so many DIY DI pipe projects run into avoidable problems? Common errors stem from measurement, fitting, surface prep, and load assumptions. Clear fixes improve outcomes.
- Incorrect measurements — Re-measure twice, mark cuts, test-assemble before final joining.
- Poor thread engagement — Clean threads, use proper thread sealant or tape, tighten to spec.
- Inadequate surface prep — Deburr edges, remove oil/scale, sand for paint adhesion when needed.
- Overloading designs — Calculate load, add braces or thicker pipe, distribute weight to studs or anchors.
Caring for Finished DI Pipe Projects to Prevent Rust
Mistakes in measurement, joining, and load planning may leave DI pipe projects structurally sound but finish-vulnerable; protecting completed work from corrosion preserves both appearance and lifespan.
Regular inspection for scratches, moisture pooling, and surface rust is essential. Clean gently with a soft brush and mild detergent, then dry thoroughly.
Apply a rust-inhibiting primer where bare metal shows, followed by durable topcoat or clear sealer formulated for metal. For high-humidity areas, use silicone or felt pads at contact points to prevent trapped moisture.
Recoat annually or after damage. Prompt treatment of any rust spots prevents spread and avoids costly restoration.
Where to Buy DI Pipe and Best Suppliers for DIYers
When sourcing DI (ductile iron) pipe for DIY projects, buyers should prioritize suppliers that offer clear specifications, traceability, and readily available fittings and couplings.
A concise supplier evaluation helps assure material quality, correct dimensions, and compatible accessories.
Local plumbing distributors, specialty metal suppliers, and online industrial marketplaces each offer advantages.
Pricing, minimum order quantities, delivery options, and return policies should be compared.
Certifications (ASTM, ISO) and material test reports increase confidence.
DIYers can also consult trade forums for vendor reputations.
- Local plumbing supply stores
- Industrial suppliers (e.g., Grainger)
- Specialty pipe manufacturers
- Online marketplaces with verified sellers
Conclusion
DIY pipe projects transform industrial materials into stylish, functional home decor while connecting makers to a hands-on tradition. Surprisingly, 60% of hobbyists report feeling more confident tackling other home repairs after completing a single pipe build — a reminder that these projects do more than decorate. With careful material choice, basic tools, and simple maintenance to prevent rust, DI pipe offers accessible, durable options for creative furniture and fixtures that age gracefully with use.