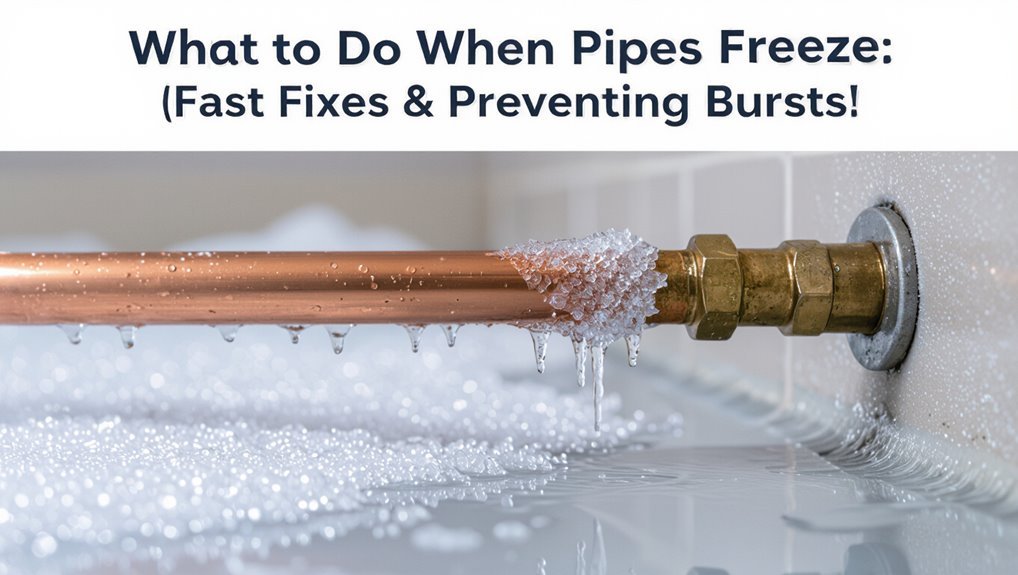
What to Do When Pipes Freeze: Fast Fixes & Preventing Bursts
When pipes freeze, it’s important to act quickly to prevent damage. First, locate the cold spot by checking for frost on the pipes. Open nearby faucets to relieve pressure and shut off the local or main valve if you notice any leaks or bulging. Use controlled heat sources like a hair dryer, warm towels, or heat tape to gently thaw the pipe, starting from the faucet and moving toward the frozen section. Avoid using open flames, and keep an eye out for new leaks or warped fittings. If you do encounter leaks, turn off the water supply and apply a temporary clamp, or contact a plumber for assistance. For more detailed steps and prevention tips, keep reading.
What This Guide Covers : Fast, Safe Thawing and Troubleshooting
This guide outlines clear, practical steps for quickly and safely thawing frozen pipes, diagnosing common causes of blockage and damage, and preventing recurrence through simple preparations and maintenance.
It summarizes safe thawing methods, identifies likely freeze points, and explains how to spot stress or breach indicators without detailing immediate emergency actions.
Guidance covers evaluating insulation, checking heat sources, and evaluating valve and fixture conditions.
It highlights routine maintenance: insulating vulnerable runs, sealing drafts, and keeping ambient temperatures adequate.
The section equips readers to recognize causes and adopt preventive habits, enabling informed decisions before initiating hands-on repair or calling a professional.
Immediate Steps After You Find a Frozen Pipe
On discovering a frozen pipe, the first task is to locate the exact freeze point to target thawing.
Thawing should proceed slowly and safely, using gentle heat sources and open faucets to relieve pressure.
Once flow returns, the pipe and surrounding areas should be inspected promptly for cracks, swelling, or leaks.
Locate The Freeze Point
After identifying a frozen section, the homeowner should pinpoint the exact freeze point before applying heat.
Inspect accessible pipe runs visually and by touch, moving outward from the visible ice until temperature changes. Look for bulging, frost, or discoloration and listen for hollow sounds when tapped.
Check nearby cold spots: exterior walls, unheated basements, crawlspaces, attics, and cabinet interiors.
Trace shutoff valves and fixtures to isolate affected segments. Note fittings, bends, and joints where freezing often begins.
Mark the location clearly and guarantee water supply is shut at the nearest valve to minimize pressure if thawing causes leakage.
Thaw Safely And Slowly
With the frozen section located and the supply shut off, begin thawing slowly and safely to reduce the risk of burst joints or sudden leaks.
Apply gradual heat to the affected pipe, working from the faucet toward the freeze to encourage melting toward the open outlet.
Monitor nearby fittings and walls for developing moisture. Stop if signs of stress or large leaks appear and keep the supply off until the pipe is verified intact.
Maintain ventilation and avoid open flames.
- Use a hair dryer or electric heat pad, not open flame
- Wrap pipe with warm towels
- Apply heat incrementally
- Keep the faucet slightly open
- Monitor for water flow restoration
Inspect For Damage
Once thawed and supply remains off, inspect the affected section promptly to assess damage and prevent hidden leaks.
The inspector checks joints, fittings, valves, and visible pipe runs for cracks, bulges, corrosion, or pinhole leaks. Flexible connections and traps merit close attention. Use a dry towel to blot damp areas and a flashlight to reveal hairline fractures.
If water is present, trace its origin and mark suspected failure points. Test nearby ceilings, walls, and floors for moisture intrusion.
If any structural or plumbing damage is found, contact a licensed plumber before restoring water to avoid worsening leaks or flooding.
Is the Pipe Frozen or Just Low Flow?
The section distinguishes between a truly frozen pipe and one suffering from low flow by outlining common signs of each.
It then advises simple diagnostic steps—feeling for cold spots, listening for irregular sounds, and isolating fixtures—to confirm the condition.
Finally, it offers quick checks for low-flow causes, such as closed valves or partial blockages, before recommending freeze-specific responses.
Signs Of A Freeze
How can one tell whether a pipe is frozen or simply experiencing low flow? Visual, tactile, and audible cues indicate freezing rather than normal restriction.
Discoloration, frost, or bulging on exposed pipe surfaces, unusually cold sections to the touch, and completely stopped fixtures despite other house water use are strong signs. Expansion-related joint stress or small leaks also point to ice. Rapid changes after brief warming attempts suggest thawing behavior.
- Frost or ice on pipe exterior
- Pipe feels icy cold along a section
- No water from multiple nearby fixtures
- Visible bulging or cracked insulation
- Sudden leaks near joints
Check For Low Flow
Several simple checks can distinguish a true freeze from routine low flow: measure flow at multiple fixtures, compare hot and cold lines, and note whether pressure drops after a few seconds of running water.
If other taps deliver normal volume, the issue is localized. Consistently low flow on both hot and cold suggests supply or pressure problems rather than an isolated freeze.
Intermittent sputtering often indicates air pockets or partial restriction, not a solid ice blockage. Also consider recent work or valve adjustments that could limit flow.
Identifying these patterns helps prioritize response: investigate supply and valves before assuming a frozen section.
Simple Diagnostic Steps
Why is the water barely trickling — frozen solid or simply low flow? A quick diagnostic narrows causes and guides response. Observe fixtures, feel exposed pipes, and compare indoor versus outdoor taps. Note sudden drops after cold snaps; listen for unusual sounds. Safety first: avoid open flames. If unsure, shut main and call a pro. Simple checks identify whether thawing, pressure issues, or clogs are needed.
- Run multiple fixtures to see if flow improves
- Inspect exposed pipes for frost or bulging
- Test outdoor spigot flow for systemic issues
- Check water heater output and pressure
- Monitor changes as temperature rises
Safety Checks Before You Touch or Heat a Pipe
Before applying heat or touching a frozen pipe, conduct basic safety checks to prevent burns, electrical hazards, and water damage.
Assess power sources: locate circuit breakers and consider shutting off electricity to nearby outlets or appliances to avoid shock if moisture appears.
Inspect surrounding materials for combustibles or insulation that could ignite when using a torch or heat gun.
Verify access to shutoff valves and confirm they operate without forcing.
Keep a bucket and towels ready for potential leaks.
Wear protective gloves and eye protection.
If pipes are metal and visibly damaged or if wiring is compromised, consult a professional before proceeding.
How to Locate the Exact Frozen Section Fast
How can the frozen section be found quickly and accurately? A homeowner or responder scans accessible runs, feeling for cold, frost, or bulging. Thermal clues and sound help narrow the spot without opening walls. Visual inspection plus targeted tools reduces damage and speeds repair.
- Feel pipes for abrupt temperature change or ice buildup.
- Use a non-contact infrared thermometer to compare temperatures along the line.
- Tap gently and listen for dull, solid sound indicating ice blockage.
- Inspect exposed fittings, exterior walls, basements, crawlspaces and unheated cabinets first.
- Trace pipe routing from fixtures toward the frozen area to pinpoint the section.
When to Turn Off Your Main Water (Now)
When should the main water supply be shut off during a frozen-pipe incident? The main should be closed immediately if pipes are bulging, frost is visible on exposed lines, multiple fixtures stop flowing, or a leak is detected. Shutting off limits flooding and damage until thawing or repairs occur. After closing, open a cold faucet to drain remaining pressure and call a plumber if unsure. Restore water only after inspections confirm integrity. The table below summarizes clear triggers and immediate actions.
| Trigger | Action | Timing |
|---|---|---|
| Bulging pipe | Shut off main | Now |
| Visible frost | Close valve | Immediately |
| No flow | Turn off | As soon as noticed |
| Active leak | Stop supply | Immediately |
| Multiple failures | Cut water | Now |
How to Relieve Pressure to Prevent a Burst
To reduce the risk of a burst when pipes begin to freeze, the occupant is advised to open faucets slightly to allow trapped water and pressure to escape.
If freezing is severe or imminent, the main valve should be shut off to stop additional water flow into the system.
These simple steps help relieve pressure and limit damage until repairs or thawing can occur.
Open Faucets Slightly
Opening a faucet slightly lets expanding ice-and-water move out of pipes, lowering internal pressure that otherwise can cause joints or pipe walls to rupture.
A small steady drip or trickle at affected fixtures provides a pressure relief path while temperatures rise. Choose taps nearest the freeze and those on exterior walls. Monitor flow; once steady water runs and ice thaws, keep faucets open briefly to clear remaining pockets. Avoid large openings that waste heat. Document which fixtures responded for future prevention and inform household members where drips are left to reduce accidental closure.
- Use a cold-tolerant sink or tub
- Start with cold tap
- Keep flow minimal
- Check other fixtures
- Note location and time
Shut Off Main Valve
After allowing nearby faucets to drip and relieve pressure, shutting off the main water valve further reduces the risk of a pipe burst by stopping incoming supply and preventing pressure build-up from melting ice.
Locating the valve quickly—typically near the water meter, basement, or where the service line enters—lets one isolate the home’s supply.
Turn the valve clockwise or use the lever perpendicular to the pipe; confirm shutoff by checking that indoor taps no longer flow.
Once closed, drain remaining lines by opening faucets.
Keep a wrench accessible and mark the valve for emergencies.
Contact a plumber before restoring full service.
Quick DIY Thawing: Apply Gentle Heat Safely
With a cautious approach centered on safety, apply gentle, consistent heat to a frozen section of pipe rather than rapid, high-temperature methods that can cause damage.
One key is to warm from the faucet toward the frozen area, reducing pressure and allowing melted ice to flow.
Monitor fittings for leaks and stop if metal warps or moisture appears.
Avoid open flames and electrical hazards; guarantee cords and devices stay dry.
If thawing stalls or noises suggest stress, contact a professional to prevent bursts.
- Warm evenly from the faucet outward
- Use low-heat, controllable sources
- Protect surrounding materials
- Monitor for leaks continually
- Call a plumber if unsure
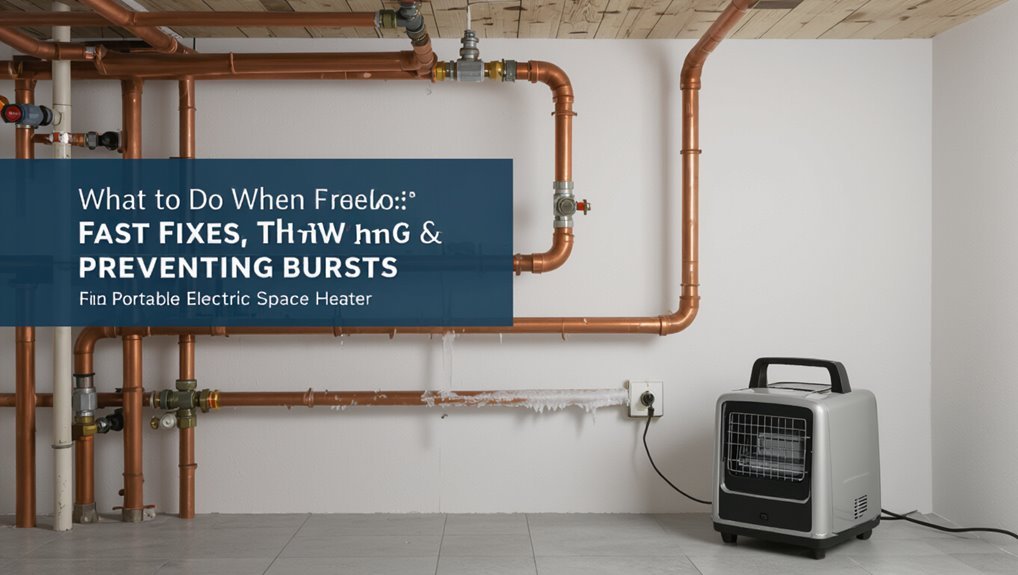
DIY Thawing Frozen Pipes With a Hair Dryer, Heat Gun, or Heater
When confronting a frozen pipe, using a hair dryer, heat gun, or portable space heater can be effective if applied carefully and progressively; each tool offers different heat output and control, so selection should match the pipe location, material, and surrounding risks.
A hair dryer provides low, focused heat for accessible indoor pipes and reduces burn risk.
A heat gun delivers stronger, concentrated warmth but requires distance, continuous motion, and caution to avoid overheating fittings or insulation.
A portable space heater warms enclosed areas gradually; position it safely, keep combustibles clear, and monitor progress.
Always shut off lines and open faucets to relieve pressure.
Thawing With Towels and Warm Water : Step-by-Step
The technician first locates the frozen section by checking exposed pipes and feeling for cold spots.
Next, warm towels soaked in hot (but not boiling) water are wrapped around the affected area and replaced as they cool to transfer heat gradually.
Throughout the process flow and pipe temperature are monitored until water runs freely and warmth is consistent.
Locate The Frozen Section
Beginning at the fixtures and moving outward, the person should inspect pipe runs for cold spots, frost, bulges, or condensation to pinpoint the frozen section.
They should listen for reduced flow, feel along accessible pipe lengths, and check exposed areas near exterior walls, crawlspaces, and basements.
Note any temperature differences and visible ice. Mark the location clearly before proceeding to thawing steps.
If multiple sections show signs, prioritize those nearest valves to limit pressure build-up.
If unsure or pipes appear damaged, stop and call a professional.
- Inspect visually for frost or bulging
- Feel for icy cold spots
- Check nearby fixtures for slow flow
- Trace along exterior walls and crawlspaces
- Mark suspected frozen area immediately
Apply Warm Towels
With a cloth soaked in warm (not scalding) water, one should wrap the suspected frozen pipe section tightly and re-soak the towel as it cools, maintaining steady, gentle heat until flow returns; this method concentrates warmth directly on the ice without shocking the pipe.
The process continues by replacing towels frequently, working outward from the frozen area toward unfrozen sections.
If accessible, apply heat to joints and fittings where ice often lodges.
Avoid open flames or excessive heat.
Protective gloves prevent burns.
Once thaw begins, clear any clogs and dry the pipe exterior to reduce refreezing risk before restoring normal use.
Monitor Flow And Heat
After towels are applied and heat is maintained on the frozen section, monitoring flow and temperature guides when thawing is successful and when to adjust the method.
The caregiver observes faucet trickle, checks towel warmth, and notes any creaks or leaks.
Temperature readings near the pipe help determine progress; sustained above freezing indicates thawing.
If flow resumes slowly, continue warming until steady.
If pressure surges or sounds suggest a rupture, stop and call a professional.
Record actions and times to evaluate effectiveness and prevent repeat freezes.
- Check faucet flow every 5–10 minutes
- Feel towels for consistent warmth
- Use a thermometer near the pipe
- Watch for unusual noises or leaks
- Stop and call a plumber if rupture suspected
Why You Should Never Use Open Flames on Pipes
Using an open flame to thaw frozen pipes can quickly escalate from a quick fix to a hazardous disaster: direct heat can weaken solder joints, melt plastic piping, ignite nearby insulation or framing, and create a serious risk of fire or explosion if trapped gas is present.
Professionals warn that flames concentrate heat unevenly, causing metal to warp and seals to fail. Nearby combustible materials and hidden voids amplify danger.
Safer alternatives—space heaters, hair dryers, warm towels, or professional thawing tools—apply controlled, even heat without open combustion. Emergency services and plumbers should be consulted if uncertainty or hazards exist.
Signs a Pipe Is About to Burst During Thawing
Visible cracks, bulging along a pipe, or wet spots appearing during thawing indicate immediate risk of failure.
A sudden surge in water flow or pressure when ice gives way often precedes a rupture.
Observers should shut off the main supply and inspect the affected section before restoring normal use.
Visible Cracks Or Bulging
Inspectors should watch for cracks or bulging on thawing pipes, as these are clear mechanical signs that internal pressure has compromised the pipe wall and a rupture may be imminent.
Visual inspection should be systematic, noting small hairline fractures, longitudinal splits, or localized swellings.
Immediate containment and professional assessment reduce damage risk.
Avoid applying excessive heat or pressure during evaluation.
- Note size, location, and direction of any crack
- Mark bulging areas and stop using nearby fixtures
- Photograph defects for records and insurance
- Isolate the section if possible using shutoff valves
- Call a licensed plumber for repair or replacement
Sudden Water Surge
How can homeowners tell if a thawing pipe is about to fail? Sudden increases in flow, hammering noises, and unexpected wet spots indicate imminent rupture. Rapid pressure spikes when ice melts stress weakened joints. Immediate steps include shutting the main, relieving faucets, and calling a plumber.
| Sign | What it means |
|---|---|
| Surge in flow | Sudden release from melt |
| Water hammer | Shock from pressure change |
| New leaks | Cracks forming |
| Discolored water | Interior corrosion dislodged |
| Dripping ceilings | Structural risk |
Recognizing these signs early prevents major damage and allows targeted emergency response.
Emergency Temporary Fixes for Small Leaks
When a small pipe leak is discovered during freezing conditions, quick temporary measures can limit water loss and property damage until a plumber arrives.
The resident should shut off the local or main valve, drain affected lines, and apply a temporary seal to slow seepage.
Insulation and targeted heat can prevent refreezing nearby.
Document the leak location and monitor for worsening.
Use gentle, safe methods; avoid risky repairs that could cause bursts.
- Turn off water and relieve pressure
- Wrap with rubber and hose clamp
- Apply epoxy or pipe repair tape
- Warm surrounding pipes gradually
- Place a drip pan and monitor
When to Call a Plumber : Red Flags
A homeowner’s quick fixes can buy time, but certain signs indicate professional intervention is required: rapidly worsening leaks, visible cracking or bulging of pipe sections, water pooling that can’t be contained, loss of heat coinciding with frozen plumbing, or recurring freezes and leaks despite temporary measures.
When these red flags appear, a plumber should be contacted promptly to prevent structural damage and mold. The following table summarizes clear triggers and immediate risks:
| Red Flag | Immediate Risk |
|---|---|
| Rapidly worsening leak | Flooding |
| Visible cracks/bulges | Impending rupture |
| Uncontainable pooling | Structural damage |
| Heat loss + frozen pipe | Widespread freezing |
| Repeated incidents | System failure |
What a Plumber Will Do That You Can’t
A professional plumber can locate hidden leaks using specialized cameras and pressure testing that most homeowners cannot perform.
They can cut out and repair burst sections with proper fittings and materials to restore system integrity.
They will also replace and upgrade damaged pipe insulation to prevent repeat freezing.
Locate Hidden Pipe Leaks
How can a hidden leak be found without tearing open walls? A plumber uses diagnostic tools and experience to pinpoint concealed leaks quickly and safely. Thermal imaging detects temperature differences from escaping water. Acoustic listening isolates running water inside structures. Pressure testing reveals unseen drops in system integrity. Moisture meters map damp zones within finishes. Trace dyes combined with controlled flushing show paths to the source. These techniques minimize demolition and speed decisions about targeted repairs or further investigation.
- Thermal imaging scans
- Acoustic leak detection
- Pressure decay tests
- Moisture mapping
- Dye tracing and flushing
Repair Burst Pipe Sections
Starts by isolating the damaged section and shutting off water to prevent further flooding, then assesses the break’s extent, pipe material, and surrounding damage to determine repair options a homeowner typically cannot execute safely.
A plumber cuts out compromised pipe, prepares clean ends, and installs a compatible replacement segment using soldered, welded, or solvent-weld joints as appropriate.
They pressure-test the repair, restore proper slopes, and verify fittings meet code. If corrosion or hidden damage exists, they expand the repair zone to prevent repeated failure.
Finally, they document work, advise on circulation or heat strategies, and dispose of damaged materials safely.
Replace Damaged Pipe Insulation
Recognizing that soaked, compressed, or missing insulation undermines freeze protection, the plumber will remove compromised material, inspect the pipe and surrounding supports for hidden moisture or mold, and select replacement insulation rated for the pipe type and location (foam, fiberglass with vapor barrier, or closed-cell elastomeric).
The technician measures, seals joints with appropriate tape or adhesive, restores vapor barriers where required, and secures insulation to prevent sagging. They document damaged areas and advise on environmental fixes like improved ventilation or heat tracing. Professional replacement guarantees proper R-value and long-term protection against freezing and corrosion.
- Measures and cuts insulation to fit
- Seals seams and terminations
- Replaces vapor barriers when needed
- Secures insulation to supports
- Reports moisture or mold issues
Why Frozen Pipes Burst
Water expands as it freezes, and that expansion exerts tremendous pressure on the interior walls of pipes; when pressure exceeds the pipe material’s strength or a weak point such as a joint, the pipe ruptures. Ice formation also blocks flow, creating localized pressure spikes upstream.
Metal pipes contract in cold, stressing fittings and seals; brittle plastics become less ductile, failing at lower loads. Repeated freeze–thaw cycles fatigue materials, widening microcracks into full fractures.
Pressure from trapped water seeks any release, often at welds, threads, or corrosion-weakened sections. Understanding these mechanical and material behaviors explains why preventive warming and pressure relief are critical.
How to Check for Hidden Pipe Damage After Thawing
After thawing, a visual inspection of all accessible pipe runs can reveal cracks, bulges, corrosion, or wet spots that indicate concealed damage.
The homeowner should also monitor water pressure and flow at multiple fixtures for signs of leaks or internal narrowing, noting any sudden drops or sputtering.
If abnormalities appear, prompt professional assessment is recommended to prevent later failure.
Inspect Visible Pipe Sections
With the ice gone and normal flow restored, the first step is a careful visual scan of all exposed pipe sections for dents, cracks, bulges, rust, or hairline splits that may signal hidden damage.
The inspector notes discoloration, moisture beads, new sagging, or loose fittings. Immediate marking of suspect spots and gentle tapping can reveal hollow sounds indicating thinning. Photographs document conditions for repair decisions. If corrosion or deformations appear, schedule professional assessment. Avoid turning fixtures back on full force until inspections conclude.
- Check joints and solder seams
- Look under insulation layers
- Note recent wet stains
- Tap for abnormal hollowness
- Photograph defects for records
Monitor Water Pressure
Beginning the supply and drain systems slowly allows detection of pressure anomalies that can indicate hidden thaw-related damage. The assessor watches gauges and fixture flow while opening valves incrementally, noting slow rises, drops, or surges that differ from baseline.
Sudden pressure loss or persistent low flow suggests leaks or ruptures; intermittent spikes may signal trapped air or partial blockages. Testing includes mains pressure reading, running multiple fixtures simultaneously, and inspecting the water meter for continuous movement when all fixtures are off.
Documented anomalies warrant shutting the system and calling a licensed plumber for targeted inspection and repair to prevent concealed failures.
Preventing Leaks After Thawing: What to Watch
Inspect surrounding plumbing and fittings immediately after thawing to catch small cracks or joint failures before they worsen. A careful visual and tactile check identifies dampness, hairline splits, loose fittings, and discolored insulation indicating slow leaks.
Pressure-test faucets briefly and watch meter movement when all fixtures are off. Note any corrosion or warped pipe sections needing replacement. If leaks appear, shut water, drain lines, and arrange prompt repair to prevent hidden damage.
- Check joints and soldered seams for weeping
- Look for puddles and damp drywall or flooring
- Monitor water meter for unexplained flow
- Feel along pipes for cool, wet spots
- Inspect appliance connections and valves
Insulation Options to Stop Pipes Freezing
To prevent pipes from freezing, selecting appropriate insulation is essential: materials and installation methods vary by location, pipe type, and exposure. Foam tube insulation fits common copper or PVC runs; choose thickness matching local cold severity.
Fiberglass wrap suits irregular shapes and outdoor valves but requires vapor barriers where condensation risks exist. Pipe sleeves and heat tape combine for vulnerable sections; follow manufacturer instructions and electrical codes.
Seal gaps where pipes enter walls or foundations with caulk or foam. Insulate exposed hot-water lines to reduce heat loss. Periodic inspection makes certain coatings remain intact and insulation stays dry and effective.
Best Ways to Heat and Protect Crawlspaces, Attics, and Garages
In cold climates and during sudden freezes, heating and protecting vulnerable spaces such as crawlspaces, attics, and garages reduces the risk of frozen pipes, structural damage, and insulation degradation; effective strategies balance targeted heat, adequate ventilation, and moisture control to maintain safe temperatures without wasting energy. A professional approach assesses insulation gaps, seals air leaks, and selects appropriate heat sources or thermostatic controls.
Moisture barriers and ventilation prevent condensation and rot. Access panels and pipe routing are evaluated to keep water lines within conditioned envelopes. Regular inspections and smart thermostats optimize safety and efficiency.
- Seal gaps and add insulation
- Install timed or thermostatic heaters
- Use vapor barriers in crawlspaces
- guarantee balanced attic ventilation
- Keep garage doors insulated and weatherstripped
Pipe Wrap, Foam, and Sleeve Comparisons
When comparing pipe wrap, foam insulation, and pre-formed sleeves, the decision centers on thermal performance, ease of installation, and the service environment: pipe wrap (foil-backed or fiberglass) is flexible and good for irregular runs or retrofit work; closed-cell foam sleeves offer excellent R-values and moisture resistance for exposed lines; and foam-in-place or molded sleeves provide a neater fit for straight runs and visible areas.
Choice depends on space, pipe material, and exposure to condensation. Wrap suits odd shapes and tight spots. Sleeves yield consistent coverage and appearance. Foam-in-place seals gaps but may complicate future access.
Budget and longevity also guide selection.
Using Heat Tape and Cable: When and How
Apply heat tape or self-regulating cable to vulnerable plumbing runs only after evaluating pipe material, exposure, and available insulation, since these systems provide active freeze protection rather than passive R-value.
The installer should select UL-listed products, follow manufacturer spacing and overlap rules, and avoid running tape over insulated jackets unless rated.
Power sources must be GFCI-protected; permanent installations should use hardwired or properly routed cords.
Monitor for wear and replace aged tape.
Regular inspection guarantees effectiveness and safety.
- Choose self-regulating cable for varying temperatures
- Confirm compatibility with metal or plastic pipes
- Keep cords dry and secured
- Follow mounting and overlap guidelines
- Test operation before freezing weather
Winterizing Outdoor Hoses, Faucets, and Spigots
For outdoor hoses, faucets, and spigots, proper winterizing prevents trapped water from freezing and rupturing lines by draining, disconnecting, and insulating exposed components. The homeowner disconnects hoses, drains backflow preventers, closes interior shutoffs, and insulates spigots with fitted covers. Leaving fittings clear of debris and checking for leaks reduces risk. Simple insulation and timely maintenance avert costly bursts and water waste.
| Item | Action | Timing |
|---|---|---|
| Hose | Disconnect & store | Before freeze |
| Spigot | Insulate cover | After drain |
| Shutoff | Close interior valve | Immediately |
| Check | Inspect seals | Annually |
| Drain | Remove standing water | Every fall |
When and How to Let Faucets Drip to Prevent Freezing
After draining and insulating outdoor fixtures, homeowners should also consider allowing selected indoor and outdoor faucets to drip during prolonged subfreezing periods.
A slow, steady drip keeps water moving, reducing pressure buildup and formation of ice pockets in vulnerable sections.
Target faucets on exterior walls, basements, and near crawl spaces. Open both hot and cold taps slightly on dual-handle fixtures. Monitor water bills and shut drips when temperatures rise above freezing.
- Choose faucets nearest exposed piping
- Maintain a pencil-sized steady drip
- Prefer night hours for increased protection
- Combine with pipe insulation where possible
- Check for leaks and repair promptly
Managing Indoor Temps and Ventilation to Protect Pipes
By keeping occupied rooms at a consistent temperature and ensuring controlled airflow, homeowners can greatly reduce the risk of frozen pipes. Maintain thermostat settings overnight and when away; avoid large drops that let indoor cold penetrate walls and cavities.
Open cabinet doors beneath sinks and near exterior walls to let warm air circulate around plumbing. Use interior doors strategically to permit or restrict airflow to vulnerable areas.
Seal drafts at windows, doors, and where pipes enter the home to prevent cold pockets. Monitor temperature in basements and crawlspaces; supplement briefly with safe, portable heat if readings approach freezing.
Long-Term Upgrades: Relocate, Insulate, or Add Pipe Heating
Why move a vulnerable run of piping when simpler fixes might suffice? Long-term upgrades target recurring freeze risk: relocating pipes away from exterior walls, adding continuous heat tracing, and installing high-quality insulation reduce incidents.
Decisions weigh accessibility, climate exposure, and lifespan gains. Professional assessment identifies freeze-prone segments and recommends materials and routing that minimize thermal bridging.
Implementations often require permits and skilled plumbing or electrical work. Maintenance plans include periodic inspection of heat tape and insulation integrity.
Homeowners benefit from reduced emergency repairs, improved reliability, and lower long-term risk when upgrades replace temporary band-aid measures.
- Relocate lines to interior walls or conditioned spaces
- Install self-regulating heat tape
- Upgrade to foam or pipe sleeve insulation
- Seal drafts around penetrations and cavities
- Schedule professional evaluation and installation
Estimating Repair vs. Replacement After a Burst (Cost Ranges)
Estimate costs quickly and realistically when a frozen pipe bursts to decide between localized repair and full replacement. A plumber assesses visible damage, water loss, pipe material, accessibility, and extent of corrosion; immediate stopgap repairs (clamps, epoxy, solder) typically cost $50–$300 for DIY or $150–$600 professionally.
Sectional replacement ranges $200–$1,000 depending on length and fittings.
Whole-run or system replacement jumps to $1,000–$5,000+ for residential work, higher for complex layouts or premium materials. Factor in water damage remediation, permits, and labor. Choose replacement when recurring failures, extensive corrosion, or repair costs approach replacement estimates.
Seasonal Maintenance Checklist to Prevent Frozen Pipes
As temperatures drop, a compact seasonal checklist helps homeowners systematically reduce the risk of frozen pipes. A focused routine identifies vulnerabilities and applies preventive measures before cold snaps. Inspect exposed and attic pipes, seal gaps where cold air enters, and drain outdoor lines.
Test thermostats and maintain consistent indoor temperatures. Prioritize quick fixes and schedule professional plumbing service for compromised insulation or recurring freezes.
- Insulate exposed pipes and add heat tape where recommended
- Seal foundation and exterior wall gaps near piping
- Drain and winterize outdoor faucets and irrigation
- Maintain 55–65°F indoor baseline during cold periods
- Schedule annual plumbing inspection
Conclusion
When a pipe freezes, prompt, calm action can prevent a small problem from becoming catastrophic. Following safety checks, locating the frozen section quickly, and using safe thawing methods limit damage; if a burst occurs, evaluating repair versus replacement helps plan next steps. Could a few preventative upgrades and a simple seasonal checklist save time, money, and stress next winter? With preparedness and routine maintenance, frozen-pipe crises become far less likely and easier to handle.