Why Your Water Pipes Make Noise €” Fix It Fast With These Tips
If your water pipes are making noise, it’s often due to issues like loose straps, trapped air, sudden valve closure (known as water hammer), worn cartridges or aerators, thermal expansion, or sediment buildup in heaters. To resolve rattles, homeowners can tighten supports, add foam or rubber padding, clean aerators, and open faucets to release trapped air. However, if you experience persistent banging, whistling, or signs of corrosion, you may need to install arrestors, regulate pressure, or seek professional help. Follow these steps to identify the source of the noise and try some simple fixes.
Quick Answer: How to Stop Noisy Water Pipes Now
Often a few simple checks and fixes will stop noisy water pipes quickly: inspect visible pipes for loose straps, tighten or replace worn clips, and add foam pipe insulation to eliminate vibration.
If the noise occurs only when a faucet is turned off, install or replace a washer-style or ceramic disc cartridge to resolve water hammer, and if it persists, fit an air chamber or pressure-absorbing arrestor or have a plumber check system pressure and loose valves.
Further steps include securing piping clearances, replacing failing fasteners, cleaning aerators and faucet components, and checking expansion gaps near studs; persistent issues warrant professional assessment.
How to Identify Where the Noise Is Coming From
The first step is to identify the loudest fixture when the noise occurs, noting whether it comes from a tap, shower, or appliance.
From that source, one can trace the visible pipe runs to pinpoint sections that echo or vibrate.
Finally, inspect nearby valves and pipe fasteners for looseness or wear, as these often create or amplify the sound.
Locate The Loudest Fixture
Where is the noise loudest? One methodical approach is to listen at each fixture while someone briefly opens and closes taps or runs appliances.
Note intensity, pitch, and whether sound occurs during hot, cold, or both. Use a simple cardboard tube or stethoscope app to focus hearing on pipes, valves, and fittings.
Record locations and conditions that produce the worst noise.
Pay attention to nearby appliances—water heaters, dishwashers, washing machines—and fixtures above or below the suspected area.
Prioritize fixtures with consistent, repeatable loudness for inspection or when consulting a plumber, as they indicate the primary source.
Trace Pipe Runs
By following the pipe paths from the noisy fixture outward, a clear map of where vibrations travel can be formed. The observer notes pipe materials, junctions, and changes in direction, listening at intervals and tapping gently to pinpoint resonant spots. Visible clamps, wall penetrations, and attic runs are inspected for sound transfer. Temperature and flow conditions are recorded to reproduce the noise.
- Listen at joints and along straight runs for amplified vibration.
- Trace where pipes contact framing or pass through cavities.
- Mark suspected hotspots and observe during varied water use.
Document findings before planning targeted repairs or isolation.
Check Valve And Fasteners
Frequently, noisy pipes trace back to loose valves or missing fasteners that allow movement and vibration to amplify through the plumbing network.
Inspect shutoff and check valves for play; body wobble or loose packing nuts often signals internal wear or loose mounting. Tap along runs while water flows to localize resonance, noting louder responses near joints and valve locations.
Secure straps, hangers, and anchor points reduce vibration transfer; replace missing or corroded fasteners. If noise persists after tightening, consider worn check valve internals or water hammer arrestors.
Record locations and conditions before repair or when consulting a plumber.
Simple Checks You Can Do Right Now (No Tools)
Before touching anything, a homeowner can quickly narrow down the source of noisy pipes with a few simple observations. Listen at fixtures while someone runs water: identify whether noise follows a specific tap, the shower, or occurs when appliances cycle.
Note when sounds happen — only during hot water use, intermittently, or constantly. Check visible pipe runs in basements, crawlspaces, and under sinks for movement or contact with framing.
- Observe timing: immediate when valves open, delayed after use, or random.
- Watch for vibration against joists or cabinetry.
- Compare cold vs hot water sources to isolate heater-related issues.
Clicking or Ticking Sounds: Pipe Straps vs Thermal Expansion
Often a ticking or clicking noise in plumbing signals either pipes shifting against their fastenings or metal expanding and contracting with temperature changes. The sound often comes in short, rhythmic clicks as hot water moves or when straps allow slight movement. Inspection reveals loose straps, worn insulation, or tightly clamped pipes that need cushioning. Thermal expansion produces predictable sequences during long hot-water draws, especially on rigid runs.
| Cause | Character |
|---|---|
| Loose strap | Intermittent click |
| Tight metal clamp | Sharp tick |
| Expansion on heat | Repeating sequence |
| Insulation worn | Amplified noise |
Banging or Hammering: Is It Water Hammer or Loose Fittings?
Banging or hammering noises in plumbing usually stem from either water hammer—sudden hydraulic shock when a valve closes quickly—or from loose fittings and straps that allow pipes to strike framing.
The article distinguishes the two by sound pattern and timing: water hammer produces sharp, repeated bangs immediately after a tap or appliance shuts off; loose fittings create more random thuds as pressure or thermal movement shifts pipes.
Remedies differ: arrestors or pressure adjustments for hydraulic shock; secure clamps, padding, or re-routing for mechanical contact.
Consider inspection order and safety: isolate valves, drain lines, and test after each corrective step.
- Listen for timing and repetition
- Check supports and strap tightness
- Test with valve cycling
Whistling or Squealing Taps: Worn Valves and Aerators
After addressing loud bangs and loose fittings, attention should turn to higher-pitched noises at fixtures: whistling or squealing taps usually indicate worn valve seats, cartridges, or clogged aerators that force water through narrow openings.
These sounds happen when water accelerates through constricted paths, vibrating metal or plastic components.
Diagnosis starts with isolating the fixture, testing hot and cold separately, then removing and inspecting the aerator for debris.
If cleaning stops the noise, reinstall; if not, inspect the cartridge or valve seat for wear.
Replacing worn parts or installing new aerators designed to reduce flow turbulence typically restores quiet operation.
Rattling or Vibration: Pump, Washer, or Loose Piping?
Check the pump, washer, and pipe supports when a persistent rattling or vibration appears in the plumbing system: the sound can come from a failing pump motor, a worn washing machine hose or pump, or loose straps and brackets that let pipes vibrate against framing.
A methodical inspection isolates the source: listen near appliances, feel for vibration along runs, and tap mounts for looseness.
Tightening or replacing worn mounts and hoses often stops the noise; pump bearings or internal faults require service or replacement.
Prevent recurrence by securing runs and adding cushioning where metal meets structure.
- Listen at appliances and along pipe runs
- Tighten or replace loose supports
- Replace worn hoses or service faulty pumps
Signs of Corrosion, Sediment, or Scale in Pipes
Noticing persistent discoloration, reduced flow, or rough-tasting water can indicate corrosion, sediment buildup, or mineral scale inside pipes.
Other signs include brown or rusty stains on fixtures, frequent clogs, uneven water pressure between outlets, and metallic odors.
Scale often forms white or chalky deposits on aerators and inside kettles; corrosion may cause flaking and pitting visible where pipes are exposed.
Sediment settles in low spots and around valves, increasing noise as water moves.
These conditions accelerate wear, encourage leaks, and impair appliances.
Professional inspection identifies the material and extent, guiding targeted remediation or replacement.
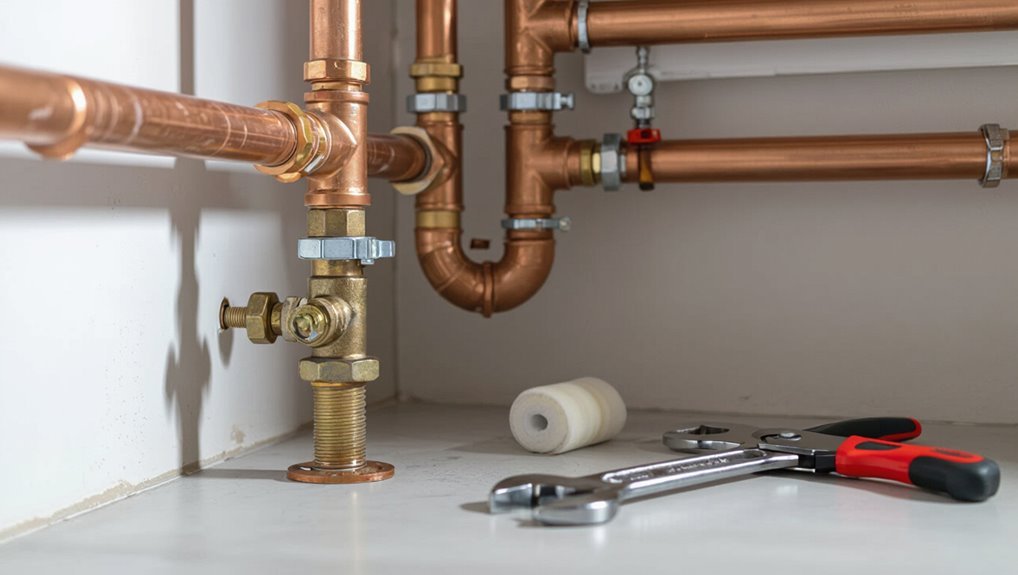
Quick DIY Fixes for Loose Straps and Supports
Loose or missing pipe straps often cause rattling and should be tightened promptly.
Cushioning pads can be added between straps and pipe to absorb vibration.
Worn supports that no longer hold snugly ought to be replaced to prevent recurring noise.
Tighten Loose Pipe Straps
When pipes rattle against framing or hangers, tightening the straps that secure them often stops the noise immediately.
A visual inspection locates loose or corroded straps; a wrench or screwdriver tightens metal bands, while proper clamps replace damaged hardware. Care is taken not to overtighten and deform pipes.
After securing, operate fixtures to confirm silence and check for leaks.
- Inspect all accessible straps along the noisy run.
- Use matching hardware type and size for replacement.
- Tighten incrementally, testing movement and alignment.
If noise persists after tightening, the cause likely involves supports or padding addressed elsewhere.
Add Cushioning Pads
If tightening straps stops some movement but leaves metal-on-wood or metal-on-metal contact, adding cushioning pads around pipes and under supports often eliminates remaining rattles and vibration. Pads of rubber, felt, or foam are cut to fit pipe diameters, slipped between pipe and strap, and secured with zip ties or adhesive. They dampen impact and reduce transmitted vibration without replacing hardware. Install where straps contact surfaces and where pipes cross framing. Check for moisture or oil that shortens pad life. Periodic inspection guarantees continued performance.
| Material | Benefit |
|---|---|
| Rubber | Durable dampening |
| Felt | Quiet, thin |
| Foam | Lightweight insulation |
| Tape | Conforms tightly |
Replace Worn Supports
Several common noises trace back to worn or damaged pipe supports that no longer hold plumbing securely. Replacing loose straps and broken hangers restores alignment and prevents vibration against framing. Inspection should identify cracked plastic clamps, stretched metal straps, or missing insulation. Simple replacements require basic tools and matching support sizes to pipe diameter.
- Swap brittle plastic clips for metal or cushioned supports rated for the pipe material.
- Tighten or replace corroded metal straps; make sure screws anchor to solid structure.
- Add rubber sleeves or foam between support and pipe to dampen remaining vibration.
Timely replacement reduces noise and prevents long-term wear.
Reduce Water Hammer With Inexpensive Devices
Often, homeowners can curb water hammer quickly and affordably by installing simple devices like air chambers, arrestors, or pressure-reducing valves that absorb or slow the sudden surge of water.
These items fit near fixtures or at strategic points along supply lines; arrestors use trapped air or springs to cushion shocks, while pressure-reducing valves lower system pressure to minimize force.
Installation is straightforward for basic models and often inexpensive.
Proper placement matters: close to the problem fixture or at branch inlets.
Regular inspection guarantees air chambers remain effective.
When DIY limits are reached, consult a plumber for correct sizing and mounting.
Replace or Service Valves to Stop Whistles and Squeals
Why does a faucet or shutoff suddenly emit a high-pitched whistle or persistent squeal? Aging or worn valve components often vibrate as water forces a narrow passage, producing noise. Replacing cartridges, washers, or entire valves often cures the problem faster than DIY tinkering.
- Inspect valve internals for mineral buildup, damaged seats, or loose packing.
- Replace cartridge or washer assemblies with correct OEM parts to restore smooth flow.
- Consider upgrading to pressure-balanced or ceramic-sealed valves to resist future squeals.
Service should isolate water, follow manufacturer steps, or call a plumber for complex or multi-valve systems.
When and How to Flush Pipes to Remove Sediment
Replacing faulty valves can stop whistles, but noise and flow issues also arise from mineral and sediment buildup inside the pipes themselves.
Homeowners should flush lines when reduced pressure, discolored water, or banging noises suggest deposits.
Begin by shutting off the main, opening highest and lowest faucets to create flow, then run water until clear.
For hot-water sediment, flush the water heater per manufacturer guidance before pipe flushing.
Collect samples to check for grit.
If heavy buildup persists, consult a plumber for power-flushing or hydro-jetting.
Regularly scheduled flushing—annually in hard-water areas—prevents recurrence and preserves flow.
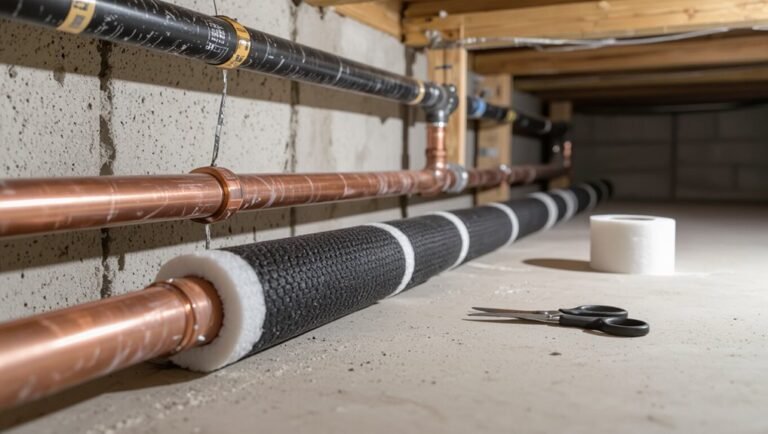
Insulate Pipes to Stop Expansion and Rattle
When pipes expand and contract with temperature changes, friction against framing and hangers can produce rattles, ticking, or loud knocks; insulating them cushions movement and absorbs vibration. The homeowner or technician selects foam sleeve or rubber wrap sized for pipe diameter, cutting to fit and sealing seams with tape or clamps.
Insulation also reduces heat loss on hot lines and prevents condensation on cold lines. Properly supported insulated runs reduce noise transfer into walls and ceilings. Consider flexible foam for retrofit and thicker rubber for high-contact areas.
- Choose material by temperature and location
- Secure with nonmetallic fasteners
- Seal all seams and joints
Boiler, Pump, and Water-Heater Noises That Mimic Pipe Noise
Not caused by piping alone, many familiar clanks, hums, and gurgles originate in boilers, circulator pumps, and water heaters and can be mistaken for pipe noise.
Boilers may produce ticking from thermal expansion, kettling from mineral buildup, or knocking from steam traps.
Circulator pumps often emit low-frequency hums or ticking when bearings wear or mounts loosen; air in the pump causes vibration and noise.
Water heaters can rumble due to sediment collecting on the tank bottom, producing popping as pockets of steam form and collapse.
Diagnosing the true source prevents unnecessary pipe work; routine servicing, flushing, and proper mounting usually resolve these issues.
Faucet Upgrades That Actually Stop the Noise
How can a simple faucet swap quiet common plumbing noises? Replacing old faucets can eliminate hammering, whistling, and vibration caused by worn valves or loose aerators. Upgrading targets the noise source without invasive plumbing work.
- Cartridge or ceramic-disk faucets reduce internal movement and seal reliably, preventing water hammer and drips.
- Pressure-compensating aerators smooth turbulent flow and cut high-pitched whistles from high velocity.
- Single-handle mixers with integrated flow controls stabilize pressure changes that create knocking.
A focused faucet upgrade often yields immediate, durable noise reduction while improving performance and conserving water, making it a practical first step.
Cost vs Benefit: DIY, Small Repairs, or Hire a Plumber
A homeowner weighing whether to tackle noisy pipes should compare the complexity of the problem and the cost of parts against potential risks and time investment.
Simple fixes like replacing a washer or tightening a loose bracket can be economical DIY projects, while persistent knocking, high-pressure issues, or inaccessible piping usually warrant a professional.
Prioritizing safety, warranty concerns, and long-term reliability helps determine when to call a plumber.
When To DIY
When should a homeowner tackle noisy pipes themselves and when is it wiser to call a professional? A practical assessment favors DIY for simple, low-risk fixes: loose straps, isolated vibrations, or aerator cleaning. Time, skill, and tool availability shape the decision. If uncertainty about system layout or potential water damage exists, stop and reassess.
- Easy wins: tighten clamps, add insulation, replace faucet aerators.
- Time vs cost: small jobs under an hour often justify DIY; complex diagnostics may not.
- Safety and warranty: avoid work that risks propane, gas, or voiding warranties.
Choose conservatively; prioritize preventing escalation.
When To Hire
Why should a homeowner weigh the cost of time and tools against the potential scope of the problem? The decision to hire hinges on skill, risk, and value.
For minor noise sources—loose straps, small air chambers, or faucet washers—DIY saves money. For persistent banging, vibration throughout the system, corroded pipes, or issues near mains and appliances, professional assessment prevents misdiagnosis and costly damage.
Consider warranty, insurance, and local code requirements; plumbers bring diagnostic tools and experience. Obtain estimates, compare labor versus parts and potential repair escalation, and choose hiring when complexity, safety, or long-term reliability outweigh immediate savings.
How to Describe the Problem So a Plumber Diagnoses Faster
For a plumber to diagnose noisy pipes quickly, the homeowner should provide a concise account of what is heard, where it occurs, when it happens, and what actions or fixtures coincide with the noise.
The report should identify sound type (bang, rattle, hum), exact locations (kitchen sink, second-floor wall), timing (only when taps run, after pump starts, intermittently at night) and any recent changes (new appliances, cold weather, work).
Include relevant system details such as water pressure changes or shared walls.
Helpful notes can be:
- Short audio/video clip of the noise
- Sequence of actions that trigger it
- Relevant fixture ages and recent work
Safety Checks Before You Start Any Pipe Repair
After giving a plumber clear details about a noisy pipe, the homeowner should perform basic safety checks before attempting any repairs themselves.
Verify water is shut off at the main valve and test faucets to confirm no flow.
Turn off electricity to nearby appliances and outlets when working near wet areas.
Wear gloves, eye protection, and non-slip footwear.
Inspect for visible leaks, corrosion, or mold that indicate professional help is needed.
Make certain adequate lighting and ventilation in workspaces.
Keep a charged phone nearby and clear an exit path.
If unsure at any step, stop and call a licensed plumber.
Preventive Maintenance to Keep Pipes Quiet Long-Term
Regularly scheduled inspections and simple upkeep greatly reduce the chance of recurring pipe noise. A routine approach identifies loose fittings, worn valves, and pressure issues before they escalate. Homeowners or maintenance staff should follow a concise plan addressing common sources and documenting findings for trends.
- Check and tighten mounts, straps, and hangers every six months.
- Test and adjust water pressure; install a pressure regulator if fluctuations occur.
- Replace aging washers, valves, and corroded sections proactively.
Consistent attention prevents hammering, whistling, and vibrations, extending system life and avoiding costly emergency repairs while preserving quiet operation.
Conclusion
In short, homeowners are advised to act promptly: a stitch in time saves nine. Identifying whether noise stems from loose straps, thermal expansion, or water hammer guides the fix—simple checks first, small repairs next, and a plumber when needed. Safety precautions and clear descriptions speed diagnosis, while routine maintenance prevents repeat disturbances. With calm, steady attention to these steps, noisy pipes can be tamed before they escalate into costly, disruptive problems.