How to Unfreeze Toilet Pipes Fast: Simple DIY Fixes & Tips
If you need to unfreeze toilet pipes quickly, begin by shutting off the supply line and checking for any flow. Next, open the toilet tank and a nearby faucet to relieve pressure. Apply gentle heat from the valve towards the blockage using a hair dryer, warm towels, or lukewarm water from the tank. Avoid open flames and keep the heat moving to prevent damage. Protect your floors and electrical outlets, and monitor for leaks as pressure returns. Stop heating if you notice any softening or bulging of plastic. Follow these steps for a complete thaw.
Primary Search Intent : Fast How‑To for Frozen Toilet Pipes
Begin by locating the frozen section—usually the supply line behind or beneath the toilet—and shut off the water at the shutoff valve to prevent pressure buildup.
The primary intent is a rapid, safe thaw: apply targeted heat (hair dryer, heat gun on low, or warm towels) to the exposed pipe, avoid open flames, and work progressively from the faucet toward the blockage.
Insulate nearby cold areas afterward.
If the pipe is inaccessible, warm the room and containerize warm water near the fixture.
If thawing fails within a short, reasonable time or damage appears, seek a plumber to prevent leaks and further freeze-related failures.
How to Tell If the Toilet Is Frozen or Just Clogged
When confronted with a non‑flushing toilet, distinguishing a freeze from a clog hinges on a few clear signs: a frozen supply line typically prevents any water refill after flushing and often shows low or no flow at the shutoff valve, while a clog allows water movement in the tank but blocks passage into the bowl, producing slow drains, gurgling, or bubbling.
Check tank water level, listen for filling, and test the shutoff. External pipes may feel cold or rigid. If uncertain, measure flow from the shutoff and use a plunger cautiously.
- Panic fades when simple checks confirm the issue.
- Relief arrives with a clear diagnosis.
- Confidence grows after successful basic tests.
Why Frozen Toilet Pipes Threaten Your Home
After confirming whether a toilet is frozen or merely clogged, homeowners should consider the larger risks frozen toilet pipes pose to the property: ice expands inside pipes, creating pressure that can split fittings or burst sections of supply and waste lines, leading to hidden leaks, water damage to walls and floors, and costly emergency repairs.
Frozen pipes can compromise seals and joints, promote mold from trapped moisture, and impair toilet function until thawed.
Repeated freeze–thaw cycles weaken materials, increasing long-term failure risk.
Early detection and prompt, appropriate response reduce structural damage, health hazards, and the need for extensive, expensive remediation.
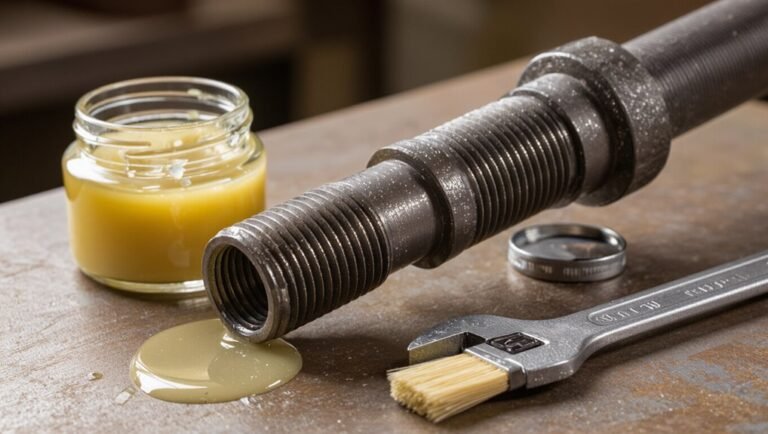
Tools You Need to Unfreeze Toilet Pipes
The section outlines the basic hand tools—adjustable wrenches, pliers, and pipe tape—needed to access and protect toilet plumbing during thawing.
It then summarizes heat options such as hair dryers, heat guns, and portable space heaters, with notes on safe use.
The goal is to match the tool selection to the specific pipe location and material.
Essential Hand Tools
A handful of reliable hand tools can make the difference between a quick fix and a costly emergency when toilet pipes freeze.
A compact kit reduces fumbling and prevents further damage.
Essential items include a basin wrench for hard-to-reach fittings, adjustable pliers for gripping and twisting frozen connectors, and a pipe cutter for emergency section replacement if corrosion or cracking appears.
- Basin wrench — access and loosen confined nuts.
- Adjustable pliers — firm, controlled grip to avoid stripping.
- Pipe cutter — clean, safe cuts for quick repairs.
Keep tools organized, dry, and within reach to act confidently.
Heat Sources Overview
When thawing frozen toilet pipes, selecting an appropriate heat source is essential to speed thawing while minimizing risk to plumbing and surrounding materials. The section outlines safe, effective options: gentle radiant heat, portable electric heaters, and controlled hot water application. Each method suits different pipe locations and materials; avoid open flames and high-temperature direct heat on PVC. Monitor temperature, maintain ventilation, and protect nearby finishes. Use thermostat-controlled devices when possible and keep electrical gear away from water. Below is a quick comparison to choose the right tool for common scenarios.
| Heat Type | Best For | Risk Level |
|---|---|---|
| Radiant heater | Enclosed spaces | Low |
| Electric space heater | Basements | Medium |
| Hot towels/water | Accessible pipes | Low |
Safety Checklist Before You Start Thawing
Before attempting to thaw frozen toilet pipes, make sure safety measures are in order: shut off water to the toilet, unplug or switch off nearby electrical devices, ventilate the area if using heat sources, and have a fire extinguisher and insulated gloves on hand.
The person assesses risks calmly, confirming stable footing, clear egress, and dry surroundings to prevent slips and shocks.
Nearby combustibles are removed.
A basic first-aid kit is accessible.
Emergency contacts are noted.
The checklist reassures and focuses action.
- Check footing and lighting
- Remove flammables
- Keep emergency numbers visible
How to Shut Off Toilet Water Quickly
Locate and close the toilet’s shut-off valve to stop water flow immediately: the valve is typically on the wall or floor behind the toilet and turns clockwise to shut.
Confirm full closure by gently attempting to flush; the tank should not refill.
If the valve is stiff, use an adjustable wrench with careful pressure to avoid damage.
For inaccessible or broken valves, turn off the home’s main water supply and notify a professional if unable to control flow.
After stopping water, open the tank and bowl to relieve pressure and drain remaining water.
Label and note valve condition for future maintenance.
How to Protect Floors and Fixtures While Thawing
With a wet towel or plastic sheeting placed around the toilet base and beneath nearby fixtures, protect flooring and finishes from drip damage and warmer runoff during thawing.
Place a shallow pan to catch water and change towels as they saturate.
Use waterproof tape to secure barriers without leaving residue.
Elevate nearby rugs and move toiletries away from splash zones.
Limit heat application areas to avoid warping finishes; monitor temperature and humidity.
Keep a mop and bucket ready for sudden leaks.
Follow these simple steps to minimize damage and anxiety while thawing frozen toilet pipes.
- Wrap
- Catch
- Monitor
How to Inspect Accessible Pipes Behind the Toilet
Begin by visually scanning the exposed piping behind the toilet for obvious signs of damage—corrosion, pinholes, frost buildup, or moisture stains—that indicate where the freeze has affected the system. Check fittings, shutoff valve, and flex lines for stiffness or cracking. Gently tap fittings to sense hollowness or ice; note cold spots. Confirm accessible insulation is intact and mark areas needing repair. If leaks or severe corrosion appear, plan for replacement rather than thawing. Record findings and take photos before work begins to guide repairs or a plumber’s assessment.
| Item inspected | What to look for |
|---|---|
| Pipe body | Corrosion, dents |
| Fittings | Cracks, stiffness |
| Valve | Leaks, hardness |
| Insulation | Tears, compression |
| Surroundings | Moisture stains, mold |
How to Thaw a Frozen Toilet Supply Line With a Hair Dryer
Often a hair dryer offers a quick, controlled way to thaw a frozen toilet supply line without opening walls or using open flames.
A technician or homeowner should plug the dryer into a safe outlet, set it to low or medium, and warm the exposed line gradually, keeping the nozzle moving to prevent overheating.
If accessible, wrapping a towel around the line while applying heat helps retain warmth.
Stop immediately if plastic softens or fittings feel excessively hot.
If thawing doesn’t progress in 15–20 minutes, call a plumber to avoid causing damage.
- Relief
- Urgency
- Caution
How to Use a Heat Gun Safely on Toilet Pipes
A heat gun can speed thawing but requires strict precautions to prevent burns, pipe damage, or fire.
Proper basic safety—using protective gloves, maintaining distance, and keeping the gun moving—reduces risks.
Safe heating techniques include starting on low heat, aiming at a broad area rather than a single spot, and monitoring pipe temperature continuously.
Heat Gun Safety Basics
When using a heat gun on frozen toilet pipes, prioritize controlling temperature, distance, and exposure time to prevent pipe damage, burns, or fire hazards. Safety gear should include heat-resistant gloves, eye protection, and a face shield.
Inspect the workspace: remove flammable materials, guarantee good ventilation, and have a fire extinguisher within reach. Maintain steady movement; never linger on one spot.
Monitor pipe materials—PVC and plastic require much lower heat than metal. Keep bystanders, pets, and children away. If uncertain, stop and consult a professional. Respect the tool’s power to avoid costly mistakes or injury.
- Protect.
- Inspect.
- Retreat.
Safe Heating Techniques
Regularly applied with controlled motion and measured heat settings, safe heating techniques focus on gradually warming frozen toilet pipes to avoid thermal shock or material damage.
The operator uses a heat gun at low to medium settings, maintaining at least 6–12 inches distance and constant sweeping strokes.
Plastic and PVC require lower temperatures; metal tolerates more heat but still benefits from slow application.
Insulation, towels, and a moisture barrier protect surrounding fixtures and finishes.
Monitor pipe temperature with an IR thermometer if available, and stop immediately if paint blisters, plastic softens, or unusual odors appear.
Always follow manufacturer and local safety guidelines.
How to Thaw Pipes With an Electric Space Heater
Position an electric space heater near the frozen section of pipe and make sure the cord and heater base stay dry and clear of combustible materials. The heater should be placed several feet away, directed at the pipe without touching insulation or fittings. Monitor temperature and never leave the heater unattended; use a thermostat or timer if available. Keep vents unobstructed and ensure room ventilation. If thawing progresses, slowly open faucets to relieve pressure and check for leaks. Stop heating immediately if odor, smoke, or unusual noise occurs and call a professional.
- Relief
- Caution
- Control
How to Apply Hot Towels to Thaw Exposed Pipes
The section explains how to prepare towels—using clean, absorbent fabrics warmed in hot water and wrung to a safe temperature—before use.
It then outlines a safe application technique: wrap towels snugly around exposed pipe sections, replace them frequently to maintain heat, and avoid direct contact with electrical components or damaged insulation.
Emphasis is placed on monitoring for signs of leaks and stopping immediately if pipes show cracks or excessive pressure.
Preparing Towels Properly
Before applying heat, a person should soak thick cotton towels in hot (not boiling) water, wring them until damp but not dripping, and fold them to cover the exposed pipe evenly; this guarantees steady conduction without pooling water that could refreeze or drip onto fittings.
The person arranges towels to maximize contact, replacing them as they cool.
Care is taken to avoid synthetic fabrics that trap moisture.
Three quick reminders to reinforce proper preparation:
- Use thick cotton for consistent warmth.
- Wring thoroughly to prevent dripping and damage.
- Fold to wrap snugly, ensuring full surface contact.
Safe Application Technique
When ready, one person applies the damp hot towels directly to the exposed pipe in successive sections, maintaining firm contact and replacing cooling towels promptly to sustain steady heat transfer. Gloves protect hands; avoid burns by testing towel temperature. Work from warmer to colder zones toward the frozen section to encourage flow. Monitor pipe joints for leaks and stop if swelling occurs. Keep towels damp, reheat as needed; never use open flames. Maintain ventilation and have a partner ready for assistance or to call a plumber if progress stalls.
| Step | Action | Safety Note |
|---|---|---|
| 1 | Apply towel | Wear gloves |
| 2 | Rotate sections | Check temperature |
| 3 | Reheat towels | Avoid flames |
| 4 | Inspect joints | Stop if leaking |
How to Use Warm Toilet Tank Water to Help Thaw a Line
Using warm water from a toilet tank can be a quick, targeted method to melt ice in a nearby supply line without introducing boiling water that might damage fixtures.
The tank’s lukewarm water is safer; drain a little into a container, then pour slowly along exposed pipe sections or into the shutoff valve area.
Repeat as needed, allowing heat to conduct and monitoring for leaks.
Avoid forceful disassembly.
If warming fails after several attempts or pipes remain rigid, call a plumber.
Emotional reassurance: the method is gentle, controlled, and often immediately satisfying.
- Relief
- Confidence
- Caution
How to Thaw a Frozen Toilet Fill Valve
The technician first locates the frozen fill valve by inspecting the tank exterior, fittings, and supply line for ice or stiffness.
Controlled heat is then applied with a hair dryer or warm compress, focusing on metal and plastic parts while avoiding open flames and excess water.
After restoring movement, the valve is tested for proper refill and measures such as insulation or a heat tape are recommended to prevent recurrence.
Locate The Frozen Valve
Locate the shutoff and fill valve by tracing the water supply line from the toilet tank to where it connects to the wall or floor; the frozen component is usually at that connection or within the visible section of the line. The reader should inspect for frost, bulging, or ice accumulation, noting whether the shutoff knob or compression fitting feels cold. If the line disappears into a wall, suspect the valve or nearby piping. Record observations and take photos for reference before attempting repairs or calling a professional.
- Fear — seeing ice where water should flow.
- Relief — finding a visible, accessible problem.
- Confidence — knowing the exact location.
Apply Controlled Heat
With steady care, controlled heat should be applied to the frozen fill valve to restore flow without causing damage. Use a hair dryer or warm towels rather than open flame; keep the device moving to prevent localized overheating.
Begin at the valve body, working outward along connected pipes until flexibility returns. Monitor temperature by touch—warm, not hot—and pause if plastic softens or seals seep.
Insulate or cover surrounding materials to protect finishes and electronics. If heat fails after a reasonable period or fittings show stress, stop and consult a plumber to avoid risking cracks, leaks, or compromised components.
Test And Prevent Recurrence
Once flow returns and fittings show no signs of stress, testing and preventive steps confirm the repair and reduce future freezes.
The operator gently cycles the fill valve, watches for steady refill, and inspects for leaks.
If performance is erratic, reheat slowly and tighten connections.
Then implement measures to prevent recurrence: insulating exposed pipes, improving room heat, and adding a slow trickle during extreme cold.
- Insulate: foam sleeves or heat tape to shield vulnerable runs.
- Heat: maintain ambient temperature above freezing where pipes run.
- Flow: permit minimal continuous trickle to deter re-freezing.
How to Thaw Pipes Under a Crawlspace Toilet
When pipes under a crawlspace toilet freeze, the homeowner should work methodically to restore flow without causing damage: begin by evaluating access and safety (shutting off water at the main and ensuring power to nearby electric heaters is safe), then open the toilet tank and any nearby faucets to relieve pressure and allow melted water to run, and finally apply gentle, even heat to the exposed pipe sections—using a space heater, warm air from a hair dryer, or heated cloths—while monitoring for leaks and avoiding open flames or excessive heat.
Inspect insulation, thaw from warmest to coldest end, and tighten joints if needed.
How to Thaw Toilet Pipes in an Unheated Garage Bathroom
In an unheated garage bathroom, frozen toilet supply lines require a calm, safety-first approach: shut off the main water, open the toilet tank and a nearby faucet to relieve pressure, and guarantee electrical heaters or hair dryers can be used without creating hazards.
The person assesses pipe exposure, wears insulated gloves, and brings portable heat safely: space heater at a distance, hair dryer on low, or warm towels.
Monitor for leaks as thawing proceeds. If thawing fails or pipes bulge, call a plumber.
The emotional arc combines urgency, relief, and cautious optimism:
- Frustration
- Hope
- Confidence
How to Find and Thaw Hidden or Wall‑Mounted Toilet Pipes
How can one locate pipes concealed behind walls or inside cabinets without causing unnecessary damage? A stud finder with live‑wire mode or a thermal camera quickly reveals pipe runs and cold spots.
Inspect fixtures, follow caulk lines and access panels; check basement or crawlspace where lines ascend. Once located, open minimal access—remove a single drywall screw or cabinet panel.
Apply heat gradually: a hair dryer, electric heat lamp, or warm towels; avoid open flames. Monitor temperatures and water flow.
If insulation is lacking, add foam or pipe wrap after thawing. Document the route for future access and prevention.
When to Stop DIY and Call a Plumber
Why continue DIY if the problem worsens or remains unresolved? A homeowner should stop attempts and call a plumber when risks escalate beyond simple thawing: persistent leaks, spreading water damage, or visible pipe deformities. Recognizing limits prevents costly repairs.
- Significant leaks or pooling water — anxiety and urgency.
- No progress after safe methods — frustration and helplessness.
- Signs of burst, bulging, or frozen sections inside walls — alarm and need for expertise.
Professional help provides diagnostics, permanent fixes, and mitigation of hidden damage.
Timely escalation minimizes loss and restores safe plumbing function.
How to Confirm a Frozen Pipe Has Fully Thawed
To confirm a frozen toilet pipe has fully thawed, one should first check steady water flow from the fixture and nearby taps.
Next, a brief inspection of the pipe’s surface temperature—by touch where safe or with an infrared thermometer—helps verify warmth.
Finally, monitor joints and surrounding areas for any leaks or drips that could indicate lingering ice or damage.
Check Water Flow
Begin by running the affected faucet and observing both the flow rate and water temperature; steady, full flow and consistent warm temperature indicate the pipe has likely thawed.
Then note any sputtering, air pockets, or weak flow that suggest residual ice or trapped air.
Observe for leaks at joints as pressure normalizes.
If flow remains uneven, continue gradual gentle warming and retest.
Record results and times to track progress.
Emotion can be engaged by concise milestones:
- Relief — steady stream restores confidence.
- Caution — minor sputters warn of unresolved ice.
- Victory — full flow signals task completion.
Inspect Pipe Temperature
Check the pipe temperature along its length with a hand-held infrared thermometer or by carefully feeling accessible sections through a towel; consistent warmth near the system’s normal operating temperature indicates thorough thawing, while cold spots reveal remaining ice. The inspector notes gradual temperature increases moving toward the fixture; sudden drops signal trapped pockets of ice. Record readings at several points and compare to baseline room and water temperatures. If temperatures are uniform and flow is steady, thawing is complete. Otherwise, reapply gentle heat and recheck until readings match expected values.
| Section | Expected cue |
|---|---|
| Near wall | Warmth similar to room |
| Along run | No cold spots |
Watch For Leaks
Frequently, confirming that a frozen pipe has fully thawed requires more than restored flow; it also demands a careful inspection for leaks that can appear as pressure returns and ice melts.
A detached observer checks joints, fittings, and ceilings for water, feeling for dampness and listening for drips.
If leaks are found, shut the supply and assess damage; small pinholes may be temporarily sealed, larger failures need a plumber.
Document locations and times for repairs.
- Notice faint drips — panic, urgency, relief.
- Spotting stains — dread, resolve, action.
- Hearing runs — anxiety, focus, response.
How to Check for Leaks Right After Thawing
After thawing, inspect the toilet and nearby plumbing immediately for signs of leaks: look for water pooling on the floor, dampness around the base, wet or discolored ceiling below (if on an upper floor), and drips from exposed supply lines and shutoff valves.
Check supply line connections, tank-to-bowl bolts, and the fill valve area for seepage. Run a short flush cycle and watch for slow leaks that appear after pressure changes. Use a flashlight to reveal hairline cracks and follow any damp trails to origins. Note leak locations and severity, shut off water if necessary, and document findings for repair.
How to Temporarily Repair Small Leaks
After confirming a small leak, the writer outlines quick patch options such as plumber’s tape, epoxy putty, or hose clamps to provide immediate containment.
Temporary sealants are described with attention to surface preparation, cure time, and temperature limits to guarantee a short-term fix holds.
Controlled water pressure—reducing flow or shutting off the supply—complements repairs and limits stress on the patched area.
Quick Patch Options
How can a small leak in a toilet’s supply or waste line be controlled long enough to allow for a permanent repair? A homeowner can apply simple, temporary measures to stop dripping and limit water damage until a proper fix is made. Quick actions focus on containment, reduction, and safe access.
- Wrap: compress plumbing tape or a rubber patch tightly around the leak to slow flow and reassure.
- Clamp: use a hose clamp or C-clamp with rubber padding to compress the leak site and buy time.
- Divert: shut the local valve and use a bucket or towel to manage residual water.
Temporary Sealants
When facing a small toilet-line leak, temporary sealants offer a fast, short-term fix that can stop or slow dripping until a permanent repair is made. Products such as plumber’s putty, silicone sealant, epoxy putty, or pipe-repair tape adhere to wet or dry surfaces and fill hairline cracks or pinholes.
Surfaces should be cleaned and dried when possible; for frozen areas, remove ice and excess moisture. Apply per manufacturer instructions, shape to cover the defect, and allow recommended curing time. Monitor the repair, replace seals if they fail, and schedule a qualified plumber for a durable, code-compliant solution.
Controlled Water Pressure
Following temporary surface repairs such as sealants, managing the toilet line’s water pressure can reduce leakage until a permanent fix is made.
One should lower the supply valve slightly to lessen stress on patched areas. Monitor for seepage and adjust until the leak stops or slows. Avoid full shutoff if toilet use is needed; balance flow and pressure carefully. Record valve position for restoration after repair. Seek professional help if leaks persist or worsen.
- Reduced anxiety: less water damage risk.
- Confidence: visible improvement fast.
- Relief: temporary control before permanent repair.
How to Prevent Pipe Bursts While Thawing
Begin thawing gradually and with constant monitoring to minimize pressure buildup inside frozen sections of pipe.
The caretaker opens a nearby faucet slightly to allow steam and meltwater to escape, reducing backpressure.
They apply steady, even heat along the pipe length, moving from warmest toward coldest sections and pausing when water flow resumes.
Periodic checks for bulges, cracks, or drips guide progress; any sign of damage prompts immediate shutdown and professional help.
Avoid sealed systems or rapid, concentrated heat that can create thermal stress.
Maintain clear access and keep towels or buckets ready to catch unexpected leaks.
How to Use Heat Tape to Prevent Freezing
With a thin, heat-conductive strip applied directly to vulnerable sections, heat tape provides controlled warmth to keep pipes above freezing without excessive energy use. It adheres along exposed runs, connects to a grounded outlet or thermostat, and maintains safe temperatures.
Installation follows manufacturer instructions: clean pipe, wrap or lay tape per type, secure with electrical tape or clips, and test. Regular inspection prevents wear and hazards.
Suitable for metal and some plastics when specified, heat tape offers reliable prevention when used correctly.
- Relief: quiet assurance against frozen pipes
- Confidence: steady, automatic protection
- Simplicity: easy setup and monitoring
How to Insulate Toilet Supply Lines
After addressing exposed runs with heat tape, attention turns to insulating the short, vulnerable supply lines that feed the toilet tank.
The objective is minimizing heat loss along the visible segment from the wall to the tank.
Install closed-cell pipe insulation sized to fit the line, securing seams with waterproof tape and ensuring snug contact around fittings.
For metal supply lines, wrap a thin layer of foam or neoprene before the main insulation to prevent conductive bridging.
Maintain access to shutoff valves and avoid compressing the insulation.
Properly installed insulation reduces freeze risk and limits condensation without altering valve function.
How to Add Foam Sleeves Around Toilet Pipes
First, the pipe diameter is measured to select the correct sleeve size.
Next, an appropriate insulating foam is chosen for durability and R-value.
Finally, the sleeve is fitted and secured with tape to prevent gaps.
Measure Pipe Diameter
A precise diameter measurement guarantees the foam sleeve fits snugly and insulates effectively.
The technician measures pipe outside diameter with calipers or a tape measure, noting irregularities, corrosion, or bends that affect fit. If measurements fall between common sleeve sizes, the installer selects the larger size and plans for a thin adhesive strip to secure the seam.
Record measurements for all visible runs and label sections to avoid mismatches. Accurate data prevents gaps that allow freezing and reduces rework.
Emotional reassurance comes from demonstrating control, preparedness, and care during a cold-weather emergency.
- Relief
- Confidence
- Safety
Choose Insulating Foam
With accurate diameter records in hand, the technician selects foam sleeves that match pipe dimensions and site conditions. Closed-cell polyethylene or elastomeric foam is preferred for moisture resistance and thermal performance.
Wall thickness is chosen to balance insulation R-value and fit; thicker sleeves for exterior or unheated spaces, slimmer for tight interiors. Pre-slit or wrap-around types speed installation where access is limited.
Compatible adhesives and corrosion-inhibiting liners are considered when metal pipes are present. Sleeve length is matched to pipe runs and fittings are planned to avoid gaps. Purchased components are inspected for defects before proceeding.
Secure With Tape
Before securing foam sleeves, the installer inspects each joint and fitting to make certain the sleeve fits flush against the pipe and any nearby obstructions; proper alignment prevents gaps that compromise insulation.
The installer wraps the sleeve around the pipe, ensuring seams meet tightly, then applies weatherproof tape spiraling from one end to the other. Tape overlaps by half its width for a continuous seal. Ends receive extra tape to resist moisture and pests.
Visible labels or a small tag note installation date.
The result is neat, durable insulation that reduces freeze risk and reassures the homeowner.
- Relief
- Confidence
- Security
How to Insulate Behind the Toilet and Inside Walls
Behind the toilet and inside exterior walls, insulating around pipes reduces heat loss and prevents freezing by creating a continuous thermal barrier and limiting cold air infiltration.
Install foam pipe sleeves on exposed runs and fill gaps with low-expansion spray foam where pipes enter wall cavities.
For confined spaces, use fiberglass batts or rigid foam board fitted snugly around pipe locations; seal seams with foil tape to maintain continuity.
When replacing backer boards, add insulation behind the fixture access panel.
Make sure vents and openings are weatherstripped to stop drafts.
Inspect annually and replace compressed or wet insulation to retain effectiveness.
Keep Bathroom Pipes Warm: Ventilation and Heating Tips
The section examines ways to keep bathroom pipes warm through controlled airflow, targeted heating, and local insulation.
It recommends directing warm air toward vulnerable runs, using certified space heaters safely when necessary, and adding insulation or foam sleeves around exposed pipe sections.
Practical precautions for ventilation and heater placement are highlighted to reduce freeze risk without creating hazards.
Keep Warm Airflow
In cold climates, maintaining warm airflow through a bathroom prevents pipes from freezing by reducing temperature differentials around plumbing runs and fixtures. A steady, gentle circulation moves warmer air toward concealed pipes and under sinks. Assure vents are unobstructed, interior doors stay slightly ajar to share heat, and insulation around ductwork is intact. Monitor humidity to avoid condensation that can freeze. Simple adjustments minimize risk and anxiety about burst lines.
- Clear vents to restore natural convection.
- Crack doors to equalize room temperatures.
- Seal drafts to concentrate warm air where pipes run.
Use Safe Space Heaters
After ensuring warm airflow reaches concealed plumbing, attention can shift to targeted heating: safe space heaters offer a practical supplement when ambient warmth alone won’t prevent freezing.
Choose units with tip-over and overheat protection, thermostatic control, and an appropriate wattage for bathroom size.
Place heaters on stable, dry surfaces at least three feet from water sources, fixtures, and flammable materials.
Direct gentle, indirect heat toward areas where pipes run visible or nearby, avoiding prolonged high-intensity output that can damage finishes or fittings.
Monitor heaters while in use, unplugging overnight or when unattended, and follow manufacturer safety guidelines closely.
Insulate Around Pipes
Beneath vanity cabinets and along exposed runs, insulating around pipes reduces heat loss and prevents costly freezes by maintaining a more stable pipe temperature.
Attention to simple materials—foam sleeves, fiberglass wrap, or self-sealing tape—cuts drafts and calms worry about burst lines.
Seal gaps where pipes enter walls and secure insulation with zip ties or HVAC tape.
Focus on supply lines and trap areas near fixtures.
Routine inspection after storms keeps protection effective.
- Foam sleeves: quick, neat, comforting.
- Fiberglass wrap: durable, thorough, reassuring.
- Self-seal tape: flexible, precise, calming.
How to Keep an Unused Bathroom From Freezing
Left unused through winter months, a bathroom can quickly become vulnerable to freezing pipes unless simple preventive measures are taken.
Seal drafts around windows, doors and exhaust vents to limit cold air infiltration.
Keep interior doors open to allow warmer house air to circulate toward plumbing.
Maintain a consistent moderate thermostat setting, avoiding deep nighttime setbacks.
Add temporary insulation to exposed pipes and the toilet base with appropriate covers.
Remove water from fixtures that won’t be used long-term: shut off supply and drain lines to prevent standing water.
Monitor temperatures and inspect periodically for early signs of trouble.
How to Use a Drip to Prevent Future Freezes
Regularly leaving a slow, steady drip from the bathroom faucet is a simple and effective way to reduce the risk of pipes freezing, because moving water resists freezing longer than standing water.
The practice is low-effort and protective: a trickle keeps pressure moving, prevents ice block formation, and signals attention to vulnerable spaces.
Recommendations include monitoring indoor temperature and isolating exposed pipes when possible.
Emotional reassurance comes from small, consistent actions that avert costly damage.
- Relief: small drip, big peace of mind.
- Confidence: measurable protection during cold nights.
- Control: simple step to prevent emergency repairs.
How to Winterize a Guest Bathroom Quickly
After setting a steady drip at the main bathroom to keep lines moving, attention shifts to preparing a guest bathroom for cold snaps. Inspect exposed pipes, add insulation sleeves, and close under-sink cabinet doors to retain warmth. Leave the room heated on a low setting or use a space heater briefly before guests arrive. Drain and store portable water containers; label valves for quick shutoff. Check caulking around windows and vents for drafts and apply weatherstripping where needed.
| Task | Tool | Time |
|---|---|---|
| Insulate pipes | Foam sleeves | 10–15 min |
| Seal drafts | Weatherstrip | 10 min |
| Heat briefly | Space heater | 5–20 min |
How to Prepare Toilets Before Storms or Outages
In preparing toilets for storms or outages, a practical checklist focuses on preventing overflow, conserving water, and ensuring sanitation if the main supply fails.
The homeowner secures supply lines, shuts off external valves, and fills the tank manually while noting tank capacity.
Store a sealed bucket, spare water, and disinfectant nearby.
Label tools and post simple instructions for household members.
Maintain a small emergency kit with a plunger, gloves, and biodegradable wipes.
Check seals and caulking to limit leaks before the event.
- Seal leaks to avoid panic.
- Stock water to retain dignity.
- Organize tools for calm action.
How to Monitor Vulnerable Pipes During Cold Snaps
Often a quick visual and tactile check of vulnerable pipes provides the earliest warning of freezing conditions.
Inspect exposed pipes near toilets, in crawlspaces, attics, and unheated garages for frost, condensation, or bulging. Feel for unusually cold sections and listen for reduced water flow or trickling sounds indicating partial ice.
Use simple thermometers or inexpensive temperature sensors to track ambient and pipe temperatures, and log readings during cold snaps.
Maintain small, regular checks—morning and evening—when temperatures drop rapidly. Prompt detection allows timely measures like targeted heat, insulation wraps, or controlled faucet drip to prevent full freezes.
Choosing Replacement Parts If a Pipe or Valve Failed
When a pipe or valve fails, selecting replacement parts requires matching material, size, and pressure ratings to the existing system to guarantee reliable operation.
Inspect fittings, note thread types, and prefer parts rated for potable water and freeze resistance.
Choose brass or stainless for durability; PEX offers flexibility where vibration or movement occurred.
Keep receipts and document serial numbers for warranty claims.
If uncertainty exists, consult a plumber or bring the failed part to a supply store for comparison.
- Panic: avoid rash buys that don’t fit.
- Relief: matching parts restore confidence.
- Pride: proper selection prevents repeat failure.
How to Replace a Cracked Toilet Supply Line Step‑By‑Step
After selecting a properly matched replacement part, the next step is to remove the damaged supply line and install the new one safely and correctly.
Shut off the water at the shutoff valve, drain residual water by flushing the toilet and blotting the tank connection.
Use an adjustable wrench to loosen the nut at the valve and another at the toilet fill stem; support fittings to prevent twisting.
Remove the old line, inspect threads and washers, then install the new line hand-tighten, finish with a quarter turn wrench.
Turn water on slowly, check for leaks, and retighten if necessary.
How to Temporarily Bypass a Frozen Toilet Supply Line
Begin by locating the shutoff valve and confirming that the toilet is drained to minimize water flow; this prepares for a temporary bypass that restores water without opening the frozen segment.
A temporary bypass uses a short length of flexible tubing and a spare valve or compression fitting to route water around the frozen portion. Clamp the frozen section, attach tubing from the supply to the fixture or an adjacent fixture, and open the upstream valve slowly to test for leaks. Monitor pressure and avoid prolonged use. Seek permanent repair once thawed; this is an emergency measure, not a long‑term solution.
- Relief
- Urgency
- Caution
DIY vs Pro Thawing: Cost Comparison
Several factors determine whether a homeowner saves money by thawing frozen toilet supply lines themselves or hiring a professional.
DIY costs typically include basic tools (hair dryer, heat tape, portable heater) and small materials, plus time and risk of error.
A professional charges labor, emergency call fees, and possible diagnostic charges but brings experience, faster resolution, and warranty on work.
Compare expected equipment spend and self-confidence against quoted service rates.
If pipes are accessible and damage unlikely, DIY is often cheaper; if access is limited, pipes are metal, or risk of burst exists, professional service may be more cost-effective.
How to Document Pipe Damage for Insurance Claims
When documenting pipe damage for an insurance claim, homeowners should create a clear, time-stamped record that combines photographs, written notes, and receipts to establish cause, extent, and costs.
Photographs should show wide and close views, date-stamped and backed up to cloud storage.
Notes must describe events, visible damage, and any temporary repairs.
Keep all invoices and purchase receipts, and request written estimates from plumbers.
Provide contact details for witnesses or neighbors if relevant.
Maintain a chronological file for submission to the insurer.
- Shock — capture the initial scene.
- Loss — itemize damaged property.
- Recovery — document repairs and expenses.
Common Mistakes to Avoid When Thawing Pipes
Common errors when thawing toilet pipes include applying open flames and overheating sections of pipe.
Such actions can scorch insulation, melt fittings, or ignite nearby materials.
Careful, controlled heat and appropriate tools reduce those risks.
Using Open Flames
Avoids all use of open flames near frozen pipes: directing a torch, candle, or grill flame at plumbing invites fire, warped fittings, and burst pipes from uneven heating. The advice emphasizes safer alternatives and clear risk awareness. Flames create sudden expansion, scorched insulation, and hidden structural damage; they endanger property and occupants. Instead, employ controlled, indirect heat and professional help when needed. Emotional resonance underscores responsibility and caution.
- Fear: flames escalate into catastrophic damage.
- Anger: discovering unnecessary destruction from a rash attempt.
- Relief: choosing safer methods preserves home and safety.
Overheating Pipes
After warning against open flames, attention shifts to another frequent error: applying too much heat for too long. Excessive temperature and prolonged exposure warp plastic pipes, degrade joints, and damage seals.
Metal pipes can expand unevenly, stressing fittings and causing leaks once cooled. Heat sources placed directly on insulation or nearby materials pose fire risks and hidden damage.
Instead, incremental warming with a hair dryer, electric heat pad, or warm towels allows controlled thawing and inspection. Monitoring progress prevents overheating; stop when flow resumes and check for leaks. Caution preserves plumbing integrity and avoids costly repairs.
Safe Use of Chemical De‑Icers Around Plumbing
When using chemical de‑icers near plumbing, homeowners should select products and application methods that minimize corrosion, seal damage, and harmful runoff. Choose formulations labeled safe for metal and rubber components, and avoid high-chloride salts that accelerate deterioration.
Apply sparingly, targeting exposed fittings rather than drains or toilet bowls, and rinse treated areas after thawing to remove residues. Wear gloves and eye protection to prevent skin or mucous membrane contact. Monitor for leaks or softened seals in the days after use.
Emotional reassurance can help focus caution:
- Relief — knowing damage was prevented.
- Confidence — trusting safer choices.
- Calm — avoiding costly repairs.
Thawing Tips for Older Homes and Mobile Homes
Older homes and mobile homes require careful attention to vulnerable pipe locations such as crawlspaces, exterior walls, and under-sink runs.
Thawing is best accomplished with gentle heat methods like hair dryers, heat lamps, or warm towels to avoid thermal shock and pipe damage.
After restoring flow, owners should add insulation, seal drafts, and maintain low background heat to prevent future freezing.
Inspect Vulnerable Pipe Locations
A quick walkthrough of an older home or mobile home should focus on known trouble spots—crawlspaces, exterior walls, attic eaves, and plumbing runs near unheated closets—so a clear map of vulnerable pipes is established before thawing begins.
The inspector notes insulation gaps, exposed runs, sagging lines, and nearby drafts; photographs and a simple sketch pinpoint priorities.
Safety checks guarantee accessible shutoffs and no electrical hazards.
Emotional stakes—comfort, cost, and urgency—motivate careful inspection.
- Fear: visible frost or bulging pipe sections.
- Relief: clear access and intact insulation.
- Resolve: prioritized repairs and documented plan.
Use Gentle Heat Methods
Start thawing with slow, controlled heat sources to minimize thermal shock and reduce the risk of pipe rupture.
Apply electric space heaters, infrared lamps, or a hair dryer at low to moderate settings aimed along the pipe run, not directly at joints.
Wrap pipes with warm (not boiling) towels or use heat tape rated for plumbing; follow manufacturer instructions.
Monitor temperature and progress frequently, keeping the area ventilated and clear of combustibles.
For mobile homes or older construction with fragile plumbing, proceed incrementally and stop if leaks appear.
If thawing stalls or damage is suspected, contact a qualified plumber promptly.
Prevent Future Freezing
Regularly inspecting insulation, sealing drafts, and maintaining consistent indoor temperatures reduces the chance of toilet pipes freezing in older homes and mobile homes.
Homeowners should add foam pipe wrap, seal gaps around foundation and windows, and keep interior doors open to promote warm airflow.
Routine maintenance prevents emergency midnight thaws and costly repairs.
- Install targeted insulation to ease anxiety about winter pipes.
- Use heater tape or low-wattage lamps cautiously to reassure against re-freeze.
- Schedule yearly checks to maintain confidence and prevent surprises.
Clear records and simple upgrades yield steady protection and peace of mind.
How to Explain Frozen‑Pipe Risks to Tenants or Roommates
How can tenants or roommates be made aware that frozen toilet pipes are not merely a nuisance but a preventable property risk?
Clear, concise communication should state consequences: burst pipes, water damage, repair costs, and temporary loss of facilities.
Provide simple causes—low temperatures, drafts, and neglected leaks—and immediate actions to reduce risk without performing seasonal maintenance.
Offer specific reporting steps, emergency contacts, and permission for quick, safe interventions like targeted warming.
Use written notices and brief meetings to document expectations and responsibilities.
Emphasize shared interest in prompt reporting and cooperation to limit damage, liability, and disruption.
Seasonal Maintenance to Prevent Frozen Toilet Pipes
Having established why tenants should report cold-related concerns promptly, seasonal maintenance steps can be scheduled to prevent frozen toilet pipes before temperatures drop. A landlord or homeowner should inspect insulation, seal drafts near plumbing, and set thermostats to avoid deep night drops.
Regularly draining and refilling exposed lines after brief heat-offs preserves integrity. Professional winterization—insulating tanks and exposed supply lines—reduces emergency calls.
Routine checks create predictable comfort and protect property value, easing worry for occupants.
- Inspect and insulate vulnerable piping.
- Seal drafts and monitor thermostat setbacks.
- Schedule professional winterization annually.
15‑Minute Checklist: Unfreeze and Secure a Toilet Pipe
Begin with a calm, methodical check: identify the frozen section (tank, supply line, or shut-off valve).
Inspect for visible ice, condensation, or bulging.
Turn off water at the main if necessary.
Open the tank and a nearby faucet to relieve pressure.
Apply gentle heat evenly—warm towels, a hair dryer on low, or a space heater at a safe distance—avoiding open flame.
Monitor connections and fittings for leaks as thawing proceeds.
Once flow resumes, tighten loose fittings, wrap exposed pipes with insulation or foam tape, and restore the shut-off valve.
Reinspect after an hour to confirm no hidden damage or slow leaks.
Recommended Products and Resources for Thawing and Protection
After completing the quick thaw-and-check routine, attention should turn to a short list of reliable products and reference sources that make thawing safer and reduce future freeze risk.
Recommended items include heat tape, a thermostatic pipe heater, and a compact space heater—each chosen for controlled, plumbing-safe warming.
Protective supplies like pipe insulation, leak-detecting tablets, and shutoff wrench kits complete the kit.
Trusted resources: manufacturer manuals, local utility winter guides, and plumbing association safety pages.
Emotional reassurance comes from preparedness and reliable backup.
- Heat tape and thermostatic controls
- Insulation and leak-detection tools
- Manuals, utility guides, plumbing associations
Conclusion
To conclude, the guide presents quick, practical steps to thaw toilet pipes and prevent repeat freezes. Like a flashlight cutting through fog, clear diagnosis and timely action reveal the problem and restore function. With basic tools, safety checks, and clear communication to household members or tenants, the risk of burst pipes and costly damage is greatly reduced. Regular seasonal maintenance and a short emergency checklist keep toilets reliable through cold snaps.