How to Install Heat Tape for Pipes: Step-by-Step Winter Prep Guide
Key Takeaway for Installing Heat Tape on Pipes:
To successfully install heat tape for pipes, follow these essential steps:
- Disconnect Power: Ensure safety by cutting off electricity and checking local electrical codes.
- Measure Pipes: Determine the length of the pipe, noting any bends, fittings, and material type.
- Select Heat Tape: Choose between self-regulating or constant-watt heat tape that is compatible with your pipe and insulation.
- Prepare the Pipe: Clean and dry the pipe thoroughly before application.
- Apply Heat Tape: Lay the tape according to the manufacturer’s specified spacing and secure it using approved fasteners.
- Insulate: Add insulation over the tape without compressing it to maintain effectiveness.
- Install Protection: Set up a thermostat and GFCI protection for safety.
- Test Systems: Before sealing everything, test for continuity, grounding, and control operation.
Following these steps will help ensure that your pipes are properly protected during winter months. For detailed guidance on selection, wiring, and inspection, refer to the manufacturer’s instructions.
Quick: How to Install Heat Tape (Step-by-Step)
Before beginning, the installer should confirm power is off and the pipe surface is clean and dry.
The installer measures pipe length, selects appropriate heat tape, and unrolls it along the pipe.
Tape is attached with recommended spacing, securing with manufacturer-approved clips or tape; overlaps are avoided.
For thermostatic tape, the sensor must contact the pipe.
Connections are made per instructions, keeping plugs accessible and protected from moisture.
Insulation is applied over the tape without compressing it, leaving joints exposed for inspection.
After restoring power, the installer tests operation and documents installation date and model for future reference.
Why Use Heat Tape on Pipes This Winter
Having completed installation steps and verification, attention turns to why heat tape is used on pipes during winter: it prevents freezing and pipe bursts by supplying controlled heat along vulnerable sections, maintains water flow in exposed or poorly insulated runs, and reduces the need for emergency repairs and water damage cleanup.
Heat tape stabilizes temperatures in critical spots, deters ice accumulation, and preserves pressure integrity without relying solely on ambient heat. It can lower long-term maintenance costs by avoiding burst-related structural damage and mold.
Used properly, it complements insulation and monitoring, delivering targeted protection where passive measures fall short.
Which Pipes Benefit Most From Heat Tape
Protecting vulnerable runs requires focusing heat tape on pipes most exposed to cold and those whose failure would cause the greatest damage or disruption.
Priority goes to exterior-facing lines in uninsulated walls, attics, crawlspaces, basements and garages.
Service lines entering buildings and long, shallow runs near foundation walls also benefit.
Pipes supplying heating systems, water heaters, boilers, or sprinkler mains deserve attention because leaks cause costly damage.
Temporary or seasonal lines, outdoor spigots, and hose bibs often need protection.
Short vulnerable sections—elbows, joints, and spots with poor insulation—should receive tape even when the remainder of the run is insulated.
Which Pipe Materials (Copper, PEX, PVC) Need Special Care
Different pipe materials require distinct precautions when using heat tape because thermal limits, expansion behavior, and joint types affect both effectiveness and safety.
Copper tolerates higher temperatures and conducts heat well but expands; heat tape should avoid concentrated heat at soldered joints and be secured to straight runs, not wrapped over fittings.
PEX is sensitive to prolonged high heat and must use heat tape rated for lower temperatures; avoid direct contact with fittings glued or crimped and monitor rated exposure durations.
PVC softens at relatively low temperatures; heat tape should be low-heat, applied sparingly, and accompanied by insulation to prevent deformation.
Self-Regulating vs Constant-Wattage Heat Tape: Which to Pick
How should one choose between self-regulating and constant-wattage heat tape? The decision depends on pipe type, exposure, and desired control.
Self-regulating tape adjusts output with temperature, reducing overheating risk and allowing overlap; it suits varying ambient conditions and sensitive materials.
Constant-wattage tape supplies steady heat along its length, offering predictable performance and often lower cost, but requires careful sizing and thermostat or external control to prevent hot spots.
For long runs or mixed-temperature environments, self-regulating is often safer.
For short, well-insulated sections where consistent heat is needed, constant-wattage can be appropriate.
Hardwired vs Plug-In Heat-Tape Systems
When deciding between hardwired and plug-in heat-tape systems, the key considerations are installation permanence, power capacity, and code requirements.
Hardwired systems are installed directly into a building’s electrical system, offering higher continuous current capacity and cleaner appearance; they often require a licensed electrician and must meet local electrical and grounding codes.
Plug-in units are simpler for retrofit or temporary use, relying on standard outlets and offering portability but may need GFCI protection and have limited load capacity.
Choice depends on expected duration, circuit availability, code compliance, and willingness to hire qualified installation professionals.
How to Size Heat Tape for Pipe Length and Diameter
For sizing heat tape, the primary variables are pipe length and diameter because they determine the total heat required to prevent freezing and the amount of tape needed to deliver that heat.
Calculate linear footage equal to pipe length; include bends and exposed fittings.
Determine pipe outer diameter to assess heat loss—larger diameters lose more heat and may require higher wattage tape or closer spacing.
Consult manufacturer charts matching wattage-per-foot to ambient temperatures and pipe material.
Select tape rated to the computed footage and wattage; if uncertain, choose the next higher available wattage and verify electrical circuit capacity and safety ratings.
Tools and Materials You’ll Need
With pipe length, diameter, and required wattage established, assemble the tools and materials needed before beginning installation to guarantee an efficient, safe job.
Required items include the selected self-regulating or constant-wattage heat tape, compatible endcaps and splice kits, and appropriate thermostats or self-regulating controls.
Insulation materials—fiberglass, foam pipe sleeves, or closed-cell rubber—protect heat retention.
Weatherproof electrical tape, silicone-based sealant, and UV-resistant cable ties secure and seal the run.
Tools: utility knife, wire strippers, crimpers, screwdriver set, drill with bits, measuring tape, and a non-contact voltage tester.
Personal protective equipment: gloves, safety glasses, and a dust mask.
Check Local Codes and Electrical Capacity
Why verify local codes and electrical capacity before starting? Homeowners must confirm that heat tape installation complies with municipal electrical and building codes to avoid fines, failed inspections, or safety hazards.
Check whether specific heat tape types are permitted, required grounding is specified, and circuit protections meet local requirements.
Assess the circuit load: calculate added amperage, make certain dedicated circuits where required, and verify panel capacity and breaker ratings.
If capacity is insufficient, plan for a qualified electrician to upgrade the panel or add a circuit.
Obtain permits when mandated and keep documentation of approvals and electrician work for future reference.
Inspect Pipes and Surroundings Before You Start
Before beginning work, the installer should carefully inspect the pipes and their surroundings to identify physical condition, materials, and potential hazards. They note corrosion, existing insulation, joints, nearby combustible materials, and moisture sources. Make sure electrical access and clearances comply with codes; flag damaged sections for repair first. Record pipe diameter and surface type to select compatible heat tape. Check supports and straps; loose or rubbing pipes require securing. Use the table below to summarize observations succinctly and prioritize actions before proceeding to layout planning.
| Condition | Location | Action |
|---|---|---|
| Corrosion | Exterior | Repair/replace |
| Moisture | Crawlspace | Dry/ventilate |
How to Measure and Plan Your Heat-Tape Layout
Having identified pipe condition, diameter, and nearby hazards, the installer next measures and plans the heat-tape layout to make certain adequate coverage and safe electrical routing.
The installer measures pipe lengths, including bends, tees, and exposed runs, noting insulation thickness and distances to power sources. A diagram marks tape start and end points, splice locations, and outlet positions, avoiding sharp edges and combustible materials. Calculate tape length with manufacturer allowances for overlaps and endcaps. Plan for securing intervals, drip loops at power connections, and junction box placement. Verify circuit capacity and GFCI protection before procurement and installation.
Preparing Pipes: Cleaning, Drying, and Surface Prep
To make certain reliable adhesion and heat transfer, the installer thoroughly cleans and dries all pipe surfaces prior to applying heat tape.
Loose rust, flaking paint, oil, and debris are removed with a wire brush or abrasive pad.
A solvent wipe—compatible with pipe material—removes grease; allowed to evaporate fully.
Dampness is eliminated with clean, lint-free towels and forced air if needed; condensation-prone spots are monitored until bone dry.
Joints, valves, and fittings receive particular attention to make certain tape seating.
Any damaged insulation or corroded sections are noted for repair.
Surfaces are inspected for smoothness before proceeding.
Insulation Types Compatible With Heat Tape
The discussion turns to insulation choices that work with heat tape, focusing on common options like fiberglass pipe insulation and foam sleeve insulation.
Fiberglass offers high-temperature tolerance and effective thermal resistance for exposed runs, while foam sleeves provide easy installation and good moisture resistance for sheltered areas.
Each type’s compatibility with the specific heat tape product and pipe conditions should be verified before installation.
Fiberglass Pipe Insulation
Fiberglass pipe insulation offers a high-temperature, noncombustible option compatible with most electric heat tapes when installed with proper clearance and protective jacketing. It resists heat degradation and maintains insulating performance at temperatures where foam may soften.
Installers should wrap heat tape directly to the pipe, then surround both with fiberglass to guarantee intimate thermal contact and effective heat distribution. Use a vapor barrier or foil jacketing rated for use over heat tape to prevent moisture and protect the insulation.
Fasten securely without compressing the fiberglass, and inspect periodically for settling or damage that could reduce thermal efficiency.
Foam Sleeve Insulation
Foam-sleeve insulation provides a lightweight, easy-to-install option compatible with many electric heat tapes when used according to manufacturer guidelines.
Foam sleeves offer closed-cell polyethylene or elastomeric varieties that resist moisture and compress to fit odd pipe shapes.
Installation typically places heat tape directly against the pipe, with the foam sleeve slid over both, or with the tape atop the sleeve if the tape design permits.
Verify tape and foam compatibility to avoid overheating or restricted heat transfer.
Foam adds thermal resistance but less than thicker alternatives; use in moderate climates or combined with an outer jacket for exposed, windy locations.
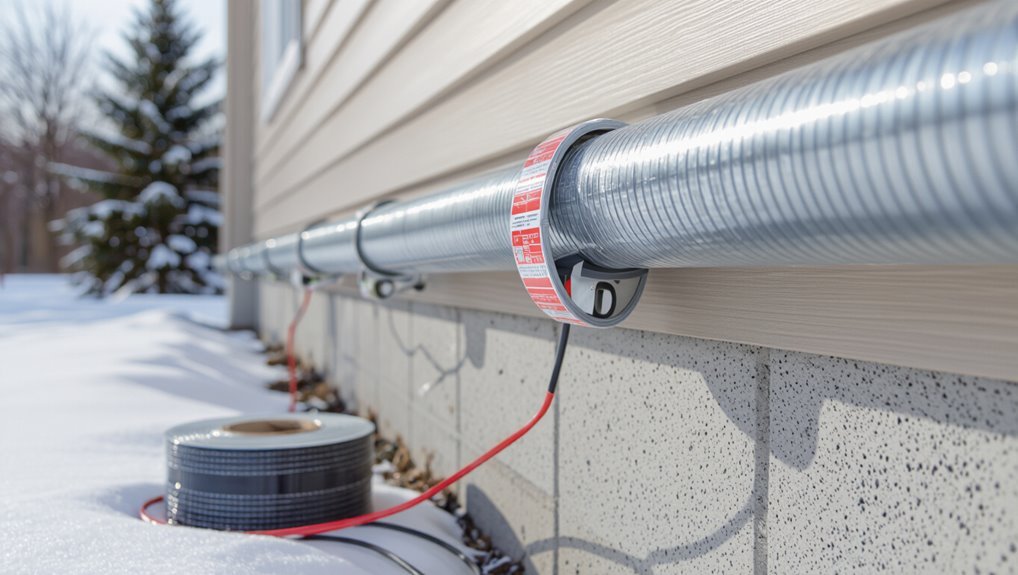
How to Attach Self-Regulating Heat Tape Correctly
Begin by laying out the self-regulating heat tape along the pipe while the power remains disconnected, ensuring the thermostat (if separate) and any built-in sensors are positioned where they will accurately monitor pipe temperature.
Follow manufacturer spacing—either spiral or straight—avoiding overlaps.
Secure tape with listed fasteners: fiberglass tape, plastic zip ties rated for outdoor use, or aluminum foil tape; do not use standard electrical tape.
Seal connections and exposed ends with approved silicone or heat-shrink caps.
Route the cord to a protected GFCI outlet, avoiding sharp edges and high-heat areas.
Test continuity and insulation resistance before powering and document installation details.
How to Attach Constant-Wattage Heat Tape Correctly
For constant-wattage heat tape, selecting the correct tape type means matching wattage, insulation compatibility, and pipe diameter to guarantee even heating and safe operation.
The attachment method must secure the tape along the pipe with appropriate spacing, insulation, and manufacturer-approved fasteners to prevent hotspots and mechanical damage.
Clear adherence to manufacturer guidelines and local electrical codes is essential before and during installation.
Choosing Proper Tape Type
Choosing the correct type of heat tape is essential for reliable freeze protection and safe installation of constant-wattage systems. Selection hinges on pipe material, exposure, power source, and thermostat needs. Constant-wattage options vary by insulation compatibility and maximum temperature; certified products reduce risk. Verify voltage, length, and ambient rating. Prefer tapes with built-in ground and moisture resistance for outdoor or damp locations. Match tape wattage to pipe diameter to avoid overheating. Consult manufacturer specs and local codes before purchase.
| Feature | Consideration |
|---|---|
| Voltage | 120V vs 240V |
| Wattage | W/ft matching pipe |
| Rating | Outdoor vs indoor |
| Certification | UL/CSA listed |
| Insulation | Compatible types |
Correct Attachment Method
After selecting a tape suited to the pipe material, voltage, and environment, attention turns to correct attachment to guarantee heat is delivered where needed and the tape remains secure.
The installer begins at the pipe’s insulated end or at the most vulnerable point, laying the constant-wattage tape flat along the pipe with the heat-emitting side contacting the pipe surface. Wrap in a spiral with recommended overlap, avoiding twists or gaps. Secure with manufacturer’s-approved fiberglass or silicone tape, not ordinary duct tape, at regular intervals. Maintain clearances from flanges and fittings, and leave thermostat or sensor positions unobstructed for accurate control.
Securing Joints, Valves, and Fittings With Heat Tape
When wrapping heat tape around joints, valves, and fittings, make certain continuous thermal contact by applying the tape snugly along the metal surface and overlapping turns by about half the tape width.
Focus on uniform coverage over elbows and threaded connections where heat loss concentrates.
Use small, secure fasteners—zip ties or stainless clips—spaced evenly to prevent sagging but avoid compressing the tape.
Route tape to minimize sharp bends and maintain manufacturer bend-radius recommendations.
For irregular shapes, spiral the tape with consistent spacing rather than bunching.
Inspect installed sections for gaps and make sure exposed thermal sensor areas remain unobstructed.
How to Terminate and Waterproof Heat-Tape Ends
Following secure placement over joints and fittings, attention turns to properly terminating and waterproofing the heat-tape ends to prevent moisture intrusion and preserve electrical safety.
The installer trims excess tape, secures the end with manufacturer-approved end caps, and seals with waterproof electrical tape or heat-shrink tubing. Connections must remain accessible for inspection while protected from ice and water. Use silicone sealant around penetrations where recommended. Verify grounding continuity and that no exposed conductors remain. Maintain a slight gap from insulation to avoid overheating. Regularly inspect terminations each season for degradation, re-sealing as needed to sustain protection.
- Trim excess tape cleanly
- Apply end caps
- Seal with heat-shrink or waterproof tape
- Inspect and re-seal annually
Install and Set Inline Thermostats and Controls
Selection of an appropriate inline thermostat is critical to match the heat tape’s wattage and the pipe material.
The thermostat should be rated for outdoor or wet locations and provide compatible sensor types for accurate control. Set the temperature range to maintain pipe surface temperatures just above freezing while avoiding continuous overheating.
Choose Proper Thermostat
Which thermostat suits a heat-tape run depends on pipe material, exposure, and local freezing risk. Selection prioritizes compatibility with the heat tape type (self-regulating or constant-watt), appropriate ambient or contact sensing, and any electrical load limits. A correctly chosen controller reduces energy use and prevents overheating.
- Confirm voltage and amperage ratings match the heat tape.
- Choose contact sensors for direct pipe temperature; ambient sensors for enclosed spaces.
- Prefer thermostats with weatherproof enclosures for exterior runs.
- Verify built-in safety features: automatic shutoff, fault indication, and approved certifications.
Install per manufacturer guidance and local electrical codes.
Set Temperature Range
After choosing a compatible thermostat, the installer must set the temperature range to maintain pipe integrity while minimizing energy use. The technician programs a lower limit just above freezing (typically 38–45°F / 3–7°C) and an upper cutoff to prevent overheating. Placement near the coldest section of pipe guarantees responsive control. Use hysteresis of a few degrees to avoid short cycling. Test the control by simulating cold conditions and confirm auto-switching. Document settings and label the thermostat. Repeat checks seasonally or after system changes to guarantee continued protection and efficiency.
| Setting | Typical Value |
|---|---|
| Low set | 38–45°F |
| Hysteresis | 3–5°F |
Protect Circuits: GFCI Options and Wiring Basics
Why is ground-fault protection essential where heat tape and pipes are present? Ground-fault protection prevents electrocution and reduces fire risk when moisture, damaged insulation, or conductive piping contact live wiring. Recommended practices include using GFCI devices and correct wiring methods.
- Install GFCI outlets or breakers for circuits serving heat tape.
- Use dedicated circuits to avoid overloads and nuisance trips.
- Follow manufacturer wiring diagrams and use outdoor-rated cable where required.
- Assure proper grounding and bond metal pipes per code.
Proper protection guarantees system reliability and safety without replacing the need for code-compliant inspection or professional consultation.
When to Hire a Licensed Electrician
When heat tape installation requires new power runs, circuit changes, or hardwiring, a licensed electrician should be engaged.
Situations involving complex or older electrical systems that may conceal faults or overload risks also warrant professional assessment.
Compliance with local codes and permit requirements is another clear reason to hire a qualified electrician.
When Power Work Needed
How much electrical work is required depends on the home’s existing circuits and the heat tape system chosen. A licensed electrician should be engaged when installations involve new circuits, permanent hardwiring, shared circuit loads that risk overload, or when local code or permit requirements apply. Professionals guarantee correct amperage, proper grounding, GFCI protection where required, and safe junctions.
- New dedicated circuit installation
- Hardwiring heat tape to house wiring
- Unclear circuit capacity or overloaded panels
- Required permits or code compliance checks
Hiring qualified help reduces fire risk and guarantees the system operates reliably throughout winter.
Complex Electrical Systems
After noting situations that clearly require a licensed electrician, attention turns to more complex electrical systems where expertise prevents unsafe connections and code violations. Complex systems include multi-branch circuits, shared neutrals, GFCI/AFCI protection, and panels near capacity.
A professional assesses load calculations, determines proper circuit protection, and selects compatible heat tape models. They guarantee secure splices, correct grounding, and appropriate junction box placement.
For installations involving timers, smart controls, or wet-location-rated wiring, an electrician verifies compatibility and weatherproofing. Hiring licensed help reduces fire and shock risk, preserves warranty coverage, and ensures reliable, code-compliant operation throughout winter.
Local Code And Permits
Where are local codes and permit requirements most strict, and how do they affect heat tape installations? Local jurisdictions, historic districts, and commercial properties often enforce strict electrical and permitting rules that can dictate wiring methods, GFCI use, and inspection.
When complexity, concealed wiring, or shared circuits appear, a licensed electrician should be engaged to guarantee compliance and safe installation.
Consider these factors:
- Building type: residential vs. commercial code differences
- Circuit capacity: load calculations and breaker sizing
- Concealed installations: walls, crawlspaces, or embedded piping
- Permit necessity: inspection schedules and documentation
Hiring a pro prevents violations, hazards, and costly rework.
How to Test Your Heat Tape After Installation
Typically, testing the heat tape immediately after installation guarantees it operates correctly and provides the planned pipe protection. The installer verifies continuity with a multimeter, checks for proper grounding, and assures the thermostat or self-regulating element cycles as specified. Power is applied briefly while monitoring surface warmth and controller indicators. Any hot spots, loose adhesion, or abnormal resistance prompt immediate shutdown and inspection. Record readings and serial numbers for warranty. Final confirmation includes a short soak test during cooler ambient conditions to observe sustained operation. If faults appear, contact manufacturer guidance before extended use.
| Step | Check |
|---|---|
| 1 | Continuity |
| 2 | Grounding |
| 3 | Thermostat/function |
Heat-Tape Inspection Checklist for Winter
A concise winter inspection begins with a pre-installation visual check to confirm the heat tape is undamaged, properly positioned along the pipe, and free of debris or loose fittings.
Next, electrical connection verification guarantees plugs, GFCI devices, and wiring are secure, dry, and show no signs of overheating or corrosion.
These steps establish a baseline for safe, effective operation throughout the cold season.
Pre-Installation Visual Check
Before any wiring or fastening begins, the installer conducts a focused visual inspection of the pipe run and surrounding area to confirm suitability for heat-tape installation.
The inspector notes pipe material, insulation condition, and visible damage, ensuring surfaces are clean and dry.
Clearance from combustible materials is verified and any leaks or loose fittings are flagged for repair.
The checklist guides decisions about heat-tape type, routing, and attachment methods.
- Confirm pipe material compatibility and joints condition
- Verify existing insulation integrity and moisture presence
- Check for nearby combustibles or heat-sensitive components
- Identify physical obstructions and secure attachment points
Electrical Connection Verification
With the pipe run cleared and mounting points confirmed, attention shifts to verifying the heat-tape electrical connections for safe winter operation. A systematic checklist reduces risk: power must be off, connections tight, insulation intact, and ground continuity confirmed. Visual and tactile checks precede meter tests. Any frayed conductors or loose clamps warrant replacement. Confirm manufacturer wiring diagram and local code compliance. Document readings and corrective actions. Final verification involves restoring power and observing thermostat or self-regulating tape response.
| Item inspected | Test method | Action if fail |
|---|---|---|
| Continuity | Multimeter | Repair/replace |
| Ground | GFCI trip | Correct grounding |
| Insulation | Visual | Re-wrap/replace |
| Terminations | Tightness check | Retorque or redo |
Troubleshooting Common Heat-Tape Problems
Commonly, homeowners and maintenance workers encounter a handful of recurring heat-tape issues—power failures, damaged or improperly installed tape, thermostat malfunctions, and inadequate insulation—that account for most performance problems and safety hazards.
Troubleshooting begins with visual inspection and power checks, then proceeds to targeted diagnostics: confirm outlet and GFCI operation, look for physical wear or moisture intrusion, verify thermostat response, and evaluate insulation coverage.
If intermittent heating occurs, test continuity and monitor temperature changes.
Safety-first protocols require disconnecting power before handling tape.
Quick, methodical assessment often isolates faults and informs repair or replacement decisions.
- Check power and GFCI
- Inspect for cuts, crushing, or moisture
- Test thermostat and sensors
- Make certain proper insulation coverage
How to Replace Damaged or Worn Heat Tape Safely
Before replacing heat tape, the installer inspects the tape and wiring for frays, exposed conductors, and signs of overheating.
If damage is found, the installer disconnects power and removes the old tape carefully to avoid nicking the pipe or electrical connections.
The installer then prepares the pipe and rewires or rewraps with new tape following manufacturer spacing and fastening guidelines.
Inspect Tape And Wiring
Inspect the heat tape and its wiring carefully to determine whether replacement is necessary and to identify potential hazards. A detached visual and tactile assessment should note brittle insulation, exposed conductors, corrosion at connections, and evidence of overheating.
Verify that wiring junctions are dry and secured, and confirm the thermostat or self-regulating sections respond appropriately. If damage or suspect performance exists, mark affected areas for replacement and disconnect power before further work.
Document findings and photograph issues for reference. Consider professional inspection for complex or extensive damage.
- Brittle or cracked tape
- Exposed or frayed wires
- Discolored or melted sections
- Loose or corroded connections
Remove And Rewrap Carefully
Begin by shutting off power to the heat tape at the breaker and verifying the circuit is de-energized with a voltage tester.
The damaged section is carefully unwrapped from the pipe, cutting only the faulty length and leaving clean ends.
Any adhesive, old tape, or insulation is removed to expose pipe and cable.
A compatible replacement heat tape segment is measured, fitted without crossing or overlapping, and secured with manufacturer-approved clips or fiberglass tape at recommended intervals.
Seams and connections are sealed per instructions.
After rewiring or splicing, restore insulation and test the system before restoring power.
Seasonal Maintenance: Remove or Leave Heat Tape On?
Typically, homeowners must decide each spring whether to remove heat tape or leave it connected, weighing factors like local climate, tape type, and manufacturer instructions. Decisions hinge on safety, longevity, and intermittent freeze risk. Recommended steps include inspection, consulting the manual, and testing functionality before next cold season.
Considerations:
- Remove tape if exposed to UV or mechanical wear; inspect adhesive and insulation beneath.
- Leave connected when occasional freezes persist and manufacturer permits continuous installation.
- Replace damaged sections rather than reusing compromised tape.
- Document installation dates and condition for future seasonal decisions and warranty records.
Energy Costs: What to Expect and How to Reduce Them
Homeowners will generally see a modest but continuous increase in electricity usage while heat tape is active, driven by tape length, the local temperature differential, and whether the tape is self-regulating or constant-wattage.
Energy impact varies: short runs of self-regulating tape use minimal power, long runs or constant-wattage systems consume more. Expect seasonal consumption increases rather than large spikes.
To reduce costs, insulate pipes and use thermostatic controls or timers to limit run time to freezing-risk periods. Regularly inspect for proper contact and avoid overlapping tape.
Selecting appropriate tape and minimizing exposed pipe length optimize protection while controlling energy use.
Safety Hazards to Avoid During and After Install
What risks should be watched for when installing and operating heat tape? Installers must avoid damaged tape, improper power connections, and contact with combustible materials. Follow manufacturer spacing and overlapping rules; never run tape over insulation unless rated.
After activation, monitor for hot spots, odors, or discolored wiring that indicate failure. Periodic inspection prevents hidden hazards.
- Do not use extension cords or share circuits.
- Replace frayed or cracked tape immediately.
- Keep tape off plastic, paper, and loose insulation.
- Make certain ground-fault protection and correct thermostat settings to prevent overheating.
Best Heat-Tape Brands for Residential Reliability
Often homeowners and contractors evaluate heat-tape brands by reliability, safety features, and warranty support; the best residential options combine robust materials, clear installation guidance, and proven performance in cold climates.
Brands with temperature-sensing thermostats, self-regulating technology, and corrosion-resistant jackets are frequently recommended because they reduce overheating risk and adapt to variable ambient conditions.
Trusted manufacturers provide thorough installation documentation and accessible customer support, and third-party certifications (UL, CSA) indicate compliance with electrical and fire-safety standards.
For typical home use, lines offering varied lengths, easy termination kits, and proven field longevity tend to deliver the most consistent, low-maintenance protection.
Where to Buy Heat Tape and How to Compare Warranties
Sources for heat tape range from big-box home centers and plumbing suppliers to manufacturer websites and trusted online retailers.
Warranty lengths commonly span one to ten years, but the effective protection depends on terms such as workmanship, component coverage, and prorated vs. full replacement.
Comparing those coverage details side-by-side helps determine long-term value beyond the sticker price.
Where To Buy
When shopping for heat tape, buyers should consider retail outlets, specialty plumbing suppliers, and online marketplaces that list product specifications and warranties side-by-side.
Sources vary by selection, expertise, and return policies; documentation and clear seller contact are priorities. Compare manufacturer vs. third-party sellers, check for installation guides, and prioritize vendors offering verified reviews.
Local suppliers may provide hands-on advice; online platforms enable side-by-side technical comparisons.
- Big-box stores: convenient stock and in-person returns
- Specialty plumbing dealers: expert guidance and part matching
- Manufacturer websites: full specs and authorized dealers
- Online marketplaces: broad selection and buyer reviews
Warranty Lengths Explained
Warranty length is a key factor buyers should evaluate alongside price and features, because it reflects manufacturer confidence and defines the period for free repairs or replacements.
Buyers should compare warranty durations offered by retailers and brands, noting typical ranges from one to ten years.
Longer warranties often indicate higher-quality components or stricter testing, but may carry conditions such as professional installation or registration.
Limited versus lifetime terms differ in scope and exclusions.
Consumers should prefer clear, written warranty periods when selecting heat tape and factor warranty length into cost-per-year calculations without assuming all-encompassing coverage.
Comparing Coverage Details
In choosing where to buy heat tape, shoppers should weigh not only price and availability but the exact terms of coverage offered with each purchase. Retailers, manufacturers, and online marketplaces vary in return policies, warranty registration requirements, and handling of defects. Comparing these details reduces risk and clarifies responsibilities if failure occurs.
- Warranty length and explicit coverage exclusions
- Return and refund windows plus restocking fees
- Transferability and registration deadlines
- Support channels, replacement process, and proof requirements
A concise side-by-side comparison of sources helps select heat tape with clear, enforceable protection tailored to installation needs.
Common DIY Mistakes That Still Lead to Frozen Pipes
Often homeowners undercut the risk by relying on partial fixes or incorrect installations that leave gaps for freezing to occur. Common DIY mistakes include using wrong tape type, skipping insulation, poor routing that creates cold spots, and failing to test the system before cold weather. Neglecting connectors and exposing cords accelerates heat loss. Regular inspection and following manufacturer specs prevent errors. Emotional weight comes from imagining costly bursts avoided by simple care.
| Mistake | Consequence |
|---|---|
| Wrong tape | No heat |
| Missing insulation | Cold spots |
| Bad routing | Stress points |
| Exposed connectors | Failure |
| No testing | Surprise burst |
Upgrades: Smart Controls, Sensors, and Long-Term Care
Consideration of smart thermostat integration, freeze-detection sensors, and routine maintenance can transform heat tape from a simple safeguard into a proactive system.
Smart controls allow temperature-based scheduling and remote management, while sensors provide early warnings of temperature drops or failures.
Regular inspection and monitoring guarantee long-term reliability and reduce the risk of undetected faults.
Smart Thermostat Integration
When integrating heat tape with a smart thermostat system, homeowners should prioritize compatibility between the tape’s controller, temperature sensors, and the thermostat’s relay or smart home hub.
The smart thermostat can schedule heat tape activation, log temperatures, and reduce energy use when paired correctly.
Wiring should follow manufacturer instructions and local code; isolation relays often prevent overload.
Testing verifies automatic responses and manual overrides.
Consider cloud access and local backup for reliability.
Maintenance reminders can be automated.
- Verify voltage and relay compatibility
- Map sensor locations to thermostat inputs
- Configure schedules and alerts
- Test fail-safes and manual control
Freeze Detection Sensors
Introducing freeze detection sensors enhances a heat-tape system by providing early warnings and automated responses to protect pipes from freezing. These sensors detect rapid temperature drops or sustained low temperatures near vulnerable sections, triggering heat tape activation, alarms, or remote notifications.
Placement focuses on exposed joints, low spots, and areas with poor insulation. Compatibility with existing controllers and clear wiring or wireless protocols guarantees reliable integration.
Battery-backed or tamper-resistant models maintain function during outages. By alerting before ice forms and enabling automated mitigation, freeze detection sensors reduce burst risk and support efficient, targeted heating without replacing primary heat-tape design.
Maintenance And Monitoring
Regularly updated maintenance and monitoring guarantee heat-tape systems remain effective and safe over their service life.
Routine inspections check cable integrity, attachment points, and insulation condition.
Smart controls and wireless thermostats enable remote temperature logging and automatic cycling to save energy.
Integrating freeze-detection sensors provides alerts before damage occurs.
Long-term care schedules replacement intervals based on manufacturer guidance and observed wear.
- Inspect for frayed tape, loose fasteners, and cracked insulation monthly.
- Calibrate thermostats and test sensor alerts each season.
- Replace heat tape per rated lifespan or after visible damage.
- Document maintenance to track performance and warranty compliance.
Conclusion
As winter approaches, one remembers that “an ounce of prevention is worth a pound of cure.” Properly installed heat tape protects vulnerable pipes, reduces costly repairs, and delivers reliable peace of mind when paired with correct materials and controls. Homeowners who choose appropriate tape type, follow manufacturer instructions, avoid common DIY errors, and consider smart sensors guarantee long-term performance. With care and routine inspection, heat tape becomes a simple, effective part of winter readiness.