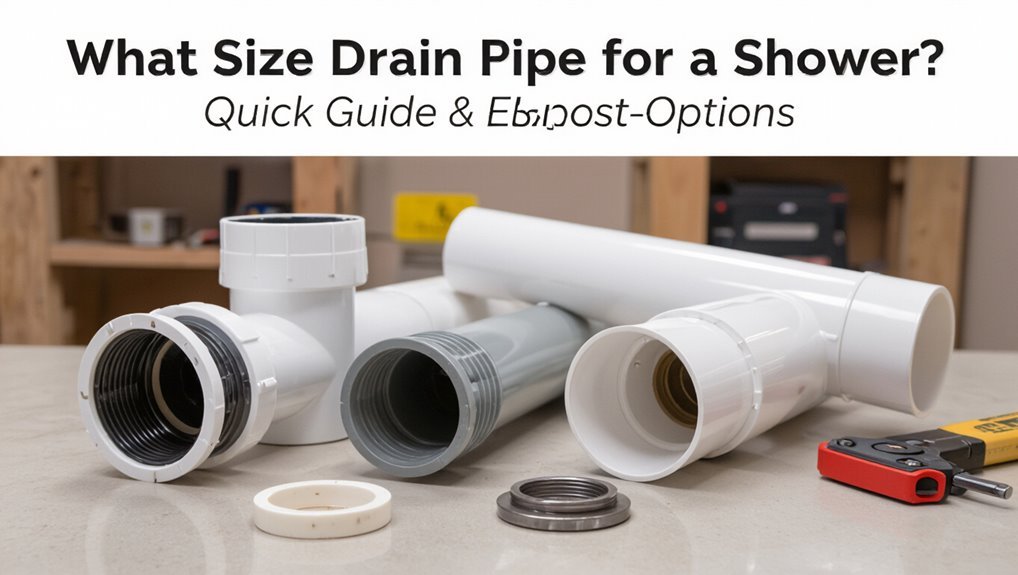
What Size Drain Pipe for a Shower? Quick Guide & Best Options
Most residential showers should use a 2-inch trap and drainpipe, which is the practical standard for optimal drainage. While 1½-inch pipes are acceptable for older or compact installations, they are more prone to clogs and limit the length of the trap-arm. Although code minimums can vary by location, many inspectors recommend using 2-inch pipes for single showers, especially in cases with longer runs, higher flow fixtures, or curbless designs. Additionally, factors such as pipe material, slope, venting, and cleanouts play a crucial role in ensuring proper drainage.
What This Guide Covers : Quick Answer, Buying & Installation Help

In this guide, the essential information about shower drain pipe sizing is presented to give a quick answer, practical buying advice, and straightforward installation pointers; readers will find the recommended pipe diameters for typical residential showers, notes on compatibility with various drain assemblies and trap types, a checklist of materials and tools to purchase, and concise installation steps with common pitfalls to avoid.
The section outlines scope: what will and won’t be covered, assumptions about standard residential plumbing, and target users. It summarizes key objectives—selecting compatible drain fittings, ensuring proper fall and venting, and preparing for a smooth installation with minimal rework.
Standard Shower Drain Size (Quick Answer)
Most residential showers use a 2-inch drain pipe, though some older or compact installations may use 1½-inch lines.
Local plumbing codes and building inspections can require different diameters or slope specifications, so compliance should be checked before installation.
Connector fittings and the trap must match the chosen pipe size to guarantee proper sealing and drainage.
Typical Pipe Diameter
A typical residential shower drain connects to a 2-inch (50 mm) trap and drainpipe in many regions, providing adequate flow for single-shower use and compatibility with standard shower drains and P-traps. Manufacturers often size shower fittings for that diameter, balancing water discharge and resistance to clogging.
Alternatives include 1.5-inch (40 mm) lines for low-flow or older installations and 3-inch (75 mm) where multiple fixtures tie in or long horizontal runs demand higher capacity. Pipe material—PVC, ABS, or cast iron—affects internal diameter tolerance. Proper slope and cleanouts matter as much as nominal diameter to maintain reliable drainage.
Local Code Variations
Recognizing regional plumbing codes is essential when specifying a standard shower drain size, since municipalities can mandate different minimums or preferred diameters based on fixture counts, flow rates, and local practices.
Local code variations influence acceptable pipe sizes, venting requirements, and permitted materials; inspectors may require documentation or deviations for older buildings.
Professionals consult municipal codes, model codes (IPC, UPC) and amendments to confirm whether a 2-inch or larger drain is required, or if special relief is granted for low-flow fixtures.
Compliance guarantees system performance, avoids costly rework, and maintains approval for occupancy or resale.
Connector And Trap Size
For shower drains the connector and trap are typically sized to match the trap weir and the branch line, with 2‑inch traps and connectors commonly used where codes allow; 1½‑inch traps remain acceptable in many jurisdictions for individual residential showers but can be restricted by local or model codes.
The connector between the drain body and trap should align with manufacturer dimensions to prevent leaks and maintain proper flow. Traps must provide adequate water seal while resisting siphonage; larger traps reduce clogging risk. Coupling fittings, slope, and cleanout accessibility influence performance. Always verify local code and manufacturer specifications before installation.
Minimum Code Requirements for Shower Drains (US)
Typically, building codes require shower drains to meet minimum diameter and flow specifications to guarantee proper drainage and prevent backups. Codes commonly mandate a 2-inch trap and drain for single showers, proper trap seal depth, and venting to avoid siphonage. Materials must be code-listed and installations accessible for maintenance. Local amendments may tighten national model code requirements.
- Minimum trap and drain diameter (typically 2″)
- Required venting within specified distances
- Trap seal depth and cleanout access
- Approved materials and fittings
- Compliance with local plumbing authority interpretations
How Shower Flow Rate Affects Drain Sizing
While codes set minimum diameters and venting, sizing a shower drain also depends on the fixture’s flow rate: higher gallons-per-minute (GPM) outputs require larger capacity for the drain, trap, and vent to prevent standing water or overflow.
Designers assess peak combined flow when multiple fixtures operate together; showers with high‑flow heads or body sprays can raise demand.
Drainline slope, trap weir height, and venting must match anticipated GPM to maintain self‑scouring velocity and avoid backups.
Manufacturers’ flow data and local plumbing tables guide selection. Where flow approaches or exceeds standard assumptions, consult calculations or a plumbing engineer for proper sizing.
2‑Inch vs 1½‑Inch Drain : When to Use Each?
When should a 1‑inch or a 1½‑inch shower drain be chosen? A 1‑inch drain suits low-flow, single-head showers or temporary installations where flow stays under code limits; it minimizes material cost but risks clogging with higher waste or hair accumulation. A 1½‑inch drain is standard for residential showers with typical faucets and tiled pans, offering better clog resistance and compatibility with traps and vents.
Choice depends on fixture flow, local code, trap size, and maintenance expectations. Consider professional guidance for borderline cases.
- Match drain size to measured flow rate and code
- Prefer 1½” for durability and reduced backups
- Use 1″ only for verified low-flow setups
- Check trap arm and vent compatibility before selecting
- Plan for hair/debris management when using smaller drains
Multiple Fixtures on One Drain: Sizing Rules
After choosing the proper individual shower drain size, attention must turn to how that shower connects with other fixtures on the same branch. Code uses fixture units and cumulative load to determine branch diameter; combining a shower with a sink or tub may require upsizing to maintain flow and venting. Plumbers sum fixture units and consult local code tables to select 1½”, 2″, or larger branch lines. Proper slope and accessible cleanouts remain essential to prevent backups.
| Fixture | Typical FU | Suggested Branch |
|---|---|---|
| Shower | 2 | 1½” |
| Lavatory | 1 | 1½” |
| Tub | 4 | 2″ |
Shower Pan Types and How They Change Drain Choice
In selecting a shower drain, the type of shower pan plays a decisive role because material, slope design, and access requirements dictate different drain assemblies and pipe connections. Different pans—preformed acrylic, tile mortar, fiberglass, prefabricated pans with liners, and curbless pans—require matching drain flanges, clamping rings, and outlet positions. Choice affects waterproofing method, structural support, and whether a clamping/adjustable drain or a simple hub connection is appropriate. Installers must consider replaceability and access for maintenance when pairing pan and drain.
- Preformed acrylic vs. tile mortar compatibility
- Liner vs. bonded waterproofing needs
- Outlet location constraints
- Adjustable drain benefits
- Curbless slope and threshold implications
Sizing Traps and Trap Arms: Diameters and Allowable Lengths
How far can a trap sit from the shower drain before it compromises flow and seal? Local codes typically limit trap arm length by diameter: larger diameters allow longer trap arms while preserving water seal and preventing siphonage. Common practice pairs 1-1/4″ traps with very short arms (rare for showers), 1-1/2″ with moderate lengths, and 2″ for longest runs. Materials and fittings affect performance; maintain accessible cleanouts. Consult code for exact allowable lengths and fixture unit equivalencies.
| Trap Diameter | Typical Max Length | Notes |
|---|---|---|
| 1-1/4″ | 12″ | Not recommended for showers |
| 1-1/2″ | 18–30″ | Standard for many showers |
| 2″ | 48–60″ | For longer runs |
Slope & Pipe Length: Effects on Drainage Performance
With a consistent slope and appropriate length, a shower drain line balances flow velocity and trap seal integrity to prevent backups and siphonage. Proper slope (commonly 1/4″ per foot) guarantees water moves briskly without eroding seals; excessive length increases friction, slows flow, and raises clog risk.
Short runs reduce head loss but must respect trap-arm maximums to maintain venting. Designers consider fixture unit load, available fall, and cleanout access. Installers verify pitch over the entire run and minimize horizontal runs where possible to preserve self‑scouring flow.
- Assure uniform pitch from trap to stack
- Limit horizontal pipe length where practical
- Include accessible cleanouts
- Avoid sagging or backpitch
- Account for fittings’ equivalent length
Common Pipe Materials: PVC, ABS, Cast Iron, Copper Compared
Typically, plumbing professionals choose among PVC, ABS, cast iron, and copper based on durability, cost, noise control, and compatibility with local codes. PVC is lightweight, inexpensive, and corrosion‑resistant but less sound‑dampening. ABS offers similar benefits with greater cold‑temperature toughness. Cast iron is durable and quiet but heavy and costly. Copper resists heat and corrosion; it is pricier and may react with water chemistry. Selection balances budget, noise, lifespan, and code. Maintenance and joint type also influence choice. A brief comparison follows.
| Material | Key traits |
|---|---|
| PVC | Low cost, easy install |
| ABS | Tough, cold-resistant |
| Cast iron | Quiet, long-lasting |
| Copper | Heat-resistant, premium |
Best Long‑Lasting, Low‑Maintenance Drain Pipe Options
After comparing materials by cost, noise, and durability, attention turns to which options deliver the longest service life with minimal upkeep. The most reliable choices balance corrosion resistance, clog resistance, and ease of replacement.
Cast iron resists crushing and suppresses noise but requires proper joints to avoid leaks. PVC offers chemical resistance, lightweight handling, and straightforward repairs. Copper combines longevity and bacteriostatic properties where local codes allow. ABS provides impact resistance in colder climates. Stainless steel fittings can extend system life where connections face wear.
- Cast iron
- PVC (schedule 40)
- Copper
- ABS
- Stainless steel fittings
Walk‑In Tubs and Curbless Showers: Special Drainage Needs
Walk‑in tubs and curbless showers often require larger drain diameters to handle higher flow rates and prevent pooling.
Proper floor slope is critical to direct water toward the drain, and waterproofing must extend across the entire floor plane to protect underlying structures.
These installations demand coordinated sizing and drainage detailing to guarantee reliable performance.
Larger Drain Diameter Needed
Because curbless showers and walk-in tubs often handle larger water volumes and faster flow rates, they usually require a larger drain diameter than standard shower drains.
Designers and plumbers select increased pipe sizes to reduce clogging risk, guarantee rapid evacuation during high-flow fills, and meet local code demands for accessible fixtures.
Larger diameters also simplify maintenance and accommodate debris and hair. Material choice, trap design, and connection to the main waste line remain critical considerations when upsizing drains.
- Reduced clogging and easier maintenance
- Faster emptying for safety and convenience
- Compatibility with higher-flow fixtures
- Code compliance for accessibility
- Improved longevity of the drainage system
Floor Slope And Waterproofing
When designing curbless showers and walk‑in tubs, proper floor slope and continuous waterproofing are essential to channel water toward the drain while preventing leakage into adjacent spaces.
Install a 1/4 inch per foot slope toward the drain or follow manufacturer recommendations for linear drains; maintain consistent slope transitions to avoid low spots.
Use a continuous waterproof membrane extending up walls and under finished flooring, sealed at penetrations and drain assemblies.
Integrate bonded or clamped drain flanges compatible with the membrane.
Verify slope and membrane integrity before tile installation and perform flood tests to confirm proper drainage and watertightness.
Retrofitting an Old Shower: When to Upsize the Pipe
In older bathrooms, replacing a shower often prompts an evaluation of the existing drain line to determine if a larger diameter is necessary; decisions hinge on fixture type, local code, and observed performance such as slow drainage or frequent backups.
Assessment weighs flow rate of new fixtures, trap and vent configuration, pipe material deterioration, and compatibility with remodel layout.
Upsizing is advised when multiple high-flow fixtures share a line, vents are inadequate, or chronic clogs persist despite cleaning.
Any change must meet code and slope requirements to prevent siphoning or pooling.
- Verify local code minimums first
- Inspect venting and trap integrity
- Measure fixture flow rates
- Check current pipe condition
- Consider slope and fitting count
Cost Comparison for Shower Drain Materials and Labor
Typically, cost differences for shower drain projects depend on material choice, labor complexity, and local rates. The analysis compares common pipe materials, expected material costs, and typical labor ranges. Ceramic or brass drains cost more but last longer; PVC is cheapest and easiest to install. Labor rises with access difficulty, tile removal, or rerouting. Regional rates shift totals considerably; contractors provide quotes. Budgeting should include permit and disposal fees. The table below summarizes typical relative costs and labor effort estimates.
| Material | Material Cost | Labor Complexity |
|---|---|---|
| PVC | Low | Low |
| ABS | Low–Medium | Low |
| Copper | Medium–High | Medium |
| Brass/Ceramic | High | Medium–High |
DIY Checks: Confirm Drain Diameter, Slope, and Trap Size
Measure the existing drain opening, verify the pipe slope, and confirm trap dimensions before any DIY shower work begins. The DIYer should document measurements, compare them to local code or manufacturer requirements, and note access points. Use a level and tape, inspect trap type (P-trap or drum), and make certain the trap seal depth matches fixture needs. Confirm pipe material and inside diameter to select compatible fittings. If uncertainties arise, consult a plumber for verification.
- Measure inside pipe diameter at the hub
- Check fall: minimum 1/4″ per foot for horizontal runs
- Record trap seal depth
- Inspect for vent connection
- Verify fitting compatibility
Warning Signs a Shower Drain Is Undersized or Failing
Slow drainage, where water pools instead of clearing promptly, often indicates the pipe is undersized or partially blocked.
Gurgling or bubbling sounds as water drains signal trapped air and poor flow capacity.
Repeated backups, especially during concurrent fixtures, confirm the need for inspection and possible upsizing or repair.
Slow Drainage Rates
Frequently, a shower that drains sluggishly signals more than temporary hair buildup; it can indicate an undersized or failing drain system unable to handle expected flow. Slow drainage often reflects restricted pipe diameter, partial blockages within narrow piping, or improper slope reducing conveyance. Persistent pooling after typical use suggests capacity mismatch—especially in multi-shower or high-flow fixtures.
Reduced flow increases risk of standing water, odors, and prolonged drying times. Inspection should assess pipe size, trap restrictions, and venting. Upgrading to appropriately sized piping or correcting pitch often restores performance and prevents recurring slow-drain symptoms.
- Standing water after several minutes
- Repeated slowdowns despite cleaning
- Water level rises when adjacent fixtures run
- Long drying times and mildew odor
- Visible corrosion or sediment buildup
Gurgling Or Bubbled Water
Gurgling or bubbled water from a shower drain signals airflow disruption in the plumbing that often accompanies undersized or failing drain systems. Such noises indicate trapped air moving through partial blockages, restrictive pipe diameters, or improperly vented configurations.
The sound often coincides with slow water removal and intermittent bubbling as water displaces air pockets. Persistent gurgling suggests the system cannot equalize pressure quickly enough, increasing corrosion risk and stressing seals. Detection warrants inspection of pipe size, pitch, vent connections, and trap integrity. Addressing the root cause—often resizing or correcting venting—prevents escalation to more severe drainage failures.
Repeated Backups Occurring
Repeated backups in a shower indicate that wastewater is not being carried away quickly enough, a clear sign the drain line may be undersized, obstructed, or improperly vented.
Recurrent pooling or slow emptying signals hydraulic capacity issues or persistent blockages; odors and sewage backup into other fixtures may follow.
A professional evaluation can confirm pipe diameter, slope, and venting, and identify roots, grease, or buildup restricting flow.
Corrective actions range from snaking and hydro-jetting to replacing undersized sections or adding vents.
Timely intervention prevents structural water damage and health hazards associated with foul discharge.
- Frequent slow draining after use
- Water rising when other fixtures run
- Sewage smell in bathroom
- Visible pooling or overflow events
- Reoccurring clogs despite cleaning
Quick Buying Checklist: Pick the Right Drain Pipe and Parts
When choosing shower drain pipes and parts, prioritize pipe size, material, connection type, and flow rate to guarantee compatibility with the bathroom’s waste system and local code.
Confirm drain diameter matches trap and waste line; measure existing fittings.
Select materials (PVC, ABS, cast iron, stainless) for durability, chemical resistance, and noise.
Pick connection types—slip, hub, threaded, or compression—that fit existing plumbing and ease installation.
Verify flow rating in gallons per minute to avoid backups.
Include a compatible trap, flange, and waterproofing flange or clamping ring.
Buy parts with matching standards and replacement availability for future service.
Further Reading & Local Code Resources
For guidance beyond basic selection, consult authoritative resources and local plumbing codes to make sure installations meet safety, ventilation, and drainage requirements. The reader is directed to primary sources: national plumbing codes, manufacturer installation manuals, and technical guides that clarify pipe sizing, trap placement, slope, and venting.
Local amendments and permit offices can alter nominal requirements; verifying jurisdictional rules avoids rework. For complex or multi-bath installations, consider professional consultation. Reliable online databases and trade association publications provide searchable references and explanatory diagrams.
- International Plumbing Code (IPC) and Uniform Plumbing Code (UPC)
- Local municipal plumbing amendments
- Manufacturer installation manuals
- Trade association technical bulletins
- Licensed plumber or building inspector guidance
Conclusion
A clear rule and frequent confusion sit side by side: most showers use 2‑inch drains, yet many installations still rely on 1½‑inch lines. Practical code, flow rates, and trap performance demand the larger size in newer or high‑flow setups, while older or low‑flow showers can function with smaller piping. Homeowners benefit from matching pipe, slope, and trap to usage; a proper check prevents slow drains, backups, and costly retrofits.