How to Vent a Water Heater Safely: Step-by-Step Guide for Gas & Electric Units
To safely vent a water heater, ensure that combustion gases are directed away from the unit to prevent hazards like carbon monoxide buildup. For gas water heaters, install appropriately sized flues or direct-vent systems, seal all joints, maintain required clearances, and confirm proper terminations. For electric units, ensure adequate clearance and ventilation. Always shut off power or fuel before starting, use the right materials, and adhere to local codes. For complex installations or gas work, it’s best to hire a licensed professional. Follow this guide for detailed steps, checks, and troubleshooting.
What Venting a Water Heater Means and Why It Matters
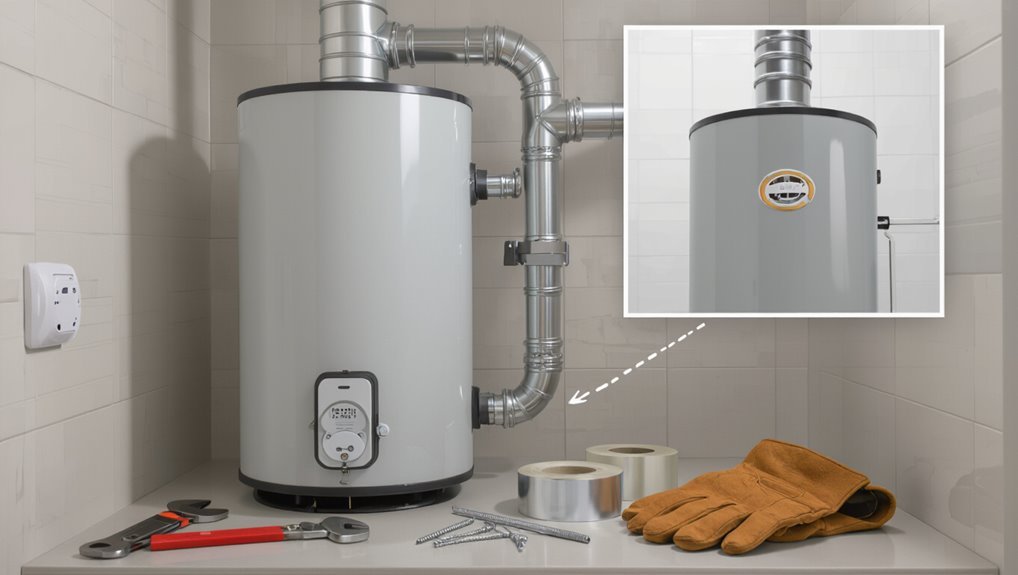
Venting directs combustion gases and excess heat away from the water heater, directly affecting both safety and system performance.
Gas and electric units require different venting approaches—gas heaters need proper flues for combustion products while electric models generally need only clearance and exhaust for moisture.
Improper venting can cause carbon monoxide buildup, backdrafting, and accelerated corrosion, creating immediate safety hazards and long‑term equipment damage.
How venting affects safety and performance
Properly directing combustion gases from a water heater is essential to both safety and system efficiency.
Correct venting prevents carbon monoxide buildup, reduces fire risk, and guarantees consistent draft for efficient combustion.
Following guidance on how to vent water heater units maintains appliance longevity, minimizes corrosion and soot, and preserves heating performance.
Improper venting compromises safety and increases energy use and maintenance needs.
Differences between venting gas and electric water heaters
Having established how venting influences safety and performance, the discussion now shifts to the fundamental differences between gas and electric water heater venting.
Gas units require dedicated flues or direct-vent systems to remove combustion products and guarantee proper draft, often needing specific materials and clearances.
Electric heaters lack combustion exhaust, so venting considerations focus on enclosure ventilation and heat dispersion rather than flue design.
Risks of improper venting (carbon monoxide, backdrafting, corrosion)
When combustion gases are not routed and expelled correctly, they pose serious hazards including carbon monoxide poisoning, backdrafting that reintroduces exhaust into living spaces, and accelerated flue and appliance corrosion.
Improper venting reduces combustion efficiency, increases fire risk, and shortens equipment life. Symptoms include soot, staining, odors, and unexplained illness.
Regular inspection, correct vent sizing, and sealed connections prevent these dangers.
Quick Overview: Can You Vent Your Water Heater Yourself?
A homeowner can handle simple venting tasks if the installation is straightforward and local codes allow it. However, complex setups or gas connections warrant a licensed professional.
Required permits and adherence to building codes are often mandatory and vary by jurisdiction. Ignoring manufacturer warranty terms or code requirements can void coverage and create safety risks.
When DIY is acceptable and when to hire a pro
Although many homeowners can handle basic water-heater venting tasks, the decision to DIY depends on the fuel type, venting complexity, local codes, and the individual’s skill level and tools.
DIY is reasonable for simple electric units and straightforward, accessible vent runs.
Hire a licensed pro for gas, complex flues, rooftop terminations, combustion-air issues, or any uncertainty to guarantee safety and proper performance.
Required permits, codes, and manufacturer warranty considerations
Deciding whether to DIY water-heater venting also requires checking permits, local codes, and manufacturer warranty rules because these factors determine legality, safety, and coverage.
Municipal codes regulate vent materials, clearances, and termination locations; inspections and permits may be mandatory.
Altering factory venting can void warranties.
Consult local building department and the heater’s manual; when in doubt, hire a licensed professional to guarantee compliance and preserve coverage.
Tools, Materials, and Safety Gear Needed
The section lists the specific tools, replacement parts, and materials required for safe venting, presented as concise checklists.
It also identifies necessary personal protective equipment and safety preparations to limit exposure and hazards.
Readers will be guided on matching tools and parts to common venting scenarios and verifying readiness before beginning work.
Tools checklist
A concise checklist helps guarantee the venting job proceeds safely and efficiently: essential hand tools (adjustable wrench, pipe wrench, screwdriver set), a hacksaw or tubing cutter for metal vent pipes, drill with masonry bits for chimney or wall penetrations, and a level to confirm proper slope.
- Safety goggles and dust mask
- Work gloves and knee pads
- Flashlight or headlamp
- Tape measure and marker
- Caulk gun and high-temp sealant
Materials and replacement parts checklist
Essential materials and replacement parts guarantee a venting job is durable, code-compliant, and safe.
The homeowner or technician should gather components that match appliance specifications and local codes, ensuring proper seals, corrosion resistance, and thermal tolerance before starting.
- Galvanized or stainless vent pipe sections
- Elbows and adapters
- Roof or wall flashing and sealant
- High-temp tape and clamps
- Draft hood or vent cap
Personal protective equipment and safety preparations
Before beginning any venting work, the installer must assemble appropriate personal protective equipment (PPE) and complete basic safety preparations to reduce risk from cuts, burns, inhalation, and falls.
Confirm gas/electric isolation, ventilation, and a clear workspace. Use lockout/tagout and a spotter for elevated work.
- Safety glasses
- Heat-resistant gloves
- Respirator or N95
- Hard hat
- Non-slip footwear
Preparing the Work Area and Pre-Work Safety Steps
Before beginning vent work, the technician shuts off the fuel source and electrical supply following the manufacturer’s and local code procedures for gas and electric units.
The water supply is then closed and system pressure relieved to prevent scalding or leaks during disassembly.
Finally, gas lines and the work area are checked with a proper leak detector and the carbon monoxide alarm is verified operational before proceeding.
Shutting off fuel and power safely (gas and electric procedures)
Shut down all energy sources to the water heater before any venting work begins: close the gas supply valve for gas units and turn off the circuit breaker for electric models.
Verify gas shutoff by checking the valve position and testing for odor; confirm power is off with a noncontact voltage tester at the heater.
Post warning signs and lock out/tag out where applicable.
Turning off water supply and relieving pressure
Isolate the water feed and release system pressure to prevent scalding and flooding during venting work.
Close the cold-water shutoff at the heater, open a nearby hot faucet to drain residual hot water, and attach a hose to the drain valve if significant draining is required.
Open the pressure-relief valve briefly to equalize tank pressure, then reseal before proceeding with venting tasks.
Testing for gas leaks and carbon monoxide detectors
Check for gas leaks and verify carbon monoxide (CO) detection readiness before any venting work begins.
Inspect fittings and flex lines with approved leak solution or an electronic sniffer; never use open flame.
Test CO detectors for power, age, and function; replace batteries and units older than ten years.
Evacuate and call the gas utility if any leak or persistent CO alarm is detected.
Venting Basics: Types of Vent Systems
The section outlines common venting arrangements and how they operate, beginning with traditional atmospheric vents that rely on natural draft.
It then introduces powered options—power vent and direct vent systems—and explains when each may be appropriate.
Finally, it summarizes the differences among Category I, II, III, and IV vent classifications and their implications for installation and safety.
Atmospheric venting overview
How does atmospheric venting work in water heaters, and why is it still used?
Atmospheric venting relies on natural convection: hot combustion gases rise through a flue into a chimney or vertical vent, drawing fresh air from the room.
It’s simple, low-cost, and reliable where proper draft and chimney conditions exist.
Installation requires correct clearances, vent sizing, and unobstructed pathways.
Power vent and direct vent systems overview
After outlining atmospheric venting, attention shifts to systems that use mechanical assistance: power vent and direct vent water heaters.
Power vent units employ a fan to push combustion gases through horizontal or vertical ducts, permitting flexible installation.
Direct vent models draw combustion air from outdoors and expel exhaust externally, maintaining sealed indoor environments.
Both require proper ducting, clearances, and electrical supply for safe operation.
Category I, II, III, IV venting differences
Venting classifications — Category I, II, III, and IV — define how combustion appliances interact with their flues regarding pressure, temperature, and corrosion potential. Category I uses atmospheric draft; II is uncommon, weak positive pressure with high temp; III is positive pressure, high temp; IV is positive pressure, low temp with corrosive condensate—materials and termination differ.
| Category | Pressure | Temp/Corrosion |
|---|---|---|
| I | Negative | High/Low |
| III | Positive | High/Low |
Step-by-Step: How to Vent a Gas Water Heater
The procedure begins with a careful inspection of the existing venting and flue connection to identify corrosion, leaks, or improper materials.
Next, measurements and a plan for the vent run, terminations, and required clearances guide the selection and installation of single-wall or B-vent connectors, including any replacements.
Finally, joints are sealed, supports and draft diverters are secured, and roof or sidewall terminations are completed to code.
Inspecting existing venting and flue connection
Begin by visually and physically checking the existing venting and flue connection to confirm they are correctly sized, secure, and free of corrosion, obstructions, or improper fittings.
Inspect joints, seams, and support straps for gaps or looseness.
Verify the draft hood and chimney connection are intact and sealed.
Note signs of soot, rust, or water damage and document any defects for repair or replacement.
Measuring and planning vent run and terminations
With defects noted and documentation completed, attention shifts to measuring and planning the vent run and terminations.
The installer measures vertical rise, total equivalent length and number of elbows, then locates rooftop or sidewall termination per code.
Clearances to combustibles, proper slope for condensate, support spacing and weatherproofing are recorded.
Draft requirements, termination height above roof, and local venting rules are verified.
Installing or replacing single-wall vs. B-vent connectors
Several installers will encounter two common connector types—single-wall and B-vent—each requiring distinct materials, clearances, and installation techniques.
Installers must match connector type to appliance and local code, use proper gaskets, clamps, and support intervals, and avoid mixing incompatible sections.
Replace corroded or damaged connectors, guarantee correct length and pitch, and seal joints with approved high-temperature methods.
Making proper roof or sidewall terminations and clearances
Proper roof or sidewall terminations guarantee safe exhaust of combustion gases and must meet manufacturer instructions and local code for clearances, flashings, and cap types.
Install approved chimney caps or wall terminals at required heights above rooflines, intake openings, and property lines.
Maintain specified clearances from eaves, windows, and vents.
Verify wind, rain, and animal protection per code and label requirements.
Sealing joints, securing supports, and adding draft diverters
Begin by inspecting each vent connection, because secure, gas-tight joints and stable supports prevent leaks and misalignment that can compromise draft.
Apply high-temperature-rated sealant or foil tape to joints, tighten clamps, and fasten hangers or brackets per code.
Install a correctly sized draft diverter above the water heater to stabilize flow and protect against downdrafts while maintaining required clearances and accessibility.
Testing draft and re-lighting pilot safely
Before restoring gas and lighting the pilot, confirm that venting is clear and that combustion gases will exhaust correctly; this reduces the risk of carbon monoxide buildup and flare-ups.
Check draft with a smoke pencil or match at the draft hood, verify upward flow, and inspect for backdraft.
Follow manufacturer pilot relight steps, use proper tools, listen for steady flame, and monitor for odors or irregular combustion.
Step-by-Step: How to Vent a Power-Vent or Direct-Vent Gas Water Heater
The section outlines identification of intake and exhaust ports and the correct routing of PVC or metal intake and exhaust pipes for power‑vent and direct‑vent units, noting special routing for condensing models.
It covers installation of condensate drains and required traps, electrical connection and vent fan integration, and a startup checklist.
Final steps focus on functional tests to verify airflow, condensate handling, and safe operation.
Identifying intake and exhaust ports
Identifying the intake and exhaust ports on a power-vent or direct-vent gas water heater requires careful visual inspection and reference to the unit’s labeling and manual.
The intake usually draws fresh air and is smaller or marked “INTAKE”; the exhaust is larger, heat-resistant, and labeled “EXHAUST” or with a flue symbol.
Confirm with diagrams, model-specific documentation, and clear port markings.
Routing PVC/metal exhaust and intake pipes (condensing models)
Begin by planning the shortest, straightest run for the intake and exhaust pipes, keeping in mind that condensing models require PVC for cooler exhaust and a separate intake line.
Maintain proper slope for condensate drainage, avoid unnecessary offsets, and verify clearances and support spacing per the manufacturer’s guidelines.
Use approved PVC or listed metal where specified, seal joints with appropriate solvent or gaskets, and maintain accessible cleanouts.
Installing condensate drains and trap requirements
Install condensate drains and traps so acidic condensate and sewer gases are routed and neutralized without obstructing the vent system’s airflow.
Position a trapped drain near the appliance, sloping piping to a neutralizer or approved drain.
Use corrosion-resistant materials, accessible cleanouts, and a water seal trap sized per code to prevent flue gas entry.
Provide frost protection and follow local codes for materials and slope.
Connecting to power and running vent fan components
With condensate and traps in place, attention shifts to powering and testing the vent fan system for a power‑vent or direct‑vent gas water heater.
A licensed electrician should install a dedicated circuit, proper conduit, and a fused disconnect.
Securely mount the fan, connect wiring per manufacturer schematics, and verify grounding.
Energize briefly to confirm operation, airflow direction, and absence of abnormal noise or vibration.
Startup checklist and functional tests
Once power and vent components are in place, a concise startup checklist and set of functional tests confirm safe, code‑compliant operation before leaving the site.
Technicians verify combustion air, gas pressure, and proper vent draft. They inspect seals, condensate drains, and termination clearances.
Run the fan under load, confirm controls, safety interlocks, and CO levels. Document results and corrective actions.
Electric Water Heaters and Venting Considerations
Electric water heaters generally do not require flue venting because they produce no combustion gases.
Attention should instead focus on spacing and clearance requirements and how those differ in shared utility rooms.
Consideration must also be given to ventilation for adjacent combustion appliances and adequate combustion air if the room contains gas-fired equipment.
When venting is not required for electric models
Although tank-type and tankless electric water heaters do produce heat, they do not generate combustion gases, so they typically do not require a flue or exhaust vent.
Venting is unnecessary in standard installations; only proper electrical connections, thermal protection, and drain pan arrangements matter.
Local codes may still dictate installation clearances, seismic restraints, or secondary drains, but not combustion venting.
Space, clearance, and combustion-air differences in shared utility rooms
When installed in a shared utility room, electric water heaters still require careful attention to space, clearances, and combustion-air provisions for any nearby fuel-burning appliances.
Even without a flue, they must not obstruct access or ventilation paths. Clearances for service, seismic straps, and airflow openings must meet code.
Separate combustion-air sources for gas units, pathway continuity, and appliance placement preserve safety and serviceability.
Common Problems and How to Troubleshoot Them
Signs of poor venting—such as soot, yellow pilot flames, or strong exhaust odors—indicate issues that range from blockages to incorrect vent sizing.
The guide next covers methods to identify backdrafting and carbon monoxide risks, and how to test for airflow and combustion safety.
It also outlines steps to diagnose and address corrosion, leaks, and excessive condensation in vent components.
Symptoms of poor venting and likely causes
Poor venting frequently presents with clear, observable symptoms that indicate specific faults in the venting system. Common signs include poor combustion, soot, or staining near the flue. Likely causes range from blockages to improper flue sizing or damaged seals.
- Yellow or lazy pilot flame — fuel/air imbalance
- Soot buildup — incomplete combustion
- Excessive condensation — cold or long vent runs
- Odors near unit — leaks
- Corroded vent components — moisture or age
Diagnosing backdrafting and carbon monoxide issues
Diagnose backdrafting and carbon monoxide (CO) issues by systematically checking airflow, combustion products, and appliance operation to identify the root cause.
Inspect vent terminations, roof/chimney obstructions, and negative-pressure sources (exhaust fans, clothes dryers).
Use a combustion analyzer and CO detector to measure flue gases and concentrations.
Verify proper draft with smoke or incense.
If readings exceed limits, shut off gas and call a qualified technician.
Corrosion, leaks, and condensation troubleshooting
Several common issues—corrosion, leaks, and condensation—can compromise a water heater’s venting system and should be evaluated promptly to prevent failures or safety hazards.
Inspect joints, seams, and roof penetrations for rust or holes. Tighten or replace corroded connectors, repair flashing, and reseal joints.
Address condensation by insulating cold sections, improving ventilation, or installing a condensate drain and neutralizer as needed.
Compliance, Inspection, and Testing After Installation
Following installation, the installer verifies compliance with local codes and required clearances to guarantee the vent meets jurisdictional safety standards.
They perform draft and combustion testing with appropriate tools and procedures to confirm correct venting and safe exhaust behavior.
Finally, the technician documents the work, test results, and permit information for inspection records and future service.
Local code checkpoints and required clearances
Compliance with local codes and required clearances guarantees safe operation and legal approval of a water heater venting system.
Inspectors verify vent material, chimney height, termination clearances from openings, roof and eave distances, and required combustion air provisions.
Maintain specified clearances from combustibles, observe vent slope and support spacing, and secure permits.
Document compliance for inspection and future maintenance records.
Testing for proper draft and combustion (tools and procedures)
Begin testing the vent system and combustion performance only after all clearances, connections, and seals have been verified and the installation has been approved for commissioning.
Use a draft gauge, manometer, combustion analyzer, and CO detector. Measure draft at the draft hood or connector, record stack temperature, and analyze O2, CO, and CO2.
Compare results to manufacturer and code limits; correct deviations before final approval.
Documenting work for permits and future service
Once testing and adjustments are complete, thorough documentation must be prepared to satisfy permit requirements and to guide future maintenance and inspections.
Records should include model/serial numbers, venting diagrams, test readings, dates, installer credentials, permit numbers and any deviations from code.
Provide copies to the permitting authority and the owner, and retain originals for service history, warranty claims, and future inspections.
Maintenance and Long-Term Care of Vent Systems
A routine inspection schedule helps detect corrosion, blockages, loose joints, and improper clearances before they become hazards.
Seasonal maintenance—such as clearing debris from cap assemblies, checking condensate drains, and cleaning accessible passages—keeps draft and combustion performance reliable.
Guidance on repair versus replacement should be based on material condition, age, and cost-effectiveness, with full replacement favored for significant corrosion, persistent leaks, or compromised structural integrity.
Regular inspection schedule and what to look for
Because vent systems degrade gradually, establishing a consistent inspection schedule is essential to detect issues before they become safety hazards.
Inspect monthly for visible corrosion, blockages, and loose joints; test draft and carbon monoxide alarms quarterly; verify clearances and support annually; document findings; and schedule professional inspection every 3–5 years.
- Corrosion
- Blockages
- Loose joints
- Draft performance
- Support and clearances
Seasonal maintenance tasks and cleaning tips
Prepare a simple seasonal routine to keep vent systems functioning safely and efficiently throughout the year.
Inspect external terminations for bird nests, debris, ice, and corrosion.
Clear accessible ducts gently, remove soot or creosote buildup, and clean vent caps.
Check seals and supports, tighten loose connections, and confirm adequate airflow.
Document findings and schedule professional chimney or flue cleaning when buildup persists.
When to replace vent components vs. repair
Following seasonal checks and basic cleaning, attention shifts to deciding whether vent components require repair or full replacement.
Corrosion, extensive warping, persistent leaks, or damaged seals indicate replacement. Minor gaps, loose fittings, or isolated rust spots may merit repair.
Safety priorities, code compliance, cost, and component age guide the choice. When in doubt, consult a qualified technician to assess structural integrity and ventilation performance.
Safety Tips and Common Mistakes to Avoid
Homeowners often make simple ventilation errors—improper clearances, wrong materials, and poor termination—that can create carbon monoxide and fire hazards.
Recommended practices include following manufacturer instructions, using code-approved components, maintaining proper pitch and clearance, and scheduling inspections.
Emphasizing these precautions reduces risk and helps guarantee code-compliant, reliable venting.
Top DIY errors that create hazards
Ignoring basic venting rules or attempting complex modifications without proper knowledge are the most common mistakes that turn a routine water heater project into a safety hazard.
DIYers often create backdrafting, carbon monoxide risks, fires, or code violations by cutting corners.
Common hazardous errors include:
- Improper vent slope or pitch
- Loose or leaky connections
- Using wrong materials
- Blocking termination
- Skipping combustion air provisions
Best practices to ensure safe, code-compliant venting
After outlining common mistakes that create backdrafting, carbon monoxide risks, and code violations, attention turns to practical measures that prevent those hazards and keep installations compliant.
Inspect venting materials, maintain proper pitch and clearances, secure joints with approved connectors, and install correct draft hoods and termination caps.
Follow manufacturer instructions, local codes, and schedule professional inspections and CO detectors to verify safety.
Signs You Need Professional Help and Choosing a Contractor
Visible corrosion, persistent carbon monoxide alarms, improper draft, or complex vent routing are red flags indicating the need for a licensed HVAC or plumbing technician.
Homeowners should prepare concise questions about licensing, insurance, warranty, and experience with water-heater venting when contacting contractors.
Verify credentials by checking license numbers with state boards, reading recent reviews, and requesting proof of insurance and references.
Red flags that require licensed HVAC/plumbing technicians
Certain warning signs around a water heater indicate hazards or complex faults that require a licensed HVAC or plumbing technician.
Promptly report persistent gas smells, visible corrosion, recurring leaks, pilot light failures, irregular venting or soot, loud banging, or unexplained pressure fluctuations.
Also seek pros for improper combustion, failed safety valves, or structural flue damage.
These red flags exceed typical DIY scope and demand professional diagnosis and repair.
Questions to ask potential contractors and verifying credentials
How should a homeowner vet a contractor before authorizing water heater or venting work? A homeowner should verify license, insurance, references, and written estimates; confirm code familiarity and warranty terms; and require itemized contracts.
Ask about experience with similar units, permitting, and inspection procedures. Recommend contacting local licensing boards and checking online reviews before scheduling service.
- License and insurance
- References and portfolio
- Written estimate
- Warranty and permits
- Code compliance
Quick Reference: Venting Requirements Summary and Checklist
A concise, one-page checklist summarizes venting requirements for both gas and electric water heaters to support safe installation and routine inspection.
It lists required clearances, vent types, termination locations, and basic troubleshooting steps.
The checklist is designed as a quick-reference tool to confirm compliance before completing work or calling a professional.
One-page checklist for gas and electric water heater venting
Quick-reference checklists provide technicians and homeowners a concise summary of the essential venting requirements for both gas and electric water heaters, listing clearance, vent type, termination, combustion air, and inspection points to guarantee safe operation.
A one-page checklist condenses codes, measurements, component checks, and testing steps for rapid verification before commissioning or service.
- Clearances and mounting
- Vent material and slope
- Termination location
- Combustion air provision
- Draft and leak inspection
Conclusion
To summarize, the guide reminds readers that proper water heater venting is the backbone of household safety, preventing harmful gases from turning a home into a closed box. By following step-by-step instructions, using correct materials, and observing maintenance tips, one can reduce risks and extend appliance life. When uncertainty or complex venting situations arise, calling a qualified professional keeps occupants safe and guarantees systems run efficiently, like a well-tuned engine.