
How to Install a Reverse Osmosis System: Step-by-Step Guide for Homeowners
Installing a reverse osmosis (RO) system under your sink is a straightforward process that any homeowner can tackle. Start by gathering the necessary tools and testing your water quality. Next, locate the cold-water feed and drain. After shutting off the water supply, install the feed valve, mount the filters and storage tank, and insert the RO membrane. Then, connect the faucet and drain saddle, and pressurize the system to check for leaks. Regular filter changes and TDS (total dissolved solids) checks will ensure optimal performance. The entire installation typically takes 2 to 4 hours, with costs ranging from $150 to $600 for parts. For additional help, refer to troubleshooting tips and advanced installation advice.
What a Reverse Osmosis System Is and Why Homeowners Choose It
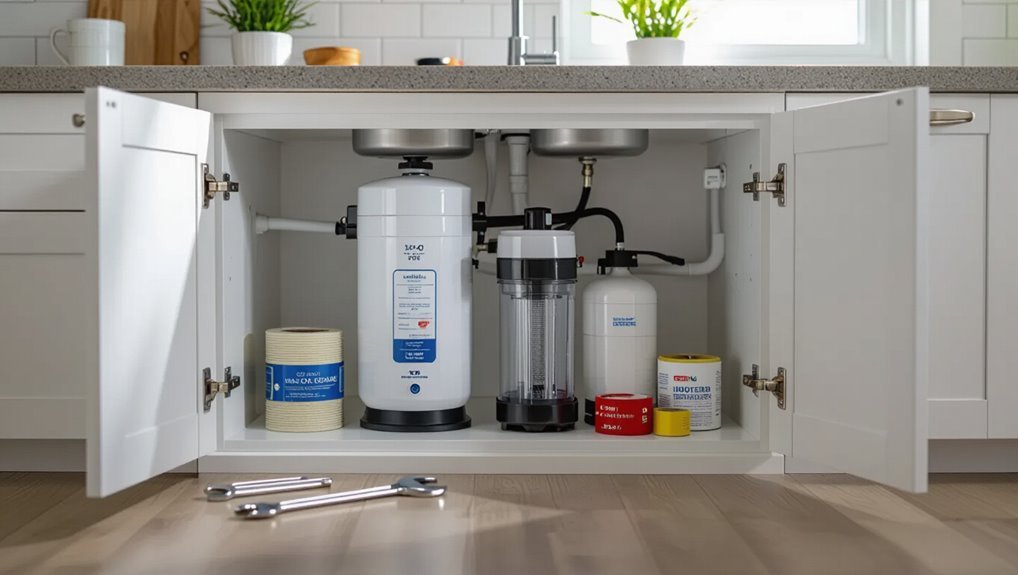
A reverse osmosis (RO) system forces water through a fine membrane to separate dissolved solids and many other impurities from the purified water.
It commonly removes contaminants such as lead, chlorine, nitrates, and dissolved salts, improving taste and protecting appliances and plumbing.
While RO offers high-quality drinking water and appliance longevity, it wastes some water, strips beneficial minerals, and may be unnecessary for already-treated municipal supplies.
How reverse osmosis (RO) works in plain terms
Because water is forced through a semipermeable membrane under pressure, reverse osmosis separates dissolved solids, contaminants, and many particles from the water that passes into a home’s storage tank.
The process uses prefilters, membrane, and postfilters; clean water collects while concentrated brine drains away.
Homeowners learn how to install reverse osmosis system to guarantee proper flow, pressure, and leak-free fittings for reliable performance.
Common contaminants removed by RO systems
Many homeowners choose reverse osmosis systems for their proven ability to remove a broad range of contaminants, including dissolved salts, lead, chlorine, fluoride, nitrates, and various organic compounds.
RO also reduces heavy metals, pesticides, herbicides, and some pharmaceuticals. It effectively lowers total dissolved solids and turbidity, while pre- and post-filters address particulates and residual tastes or odors, improving overall water purity without discussing health claims.
Benefits for drinking water, appliances, and health
When homeowners seek consistently pure water, reverse osmosis systems are chosen for their ability to remove a wide spectrum of dissolved impurities while leaving beneficial minerals largely intact through post-treatment options.
Treated water tastes better, reduces staining and scale in kettles and appliances, prolongs appliance lifespan, and lowers exposure to lead, nitrates, and disinfectant byproducts, supporting hydration and reducing certain health risks.
Limitations and situations when RO may not be ideal
Despite the clear benefits, reverse osmosis is not a one-size-fits-all solution and has specific drawbacks that can make it less suitable in some homes.
RO wastes water, reduces beneficial minerals, requires regular maintenance and filter changes, and adds upfront and ongoing costs.
It may be unnecessary for already-treated municipal supplies, incompatible with low water pressure, or impractical where wastewater disposal is restricted.
Types of Reverse Osmosis Systems for Homes
Homeowners can choose from several RO configurations based on space, water needs, and budget, including under-sink units, countertop or portable models, and whole-house systems.
Systems also vary by storage design—tank-based units that hold filtered water versus tankless designs that produce on demand—and share core components such as prefilters, the RO membrane, postfilters, and pressure controls.
Comparing these options helps determine the right balance of capacity, installation complexity, and maintenance.
Under-sink RO systems
Under-sink reverse osmosis (RO) systems mount discreetly beneath a kitchen sink to deliver purified water directly to a dedicated faucet.
These compact units typically include prefilters, an RO membrane, a postfilter, and a small storage tank.
Installation requires a cold-water feed, drain connection, and faucet hole.
They suit single-point drinking-water needs, conserve space, and provide high-quality filtration for household culinary use.
Whole-house RO systems
For households seeking purified water throughout every tap rather than a single dedicated faucet, whole-house RO systems treat incoming municipal or well water at the point of entry so all fixtures receive the same level of filtration.
These systems require larger membranes, higher pressure, prefiltration, and professional installation.
They reduce scale, contaminants, and odors across the home but increase upfront cost, maintenance, and wastewater volume.
Countertop and portable RO units
Several compact options exist for consumers who need portable or countertop reverse osmosis units that deliver filtered water without permanent plumbing changes.
These units typically connect to a faucet adapter or include a self-contained reservoir, offering easy setup and relocation.
Maintenance involves periodic cartridge and membrane replacement; flow rates are lower than under-sink systems.
Ideal for renters, travelers, or small households with limited space.
Tankless vs. tank-based RO systems
While countertop and portable RO units prioritize mobility and simple setup, homeowners considering a more permanent solution must weigh the choice between tankless and tank-based reverse osmosis systems.
Tank-based systems store filtered water for immediate use and offer steady flow, but occupy space and require periodic sanitizing.
Tankless units deliver on-demand water, save space, and reduce stagnation, though they may have slower flow and higher upfront cost.
Key components common to most systems
- Sediment and carbon prefilters to protect the membrane
- Semipermeable RO membrane for contaminant rejection
- Postfilter and faucet or direct dispense for final taste and delivery
Pre-Installation Checklist: Tools, Materials, and Preparation
Before beginning, a concise checklist should confirm required tools and safety gear, stocked parts and consumables, and recent water quality test results.
Measurements of available under-sink or dedicated-space dimensions and verification of plumbing compatibility guarantee the chosen system will fit and connect properly.
Completing these preparatory steps minimizes surprises and streamlines the installation process.
Required tools and safety gear
A careful inventory of required tools and safety gear helps confirm a smooth reverse osmosis installation and minimizes the risk of damage or injury.
The installer should verify tools are functional and PPE is available before starting.
Essential items include:
- Adjustable wrench, basin wrench, and tubing cutter
- Safety glasses and gloves
- Flashlight and small bucket for leaks and access
Parts and consumables to have on hand
Essential parts and consumables should be gathered in advance to prevent delays and guarantee each connection and filter change proceeds without improvisation.
A concise pre-install kit speeds installation and reduces callbacks. Include replacement filters, tubing, and fittings plus sealing materials and mounting hardware.
Check compatibility with the chosen RO model and local plumbing.
- Replacement filters and membranes
- Tubing and quick-connect fittings
- Teflon tape, clamps, brackets
Water quality testing before installation
Why test the feed water before installing an RO system?
Homeowners should assess contaminants, hardness, chlorine, iron, and total dissolved solids to determine prefiltration needs and membrane suitability.
Conduct basic tests with TDS meters, hardness strips, and chlorine kits, or send samples to a lab for thorough analysis.
Record results to select appropriate filters and guarantee membrane longevity and system performance.
Measuring space and checking plumbing compatibility
Before cutting or mounting anything, measure the planned installation area and inspect the existing plumbing to confirm clearances, access, and compatibility with reverse osmosis components.
Note cabinet height, shelf removal needs, and space for the tank.
Verify shutoff valve type, tubing diameters, drain location, and water pressure.
Identify adapter fittings and any required shutoff or sediment prefilter to guarantee smooth installation.
Step-by-Step Installation Guide for a Standard Under-Sink RO System
The following section outlines a concise, sequential procedure for installing a standard under-sink reverse osmosis system.
It begins with shutting off the water and preparing the workspace, then covers installing the feed water valve and routing tubing.
Subsequent steps describe mounting the storage tank and pre-filter housing, fitting the membrane housing and RO membrane, and connecting the faucet (including drilling a sink or countertop hole if required).
Step 1 Shut off water and prepare workspace
Shut off the cold-water supply valve and clear the cabinet beneath the sink to create an accessible, well-lit workspace.
Verify water is fully off by opening the faucet briefly.
Remove stored items and place a bucket and towels to catch residual water.
Assemble basic tools on a mat: adjustable wrench, screwdriver, utility knife, flashlight and safety glasses before proceeding with installation.
Step 2 Install feed water valve and connect tubing
Locate the cold-water line under the sink and install the RO feed valve where the supply connects to the faucet or the shutoff valve.
Tighten securely, avoiding overtightening.
Cut a short length of 1/4″ tubing, deburr the end, and insert into the valve compression fitting.
Route tubing to the RO unit location, securing with clips to prevent kinks and contacting sharp edges.
Test for leaks.
Step 3 Mount the RO storage tank and pre-filter housing
With the feed tubing secured and checked for leaks, attention shifts to mounting the storage tank and pre-filter housing under the sink.
Position the tank on a stable surface or use a bracket, orienting the outlet toward the system.
Mount the pre-filter housing to the cabinet wall at accessible height.
Tighten fittings, apply thread sealant where required, and recheck alignment and clearance.
Step 4 Install membrane housing and RO membrane
Proceed to fit the membrane housing into the system and insert the RO membrane, ensuring correct orientation and secure seals before connecting to the tubing.
Tighten the housing with the provided wrench, hand‑tight plus a quarter turn. Check O‑rings for damage and lubricate with food‑grade silicone.
Align inlet/outlet ports, attach tubing with compression fittings, and verify there are no cross‑threads or leaks before continuing.
Step 5 Connect faucet and drill sink/countertop hole if needed
Begin by confirming the faucet type and the need for a hole in the sink or countertop: some sinks include a predrilled hole, while others require drilling to accommodate the RO faucet’s shank.
Prepare necessary tools, measure and mark hole location, drill with appropriate bit and backing to prevent chipping, deburr edges, insert faucet, secure mounting nut, and connect tubing to the faucet tailpiece per manufacturer instructions.
Step 6 Install drain saddle and connect drain line
Install the drain saddle on the household drain pipe at a location above the trap and below the sink to guarantee proper flow and avoid backpressure; the saddle must sit on a smooth, clean section of pipe, aligned so the drilled hole enters the pipe’s top or upper side.
The connection tubing should run without kinks to the RO unit’s drain fitting. Mark, drill small pilot hole, deburr, tighten saddle evenly.
Step 7 Connect all tubing, check for correct routing and colors
Connect the tubing by matching each line to its labeled port and following the color-coding: typically red for the feed from the cold-water valve, blue for the purified water to the faucet, and black for the waste/drain line.
Firmly insert tubing into quick-connect fittings, trim clean square ends, secure clips or clamps where specified, and route lines to avoid kinks, heat sources, and chafing.
Step 8 Pressurize system, flush membranes, and perform initial leak check
Power on water flow to slowly pressurize the RO system, watching the tank pressure and fittings as the lines fill.
Open the faucet and allow initial flushing to clear preservative and debris from membranes for the manufacturer-recommended duration.
Inspect all connections and filters for leaks during pressurization.
Tighten any loose fittings, recheck seals, and verify draining and product lines function before proceeding.
Step 9 Final testing: TDS meter, flow rate, and pressure confirmation
Begin final testing by verifying water quality, flow, and system pressures to confirm the RO unit operates within specifications.
Use a calibrated TDS meter to compare feed and product readings; expect substantial TDS reduction.
Measure production flow rate and tank fill time against manufacturer specs.
Check inlet and outlet pressures with a gauge.
Record results, resolve deviations, and retest until performance meets standards.
Alternative Installation Scenarios and Tips
The section outlines solutions for common variations, including adding a faucet when no hole exists and securing mounts on plastic, metal, or thin counters.
It also briefly contrasts under-sink units with whole-house/point-of-entry systems and highlights prefiltration needs for well water or high-sediment sources.
Practical tips and decision factors for each scenario are then presented.
Installing when there is no existing faucet hole
If a sink lacks a predrilled faucet hole, installing a reverse osmosis faucet requires planning for a new cut or an alternate mounting location.
Evaluating sink material, available countertop space, and under-sink clearance first will determine the best approach. Options include drilling a new hole with proper tools, mounting the faucet on a nearby countertop or backsplash, or using a deck adapter; guarantee secure sealing and access for tubing.
Adapting to plastic vs. metal sinks and thin counters
Many installations require special consideration when sinks and counters are made from thin materials or plastic rather than thicker metal or stone; these surfaces affect drilling techniques, mounting hardware choices, and sealing methods.
Installers should use low-speed bits, backing plates, rubber gaskets, and vibration-isolating mounts. Adhesive-mounted brackets or clamp-style fittings prevent cracking.
Sealants must be compatible with plastic to avoid stress and discoloration.
Installing a whole-house or point-of-entry RO system (overview)
When countertops or sink materials force alternative drilling and mounting techniques, similar caution applies to planning a whole-house or point-of-entry (POE) reverse osmosis installation: these systems require different site considerations, larger plumbing connections, and space for pre- and post-treatment components.
Placement near main supply, accessible shutoffs, proper pressure regulation, adequate drain routing, electrical needs, and allowance for filter replacement guarantee safe, serviceable POE RO performance.
Working with well water or high-sediment sources
Because well water and sources with heavy sediment present unique challenges, RO installations for them require tailored pre-treatment, protection, and maintenance strategies.
Install sediment and carbon filters, consider a water softener for hardness, and use a booster pump if pressure is low.
Schedule frequent filter changes, monitor turbidity and iron, and test water periodically to adjust treatment and prevent membrane fouling.
Common Problems During Installation and How to Fix Them
Common installation problems include leaks at fittings, low water pressure or slow production, noisy tanks or pumps, and unexpectedly high TDS after commissioning.
Each issue has specific diagnostic steps—tightening or resealing fittings, checking feed pressure and pre-filters, inspecting tank and pump components, and testing/confirming membrane integrity.
The following section outlines targeted fixes and troubleshooting order to isolate and resolve these faults efficiently.
Leaks at fittings and how to stop them
Inspect fittings immediately after initial pressurization to catch any leaks before they worsen.
Tighten compression nuts or push-fit collars snugly; avoid overtightening plastic threads.
Replace damaged O-rings and apply food-grade silicone grease for seals.
Confirm tubing is fully inserted to the fitting shoulder and cut squarely.
Recheck under load and isolate persistent leaks for component replacement rather than repeated tightening.
Low water pressure or slow production causes
Diagnose low water pressure or slow RO production by checking source pressure, prefilter condition, membrane performance, and flow-restrictor integrity; any restriction or drop before the membrane reduces output and can indicate clogged prefilters, a fouled membrane, a failing booster pump, undersized supply lines, or a malfunctioning automatic shut-off valve.
Inspect tubing and fittings for kinks, verify feed valve fully open, test membrane rejection, and replace clogged filters or undersized components.
Noisy tank or pump issues
Address noisy tank or pump issues promptly to prevent premature wear and persistent vibration during and after RO installation.
Technicians should verify secure mounting, proper pump isolation mounts, and correct tank precharge pressure.
Inspect tubing for air traps, replace worn check valves, and confirm fittings are tightened without overtightening.
If noise persists, consult manufacturer guidance or a qualified installer for pump diagnosis or replacement.
High TDS after installation and troubleshooting steps
While mechanical noises point to mounting and pump issues, water quality problems such as unexpectedly high TDS require a different set of checks focused on membrane performance and system integrity.
Inspect prefilters for bypass or saturation, verify correct membrane seating and orientation, confirm tubing and fittings are leak-free, check feed pressure and flow restrictor, and retest TDS after replacing suspect components or flushing the membrane per manufacturer instructions.
Maintenance After Installation
After installation, routine maintenance preserves water quality and system longevity. This includes following a scheduled replacement for prefilters, postfilters, and the RO membrane, periodic sanitizing of the system and storage tank, and using a TDS meter to verify performance.
Attention to rising TDS readings, slow production, leaks, or unusual tastes and odors signals the need for service or parts replacement.
Filter and membrane replacement schedule
A clear replacement schedule helps preserve system performance and water quality, listing when pre-filters, the RO membrane, and post-filters should be changed based on usage, feed-water quality, and manufacturer guidance.
Typical guidance: replace sediment and carbon pre-filters every 6–12 months, the RO membrane every 2–4 years, and post-filters annually. Monitor pressure, taste, and TDS to adjust intervals.
- Check TDS monthly
- Inspect seals quarterly
- Record dates and parts
Sanitizing the system and tank periodically
Sanitize the reverse osmosis system and storage tank at regular intervals to prevent bacterial growth and preserve water quality.
Use a manufacturer-approved sanitizing solution or diluted household bleach following recommended concentrations.
Flush thoroughly after contact time, replace prefilters afterward, and sanitize tubing and faucet connectors.
Record dates and procedures.
Repeat sanitation annually or more often if system disassembly occurs or water quality concerns arise.
How to check system performance with a TDS meter
Once sanitation and routine checks are complete, verify system performance using a TDS (total dissolved solids) meter to confirm the membrane and filters are functioning properly.
Measure feed water, post-membrane, and faucet water TDS. Record readings and calculate rejection percentage. Compare values to manufacturer specifications.
Repeat monthly for initial months, then quarterly. Low rejection or rising TDS signals further inspection or maintenance.
Signs the system needs service or parts replacement
Several clear indicators show the reverse osmosis system requires service or parts replacement: persistent high TDS readings, reduced flow at the faucet, frequent tank refills or short cycling, unusual tastes or odors, visible leaks, and pressure drops across prefilters or the membrane.
Promptly inspect and replace clogged prefilters, the membrane, or worn fittings; check tank air pressure and valves; consult a technician if problems persist.
Cost, Time, and When to Call a Professional
Typical DIY installation of a reverse osmosis system takes two to four hours and requires basic plumbing skills and common tools.
Parts and total costs vary by model and complexity, commonly ranging from $150–$600 for units plus $50–$300 for fittings and mounting, while labor from a professional can add $100–$400.
Professional help is recommended for complex under-sink layouts, 3/8″ or whole-house tie-ins, questionable water quality, or when selecting a licensed plumber or certified RO technician with references and proper credentials.
Typical DIY time and skill level required
Most homeowners can expect a basic under-sink reverse osmosis installation to take between two and four hours and require only intermediate DIY skills — comfort with hand tools, basic plumbing (shutoff valves, drill and fittings), and careful follow-through of instructions.
More complex systems, tank relocations, poor access, or unexpected leaks increase time and may require advanced plumbing or electrical experience; in such cases, hire a licensed professional.
Estimated parts and installation cost ranges
Installation and parts for a home reverse osmosis system generally range from modest to substantial expenses depending on system complexity and labor choices. Typical DIY kits cost $150–$400; under-sink multi-stage units $300–$800; premium systems $800–$2,000. Labor adds $100–$400 if hired. Budget for filters and membrane replacements annually.
| Item | Typical Cost | Notes |
|---|---|---|
| Basic kit | $150–$400 | DIY |
| Mid-range unit | $300–$800 | Multi-stage |
| Premium unit | $800–$2000 | High capacity |
| Installation labor | $100–$400 | Optional professional |
Scenarios that warrant professional installation
Several clear situations justify hiring a professional for reverse osmosis work: complex plumbing configurations, lack of access to shutoff valves, required modifications to cabinetry or countertops, connections to well systems or booster pumps, or any visible water pressure or contamination concerns.
Additionally, tight deadlines, unfamiliarity with local codes, or unexpected leaks justify paying for expertise to guarantee safe, code-compliant installation and to avoid costly mistakes.
How to choose a qualified plumber or RO technician
When should a homeowner call a professional for RO installation, and how can they identify a qualified plumber or technician? Homeowners should hire pros for complex plumbing, gas ties, or limited time.
Evaluate candidates by credentials, experience, and clear estimates.
- Licensed and insured
- RO-specific experience and references
- Written cost, timeline, and warranty details
Environmental and Water-Waste Considerations
Consideration of reverse osmosis reject water and methods to reduce it is essential for minimizing household water waste.
The article will outline water-saving add-ons and zero-waste configurations that improve system efficiency.
Guidance on responsible disposal and recycling of used filters and membranes will also be provided.
Understanding RO reject water and reduction strategies
Many reverse osmosis (RO) systems discharge a portion of feedwater as concentrate (reject) that contains the salts and contaminants removed during purification. Understanding its volume and composition is essential for minimizing environmental impact.
Homeowners should quantify reject ratios, test conductivity or TDS, and consider siting discharge to appropriate drains or landscaping.
Simple measures—pressure optimization, correct membrane selection, and regular maintenance—reduce reject generation.
Water-saving add-ons and zero-waste systems
Although reverse osmosis systems inherently produce concentrate, a range of water-saving add-ons and zero-waste configurations can markedly reduce or eliminate discharge by reclaiming reject water, improving system efficiency, and redirecting flows for secondary uses.
Options include permeate pump integration, dual-stage reclaim units, drain-to-irrigation diverters, and storage-tank recirculation kits.
Proper installation and routing maximize reclaimed volumes while maintaining water quality and system longevity.
Disposal and recycling of old filters and membranes
Discarding or recycling spent reverse osmosis membranes and pre-/post-filters requires attention to environmental regulations, potential contaminants, and available waste-management options.
Homeowners should separate plastic housings, metal fittings, and filter media; rinse if permitted; and consult local hazardous-waste guidelines.
Manufacturers’ take-back programs and specialized recyclers can reduce landfill burden.
Dispose of contaminated components per municipal rules to prevent pollution and regulatory penalties.
Final Checklist and Quick Reference for Homeowners
A concise final checklist helps homeowners confirm readiness before installation, including required tools, shutoffs, and site clearance.
After installation, a verification checklist covers leak checks, flow and pressure readings, and filter seating.
A short list of service contacts and parts suppliers should be kept accessible for maintenance and replacements.
Pre-installation quick checklist
Before beginning installation, homeowners should verify a few key items: available under-sink space and clearance, water supply compatibility and shutoff access, electrical outlet proximity if a pump is required, a suitable drain connection, and any necessary tools or replacement parts. Confirming these now prevents delays and guarantees the system will fit and function as designed.
- Confirm fittings and tubing sizes
- Verify valve access and shutoff operation
- Ascertain adequate lighting and workspace
Post-installation verification checklist
With the installation complete and initial checks confirmed, homeowners should run a final verification to guarantee the reverse osmosis system operates safely and efficiently.
Inspect for leaks, verify storage tank pressure, and confirm water quality meets expected TDS reduction. Test automatic shutoff and flow restrictor. Review tubing connections and fittings.
- Leak-free under-sink area
- Correct tank pressure
- Expected TDS reduction
Contact information to keep for service and parts replacements
Several key contacts should be recorded and kept near the system to streamline service calls and parts replacement: the installing contractor, the RO membrane and filter manufacturers, the nearest authorized service center, and the local plumbing supply store.
Also include model and serial numbers, warranty expiration dates, preferred replacement part numbers, emergency plumber, and seller contact.
Store digital copies and one printed sheet by the unit.
Conclusion
Like a quiet guardian hidden beneath the sink, the reverse osmosis system works unseen, turning ordinary water into something purer and steadier. Homeowners who install and maintain it gain more than clean drinking water; they gain a small daily ritual of care that ripples outward—saving bottles, easing worries, and honoring the flow of resources. With attention to detail and occasional tending, this humble device becomes a lasting promise of refreshment and responsibility.
