How to Check PCV Valve: Quick Step-by-Step Guide for Accurate Diagnosis
How to Check a PCV Valve: A Quick Guide
To check your PCV (Positive Crankcase Ventilation) valve, follow these simple steps: inspect the hoses for cracks or oil, shake the valve to listen for a rattle, and test for suction at idle using your finger or a vacuum gauge. You can also blow compressed air through the hoses to ensure proper flow. If the valve is clogged or stuck, replace it. After reinstalling, monitor your engine’s idle and check for any leaks. For more detailed testing variations, maintenance tips, and troubleshooting, continue reading.
What a PCV Valve Is and Why It Matters
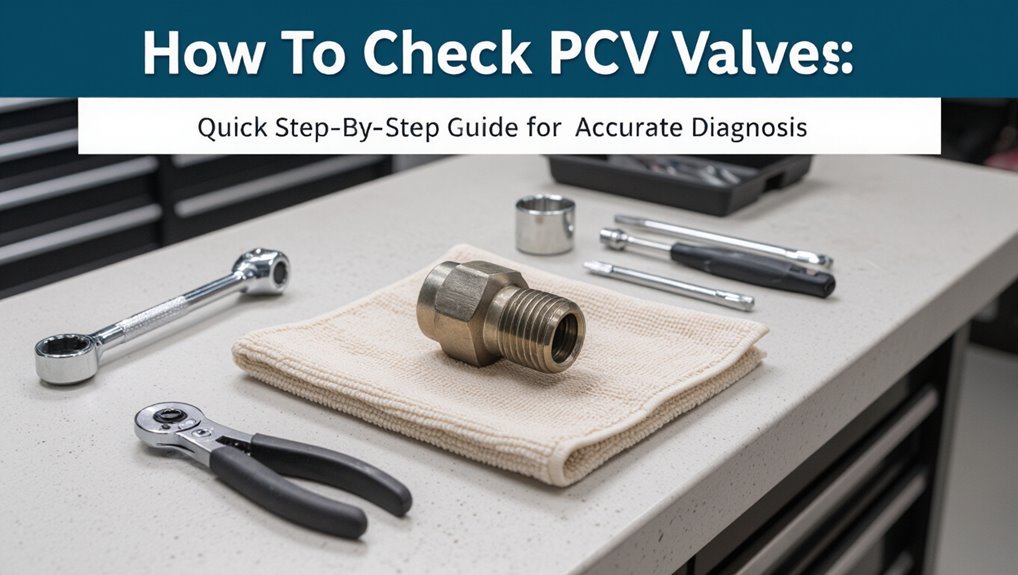
The PCV (positive crankcase ventilation) valve is a simple one-way valve that routes blow-by gases from the crankcase back into the intake to be burned, preventing pressure build-up and oil contamination.
Proper PCV system operation helps maintain engine efficiency and control emissions by regulating crankcase ventilation and preventing rich or lean running conditions.
Symptoms of a failing PCV valve include rough idle, oil leaks or sludge, increased oil consumption, and a check-engine light.
Definition and basic function of the PCV valve
A PCV (positive crankcase ventilation) valve is a small, pressure-regulating component that reroutes blow-by gases from an engine’s crankcase back into the intake manifold for combustion.
It maintains crankcase vacuum, meters flow under varying load, and prevents oil contamination.
Regular inspection informs maintenance; readers following how to check PCV valve procedures can detect sticking, clogging, or leaks that necessitate cleaning or replacement.
How the PCV system affects engine performance and emissions
Moving from its role in routing blow-by gases, the PCV system directly influences engine efficiency and emissions by controlling crankcase pressure and the composition of gases reintroduced into the intake.
Proper ventilation prevents oil contamination, reduces intake deposit formation, and maintains correct air–fuel ratios.
Consequently, combustion stability, fuel economy, and tailpipe pollutants depend on a properly functioning PCV system.
Common symptoms of a failing PCV valve
Many drivers notice specific warning signs when a PCV valve begins to fail, since its malfunction alters crankcase pressure and vapor flow.
Common symptoms include rough idling, decreased fuel economy, oil leaks or sludge buildup, increased oil consumption, and a burning oil smell.
Check engine light or failed emissions tests can also indicate PCV issues.
Early diagnosis prevents engine damage and costly repairs.
Quick Diagnostic Checklist Instant Checks Before Tools
A quick visual sweep of hoses, connections, and nearby oil stains can reveal obvious PCV issues before any tools are used.
Simple hand checks—listening for a rattle when the valve is shaken and feeling for vacuum by mouth on the hose—provide immediate, low-effort confirmation.
If hoses are cracked, oil is present, the valve does not rattle, or vacuum is weak, further diagnostic testing is warranted.
Visual inspection steps (hoses, connections, oil leaks)
Begin by visually scanning the PCV system area for obvious issues: inspect hoses for cracks, splits, soft spots or collapsed sections; confirm clamps and fittings are secure and free of corrosion; and check around the valve and intake manifold for fresh oil residue, soot, or wetness that indicate leaks or blow-by.
Note brittle plastic, swollen rubber, loose connections, and oil trails toward vacuum ports or engine seams.
Simple hand tests (rattle test, vacuum check by mouth)
With the visual scan completed, quick hand tests offer immediate confirmation of PCV function before reaching for tools.
The rattle test: remove the valve, shake for a distinct metallic click indicating internal spring movement.
The vacuum-by-mouth check: with engine idling, briefly place mouth over hose end—feel steady suction (do not inhale deeply).
No rattle or weak/no suction suggests replacement.
When to suspect deeper problems
Spot signs that hint at deeper PCV system trouble before grabbing tools. Persistent oil consumption, blue smoke on start or acceleration, rough idle that resists simple fixes, and recurring vacuum leaks suggest more than a clogged valve.
Check for excessive crankcase pressure, sludge in oil catch, or oil-soaked intake components. If multiple symptoms appear, plan detailed inspection or professional diagnosis.
Tools and Materials Needed
A concise list of tools and materials helps guarantee an efficient PCV valve check.
Basic hand tools and replacement parts are usually sufficient, while optional diagnostic items like a vacuum gauge or scan tool improve accuracy.
Appropriate safety gear and simple prep steps should be completed before work begins.
Basic tools for a DIY PCV check
Several simple tools and a few consumables are all that’s required for a DIY PCV valve check. A basic socket set and ratchet, screwdrivers (flat and Phillips), pliers and needle-nose pliers handle most removals.
A clean shop rag, disposable gloves and small flashlight improve visibility. Replacement grommets or hose clamps and a compact container for small parts complete the minimal kit.
Optional diagnostic tools for accuracy (vacuum gauge, scan tool)
Beyond the basic hand tools and consumables, a couple of optional diagnostic instruments can improve the accuracy and speed of a PCV valve check.
A vacuum gauge quantifies manifold vacuum and reveals leaks or stuck valves.
A scan tool reads live data and fault codes related to crankcase ventilation and fuel trims.
Both tools speed diagnosis and confirm intermittent or subtle faults.
Safety equipment and prep steps
Gather necessary safety equipment and set up a clean, well-lit workspace before inspecting the PCV valve.
The technician dons safety glasses, nitrile gloves, and closed-toe shoes. Required tools and materials include a flashlight, basic hand tools, rags, a catch pan for fluids, and replacement seals if needed.
Disconnect the battery to prevent electrical hazards and allow the engine to cool completely.
Step-by-Step: How to Test a PCV Valve on Most Cars
The following steps outline a practical sequence for testing a PCV valve on most cars, focusing on inspection and simple in-place tests.
Key actions include locating and removing the valve, conducting rattle and vacuum tests, and checking related hoses for damage or blockages:
- Locate the PCV valve and associated hoses
- Remove the PCV valve safely
- Perform rattle and vacuum tests and interpret results
- Inspect hoses for blockages and cracks
These steps provide a clear framework for diagnosing common PCV valve faults before considering replacement.
Locate the PCV valve and associated hoses
Where exactly the PCV valve and its hoses sit varies by engine layout, so a quick visual survey of the valve cover, intake manifold, and air intake tubing is needed before testing.
Identify a small nipple or grommet on the valve cover linked by rubber or silicone hoses to the intake tract or throttle body.
Trace both hose ends for splits, clamps, and hard lines to note routing.
Remove the PCV valve safely
Begin by relieving any residual pressure and ensuring the engine is cool to prevent burns; disconnect the negative battery terminal if recommended by the vehicle manufacturer.
Wear gloves and eye protection.
Detach vacuum hoses gently, note routing, and label if needed.
Use the correct socket or pliers to loosen the valve, turning counterclockwise.
Remove the valve straight out, inspect sealing surface and hose ends for damage.
Perform the rattle test and interpret results
Tap the PCV valve lightly between fingers or against a hard surface to listen for a distinct metallic rattle that indicates the internal valve weight is free.
Absence of rattle suggests sticking or clogging; replace the valve.
Intermittent, muted noise may indicate partial obstruction—cleaning could help but replacement is recommended for reliability.
Record findings before reinstalling or further testing.
Perform the vacuum test with engine idling and interpret results
After noting the rattle test results, the next step is to check whether the PCV valve is drawing vacuum with the engine idling. This verifies that the valve is allowing crankcase gases to be pulled into the intake rather than being blocked or stuck open.
With the engine at idle, place a finger or vacuum gauge over the valve inlet. Strong steady suction indicates proper operation; weak or no vacuum suggests replacement.
Inspect and test PCV valve hoses for blockages and cracks
Next, inspect the PCV valve hoses for cracks, blockages, and soft spots that can cause vacuum leaks or restricted flow.
Visually examine the entire hose length, feeling for brittleness or oil saturation.
Detach hoses and blow compressed air or use a thin wire to check for obstructions.
Replace any damaged, collapsed, or oil-clogged hoses before proceeding with further PCV system tests.
Reinstall or replace the PCV valve and retest
With the hoses inspected and cleared, reinstalling or replacing the PCV valve is the next procedural step before retesting the system.
Fit the cleaned or new valve securely, reconnect all hoses and clamps, and guarantee proper orientation.
Start the engine, observe idle stability, and check for vacuum leaks or abnormal noises.
If symptoms persist, repeat diagnostics or consult a technician for further evaluation.
Testing Variations for Different Engine Types
Testing procedures must be adapted to the specific PCV layout, whether the valve is an inline unit or mounted in the valve cover.
Turbocharged engines require attention to boost-related pressure differentials and any charge-air plumbing that can affect valve operation.
Modern systems with electronic controls may need scan-tool data and bench tests of actuators in addition to traditional vacuum and flow checks.
Inline PCV valves vs. valve-cover-mounted designs
Distinguish between inline PCV valves and valve-cover-mounted designs when preparing diagnostic procedures, since their locations and connections dictate different access points, vacuum behaviors, and test methods.
Inline units sit in hoses and are removed for bench testing; valve-cover-mounted types require cover access and may need hose disconnection.
Inspection, vacuum tests, and replacement approach differ; document orientation, hose routing, and sealing methods.
Turbocharged engines and additional considerations
Consider turbocharged engines as a separate category when planning PCV valve checks, because forced induction alters crankcase pressure dynamics, routing complexity, and the potential for oil blow-by into the intake.
Inspect additional vacuum/boost lines, check for oil accumulation in intercooler and charge piping, verify one-way operation under boost and vacuum, and guarantee breather routing prevents boost pressurization of the crankcase.
Modern PCV systems with electronic controls
Because modern vehicles increasingly integrate sensors and actuators into PCV circuits, electronic-control variations demand different diagnostic steps than traditional vacuum-only systems.
Technicians should scan for fault codes, verify sensor signals, and test solenoid operation with proper tools.
Confirm vacuum integrity and electrical continuity, observe commanded vs. actual responses, and consult OEM procedures for calibration, sequencing, and software-related diagnostics.
Interpreting Test Results and Common Diagnoses
Interpreting PCV test results links observed symptoms and measured findings to the most likely causes and practical fixes. The table below summarizes common symptom–finding pairs with probable diagnoses and straightforward remedies to guide the next steps. Technicians and owners use this framework to prioritize repairs and verify outcomes.
| Observation | Typical implication |
|---|---|
| Excess oil consumption or smoking | Faulty PCV valve or clogged crankcase ventilation |
| Rough idle and vacuum leaks | Sticking or leaking PCV valve |
| Oil sludge or milky oil | Blocked ventilation or coolant intrusion |
| High crankcase pressure on gauge | Hose blockage or failed valve |
Symptoms, test findings, likely causes, and suggested fixes
A clear pattern of symptoms combined with specific test findings helps pinpoint whether a PCV valve is malfunctioning or if related systems are at fault. Symptoms like rough idle, oil leaks, or smoke align with test results (vacuum, rattle, blockage). Likely causes: stuck valve, hose deterioration, intake contamination. Suggested fixes: replace valve, repair hoses, clean intake.
| Finding | Likely fix |
|---|---|
| Rattle/flow | Replace valve |
| Blockage | Clean intake |
How to Replace a PCV Valve Quick Guide
The next section outlines a concise procedure for replacing a faulty PCV valve, beginning with selecting the correct OEM or equivalent replacement part by matching part numbers and specifications.
It then presents a step-by-step removal and installation sequence, including common tools and safety precautions.
Finally, it covers proper torque values, sealing checks, and reassembly tips to guarantee a leak-free installation and reliable function.
Choosing the correct replacement part
When selecting a replacement PCV valve, prioritize exact fitment by matching the vehicle’s make, model, engine code, and year to the part number specified by the manufacturer; incorrect sizing or flow characteristics can cause vacuum leaks or crankcase pressure issues.
Confirm OEM or equivalent quality, correct hose connections, and compatible materials.
Verify flow direction, pressure ratings, and warranty before purchase to guarantee reliable operation.
Step-by-step replacement procedure
Begin by gathering tools, the correct replacement PCV valve, and any required gaskets or hoses.
Then verify the engine is cool and disconnected from the battery to prevent accidental starts.
Locate the valve, note hose routing, remove clamps and hose, extract the old valve, compare new part, install new valve and hose, secure clamps, reconnect battery only after confirming proper fit and clearances.
Torque and reassembly tips
Tighten fasteners to manufacturer-specified torques and reassemble components in the reverse order of removal, using a torque wrench for bolts and a snug, hand-tight fit for hose clamps where recommended.
Verify vacuum hoses seat fully on barbs, replace any brittle clamps or gaskets, and route lines to prevent kinks or contact with hot or moving parts before reconnecting the battery.
Torque sequence and final inspections guarantee leak-free operation.
Maintenance Tips to Prevent PCV Issues
Recommended inspection intervals are noted, with most manufacturers advising checks every 30,000 miles or at each major service.
At every oil change, visual signs such as oil leaks, excessive crankcase pressure, or clogged hoses should be checked.
If persistent symptoms or uncertain diagnosis occur, a professional mechanic should be consulted for testing and repair.
Recommended inspection intervals
For most passenger vehicles, a PCV valve should be inspected at least once every 30,000 miles or during major service intervals (typically every 2–3 years), with more frequent checks advised for high-mileage, turbocharged, or frequently short-trip driven cars.
Visual inspection and basic function testing at each oil change can catch early signs of sticking or clogging.
Manufacturer recommendations override general guidance; replace per interval or when test fails.
Signs to check at every oil change
Following the inspection interval guidance, a few quick checks at every oil change can catch developing PCV problems before they affect engine performance.
Inspect oil for milky residue, check for excessive sludge, note unusually dark or burnt-smelling oil, feel for crankcase pressure when removing the filler cap, and verify hoses for brittleness, cracks, or oil-soaked buildup.
Record findings and act on abnormalities promptly.
When to consult a professional mechanic
Although many PCV checks are suitable for a DIY inspection, a professional mechanic should be consulted whenever symptoms persist after basic troubleshooting, when diagnostic trouble codes point to PCV-related faults, or when access requires disassembly beyond routine maintenance.
A mechanic can perform pressure tests, vacuum checks, replace valve housings, inspect PCV-related hoses, and guarantee proper reassembly, preventing engine damage and drivability issues.
Potential Complications and How to Handle Them
The section outlines common complications encountered during PCV inspection and their remedies.
It covers techniques for freeing or replacing stuck valves, addressing oil sludge and carbon buildup, and steps to identify and fix vacuum leaks that can appear after replacement.
Practical tips and diagnostic cues are provided to guide safe, effective resolution.
Dealing with stuck or seized PCV valves
When a PCV valve becomes stuck or seized, it can disrupt crankcase ventilation and lead to oil leaks, increased pressure, and poor engine performance. Addressing this issue promptly prevents further damage.
The technician inspects, removes, and tests the valve; if immovable, penetrating lubricant and gentle heat may free it.
If damage or corrosion persists, replacement and hose inspection guarantee reliable ventilation and pressure control.
Handling oil sludge and carbon buildup
A seized or corroded PCV valve often signals broader issues in the crankcase. Persistent valve sticking can coexist with oil sludge and carbon deposits that obstruct passages and reduce ventilation effectiveness.
Inspect hoses and baffles, clean accessible ports with appropriate solvent, and replace heavily contaminated valves.
Consider an oil change using recommended viscosity and engine flush products if manufacturer allows; monitor for recurrence during follow-up checks.
Troubleshooting vacuum leaks after replacement
If vacuum leaks appear after PCV valve replacement, immediate assessment focuses on connection points, hose integrity, and sealing surfaces to isolate the source.
Technicians should listen for hisses, use a smoke machine or propane/butane spray for detection, and visually inspect clamps and mating surfaces for improper fit or damage.
After locating the leak, replace cracked hoses, retorque fittings, apply proper clamps or gaskets, and retest.
Cost Expectations and When Replacement Is Worth It
Costs for PCV valve service vary by parts and labor, and evaluating whether to replace it at home or in a shop requires weighing those figures against time and skill.
Typical cost considerations can be summarized as follows:
- Replacement part: usually $10–$60
- Labor at a shop: typically $50–$200
- DIY: saves labor but requires tools and moderate skill
When benefits (improved idle, reduced oil consumption) outweigh cost, replacement is justified.
Typical parts and labor cost ranges
Typical PCV valve replacements usually fall into two main cost buckets: the part itself, which commonly ranges from $10 to $60 depending on vehicle make and aftermarket versus OEM choice, and the labor, which generally adds $40 to $120 when replacement requires simple access under the hood but can climb higher if the valve is buried beneath intake components.
Cost vs. benefit for DIY vs. shop replacement
Weighing DIY versus shop replacement hinges on skill level, time availability, and the vehicle’s accessibility: a person comfortable with basic tools can often save $40–$120 in labor by replacing a PCV valve themselves, while a shop removes uncertainty, guarantees correct diagnosis, and covers labor for hard-to-reach installations that can push total cost above the $180 typical range.
Decision factors include tool access, repair confidence, warranty needs, and potential for related repairs.
Quick Reference: PCV Valve Check Cheat Sheet
A concise cheat sheet gives a technician a symptom-to-action flow and a one-minute roadside checklist for quick decisions.
The sheet highlights common signs and the immediate checks to perform.
- Rough idle → inspect PCV hose and valve for rattling
- Oil leakage or sludge → check valve operation and replace if clogged
- Check-engine light related to emissions → test valve and vacuum lines
- One-minute roadside: visual hose check, shake valve, listen for rattle, note oil in intake
Short symptom-to-action flowchart
When symptoms like rough idle, excessive oil consumption, or a persistent check-engine light appear, consult this short symptom-to-action flowchart to quickly determine whether the PCV valve is the likely cause and what next step to take.
Assess vacuum leaks, inspect PCV hose for cracks, shake/remove valve for rattle, check for oil in intake.
If fault found, clean or replace PCV valve; recheck.
One-minute checklist for roadside inspection
Several quick checks fit easily into a one-minute roadside routine to assess the PCV valve’s condition and decide if immediate action is needed.
Visually inspect for oil leaks and disconnected hoses, listen for unusual hissing at idle, gently shake accessible valve for rattle, verify vacuum at hose (suction present), and note excessive smoke or rough idle.
If failed, tag for replacement.
Conclusion
A concise understanding of the PCV valve’s role completes the guide: it regulates crankcase ventilation, affects performance, and prevents oil contamination. The reader is encouraged to follow the quick diagnostic checklist, use basic tools, and perform the step-by-step test while accounting for engine variations. Regular maintenance reduces complications and replacement costs. When symptoms persist despite checks and cleaning, isn’t it wiser to replace a suspect valve to avoid larger engine damage?