How to Connect a Solar Heater to Your Pool Pump: Step-by-Step Guide for Efficient Heating
To efficiently connect a solar heater to your pool pump, route the pump discharge through roof-mounted collectors, then return the heated water to the pool using a bypass loop and valves. Ensure that your pump’s flow and head specifications match the collector requirements. Install UV-rated PVC piping and include a filter, flow-control valves, and a temperature-sensing controller. Once everything is set up, pressure-test the system, purge any air, and adjust the flow to achieve the ideal temperature differential. For ongoing maintenance, consider plumbing options, seasonal adjustments, and troubleshooting tips to keep your solar heating system running smoothly.
How a Solar Pool Heater Integrates with Your Existing Pool Pump
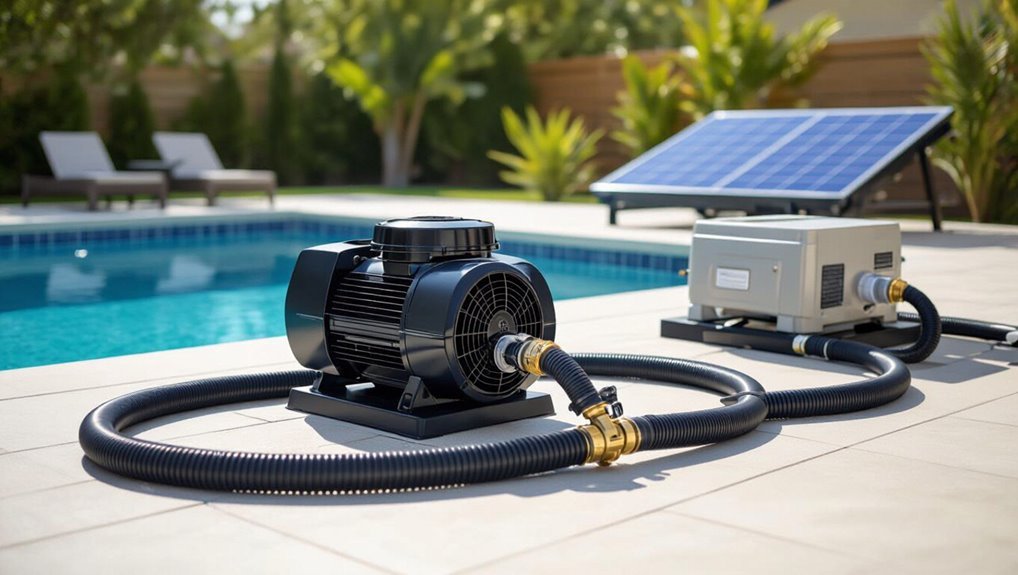
A solar pool heater connects to the existing circulation system using a few key components: the solar collector, pool pump, filter, valves, and an optional controller.
Water is drawn from the pool, pushed by the pump through the filter and either directly through the solar collector or through a heat exchanger, then returned to the pool.
The setup differs by direct systems, which route pool water through the collector, and indirect systems, which circulate a separate heat-transfer loop.
Overview of system components (solar collector, pump, filter, valves, controller)
Solar pool heating systems consist of a few key components that work with the existing circulation setup: the solar collector (typically mounted on a roof or rack), the pool pump that drives flow, the filter that protects collectors from debris, a set of valves to route water, and a controller that automates switching.
Descriptions:
- collector (absorbs heat)
- pump (circulates)
- filter (screens)
- valves (isolate/redirect)
- controller (schedules/engages).
How to connect solar heater to pool pump requires matching flow capacity, valves placement, and controller integration.
Flow path: from pool to pump to heater and back
With the components identified, the next focus is the flow path that links pool, pump, filter, collector, and return lines so heated water circulates efficiently.
Water is drawn from the skimmer/main drain, passes through the pump then the filter, is diverted via valves to the solar collector array, returns through a check valve to prevent backflow, and re-enters the pool via dedicated return fittings.
Differences between direct and indirect solar heating setups
When deciding how to integrate a heater into an existing pool pump system, two distinct approaches—direct and indirect—define how water is routed, controlled, and protected.
Direct systems circulate pool water through rooftop panels for simplicity and efficiency but risk debris and freezing.
Indirect systems use a closed-loop heat exchanger with antifreeze, isolating collectors from pool plumbing, increasing safety and maintenance complexity.
Quick Compatibility Check: Is Your Pool Pump Ready for Solar Heating?
A quick compatibility check focuses on whether the pump can meet the flow rate and head requirements specified by the solar collectors while operating through the existing filter and plumbing.
It also assesses pump type—single‑speed, two‑speed, or variable‑speed—for efficiency and matching to solar run times, plus whether electrical connections and controls can integrate with a solar controller or timer.
Any shortfalls in flow, pressure, filtration capacity, or control wiring should be identified before installation.
Pump flow rate and head requirements for solar collectors
Pump performance determines whether a pool’s circulation system can drive water through roof-mounted solar collectors efficiently.
The pump must supply the flow rate specified by the collector manufacturer—typically 30–50 gallons per minute for residential arrays—while overcoming additional head from elevation, piping, and the collector matrix.
Calculate total dynamic head, compare to pump curve, and guarantee sufficient margin for peak solar operation.
Pump type considerations (single-speed, two-speed, variable-speed)
After confirming the pump can meet the collector’s flow and head requirements, attention turns to selecting the right pump type for solar heating compatibility.
Single-speed pumps may over- or under-deliver flow; two-speed units offer economy by running low for circulation and high for solar transfer.
Variable-speed pumps provide precise flow control, energy savings, and easier matching to collector requirements, making them the preferred option when budget allows.
Filter and plumbing capacity checks
Several quick checks reveal whether the existing filter and plumbing can handle the added flow and pressure from a solar heater:
Inspect filter model and max flow rating, verify cartridge/DE/backwash capacity, confirm pipe diameters and fittings (reduce restriction), check valve condition and actuator clearance, and guarantee skimmer and return lines are unobstructed.
Note pressure gauge readings during operation to spot excessive head loss.
Electrical and control compatibility
While plumbing and filtration determine whether water can reach the solar panels, electrical and control compatibility guarantees the pump can operate them safely and efficiently. This quick check assesses motor type, voltage and amperage capacity, control wiring, and any automation or variable-speed settings that might need adjustment.
Verify dedicated circuit sizing, GFCI protection, relay or contactor compatibility, and controller inputs. Consult manuals or an electrician for upgrades.
Tools, Materials, and Safety Preparations
A concise list of required tools and materials should be assembled before beginning, including pipe fittings, valves, mounting hardware, and appropriate sealants.
Appropriate safety gear and lockout/tagout procedures must be established to prevent electrical and mechanical hazards during installation.
The installer should verify local codes, permits, and manufacturer requirements to guarantee the system is compliant and warranty-safe.
Required tools and materials list
Preparation begins with assembling the correct tools, materials, and safety gear to guarantee a safe, efficient solar heater installation.
Required items include plumbing parts, mounting hardware, and basic hand tools.
Essential checklist:
- PVC pipes, fittings, and primer/solvent cement
- Solar panel/heater kit and flow control valve
- Hose clamps, unions, and pressure-rated hoses
- Wrenches, drill, tape measure, and Teflon tape
Safety gear and lockout/tagout procedures
With the tools and materials laid out, attention shifts to personal protective equipment and lockout/tagout steps that keep installers safe during plumbing and electrical work.
Wear gloves, safety glasses, sturdy footwear, and hearing protection when cutting or drilling.
De-energize pumps and electrical circuits, lock out switches, tag controls, and verify zero energy with a tester.
Follow manufacturer safety recommendations and communicate status to all workers.
Local codes, permits, and manufacturer requirements to verify
Several jurisdictions require specific permits and inspections before altering pool plumbing or adding solar equipment, so installers should confirm local building, electrical, and plumbing codes at the outset.
Verify required permits, inspection schedules, and utility notifications.
Review manufacturer installation manuals for warranties, pressure ratings, and piping/electrical specs.
Ascertain certified trades perform work as mandated and obtain written approvals before system startup.
Step-by-Step Installation Plan
The installation plan outlines a clear sequence of actions: select and mount collectors, shut down and isolate the pump and lines, and secure collectors to their roof or ground mounts.
Next, route header and return plumbing from the collectors to the pool, then fit flow control and check valves along with a bypass loop.
These ordered steps guarantee safe shutdown, proper plumbing alignment, and reliable flow control for the solar heating system.
Step 1 Plan collector placement and roof or ground mounting
A clear placement plan guarantees maximum heat gain and efficient plumbing runs when deciding between roof or ground mounting for solar collectors.
The installer evaluates sun exposure, roof slope, structural capacity, and local codes.
On-ground arrays require stable, level frames and proximity to the pump.
Minimize pipe length, avoid shading, plan access for maintenance, and orient panels for peak seasonal sun.
Step 2 Shut down pump, drain lines as needed, and isolate system
Begin by powering down the pool pump at the breaker and locking out the circuit to prevent accidental restart; this guarantees all subsequent work is performed on a de-energized system.
Close manual valves to isolate the pump and heater loop, relieve pressure, and open drain ports where required.
Cap or plug exposed fittings to prevent debris ingress and clearly tag isolated components before proceeding.
Step 3 Install solar collectors and mounting hardware
Once the pump is verified de-energized and lines isolated, attention shifts to positioning and securing the solar collectors on the chosen roof or ground mount.
Panels are aligned for ideal sun exposure, brackets anchored to structural members, and tilt adjusted for seasonal gain.
Seal penetrations, fasten collectors to rails, and torque hardware to manufacturer specifications.
Inspect for stability and waterproofing before proceeding.
Step 4 Run header and return plumbing from collectors to pool area
Route the header and return lines from the solar collectors to the pool area following a clear, level path that minimizes bends and maintains proper slope for drainage.
Use appropriately sized PVC or CPVC, secure with UV‑rated clamps, and support runs at recommended intervals.
Keep unions accessible for maintenance, avoid low spots, and align connections to simplify future service and pressure testing.
Step 5 Install flow control valves, check valves, and a bypass loop
Install the flow control valves, check valves, and bypass loop to regulate water direction, prevent backflow, and allow isolation of the solar circuit for maintenance or winterizing.
Position a three-way bypass and manual ball valves to divert flow; add spring-loaded or swing check valves to stop reverse circulation.
Guarantee accessible placement, secure fittings, and clear labeling for seasonal shutdown and pressure testing.
Step 6 Connect plumbing to pump discharge or dedicated solar return
With the bypass, valves, and check valves secured and labeled, the next step is to connect the solar loop to the pump discharge or to a dedicated solar return line.
Route UV-resistant PVC or rubber hose from the pump outlet to the solar manifold, using appropriate unions, adapters, and clamps.
Verify slope for drainage, test for leaks at pump startup, and tighten fittings as needed.
Step 7 Install temperature sensors and solar controller
Begin by mounting the solar controller at a convenient, weather-protected location near the pump and panels.
Then place temperature sensors on the pool return line and on the solar panel manifold to monitor system performance.
Secure sensors with thermal paste and clamps, route sensor wires to the controller, configure setpoints and differential settings, and test readings.
Verify controller activates the valve or pump relay according to temperature differentials.
Step 8 Pressure test plumbing and check for leaks
Step 8 focuses on pressure testing the plumbing and checking for leaks to confirm the solar-heating loop is watertight and safe to operate.
The installer isolates the solar loop, applies recommended air or water pressure using a gauge, inspects all joints, fittings, and valves for drops or visible seepage, tightens or replaces faulty components, and records test pressure and duration before finalizing plumbing.
Step 9 Start-up sequence: purge air, set controller parameters, and observe flow
Prior to activating the system, the installer purges trapped air from the solar loop, programs the controller with temperature differentials and pump schedules, and verifies steady flow through the collectors and return lines.
Then they cycle the pump gradually, monitor pressure and flow meters, confirm absence of bubbles or leaks, record initial temperature readings, and lock controller settings once stable operation and consistent collector circulation are achieved.
Step 10 Fine-tune valve settings and verify temperature rise
With steady circulation confirmed and controller settings locked, the installer adjusts the system valves and verifies thermal performance.
The installer balances bypass and solar loop valves for ideal flow, ensuring pump load and pressure remain within specifications.
Temperature differentials across the collector and pool are recorded over several cycles.
Final tweaks secure valves, retighten fittings, and document measured temperature rise for future reference.
Typical Plumbing Configurations and Diagrams
Typical plumbing layouts for solar pool heating include pump-to-panel-to-pool (parallel) and pump-to-filter-to-panel-to-pool (series) configurations, each affecting flow rate, filtration timing, and heat transfer.
Options with a dedicated solar pump loop are also common when system pressure or pump capacity is limiting.
Strategic valve placement and clear labeling for isolation, bypass, and service access are essential for safe, efficient operation.
Pump-to-panel-to-pool (parallel) configuration
The pump-to-panel-to-pool (parallel) configuration routes a portion of the pool’s circulation through solar collector panels while allowing the remainder to bypass them.
This enables continuous filtration and adjustable solar flow without interrupting pool turnover.
This setup uses a diverter valve or manifold to split flow, a return tee to recombine warmed water, and check valves to prevent backflow.
It offers simple control and minimal pressure drop.
Pump-to-filter-to-panel-to-pool (series) configuration
Describe the series configuration as one where the pool pump sends all circulated water first through the filter, then through the solar collector panels, before returning it to the pool.
This setup guarantees debris-free water enters panels, reducing clogging and wear. It offers simpler valving and consistent flow for efficient heat transfer.
However, increased head pressure may require pump capacity assessment and periodic monitoring.
Dedicated solar pump loop options
Several common dedicated solar pump loop designs isolate solar circulation from the main pool hydraulics, using either a booster pump, a separate solar pump, or a single pump with diverter valves to drive water through the collectors and back to the pool or heater.
Options include parallel solar loops with isolation valves, pressurized collector loops with check valves, and closed-loop glycol systems for freeze protection and temperature control.
Optimal valve placements and labeling for service
Moving from selection of loop types to practical serviceability, proper valve placement and clear labeling reduce downtime and prevent mistakes during maintenance.
Strategic locations: isolation valves at pump discharge and solar inlet, a bypass valve for winterizing, and check valves to prevent backflow.
Labels should indicate flow direction, normal positions, and service notes. Use durable, weatherproof tags and a simple schematic near the equipment.
Sizing and Performance Optimization
Sizing and performance begin with selecting collector area proportionate to the pool surface—typically between 50% and 100% depending on climate and desired temperature rise.
Pump flow should match the collector manufacturer’s recommended turnover rate, with variable-speed pumps preferred for fine control and improved efficiency.
Seasonal adjustments to flow, plus optimizing collector tilt and orientation, further enhance year‑round performance.
How to size collector area relative to pool surface area
A practical rule of thumb is to match the solar-collector area to at least 50–100% of the pool’s water surface area, with the exact ratio determined by climate, desired temperature rise, and season length.
Colder regions or higher temperature goals require larger arrays; sheltered, sunny locations can use lower ratios.
Consider pool usage patterns and available roof or ground space when finalizing collector sizing.
Matching pump flow to collector manufacturer recommendations
Proper pump flow is critical for solar-collector efficiency and longevity, so installers should set circulation rates to meet the specific gallons-per-minute (GPM) targets provided by the collector manufacturer.
Installers must measure system head, account for pipe length and fittings, and select a pump delivering the required GPM at that head.
Deviations reduce heat transfer or damage panels; follow manual tolerances.
Using variable-speed pumps for efficiency and control
Optimize pool heating by selecting a variable-speed pump that matches the solar loop’s required flow profile while minimizing energy use.
The installer configures speeds to achieve manufacturer-recommended GPM at lower RPMs, reducing electrical consumption.
Built-in timers and smart controls enable gradual ramping, freeze protection, and differential control with the solar controller.
Proper pump sizing prevents cavitation, maintains collector efficiency, and extends equipment life.
Seasonal adjustments and tilt/orientation effects
Seasonal shifts in sun angle and ambient temperature materially affect a solar pool heater’s output, so installers adjust panel tilt, orientation, and system flow to preserve desired heat gain across the year.
Panels tilt steeper for winter to capture lower sun, flatten for summer to avoid overheating. Orientation favors true south (northern hemisphere).
Flow rates and run times are shortened or extended to match seasonal insolation and temperature.
Controls, Automation, and Energy Efficiency
The section outlines common controller types and their methods for activating the solar loop, including differential controllers and simple thermostats.
It also covers sensor placement best practices, integrating controllers with pool timers or smart-home platforms, and recommended energy-saving run-time schedules.
Practical tips quantify expected savings and suggest schedules based on pool size, climate, and pump efficiency.
Controller types and how they activate the solar loop
Controllers regulate when the pool pump diverts water through the solar loop by monitoring temperatures and running preset logic: simple differential controllers compare collector and pool temperatures to start and stop circulation.
Programmable timers allow scheduled operation, and smart controllers integrate sensors, weather data, and variable-speed pump commands for finer energy management.
Relay, solid-state, and electronic PWM outputs translate decisions into valve and pump actions reliably and efficiently.
Temperature sensor placement best practices
Several key sensor placements determine how accurately a solar controller assesses system performance and when it actuates the solar loop.
Sensors should be mounted on the solar panel outlet (measuring warmed fluid), at the pool return or near the heater inlet, and in shaded locations to record ambient reference.
Guarantee solid thermal contact, avoid direct sun on pool sensors, and protect wiring from heat and moisture.
Integrating with pool timers and smart home systems
Integrating a solar heater with pool timers and smart-home systems lets homeowners automate heating based on schedule, temperature, and energy cost signals.
Controllers coordinate pump run times, valve actuation, and sensor inputs; smart platforms enable remote monitoring, alerts, and integration with weather forecasts.
Verify compatibility, use fail-safe defaults, and program priority rules to prevent unnecessary circulation while maintaining desired water temperature and system protection.
Energy-saving strategies and expected run-time schedules
After establishing how timers and smart-home platforms coordinate circulation and temperature control, attention turns to optimizing runtime and minimizing energy consumption.
Recommended strategies include scheduling pump operation during peak solar hours, using variable-speed pumps at lower RPMs, implementing temperature deadbands, and leveraging weather forecasts.
Typical run-time ranges from 4–8 hours daily, adjusted by pool size, solar array output, and target temperature to balance efficiency and comfort.
Troubleshooting Common Problems
The troubleshooting section highlights typical issues such as low flow or airlocks in the solar loop and steps to purge and restore proper circulation.
It also covers diagnostics for insufficient temperature rise, methods to locate and repair leaks at fittings, and safeguards for freeze protection and overheating prevention.
Clear, practical checks and corrective actions are presented so users can identify and resolve faults efficiently.
Low flow or airlocks in solar loop and how to fix them
When flow through the solar loop drops or becomes interrupted by trapped air, the collector array underperforms and the pump may cycle or overheat; diagnosing and correcting low flow or airlocks is therefore essential.
Inspect valves, filters, and risers for clogs; bleed air at high points and automatic air vents.
Confirm pump suction, tighten fittings, and clear debris from strainer baskets to restore steady circulation.
Temperature not rising common causes and diagnostics
Several factors commonly prevent a pool from warming as expected, and systematic diagnosis narrows the culprit quickly.
Inspect pump output, filter cleanliness, and flow rate to guarantee adequate circulation.
Verify solar controller settings, collector orientation, and shading.
Check valve positions and bypasses for correct routing.
Monitor temperature differential across collectors; negligible rise indicates collector or flow issues rather than thermostat error.
Leaks at fittings and how to locate/repair
Inspect fittings and connections promptly, as leaks at joints are a common and often localized source of fluid loss in solar pool heater systems.
Visually inspect unions, valves, manifolds, and hose clamps while the system is pressurized. Use soapy water to reveal bubbles or towel-dry sections to find dampness.
Tighten, reseal with PTFE tape, replace damaged O-rings or cracked fittings, and retest under pressure.
Freeze protection and overheating prevention measures
Many systems require active measures to prevent freeze damage and avoid overheating, both of which can cripple solar pool heaters if left unchecked.
Install drainback or antifreeze systems, automated flow/temperature controllers, and pressure relief valves.
Use freeze sensors and thermostatic bypasses to divert flow when temperatures approach limits.
Regularly inspect panels, valves, and drains; purge trapped water before cold snaps and shade or circulate to reduce overheating.
Maintenance Checklist and Seasonal Tasks
A concise maintenance checklist helps preserve system efficiency and extend component life.
Routine tasks include scheduled inspections, cleaning collectors and removing debris, and following winterizing or decommissioning procedures as seasons change.
Professional service should be sought for complex repairs, persistent performance issues, or safety-related concerns.
Regular inspection schedule
Consistency is the foundation of effective pool heater maintenance, and a clear regular inspection schedule guarantees issues are caught early and performance remains reliable.
A technician or owner should log checks weekly or monthly depending on use, noting valve operation, pump pressure, panel integrity, and controller settings.
- Verify valve and hose connections
- Record pump pressure and flow
- Inspect panel mounting and seals
- Confirm controller programming
Cleaning collectors and clearing debris
Inspect collectors and remove debris on a monthly schedule during the heating season and immediately after storms to preserve flow and efficiency.
Use a soft brush and low-pressure water to dislodge leaves, pine needles, and sediment without damaging glazing or tubing.
Check inlet screens, joints, and mounting brackets for blockages.
Dispose of removed material, document cleaning dates, and note any damage needing repair.
Winterizing and decommissioning procedures
Prepare the system for dormancy by following a concise, ordered winterizing checklist that protects collectors, piping, and the pump from freeze damage and prolongs component life.
Drain panels and low points, bypass or isolate solar loop, blow out remaining water with compressed air, and remove or insulate exposed fittings.
Store removable components indoors, tag valves for restart, and document service dates for spring reactivation.
When to call a professional
After completing winter shutdown tasks, homeowners should recognize when routine care reaches the limits of DIY competence and schedule professional service.
Call a technician for persistent leaks, abnormal pump noises, electrical faults, damaged solar panels, or recurring pressure problems.
Arrange inspections before spring startup, after major storms, or when warranty-covered components require certified handling.
Professional diagnostics prevent downtime and costly repairs.
Cost Considerations and Return on Investment
A brief cost overview outlines typical installation expenses—panels, plumbing, mounting hardware, and labor—so homeowners can compare quotes.
Operational savings from reduced gas or electric heating, combined with estimated payback time, clarify long-term value.
Available incentives, rebates, and financing options can notably lower upfront cost and shorten the return-on-investment period.
Typical installation cost breakdown
Several key cost components determine the typical installation price for a pool solar heater: solar collectors, mounting hardware, plumbing and valves, labor, and any necessary pump or control upgrades. Costs vary by system size, roof complexity, and local labor rates. Typical ranges help budgeting.
| Component | Typical Range |
|---|---|
| Collectors | $500–$3,000 |
| Mounting | $100–$800 |
| Plumbing/valves | $150–$600 |
| Labor/controls | $300–$1,500 |
Operational cost savings and payback timeframe
Having established typical upfront costs, the focus shifts to ongoing savings and the time required to recoup the investment.
Solar pool heaters reduce monthly energy bills by cutting electric or gas heating loads, often saving 50–80% on heating expenses.
Payback periods commonly range from 2 to 7 years depending on system size, local energy prices, and pool usage patterns, after which savings are net benefit.
Incentives, rebates, and financing options
Many homeowners qualify for federal, state, or local incentives that can substantially lower the net cost of a solar pool heater.
Available options include tax credits, utility rebates, and state grant programs.
Low-interest loans, PACE financing, and lease-to-own plans can spread upfront costs.
Eligibility, application procedures, and program availability vary by location; verify current incentives before purchase to maximize return on investment.
Real-World Examples and Installation Scenarios
Typical installations illustrate different approaches: a small residential in-ground pool with a single-speed pump often requires a simple, low-cost panel loop, while a large pool with a variable-speed pump and multiple collector arrays needs careful hydraulic balancing and controller integration.
Roof-mounted systems save yard space and gain better sun exposure but may add structural and plumbing complexity compared with easier-to-access ground-mounted arrays.
Each scenario presents trade-offs in performance, cost, and maintenance that influence system layout and component selection.
Small residential in-ground pool with single-speed pump
For a small residential in-ground pool with a single-speed pump, the installation scenario focuses on simplicity and minimal plumbing changes: the solar heater loops into the existing return line via a diverter valve and bypass piping sized to match the pump’s flow, ensuring the system neither overtaxes the pump nor creates excessive head.
Install a manual valve, mount collectors on a nearby roof or rack, and include a pressure gauge.
Large pool with variable-speed pump and multiple collector arrays
Designing a solar heating system for a large pool with a variable-speed pump and multiple collector arrays requires careful balancing of flow, head, and control logic to maximize efficiency and protect equipment.
Install parallel headers, zone valves, and a bypass to match low-speed modes; size piping to limit head; program the pump controller for temperature and speed profiles; include air separation and isolation valves for maintenance.
Roof-mounted vs ground-mounted trade-offs
After balancing flow, head, and control logic for large installations, the next decision is whether to place collectors on the roof or at ground level—each option affects performance, installation complexity, and maintenance access.
Roof mounting saves space and gains solar exposure but increases lift, leak risk, and service difficulty.
Ground arrays simplify servicing and circulation but require more area and careful siting to avoid shading and vandalism.
Practical Tips to Maximize Solar Heating Performance
The section outlines practical steps for managing valves and daily pump cycles to keep solar panels operating efficiently.
It also explains how pairing the system with pool covers and thermal blankets improves heat retention and reduces runtime.
Finally, it highlights common installation mistakes to prevent performance loss and costly repairs.
Best practices for valve management and daily operation
Manage valves deliberately to balance flow, temperature, and equipment protection: set a dedicated solar feed valve to direct water through the solar loop only when the pump runs and panels are warm.
Use a bypass valve to fine-tune flow and prevent overtaxing the panels, and keep a reliable check or isolation valve to allow maintenance without draining the system.
- Monitor valve positions daily
- Record runtime and temperature
- Adjust for weather and demand
- Lock critical valves to prevent accidental changes
Combining solar heating with pool covers and heat retention
When paired with a pool cover, a solar heater’s efficiency increases markedly because covers reduce overnight heat loss and evaporation, allowing more of the sun’s gains to be retained.
Using a good-quality thermal cover and deploying it whenever the pool is unused—especially at night—maximizes net heat retention and reduces pump runtime needed to reach target temperatures.
Complement with windbreaks, insulated piping, and routine cover maintenance.
Common installation mistakes to avoid
Pairing a solar heater with a cover improves heat retention, but poor installation can negate those gains. Installers should therefore pay close attention to common mistakes that reduce system performance or shorten component life.
Avoid undersized piping, improper pump sizing, incorrect flow direction, inadequate slope, unsecured fittings, and exposed panels prone to debris.
Verify leak-free connections, proper valves, and compatible materials for longevity.
Conclusion
The homeowner gains warmth without added fuel, the technician secures efficiency without guesswork, and the environment benefits without extra emissions. The pump circulates reliably, the panels collect sun steadily, and the valves direct flow precisely. The plan saves money over seasons, the maintenance preserves performance over years, and the comfort extends over weekends. Clear checks prevent mistakes, sensible installations guarantee safety, and informed choices deliver lasting, sustainable pool heating.