
How to Adjust the Water Level in a Kohler Toilet: Step-by-Step Fix for Weak Flushes
To improve weak flushes in your Kohler toilet, adjust the tank water level. Start by shutting off the water supply and flushing to empty the tank. Next, modify the fill valve float—whether it’s a float cup, float arm, or integral slider—so that the water level sits about 1 inch below the fill valve top or the refill tube mark. After making adjustments, test the flush and fine-tune as needed to prevent overflow. Additionally, check the flapper, overflow tube, and refill tube for any leaks or buildup. Follow the remaining troubleshooting steps for further assistance.
How to Adjust the Water Level in a Kohler Toilet for a Stronger Flush
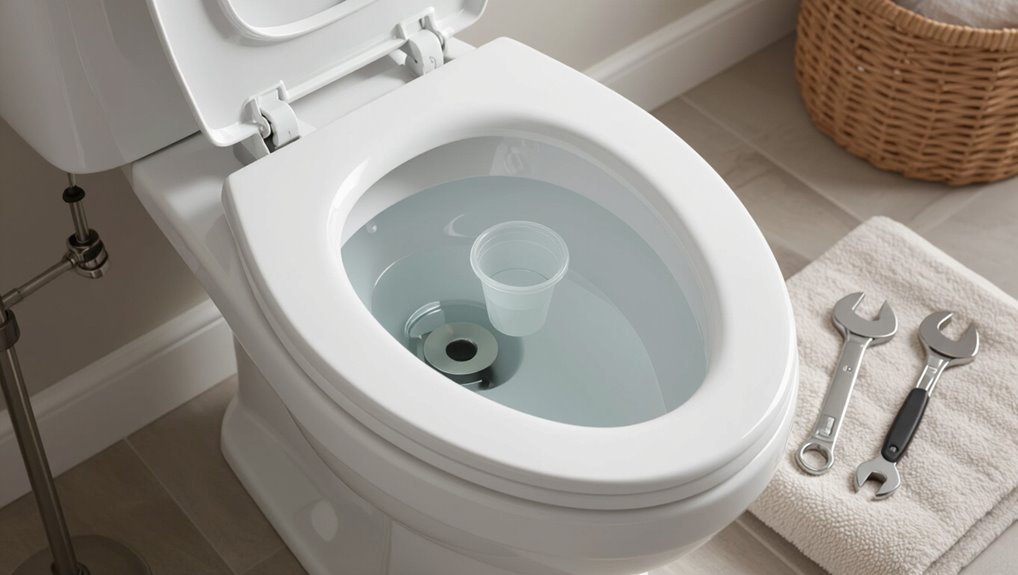
A simple adjustment to the fill valve or float raises the tank water level to increase flush force.
Doing so typically improves bowl clearance and reduces the need for repeat flushes without major repairs.
Expected results include a more powerful single flush and modestly higher water use per flush.
Quick summary of the fix and expected results
Increase the tank water level slightly by raising the fill valve or adjusting the float to let more water flow into the bowl; this restores proper siphon action and yields noticeably stronger, cleaner flushes.
The guide explains how to adjust the water level in a kohler toilet, steps to verify seal integrity, and expected outcomes: reduced clogs, consistent powerful flushes, and minimal reservoir overfill when adjusted correctly.
How Kohler Toilet Flush Performance Depends on Water Level
Flush performance in Kohler toilets is directly tied to the tank water level because higher water increases the force and sustains the siphon action needed for complete bowl evacuation.
Too low a level can weaken the flush and leave waste behind, while an excessively high level can cause siphon timing issues or overflow risks.
Common Kohler models typically specify a water line about 1 inch below the fill valve top or at the marked refill tube level, with exact heights varying by model.
How water level affects flush force and siphon action
Although subtle, the toilet’s water level directly alters the physics of each flush by changing the available hydrostatic pressure and the volume driving siphon initiation; lower water reduces the head and weakens the initial surge, while higher water increases force and sustains siphon action longer.
| Effect | Result |
|---|---|
| Low water | Reduced head, weak surge |
| High water | Stronger surge, prolonged siphon |
Typical water level specifications for common Kohler models
Having established how water level alters hydrostatic pressure and siphon initiation, the discussion now turns to typical fill heights specified for Kohler models.
Most one-piece and two-piece Kohler toilets recommend a fill level 1/2 inch below the overflow tube (about 6–8 inches from bowl rim).
Pressure-assisted and high-efficiency models may specify slightly lower volumes; always consult the model manual for exact measurements.
Tools and materials you’ll need
A short list of basic tools and a few optional items prepares the reader to adjust a Kohler toilet’s water level safely and efficiently.
Required tools typically include an adjustable wrench, flat-head screwdriver, and a towel or small bucket to catch spills.
Optional helpful items such as needle-nose pliers, replacement fill-valve parts, and rubber gloves can speed the job and improve cleanliness.
Basic tools and optional helpful items
What tools are needed to adjust the water level in a Kohler toilet? A few basic tools and optional items make the task quick and precise.
Essential tools guarantee safe adjustments; optional items improve comfort and cleanup. Keep everything nearby before starting to avoid interruptions.
- Adjustable wrench
- Flathead screwdriver
- Towel or small bucket
- Portable flashlight
Safety and preparation before you start
Before beginning adjustments, the water supply should be shut off at the angle stop and the tank drained to prevent spills.
A towel or waterproof mat under the toilet will protect the floor from residual water or accidental splashes.
If the mechanism is corroded, leaking, or the user is uncomfortable with the procedure, a licensed plumber should be contacted.
Turning off the water and protecting the bathroom floor
Several simple safety steps should be taken before adjusting the water level.
The shutoff valve behind the toilet must be turned clockwise until it stops to cut water flow.
Flush to drain the tank.
Place absorbent towels or a waterproof mat around the base to catch spills and protect flooring.
Keep a bucket and pliers nearby for controlled draining and minor adjustments.
When to call a professional instead
When should a homeowner call a professional instead of attempting adjustments alone? A professional is advised for persistent low or overflowing water, unfamiliar or corroded components, sewer odors, or repeated clogs. Complex valve or tank repairs, water supply failures, or lack of tools warrant calling a plumber to avoid damage and guarantee code compliance.
| Issue | Risk | Recommended action |
|---|---|---|
| Overflowing | Water damage | Call pro |
| Corrosion | Leak/failure | Call pro |
| Persistent clog | Sewage backup | Call pro |
Identifying your Kohler toilet fill valve and flush mechanism
The user should first locate the fill valve, float, overflow tube, and flapper inside the tank to understand how water level is controlled.
They should note whether the fill valve uses a float cup, a float arm, or an integrated assembly, since adjustment methods differ by type.
Identifying these components and the valve style makes it easier to follow the correct adjustment steps.
Locating the fill valve, float, overflow tube, and flapper
A simple visual inspection inside the tank reveals the core components: the fill valve assembly (usually at the tank’s left), a float attached to or integrated with the fill valve, the vertical overflow tube near the center, and the flapper seated over the flush valve at the tank bottom. Identify, note positions, and check connections before adjusting water level.
| Component | Location |
|---|---|
| Fill valve | Left side |
| Overflow tube | Center top |
| Flapper | Tank bottom |
Differences between Kohler fill valve types (float cup vs. float arm vs. integrated)
Often, Kohler toilets employ one of three common fill valve styles—float cup, float arm, or integrated—that differ in appearance, operation, and adjustment method.
The float cup rides the valve shaft and adjusts via a clip or screw.
The float arm uses a ball on an adjustable rod.
Integrated assemblies combine refill and overflow controls with manufacturer-specific adjustment points.
Identification guides correct adjustment and replacement.
Step-by-step: Adjusting the water level (Float cup fill valve)
With the tank lid removed, the homeowner should first inspect the float cup assembly and nearby components for wear or obstruction.
They then locate the adjustment clip or screw on the float cup and either raise or lower the cup to change the water level.
After reassembling the lid, a test flush and any fine-tuning confirm the tank refills to the desired height.
Remove tank lid and inspect components
Remove the tank lid and set it aside on a flat, padded surface to prevent chips or cracks.
The observer should visually inspect the float cup assembly, fill valve, overflow tube, and chain connection for wear, mineral buildup, or misalignment. Note any cracks, loose fittings, or debris.
Confirm parts move freely by gently lifting the float cup to observe valve response before proceeding.
Locate the adjustment clip or screw on the float cup
Locate the adjustment clip or screw on the float cup by peering along the side of the fill valve where the float cup rides; the clip is typically a small plastic tab that slides into a notch, while the screw is usually a Phillips or flat-head fastener near the top of the assembly.
Note its orientation, locking feature, and accessibility before proceeding with any adjustment.
How to raise or lower the float cup to change water level
After noting the clip or screw position on the float cup, proceed to adjust the cup height to change the tank water level.
To raise the level, lift the float cup or loosen and slide the clip upward; to lower it, press the clip or turn the adjustment screw downward.
Secure the clip or retighten the screw and guarantee the float moves freely without binding.
Test flush and fine-tune the level
Flush the toilet once to observe how the adjusted float cup affects refill height and valve shutoff.
Note whether the bowl refill reaches the marked waterline and the tank stops filling promptly.
If low, raise the float slightly; if overfilling, lower it.
Repeat flushes and minor adjustments until consistent proper levels and reliable valve closure are achieved without leaks.
Step-by-step: Adjusting the water level (Float arm fill valve)
The technician locates the adjustment screw on the float arm or notes where the arm can be gently bent to change the water level.
They carefully raise the float arm to increase the fill height, making small adjustments to avoid overfilling.
After each change, the technician flushes the toilet and observes the new water level, repeating adjustments until it sits at the correct mark.
Identify the adjustment screw or bending method
Locate the float arm assembly inside the tank to determine whether water level adjustment requires turning an adjustment screw on the fill valve or gently bending the float arm itself.
Inspect the fill valve body for a knurled or slotted screw near the float stem. If absent, note the float arm’s material and pivot type to decide if careful manual bending is appropriate.
Safely adjust the float arm to increase water level
Begin by turning off the water supply and gently depressing the fill valve to drain most of the tank.
Then, locate the float arm and confirm its connection.
For a ballfloat, bend the arm upward slightly to raise the water cutoff; for an adjustable float cup, pinch the clip and slide the cup up.
Restore water supply and verify no leaks before proceeding.
Test flush and readjust as needed
Flush the toilet once to observe the new cutoff point and the bowl refill; note whether the tank stops filling at the designated waterline and whether the bowl refill tube directs water into the overflow properly.
If water level is low or overfills, shut off supply, adjust the float arm slightly, then reopen and retest.
Repeat until consistent proper fill and reliable flush performance are achieved.
Step-by-step: Adjusting the water level (Integral fill valve or newer Kohler assemblies)
Newer Kohler toilets with integral fill valves require specific adjustment methods that vary by model and often use built-in sliders or screws instead of a float arm.
The manufacturer’s instructions should be consulted to identify the correct adjustment point and procedure.
If the valve shows wear or adjustments fail to hold the water level, replacing the assembly with the correct Kohler part is frequently simpler and more reliable than repeated tweaking.
Manufacturer-specific adjustment methods
Locate the integral fill valve assembly inside the tank to adjust the water level on Kohler toilets that use an integrated or newer-style fill mechanism.
Kohler-specific steps include turning the adjustment screw or sliding the float clip per model, consulting the model number label for exact direction, and making small increments.
Test flushes between adjustments to confirm ideal fill without overflow.
When replacement parts are easier than adjustment
Consider replacing the entire integral fill valve assembly when repeated small adjustments fail, the mechanism shows wear, or the required correction is beyond what the adjustment screw or float clip allows.
Replacement simplifies resolution: new assemblies restore proper water level, eliminate leaks, and avoid repeated tinkering.
Match Kohler model numbers, buy OEM or compatible parts, and follow manufacturer installation steps for reliable, long-term performance.
Checking and adjusting related components for optimal flush
Next, attention shifts to related components that affect flushing performance.
The flapper or flush valve seat should be inspected and cleaned to guarantee a tight seal. The refill tube must be positioned to direct water into the overflow tube without siphoning.
The overflow tube height and trim should be checked and adjusted to control maximum water level. These checks help confirm the adjusted water level produces a reliable, efficient flush.
Inspecting and cleaning the flapper or flush valve seat
Inspect the flapper and flush valve seat for mineral buildup, warping, or debris that can prevent a proper seal and cause low or continuous running water.
If deposits exist, drain the tank, scrub with a nonabrasive brush and vinegar solution, and rinse.
Replace a warped or cracked flapper.
Verify the seat is smooth; gently remove stubborn mineral rings with a soft scraper to restore a tight seal.
Ensuring the refill tube is positioned correctly
One small but essential check is the refill tube: it must deliver a steady stream of water into the overflow tube to restore the bowl’s water level after each flush.
The tube should be clipped above the overflow opening, not inserted deeply. Confirm it isn’t kinked, leaking, or too far from the overflow.
Replace brittle tubing and secure clips for reliable operation.
Adjusting the overflow tube height and trim if necessary
Raise or lower the overflow tube to set the tank’s maximum water level precisely: the top of the tube should sit just below the filled water mark indicated on the tank or at the manufacturer’s recommended height, and any excess length can be trimmed so the refill tube delivers into the overflow without submerging.
Inspect for cracks, secure the tube to prevent movement, trim cleanly, then test flush and adjust.
Diagnosing persistent weak flushes after water level adjustment
If weak flushing persists after the water level is set, other causes should be considered, such as a partial clog, blocked venting, or worn internal parts.
Simple tests can help isolate the issue: a bucket test to check trapway flow, a dye test to confirm flapper seal and refill behavior, and a plunger test to detect partial obstructions.
Based on those results, targeted repairs or replacement of worn components can be planned.
Common causes beyond water level (partial clog, venting, worn parts)
When a Kohler toilet continues to produce weak or incomplete flushes after the water level has been set correctly, the problem often lies elsewhere in the system: partial drain clogs, poor venting, or worn flush components can each reduce flow and siphon strength.
Partial blockages, blocked vent stacks, deteriorated flappers, faulty fill valves, or corroded flush valves all impair performance and may require cleaning, repair, or replacement.
Tests to isolate the problem (bucket test, dye test, plunger test)
Begin diagnostic steps with simple, controlled tests that distinguish between bowl, trap, vent, and supply issues:
the bucket test measures overall flush power by comparing tank-less pour volume to a normal flush,
the dye test reveals silent leaks around the flapper or flush valve that can lower tank pressure,
and a plunger test checks for partial downstream clogs affecting siphon initiation.
Record results, isolate cause, then repair.
Parts replacement and upgrades to improve flush
If weak flushing persists after adjusting the water level, it may indicate a worn fill valve, flapper, or flush valve that should be replaced.
The article will outline signs that each part needs replacement and suggest compatible Kohler OEM parts as well as reliable universal alternatives.
Guidance will include fit, performance trade-offs, and when an upgrade can restore or improve flush efficiency.
When to replace the fill valve, flapper, or flush valve
Evaluate component performance before assuming an adjustment will fix a weak or noisy flush: persistent running, slow tank refill, low water level that won’t hold, or repeated manual flushing are signs the fill valve, flapper, or flush valve may need replacement.
Replace when wear, cracks, mineral buildup, or warped seals are evident; age and repeated repairs also justify upgrading to restore reliable flush performance.
- Cracked or warped flapper
- Filling delay or surge
- Continuous tank runoff
- Recurrent manual flushes
Recommended Kohler parts and universal alternatives
After inspecting components and confirming that replacement rather than adjustment is required, homeowners can choose between Kohler-branded parts designed for exact fit and performance or reliable universal alternatives that simplify sourcing and often reduce cost.
Recommended replacements and upgrades include:
- Kohler genuine fill valve (model-specific)
- Universal adjustable fill valve
- Kohler flapper or seal kit
- Universal flapper compatible with 2-piece and 1-piece toilets
Preventive maintenance to keep flush strong
Routine inspections of the tank and a regular cleaning schedule help maintain proper flush performance and reveal early signs of wear.
Preparing the toilet for winter and addressing hard water through softeners or descalers prevent freeze damage and mineral buildup.
Consistent scale prevention and simple seasonal checks prolong component life and keep flush strength consistent.
Routine tank inspections and cleaning schedule
Inspect the tank at regular intervals to catch buildup and minor wear before they reduce flush performance.
A simple schedule and checklist prevent surprises: monthly visual checks, quarterly component tests, semiannual full cleanings, and immediate attention to leaks.
Replace worn flappers or fill valves promptly to preserve efficiency.
- Monthly visual inspection
- Quarterly valve and float test
- Semiannual tank cleaning
- Immediate leak response
Winterizing, hard water considerations, and scale prevention
Prepare for seasonal changes and mineral buildup by addressing winterizing, hard water, and scale prevention together, since each affects fill valves, flappers, and flush performance.
Drain and insulate exposed supply lines before freezing temperatures. Use filter-equipped shutoffs or water-softening to reduce minerals.
Routinely descale tank components with vinegar or manufacturer-approved cleaners. Replace corroded parts promptly to maintain reliable flush strength and prevent failures.
Estimated time, cost, and difficulty level for the adjustment
A simple water-level adjustment on a Kohler toilet typically takes 10–30 minutes and requires only basic tools, with parts costing under $15 if a replacement fill valve is needed.
For homeowners unsure about shutoff valves, working inside the tank, or encountering persistent leaks, hiring a plumber—usually $75–$200 for a service call—can be more cost-effective than trial-and-error.
The article will compare these typical DIY time and cost estimates with scenarios that justify professional assistance.
Typical DIY time and costs
Most homeowners can complete the water-level adjustment in roughly 15–45 minutes depending on the model and whether tools are needed.
Typical costs are minimal: no-cost if only adjusting a float, $5–20 for a replacement refill valve or float, and up to $30 for basic tools if absent.
Difficulty is low to moderate; basic mechanical aptitude suffices.
When hiring a plumber is cost-effective
Cost-effectiveness hinges on time, complexity, and risk: homeowners should consider hiring a plumber when the toilet’s water-level issue involves hard-to-access components, persistent leaks, or electrical-integrated fill systems that extend the job beyond a simple float adjustment.
Professional service typically takes 30–90 minutes, costs $100–$300 depending on parts and region, and suits moderate to high difficulty or warranty-sensitive fixtures.
Troubleshooting checklist to follow after adjustment
After adjusting the water level, the homeowner should run a brief checklist to confirm proper function and catch issues early.
A concise inspection verifies flush strength, refill timing, and leaks; any anomalies prompt further adjustment or professional help.
- Test multiple flushes for consistent performance
- Inspect tank and bowl for leaks
- Verify refill valve shuts off promptly
- Confirm overflow tube level and chain slack
Conclusion
Adjusting a Kohler toilet’s water level can restore flush power, reduce clogs, and conserve water. Studies show toilets with properly set tank levels use up to 25% less water per flush than overfilled tanks, illustrating efficiency gains from small adjustments. Homeowners following basic safety steps, identifying fill valves, and performing simple tweaks or part replacements typically see immediate improvement. Regular preventive maintenance preserves performance and avoids more costly repairs down the line.
