
How to Mark Sprinkler Heads: Quick, Safe Methods for Lawn Care Pros and DIYers
Marking sprinkler heads is essential for preventing damage and ensuring efficient maintenance. Use bright flags or low-profile stakes for visibility during routine mowing. For temporary cues, opt for colored spray paint or turf markers. If you’re working long-term or in construction, protective pop-up caps are ideal. Consider color-coding zones, mapping locations, and training crews to avoid accidental digs. Always select weatherproof, UV-stable materials, and remember to remove temporary markers once the job is done. For more practical tips, product recommendations, and troubleshooting advice, continue reading.
Why Marking Sprinkler Heads Matters for Lawn Care
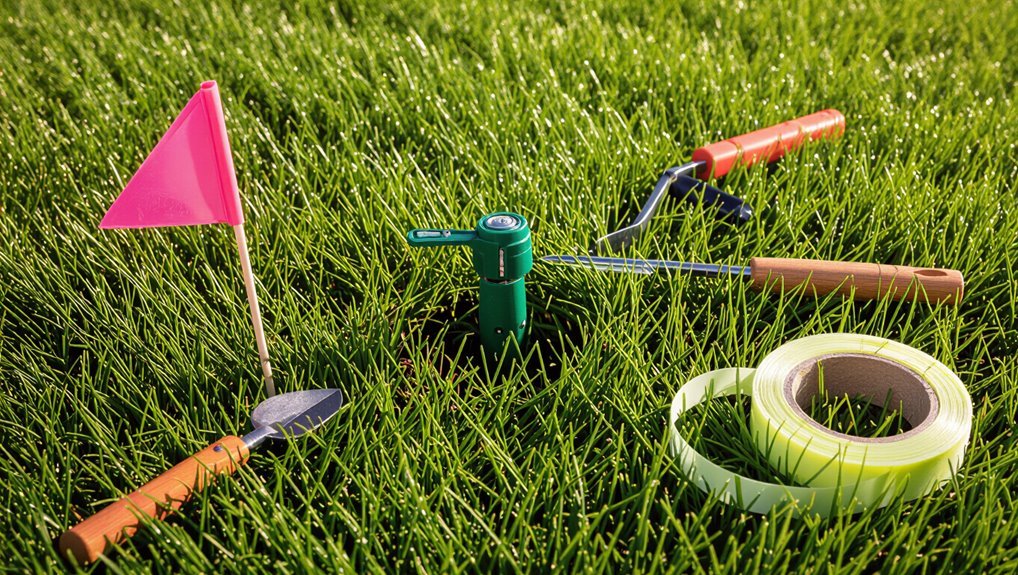
Marking sprinkler heads helps prevent accidental damage from mowing, landscaping, and winter work by making their locations visible to workers and equipment operators.
Clearly marked heads also streamline irrigation maintenance and troubleshooting by allowing quick identification of problem units and zones.
For contractors and homeowners, proper marking supports safety, reduces liability, and aids compliance with local work and permitting practices.
Preventing Damage During Mowing, Landscaping, and Winter Work
Preventing accidental damage to sprinkler heads during mowing, landscaping, and winter tasks preserves irrigation function and avoids costly repairs.
Proper marking guides equipment and workers, reducing crushed nozzles, misaligned risers, and buried heads. Clear markers and visible flags should be placed safely, noted on site plans, and communicated to crews.
Including how to mark sprinkler heads in job briefings prevents mistakes and downtime.
Improving Irrigation Maintenance and Troubleshooting
Beyond protecting heads during turf care and seasonal work, clearly identified sprinkler locations streamline routine maintenance and speed troubleshooting.
Marked heads allow quick valve checks, zone isolation, and targeted repairs without unnecessary digging. Color-coding or numbered tags link to system maps and pressure readings, reducing diagnostic time.
Clear markings also help identify mismatched nozzles, clogged filters, or lateral leaks for faster corrective action.
Safety and Compliance Considerations for Contractors and Homeowners
When sprinkler heads are clearly identified, contractors and homeowners reduce the risk of accidental damage, injury, and code violations during landscaping or maintenance work.
Clear markers support compliance with local ordinances, utility-locate requirements, and safety protocols. Marking minimizes repair costs, prevents liability from property damage, and aids inspectors.
Consistent labeling and durable materials guarantee visibility throughout seasons and during heavy work.
Quick Methods to Mark Sprinkler Heads
Practical, fast options for marking sprinkler heads include highly visible flags or stakes and bright spray paint or turf markers for immediate identification.
Pop-up protective caps and covers provide both visibility and guard against damage, while temporary stakes wrapped with reflective tape help locate heads in low light.
Each method balances speed, durability, and site conditions, and can be combined as needed.
Highly Visible Flags and Stakes
A few highly visible flags or slender stakes provide a fast, reliable way to mark sprinkler heads for mowing, landscaping, or repair work.
They stand out without harming turf, are easy to remove, and resist wind when placed properly. Use bright colors and short stems near heads to avoid mower damage.
- Quick placement
- Low turf impact
- Reusable options
- Visible from distance
Colored Spray Paint and Turf Markers
Several quick, noninvasive options exist for marking sprinkler heads, with colored spray paint and turf markers among the most commonly used for short-term identification.
These methods provide visible, temporary cues for maintenance, mowing, and repairs without permanent alteration. Choose contrast colors and low-odor, water-resistant paints or reusable plastic turf markers for safety and minimal turf impact.
- Use bright, contrasting colors
- Apply short bursts of paint
- Place markers near but not on heads
- Remove or refresh regularly
Pop-up Protective Caps and Covers
Pop-up protective caps and covers offer a simple, noninvasive way to mark sprinkler heads while also shielding them from mower damage and debris. They fit over risers, come in bright colors, and are removable for maintenance.
Ideal for contractors and homeowners seeking durable, visible markers without paint.
- Easy snap-on installation
- Durable plastic construction
- Color-coded visibility
- Minimal interference with operation
Temporary Stakes with Reflective Tape
Many homeowners and contractors use temporary stakes wrapped with reflective tape to flag sprinkler heads quickly and visibly during maintenance or landscaping.
Stakes are lightweight, adjustable, and easily removed after work; reflective tape improves visibility at dusk or in dense foliage. This method reduces accidental damage and guides crews efficiently.
- Affordable and reusable
- Visible in low light
- Easy repositioning
- Noninvasive, turf-friendly
Step-by-Step: How to Mark Sprinkler Heads Safely and Effectively
The section outlines the essential tools and materials required and a systematic method for locating every sprinkler head.
It compares marking options suited to different lawn types and gives step‑by‑step instructions for installing flags, stakes, or caps without harming components.
It also covers safe removal or replacement of markers once work is finished.
Tools and Materials You’ll Need
Before beginning, assemble the essential tools and materials to guarantee marking goes quickly, accurately, and without damaging heads or lawn. A concise kit reduces errors and protects equipment.
Recommended items include:
- Soft-tip flag markers or colored pin flags
- Low-odor, washable spray paint for turf-safe marks
- Tape measure or folding ruler for spacing
- Small hand trowel and gloves for gentle adjustments
Locating All Heads Systematically
A systematic sweep of the yard guarantees every sprinkler head is found without missing hidden or recessed units.
Proceed in overlapping rows, inspecting borders, beds, and high-traffic zones.
Run each station briefly to reveal spray patterns and pop-up locations.
Note buried or partially exposed heads, flag them, and record positions on a simple map.
Confirm by a second pass.
Selecting the Best Marking Method for Your Lawn Type
Choosing a marking method depends on lawn type, soil conditions, and visibility needs; homeowners should match durable, low-profile markers to turf that is mowed frequently.
Use taller, removable flags in ornamental beds, and prefer biodegradable stakes or paint for lawns where aesthetics and mower safety matter most.
Evaluate foot traffic, irrigation layout complexity, and seasonal maintenance to balance visibility, longevity, and minimal turf disturbance.
Installing Flags, Stakes, or Caps Without Damaging Components
Start by locating each sprinkler head visually or by gently probing the turf edge to confirm its position and verify the riser is not stressed.
Choose low-profile flags or soft plastic caps. Insert stakes beside—not through—the head using shallow, angled placement to avoid riser strain.
Secure caps by sliding gently over risers. Test pop-up action after marking to confirm no binding or interference.
Removing or Replacing Markers After Work Is Done
Once work around the lawn is finished, markers should be removed or replaced carefully to restore normal sprinkler operation and preserve component integrity.
Technicians lift flags or caps straight up to avoid twisting risers, collect stakes and debris, and inspect heads for damage.
Replace permanent markers only if secure and unobtrusive. Dispose of temporary materials properly and document any repairs or irregularities for follow-up.
Marking Strategies for Different Scenarios
Different scenarios require tailored marking approaches to protect sprinkler heads and guide work crews.
For routine mowing and edging, high-visibility flags or stakes suffice, while landscaping or planting beds may need low-profile markers and durable ground paint.
Construction, digging, utility work, and winter snow removal each call for more robust, often temporary barriers and clear documentation to prevent damage.
Routine Lawn Mowing and Edging
When mowing and edging a lawn, homeowners should mark sprinkler heads so mowing paths remain efficient and nozzles are protected. Clearly visible markers tailored to the lawn’s layout reduce accidental damage and help maintain consistent turf lines.
Use low-profile stakes, brightly colored flags, or paint dots set slightly back from heads. Replace temporary markers after repairs and reposition before seasonal height or route changes.
Landscaping Projects and Planting Beds
Shifting focus from routine mowing and edging, marking approaches for landscaping projects and planting beds prioritize visibility and protection during digging, mulching, and plant placement.
Use low-profile, color-coded stakes or small flags that resist mulch cover; durable spray paint for temporary outlines; temporary collars or foam rings to shield heads from soil and tools; map placements to avoid accidental removal during planting and maintenance.
Construction, Digging, and Utility Work
For construction, digging, and utility work, clear, durable marking of sprinkler heads minimizes damage risk and keeps crews aware of buried irrigation lines.
Use highly visible, weatherproof markers—flagging, painted caps, or stakes—placed several inches away and labeled with depth.
Coordinate with utility maps, inform contractors, and update markings after site changes.
Temporary protective covers guard risers during heavy equipment operations.
Winterization and Snow Removal
Prepare clear, durable markers before the first snowfall to protect sprinkler components during winterization and snow removal operations.
Stakes or flags placed near heads, colored for visibility, guide plow operators and homeowners. Markers should resist cold, snow cover, and ice.
Temporary taller markers help locate buried risers. Remove or store delicate markers after thaw to prevent damage and restore lawn aesthetics.
Durability, Visibility, and Environmental Considerations
Selection of weather-resistant, UV-stable materials and colors guarantees markings remain visible through sun, rain, and mower traffic.
Preference for eco-friendly paints and biodegradable markers reduces long-term environmental impact around turf and soil.
Careful choice and application prevent chemical or physical damage to grass and irrigation components.
Weather-Resistant Materials and UV-Stable Colors
Durable, weather-resistant materials and UV-stable colors are essential for marking sprinkler heads that must remain visible and intact through sun, rain, and temperature swings.
Plastics like HDPE, powder-coated metals, and marine-grade tapes resist fading, cracking, and corrosion. High-contrast, UV-resistant pigments maintain visibility.
Fastening methods should prevent displacement. Selection balances longevity, color retention, and compatibility with lawn maintenance equipment.
Eco-Friendly Paints and Biodegradable Marker Options
After outlining weather-resistant materials and UV-stable colors, attention shifts to marking options that minimize ecological impact without sacrificing longevity or visibility.
Eco-friendly sprays, water-based pigments, and plant-based chalks offer durable, high-contrast marks that break down safely.
Biodegradable flagging and compostable stakes provide temporary visibility.
Selection balances persistence through mowing with guaranteed decomposition, ensuring minimal runoff and soil disruption.
Avoiding Chemical or Physical Damage to Turf and Irrigation Parts
Prevent damage to turf and irrigation components by choosing marking methods and materials that balance visibility with nonreactivity and physical gentleness.
Use noncorrosive, low-toxicity paints or flags with smooth stakes; avoid solvents, harsh adhesives, and metal probes that compact soil or nick risers.
Test products on a small area, follow manufacturer guidance, and prioritize biodegradable or easily removable options to protect plant health and system longevity.
Best Practices for Lawn Care Pros and DIYers
Professionals and DIYers can adopt simple, standardized practices to keep sprinkler systems clear and serviceable.
Common tactics include color-coding heads for quick identification, sketching a basic map of locations, training crews and informing clients, and using a routine inspection checklist before and after work.
These measures reduce errors, speed maintenance, and improve communication.
Color-Coding Systems for Quick Identification
When systems are large or shared among multiple crews, a simple color-coding scheme lets technicians and homeowners instantly identify sprinkler head types, zones, and maintenance needs.
Standardize colors, use durable tags or paint, include a legend at the controller, and guarantee crew training.
- Blue: pop-ups
- Red: drip/low-flow
- Green: active zone
- Yellow: needs repair
Creating a Simple Mapping or Diagram of Head Locations
Why map sprinkler heads before work begins? A simple diagram notes each head’s location, type, and spray radius relative to fixed landmarks.
Use graph paper or a smartphone app, label zones, and mark obstructions and shutoffs. Keep the map with the service record and update after adjustments.
Clear diagrams reduce errors, speed troubleshooting, and preserve system integrity.
Training Crew Members and Communicating with Clients
Establish clear, consistent training and communication protocols so crew members and clients understand sprinkler head identification, marking standards, and service expectations.
Provide hands-on demonstrations, a brief reference guide with photos, and standard markup examples.
Require competency checks and periodic refreshers.
Communicate scheduled work, any deviations, and expected outcomes to clients in writing.
Document client preferences and obtain confirmation before altering markers.
Routine Inspection Checklist Before and After Work
Perform a brief, methodical inspection before and after any sprinkler work to verify system integrity, worker safety, and client expectations.
Technicians verify marked heads, check for leaks, ascertain valves operate, and confirm no hazards were introduced. Documentation and photos capture conditions and any client communications.
Follow-up repairs or adjustments are scheduled promptly to maintain performance and trust.
- Confirm head positions and markers
- Check for leaks or broken parts
- Test valve and zone operation
- Photograph and log findings
Common Mistakes and How to Avoid Them
Common errors include using markers that block nozzles or impede pop-up movement, applying permanent paint or strong adhesives, and failing to identify pop-up or buried heads.
These mistakes can reduce system performance, cause leaks, or make future repairs difficult.
Avoidance requires choosing low-profile, removable markers, non-toxic adhesives, and routinely inspecting for hidden or recessed heads.
Markers That Obscure or Interfere with Sprinkler Operation
Markers that block visibility or physically interfere with sprinkler heads can cause missed watering, damaged equipment, and costly repairs; examples include tall stakes placed too close, flags that droop over sprinkler nozzles, or paint and tape applied directly to moving parts.
Inspect placements to maintain clearance, use low-profile markers, secure flags upright, and test each head after marking to confirm unobstructed rotation and spray pattern.
Using Non-Removable Paint or Harmful Adhesives
Using permanent paint or strong adhesives on sprinkler heads can cause long-term damage and operational failure if applied directly to nozzles, seals, or rotating components.
Professionals recommend avoiding non-removable substances; they impede maintenance, void warranties, and attract dirt.
Instead, select temporary, water-resistant markers or clip-on flags designed for irrigation.
Test any product on a spare component before widespread use to prevent costly repairs.
Overlooking Pop-Up or Buried Heads
Although pop-up and buried sprinkler heads are designed to be unobtrusive, they are easy to miss during inspection and marking, leading to damaged heads, clogged nozzles, or failed zones.
Inspectors should map zones, run systems to reveal hidden pop-ups, probe gently with a hand tool, and mark locations with temporary flags.
Regular checks prevent missed repairs and accidental damage during mowing or landscaping.
Comparing Popular Marker Options
The article now compares common marker options for sprinkler heads by examining visibility, cost, ease, and durability. The following quick table highlights key tradeoffs to guide selection. Conclusions will weigh real-world needs against these factors.
| Marker Type | Notes |
|---|---|
| Flags | High visibility, low cost, moderate durability |
| Spray Paint | Low cost, high ease, variable durability |
| Protective Caps | Moderate visibility, higher cost, high durability |
Flags vs. Spray Paint vs. Protective Caps Visibility, Cost, Ease, Durability
Comparing flags, spray paint, and protective caps reveals clear trade-offs in visibility, cost, ease of application, and durability: flags are highly visible and inexpensive but can be displaced by wind or mowing; spray paint is cheap and quick but fades and can mark surrounding surfaces; protective caps offer the most durable identification and equipment protection but cost more and require removal for access.
Professionals favor caps for longevity; homeowners often choose paint or flags.
Product Recommendations and Buying Tips
The section outlines key features to seek in flags, stakes, and caps—visibility, durability, and ease of installation.
It then contrasts budget-friendly options for DIYers with long-lasting solutions preferred by professionals.
Finally, it advises where to buy supplies and how to estimate quantities for typical yard sizes.
Features to Look For in Flags, Stakes, and Caps
Visibility, durability, and ease of installation drive the best choices for flags, stakes, and caps used to mark sprinkler heads.
Select weather-resistant materials, bright colors, low-profile shapes to avoid mower strikes, and secure fastening to resist wind and foot traffic.
Consider visibility at a distance and compatibility with head sizes.
- UV-stable plastic or coated metal
- High-contrast colors
- Low snag profile
- Firm anchoring mechanism
Budget Options for DIYers and Durable Solutions for Pros
When budget constraints guide a project, DIYers can prioritize inexpensive, effective markers—such as plastic flagging tape, simple metal garden stakes, or reusable colored caps—while professionals should invest in heavy-duty, UV-stable markers and low-profile metal stakes designed to withstand mowers and traffic.
DIY selections favor affordability and visibility; pros choose longevity, low profile, and corrosion resistance.
Consider color coding and replaceable parts.
Where to Buy Supplies and How Much to Order
Because procurement choices affect both cost and long-term performance, buyers should source markers from retailers that match their priorities—big-box stores and online marketplaces for cheap, disposable options; garden centers and irrigation suppliers for mid-range reusable items; and specialty irrigation vendors for professional-grade, UV-stable markers and corrosion-resistant stakes.
Order spare parts and extras (10–20% over base count) and buy in bulk for multiple sites to reduce per-unit cost.
Quick Troubleshooting When Markers Cause Issues
When markers cause problems, the homeowner should first address removable paint or adhesive with appropriate solvents and gentle scrubbing to avoid damaging heads.
If a marker has displaced or harmed a sprinkler, basic realignment and replacement of damaged components can often restore proper function.
Persistent leaks, persistent misalignment, or uncertain repairs warrant contacting a professional irrigation technician.
Removing Paint or Adhesive Safely
Scrape away excess dried paint or sticky residue gently with a plastic putty knife or old credit card to avoid nicking sprinkler casings.
Use a cloth dampened with mild dish soap and water for water-based markers; test in an inconspicuous spot.
For stubborn adhesive, apply isopropyl alcohol or a citrus-based remover sparingly, then rinse.
Dry components fully before reassembling or marking again.
Fixing Displaced or Damaged Sprinkler Heads
After removing paint or adhesive residue, attention should turn to correcting any displaced or damaged sprinkler heads that marking attempts may have caused.
Inspect for cracks, loose risers, or misalignment. Re-seat heads to proper depth, tighten collars, replace cracked casings or seals, and adjust spray patterns.
Test the zone at low pressure to confirm operation and prevent future surface damage from repeated repairs.
When to Call a Professional Irrigation Technician
Occasionally, marking attempts reveal problems beyond basic adjustments—cracked heads, buried risers, or persistent leaks—that warrant professional attention.
A technician should be called when visible damage, recurring low pressure, unexplained wet spots, or frequent valve failures occur.
Professionals diagnose pipe faults, perform safe excavation, replace components, and recalibrate zones.
Prompt service prevents system deterioration, water waste, and landscape damage.
Checklist: Marking Sprinkler Heads Before Any Lawn Work
Before any lawn work begins, a simple checklist verifies all sprinkler heads are identified and protected:
- Walk perimeter, note visible risers and heads.
- Flag each head with high-visibility markers or stakes.
- Measure and map head locations relative to fixed landmarks.
- Record valve zones and shutoff procedures for crew reference.
This routine minimizes accidental damage and guarantees efficient, safe maintenance.
Conclusion
In the end, marking sprinkler heads becomes a discreet form of stewardship—subtle signals that spare mechanical grief and preserve verdant intentions. Whether with a tasteful flag, a low-profile cap, or a painted whisper, these gentle cues prevent accidental affronts and maintain irrigation harmony. Professionals and weekend gardeners alike adopt the practice as a quiet courtesy to turf and tools, ensuring that routine work proceeds without awkward discoveries or unintended apologies to the lawn.
