How to Turn Off Water at the Water Heater Quickly and Safely
To quickly and safely turn off the water at your water heater, first locate the heater and shut off the cold-water inlet valve to prevent leaks or flooding. Next, turn off the power (breaker) or gas for safety. Open a nearby hot faucet or the tank drain/T&P valve to relieve pressure and ensure that the flow has stopped. For tankless units, close the isolation valves and follow the manufacturer’s flushing instructions. Always use gloves and eye protection, and if you encounter stubborn valves, don’t hesitate to call a professional. Follow these steps for detailed guidance and troubleshooting.
How to Quickly and Safely Turn Off the Water at the Water Heater
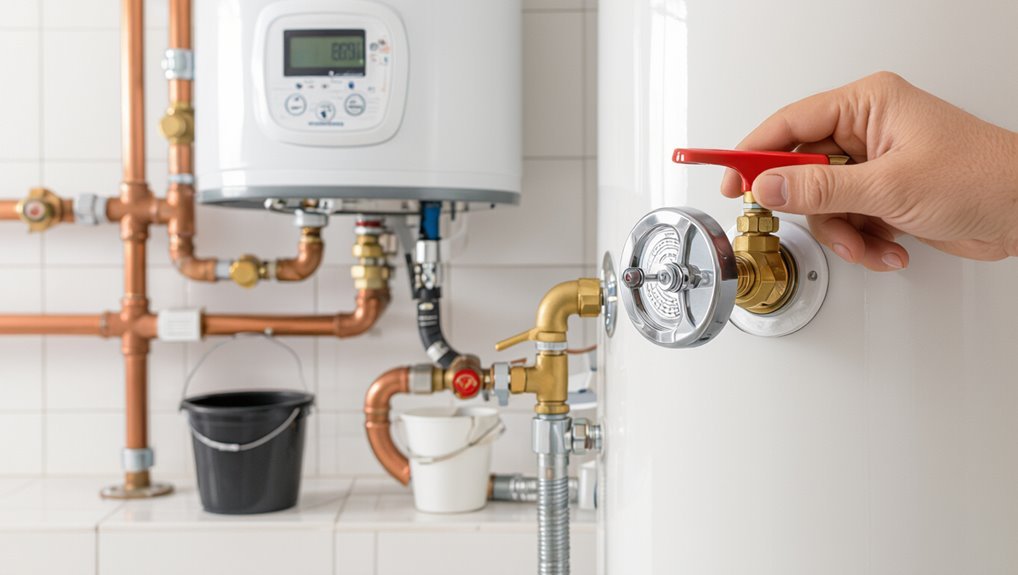
A homeowner should shut off the water to the heater immediately when a leak, burst pipe, or planned maintenance is detected to prevent flooding and equipment damage.
Visible dripping, pooling, hissing sounds, or a sudden loss of pressure are signs that require immediate shutoff.
The following steps explain how to quickly and safely stop the water flow at the heater.
When and why you should shut off the water to the heater now
Shut off the water to the heater immediately when leaks, unusual noises, or sudden loss of hot water occur, and also before any maintenance or prolonged absence to prevent flooding and damage.
Owners should know how to turn off water at water heater to avoid property loss, limit corrosion, and prevent scalding.
Timely shutdown reduces repair scope and insurance complications.
Signs that require an immediate water shutoff (leak, burst pipe, maintenance)
Detecting sudden leaks, a burst pipe, or scheduled maintenance should prompt an immediate shutdown of the water supply to the heater to prevent flooding, minimize damage, and allow safe repairs.
Visible pooling, continuous drips, hissing or spraying, reduced water pressure, unusual noises, or loss of hot water signal urgent action.
Immediate shutoff limits property damage and creates a safer environment for diagnostics and repairs.
Locate the Water Heater and Main Controls
The homeowner first identifies whether the unit is a tank or tankless model and notes its placement in the utility area.
Next, they locate the cold-water inlet, the shutoff valve on that inlet, and the temperature-and-pressure relief valve.
Finally, they inspect valve types—ball, gate, or stop-and-waste—and observe the handle orientation to determine open or closed.
Identifying the type and location of your water heater (tank vs tankless)
A quick inspection near utility areas will reveal whether a household uses a conventional tank heater—typically a large cylindrical unit with visible inlet and outlet pipes—or a compact tankless model mounted on a wall.
Tank units often occupy basements, garages, or closets; tankless units are installed where wall space and venting are available.
Note electrical or gas connections and clearances for access.
Finding the cold-water inlet, shutoff valve, and pressure relief valve
One clear step is to trace the incoming cold-water pipe to the heater: it is typically the pipe connected to the top of the unit marked with blue tape or a cold-water label and leads from the home’s main supply.
Locate the nearby shutoff valve on that inlet and the temperature-pressure relief (TPR) valve—usually on the tank side—verifying their positions before any shutoff or maintenance.
How to read valve types (ball, gate, stop-and-waste) and orientations
Several common valve types—ball, gate, and stop-and-waste—are identifiable by shape and handle orientation, which indicate whether water is on or off.
A ball valve has a lever parallel to flow when open; perpendicular means closed.
A gate valve uses a round wheel turned clockwise to close.
A stop-and-waste includes a small drain screw used after shutting to drain remaining water.
Step-by-Step: Turning Off the Water at a Tank Water Heater
Before beginning, the operator should follow a concise safety checklist: disconnect power or gas and wear appropriate protective gear.
First, shut off the electrical breaker or gas supply, then close the cold-water inlet shutoff—turning quarter-turn, gate, or multi-turn valves as appropriate.
If pressure must be relieved, use the drain valve or T&P valve, then verify the water is off and inspect for any continuing leaks.
Safety checklist before you start (power/gas, protective gear)
Confirm that the heater is safe to work on by shutting off its power source and wearing appropriate protective gear: turn off the circuit breaker for electric units or set the gas control to pilot/off for gas models.
Shut off the water supply to the heater if possible, and put on safety glasses and gloves to protect against hot water, steam, and sharp edges.
Verify ventilation, clear the area, and have a bucket ready.
Step 1 Shut off power or gas supply
With power and gas risks addressed and protective gear in place, the first operational step is to cut electrical or fuel supply to the heater.
For electric units, switch off the dedicated breaker and verify with a non-contact tester.
For gas models, shut the gas valve to “off” or close the service cock.
Confirm absence of power or gas before proceeding.
Step 2 Close the cold-water inlet shutoff valve (how to turn different valve types)
Locate and close the cold-water inlet shutoff valve to stop incoming water to the tank before draining or servicing.
Identify valve type: quarter-turn ball valves require a 90° turn so handle is perpendicular to pipe; multi-turn gate valves need clockwise rotation until snug; stop-and-waste or globe valves close similarly.
Confirm closure by checking that water flow into the heater has ceased.
Step 3 Drain or relieve pressure if necessary (using the drain valve or T&P valve)
Before draining, relieve built-up pressure to prevent splashing or steam release: open a nearby hot water faucet to vent the system, then attach a hose to the heater’s drain valve and route it to a safe drain or outside area.
Slowly open the drain valve; monitor for hot water or sediment. If pressure remains, briefly lift the T&P valve lever to release trapped pressure, then reseat it.
Step 4 Verify the water is off and check for continued leaks
Confirm that water flow has stopped and inspect all fittings for leaks.
The person checks supply lines, valves, and the drain connection for dampness or dripping. They dry suspect areas, observe for several minutes, and feel joints for moisture.
If leakage persists, containment (bucket/towels) is placed beneath the source and the condition is documented before arranging repair or further action.
Emergency tips if the valve won’t turn (tools, temporary measures)
If the shutoff valve will not turn despite drying and inspection, the homeowner should follow a few emergency options to stop or limit water flow while arranging repairs.
Apply penetrating oil, use an adjustable wrench or pipe wrench carefully, or tap the stem gently to free it.
As a temporary measure, locate and shut a main house shutoff, or call a plumber immediately to avoid damage.
Step-by-Step: Turning Off the Water at a Tankless Water Heater
For tankless units, the procedure begins with a brief safety checklist addressing electrical isolation, gas shutoff (if applicable), and protective gear.
The technician then locates the cold inlet, hot outlet, and the unit’s isolation valves before closing the inlet and isolating the heater for service.
Finally, attention is given to manufacturer-specific flushing and any drain or condensate steps required to protect the unit and plumbing.
Safety checklist specific to tankless units
Before shutting off water to a tankless heater, a brief safety checklist ascertains the procedure proceeds without damage or injury:
- Confirm power to the unit is off to prevent ignition or electrical hazard.
- Allow recent hot-water activity to cool.
- Wear gloves and eye protection.
- Guarantee adequate ventilation if combustion gas is present.
- Have tools and a bucket ready.
- Verify freeze protection measures are active.
Locating inlet, outlet, and isolation valves
Several simple steps guide identification of the inlet, outlet, and isolation valves on a tankless water heater so the shutdown can proceed safely.
Inspect cold (usually marked blue) and hot (red) pipes at the unit, follow labels or arrows on the casing, locate service valves with handles or levers adjacent to pipe unions, and note any auxiliary isolation valves used for maintenance or flushing.
Shutting off inlet water and isolating the unit for service
Shut the cold-water inlet first and close the heater’s isolation valves to prevent flow into the unit and allow safe servicing.
Confirm both inlet and outlet valves are fully closed, then open a nearby faucet to verify pressure is relieved.
Tag valves as closed for technicians.
If present, shut the unit’s gas or electrical supply per manufacturer instructions before beginning any internal work.
Flushing and draining considerations for tankless systems
When preparing to flush and drain a tankless water heater, the technician should account for the unit’s closed-loop design and built-in condensate/drain pathways so that trapped water and mineral deposits can be removed without damaging heat exchangers or control components.
Isolate inlet/outlet valves, attach a pump or garden hose to service ports, use manufacturer-recommended descaler, flush until clear, then fully reopen valves and check for leaks.
What to Do If the Water Heater Is Part of a Larger Plumbing System
If the water heater is integrated into a larger plumbing system, the homeowner may need to shut off the main water supply rather than only the heater’s valves, especially when multiple fixtures or branch lines are affected.
Locate the main shutoff valve—often where the service line enters the house or near the water meter—and operate it fully clockwise or as labeled.
Coordinate shutting off any branch lines or appliances downstream to isolate sections and prevent backflow or unexpected water use.
When to shut off the home’s main water supply instead
Where should the shutoff occur when the water heater is integrated into a larger plumbing system?
The main supply should be used when multiple fixtures or appliances are affected, when leaks span several areas, or when isolating the heater isn’t possible due to shared piping.
Shutting the main prevents further damage and allows safe repairs, though it interrupts water to the entire residence.
Locating and operating the main shutoff valve
A home’s main shutoff valve is typically located near the point where the municipal supply enters the building—often in a basement, garage, utility room, or beside the water meter outside—and should be identified before any emergency.
Locate the valve type (gate, ball, or curb stop), clear access, then turn firmly: clockwise for gate valves, quarter turn for ball valves.
Confirm flow stops at fixtures.
Coordinating with shutoff of branch lines or appliances
After shutting off the home’s main valve, attention should turn to any branch lines and appliances tied into the water heater to prevent unexpected flows or damage.
The homeowner or technician should locate isolation valves and follow a brief checklist:
- Close appliance isolation valves.
- Drain affected branch lines if necessary.
- Label closed valves.
- Restore water only after testing for leaks and system integrity.
Common Problems and How to Handle Them
Common issues when shutting off a water heater include stuck or corroded valves, a broken drain valve or leaking fittings, and frozen pipes nearby.
The article will outline practical steps to free or bypass a seized valve, temporarily manage a damaged or leaking drain connection, and thaw or protect nearby frozen piping.
It will also specify clear signs and situations when work should stop and a professional plumber should be called.
Stuck or corroded valves (steps to free or bypass)
If a shutoff valve at the water heater resists movement or shows heavy corrosion, it can prevent isolation of the tank and complicate repairs.
Addressing a stuck or corroded valve requires careful assessment to avoid damaging fittings or causing leaks. Apply penetrating lubricant, allow dwell time, try gentle taps, and use proper-sized pliers.
If immobile, shut the main supply, install a temporary bypass or consult a plumber.
Broken drain valve or leaking fittings
A damaged drain valve or leaking fitting at the water heater can quickly turn a routine maintenance task into a messy emergency. Addressing these faults promptly reduces water damage risk and restores reliable drainage.
Inspect connections, tighten fittings cautiously, and replace cracked or corroded valves. Shut off the cold-water supply first, drain remaining water safely, and consult a plumber for threads, soldered joints, or persistent leaks beyond simple replacements.
Dealing with frozen pipes near the heater
After addressing leaks or a faulty drain valve, attention should turn to frozen pipes near the water heater, a frequent winter hazard that can block flow, burst lines, and damage the tank.
Inspect exposed piping, gently thaw with a hair dryer or heat tape, open nearby faucets to relieve pressure, and insulate pipes.
Monitor for cracks and restore flow gradually to avoid sudden stress.
When to stop and call a professional plumber
When should a homeowner stop troubleshooting and call a professional plumber?
If leaks persist after shutting the heater supply, if valves are seized or burst, if corrosion, gas smell, or electrical faults appear, or if water damage spreads, professional assessment is required.
Certified plumbers can safely isolate systems, repair or replace components, and prevent hazards; avoid prolonged DIY attempts that risk injury or greater damage.
Tools, Materials, and Safety Gear You May Need
A brief inventory of tools and safety items helps guarantee a quick, safe shutoff at the water heater.
Consider carrying a basic kit:
- Adjustable wrench, pliers, and valve-turning tool
- Gloves, safety glasses, and absorbent pads or a drain pan
- Replacement washers, valve stems, and Teflon tape
- Flashlight and a small bucket for containment.
Hand tools and valve-turning aids
Gather basic hand tools and valve-turning aids to make shutting off the water at the heater quick and safe.
Include an adjustable wrench, slip-joint pliers, and a pipe wrench sized for inlet/outlet fittings.
Add a long-handled valve key or multi-size valve turner for hard-to-reach stop valves.
Keep a small rag and flashlight nearby for grip and visibility.
PPE and spill containment supplies
Personal protective equipment and spill containment supplies protect both the person shutting off the water and the surrounding area from hazards such as hot water, sharp edges, and unexpected leaks.
Recommended items include heat-resistant gloves, safety goggles, sturdy footwear, and long sleeves.
Absorbent pads, drip trays, and a few towels contain escaped water. A small flashlight aids inspection.
Dispose or launder used materials promptly.
Replacement parts to have on hand
With protective gear and spill containment in place, it is wise to keep a small selection of common replacement parts on hand to speed repairs and reduce the risk of further damage.
Recommended items include a shutoff valve, pressure relief valve, drain pan fittings, flexible connector hoses, Teflon tape, pipe dope, assorted washers and compression fittings, and basic replacement thermostats and heating elements.
Preventive Maintenance to Avoid Emergency Shutoffs
Routine operation of the heater shutoff valve and a regular inspection schedule reduce the risk of surprises and identify wear before failure.
When a valve shows signs of leaking or stiffness, replacing it promptly and following safe shutoff and pressure-relief procedures prevents emergency work.
Seasonal measures such as insulating exposed pipes and winterizing components near the heater further protect against freeze-related ruptures.
Regular valve operation and inspection schedule
Regularly operating and inspecting the shutoff valve prevents corrosion, seizing, and unexpected failures that lead to emergency water shutoffs.
A concise schedule reduces risk:
- Inspect monthly for leaks or corrosion.
- Operate valve quarterly to guarantee movement.
- Lubricate stems annually with appropriate product.
- Record findings and action dates for trend tracking and timely professional service when deterioration appears.
How to replace a failing shutoff valve safely
Replace a failing shutoff valve promptly to prevent leaks and sudden water loss that can cause property damage.
The homeowner should isolate power to electric heaters, drain minimal water to relieve pressure, close the main supply, and remove the old valve.
Install a compatible replacement, use proper fittings and thread sealant, tighten securely, restore supply, and check thoroughly for leaks and proper operation.
Tips for winterizing and insulating pipes near the heater
Several simple measures can greatly reduce the risk of frozen or burst pipes around a water heater during cold weather.
Insulate exposed hot and cold lines with foam sleeves or fiberglass wrap, seal gaps where cold air enters, add heat tape with thermostat control to vulnerable sections, maintain minimal ambient heat in the utility area, and drain or disconnect outdoor lines to prevent pressure build-up and rupture.
Quick Reference Checklist for Emergency Shutoff
A concise checklist gives clear one-line steps to follow during a water-heater emergency and lists who to contact afterward.
Follow this quick reference:
- Shut off the cold-water supply at the valve.
- Turn off the heater’s power or gas.
- Drain a small amount if needed to reduce pressure.
- Call a licensed plumber and notify the utility or insurance as appropriate.
This checklist is designed as an immediate, easy-to-scan guide for fast action and next steps.
One-line steps to follow in an emergency
Follow these steps immediately to stop water flow at the heater during an emergency:
Locate the heater, identify the cold-water shutoff valve, turn the valve clockwise until fully closed, and confirm flow stops at nearby faucet.
Close the gas or power supply if safe to do so.
Drain a few gallons from the drain valve to relieve pressure, and leave the area until a professional assesses the situation.
Contact information and next steps after shutting off water
Notify and document: after shutting off the water at the heater, the homeowner should immediately call their primary plumber or emergency water service, provide the heater location and a brief description of the issue, and record the time the shutoff occurred.
If gas or electrical supply was also disconnected, contact the gas company or electrician and the homeowner’s insurance agent to report the incident and begin claims or service scheduling.
Follow up with written confirmation and keep receipts.
Comparison of Shutoff Methods and When to Use Each
A comparison of shutting off water at the heater versus using the whole-house shutoff highlights different trade-offs in control, speed, and risk. The choice depends on the situation—localized heater shutoff can isolate a leak quickly while whole-house shutoff is safer for major breaks or winterization. The table below summarizes pros, cons, and recommended use for common scenarios.
| Method | Best Use |
|---|---|
| Local heater shutoff — Pros: isolates heater, quick; Cons: may not stop other leaks | Best for a leak at or inside the heater, routine maintenance |
| Whole-house shutoff — Pros: stops all water, prevents further damage; Cons: disrupts water to entire home | Best for major plumbing breaks, winter freeze preparation |
Pros and cons of local heater shutoff vs whole-house shutoff
When deciding whether to shut off water at the heater or at the main supply, homeowners should weigh the specific risks, convenience, and scope of the issue.
Local shutoff isolates the heater, limiting cold-water loss and reducing disruption, but may not stop widespread leaks.
Main shutoff stops all water quickly, protecting the whole house, yet disrupts all fixtures and services until restored.
Best method by scenario (leak, maintenance, winter freeze)
If the issue is limited to the water heater or its immediate connections, shutting off the heater’s local valve isolates the appliance quickly and minimizes disruption to household water use.
However, for active leaks, main-supply shutoff is safer to stop flooding throughout the home.
For maintenance, local valve suffices; for suspected internal failure or widespread risk, close the main.
For freeze prevention, drain and shut both.
Conclusion
When water must be stopped at the heater, calm, clear steps avert worse damage; the homeowner moves like a clockwork automaton—locate the tank, find the valve, close it, or shut the dedicated line on a tankless unit, and if needed, isolate the house main. Safety gear and a wrench keep actions steady. Regular checks lessen sudden alarms. With preparedness and simple tools, what begins as urgency becomes manageable, almost quaintly routine.