How to Clamp PEX Pipe: Step-by-Step Guide to Secure Connections Without Leaks
To clamp PEX pipe securely and prevent leaks, you’ll need a stainless-steel band to compress over the tubing and a barb fitting. This straightforward process requires specific tools: clamp pliers, a tubing cutter, and a deburring tool. Ensure the clamp is centered over the barb with the tubing fully seated, and squeeze evenly to avoid any gaps or over-compression. After installation, conduct a pressure test for leaks and retorque if necessary. Always adhere to local codes and manufacturer specifications for materials and torque settings. Below, you’ll find detailed step-by-step procedures, testing tips, and troubleshooting guidance.
What Clamping PEX Pipe Means and When to Use It
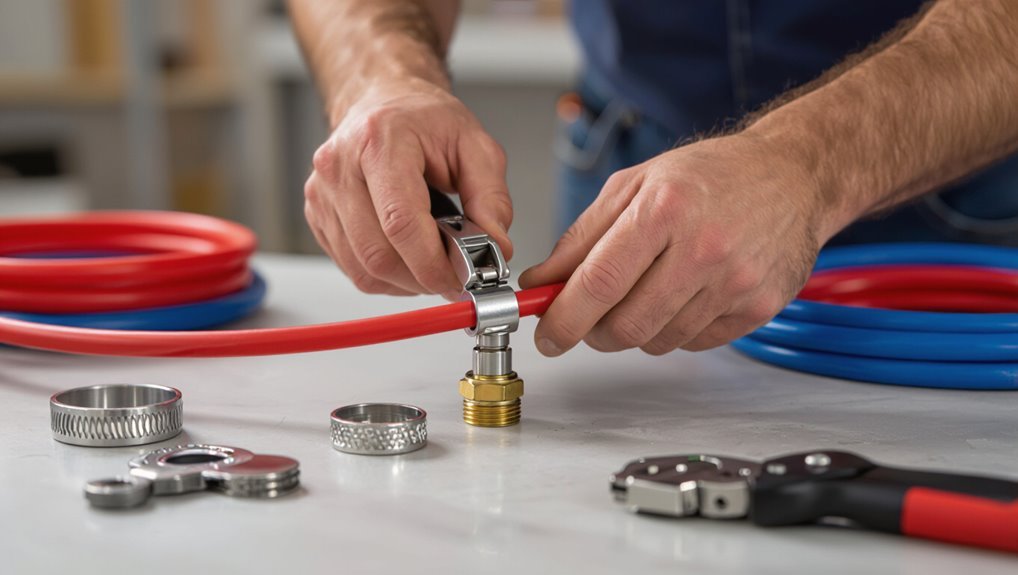
Clamping PEX pipe refers to using a mechanical clamp or stainless steel band to secure fittings and create a pressure-tight joint without deforming the tubing.
It is typically chosen for repair work, temporary connections, or situations where accessibility or material compatibility makes crimp or expansion ring systems impractical.
Clamped connections offer quick installation and reusability but can be bulkier and less standardized than crimp, ring, or expansion methods.
Definition of clamping for PEX systems
A clamp on a PEX system is a small metal or plastic ring that secures the tubing to fittings by compressing a sleeve or barb, creating a leak-resistant joint without soldering.
It describes the mechanical action used when learning how to clamp PEX pipe: applying uniform pressure with the proper tool to deform the clamp, hold the connection, and resist pressure and vibration while allowing quick, reliable assembly.
Situations that require clamps vs crimp/ring systems
When installing PEX tubing, choosing between clamp-style and crimp/ring systems depends largely on pipe size, working environment, and code requirements.
Clamp-style (stainless steel) is common for larger diameters, retrofit tight spaces, and flexible tubing.
Crimp/ring systems suit standard residential sizes, tool-accessible installs, and jurisdictions that permit them.
Inspect local codes and application constraints before selecting a method.
Benefits and limitations of clamped PEX connections
Although often chosen for retrofit and larger-diameter runs, clamped PEX connections use stainless-steel bands tightened with a tool to form a secure mechanical seal over a fitting or barb, offering quick installation and strong resistance to pull-off and vibration while remaining reversible for repairs.
Benefits include speed, reusability, and suitability for larger tubing; limitations involve tool cost, potential corrosion in harsh environments, and less aesthetic finish.
Tools and Materials Needed for Clamping PEX
The section lists the specific types of PEX pipe and compatible fittings and explains which clamp styles and sizes suit each application.
It then identifies required tools—ear clamp pliers, cinch/pinch tools or crimp alternatives, cutters, and deburring implements—and notes appropriate safety gear.
Finally, workspace preparation and safe handling practices are covered to guarantee reliable, code-compliant connections.
Types of PEX pipe and compatible fittings
Understanding PEX varieties and their matching fittings is essential before clamping begins.
PEX-A, PEX-B, and PEX-C differ in flexibility and expansion capability; PEX-A suits expansion fittings, while PEX-B and PEX-C commonly use crimp or clamp-compatible fittings.
Compatible fittings include barbed, insert, expansion, and threaded adapters; select material (brass, plastic) rated for potable water and system pressure to guarantee leak-free joints.
Clamp types and sizes (stainless steel ear clamps, cinch rings, pinch clamps)
Having chosen the correct PEX type and matching fittings, attention turns to the clamps that create a secure mechanical seal.
Stainless steel ear clamps compress evenly for permanent seals; cinch rings (stainless) offer adjustable, reusable crimp-style clamping; pinch clamps provide strong, compact fastening for tight spaces.
Select clamp diameter matching tubing wall and outer diameter; verify manufacturer sizing charts for correct fit and pressure ratings.
Required tools (clamp tool, crimp tool alternatives, cutters, deburring tools)
Essential tools for clamping PEX guarantee reliable joints and efficient workflow: a dedicated clamp/crimp tool matched to the chosen clamp system (ear, cinch, or pinch), tubing cutters that make square, burr-free cuts, a deburring or reaming tool to remove inner/external burrs, and a selection of spare clamps, rings, and fittings sized to the tubing.
Additional items include a reliable caliper or gauge, long‑nose pliers for positioning, and a small pick for removing debris.
Safety gear and workspace preparation
Prepare a safe, organized work area before clamping PEX by assembling appropriate personal protective equipment and clearing sufficient space to handle tubing and tools without obstruction.
Wear safety glasses, cut-resistant gloves, and knee pads as needed.
Verify adequate lighting and ventilation. Keep a fire extinguisher nearby when soldering or using heat.
Arrange tools on a clean surface and secure loose materials to prevent trips or contamination.
Preparing PEX Pipe and Fittings for a Leak-Free Clamp
Before clamping, the pipe must be measured and cut to the correct length, with ends deburred and reamed to guarantee a square, smooth surface.
The installer should match the clamp size to the pipe diameter and position it per manufacturer specifications.
All fittings and pipe ends must be inspected for cracks, nicks, or debris that could compromise the seal.
Measuring and cutting PEX to length
When measuring PEX for a clamp connection, account for fitting insertion depth and any bends so the cut length delivers a fully seated joint without stress.
Mark the pipe with a pencil or tape, measure twice, then cut squarely with a PEX cutter.
Guarantee adequate slack for alignment and thermal expansion.
Recheck fitment before clamping to prevent misalignment or strain.
Deburring and reaming pipe ends
Deburr and ream the cut end to remove burrs and inward lips that can compromise a clamp seal.
Use a quality deburring tool or reamer, rotating gently until the inner edge is smooth and the outer edge chamfered.
Inspect visually and by touch for roughness, then wipe away shavings.
Properly prepared ends guarantee even seating of fittings and reduce leak risk without affecting clamp placement.
Selecting correct clamp size and placement
Choosing the correct clamp size and precise placement is essential to guarantee a watertight PEX connection. A clamp that is too small will not encircle the tubing fully, while one that is too large can slide or fail to compress the fitting barb properly.
Measure tubing OD, match clamp to PEX size, position ring directly over the barb shoulder, and leave even spacing from tube end for consistent compression.
Inspecting fittings and pipe for damage or contamination
Before assembly, inspect both the PEX tubing and fittings for nicks, cracks, scoring, debris, or manufacturing defects that could compromise the seal.
Examine tubing ends for clean, square cuts and smooth inner/exterior surfaces.
Verify fittings are free of burrs, corrosion, or foreign particles.
Replace any damaged components.
Clean surfaces with a lint-free cloth; guarantee dryness and proper alignment before clamping.
Step-by-Step Clamping Procedure
The procedure begins by sliding the clamp onto the PEX, seating the pipe fully onto the fitting barb, and positioning the clamp precisely over the barb.
The installer then uses the clamping tool to compress the clamp uniformly, taking care to maintain alignment.
Finally, compression and fit are verified to guarantee a secure, leak-free connection.
Sliding the clamp onto the pipe and positioning the fitting
Slide the stainless-steel clamp onto the PEX pipe with the open end facing the designated fitting, leaving enough pipe exposed to fully seat the fitting’s barbed or threaded end.
Align the clamp band parallel to the pipe end, position the fitting straight in the pipe bore, and hold both components steady.
Confirm the clamp sits evenly over the fitting area, avoiding twists or gaps.
Seating the pipe fully onto the fitting barb
Insert the PEX pipe straight onto the fitting until it bottoms out against the barb, ensuring the pipe’s end is flush with the fitting shoulder or reaches the specified depth mark.
The installer verifies full seating by visual inspection and tactile confirmation, ensuring no gap remains. Proper alignment prevents uneven compression and potential leaks.
If resistance occurs, rotate slightly while advancing until fully seated.
Positioning the clamp over the barb – exact placement guidance
One precise clamp must be centered squarely over the fitting barb so its open end aligns with the pipe’s outer edge and the band encircles the pipe evenly.
The clamp should sit just beyond the barb tips, not over them, leaving equal material on both sides.
Confirm the band lies flat without twists and the screw housing or crimp ear is accessible for the next compression step.
Using the clamping tool to compress the clamp uniformly
With the clamp centered over the barb and the band lying flat, the installer positions the clamping tool so its jaws align squarely with the clamp’s screw housing or crimp ear.
The tool is squeezed steadily, maintaining perpendicular force, advancing until the clamp deforms uniformly.
The operator checks for even band compression along its length, avoids over-torquing, and releases the tool smoothly to prevent slippage.
Verifying clamp compression and final fit
Confirm the clamp’s compression by visually and tactilely inspecting the band, ensuring the clamp sits flush against the barb and the PEX without gaps or twists.
Check that the crimp is even around the circumference, the tubing retains its shape over the barb, and the clamp edges are not cutting into the PEX.
Perform a pressure or leak test per specifications before finalizing the installation.
Repeating for multiple connections and tees
When clamping multiple PEX connections and tees, proceed methodically to maintain consistent compression and alignment across the run.
The technician marks lengths, assembles fittings, slides clamps, and seats tubing fully before compressing. Work one joint at a time, verify clamp placement and orientation, then pressure-test sections progressively.
Maintain tool calibration, replace defective clamps, and document completed fittings to guarantee uniform, leak-free results.
Testing and Verifying Leak-Free Connections
After clamping, a concise visual inspection checks for common faults such as misaligned jaws, incomplete skirt compression, and damaged ferrules.
Standard residential pressure tests—using either air or water at manufacturer-recommended psi—confirm system integrity and reveal leaks or seepage patterns.
If a clamp shows leakage, the technician evaluates whether tightening, re-clamping, or full replacement is required based on damage and test results.
Visual inspection checklist for common clamp faults
A systematic visual inspection identifies common clamp faults that can compromise a PEX connection and lead to leaks.
Check for uneven clamp compression, gaps between clamp and fitting, slippage or misalignment, deformed or cracked clamps, corrosion, improper clamp size, and visible extrusion of PEX.
Verify clamp sits flush, teeth engage the tubing evenly, and no sharp edges cut the pipe.
Pressure testing methods for residential PEX systems
Begin pressure testing by isolating the PEX circuit and attaching a calibrated gauge to assess system integrity under controlled conditions.
Pressurize to code-specified level (typically 50–100 psi) using water or inert gas, maintain for required duration, monitor for pressure decay, and document readings.
Release pressure safely, inspect fittings for visible issues, and retest after corrective actions to confirm leak-free performance.
How to identify and interpret leaks or seepage
With the pressure-test completed and readings recorded, attention shifts to locating any signs of leaks or seepage and interpreting their meaning.
Inspect clamp joints, fittings, and junctions for drips, dampness, or mineral deposits.
Note leak rate, location, and whether seepage appears under pressure only or continuously.
Correlate findings with test logs to determine severity and likelihood of compromise without prescribing remedies.
Steps to take if a clamp leaks (repair vs replace)
Several clear steps guide whether a leaking clamp should be repaired or replaced: first confirm the leak source and severity, then evaluate clamp condition, fitting integrity, and surrounding PEX for damage.
If clamp distortion or corrosion exists, replace. For minor gaps, retighten or reinstall with correct tool.
Always test under pressure, inspect for hairline cracks, and replace any compromised PEX or fittings.
Common Mistakes and How to Avoid Them
Common failures typically stem from incorrect clamp placement or improper compression, which can cause leaks or damage to the PEX.
Using the wrong type or size of clamp or tool, failing to clean and prepare the pipe and fitting, and reusing clamps all increase the risk of connection failure.
Addressing each of these errors with proper technique and the right equipment prevents most common problems.
Incorrect clamp placement and under/over-compression
Place clamps accurately and compress them to the proper depth to guarantee a reliable PEX connection; misplacement or incorrect compression can cause leaks, damage the fitting, or compromise the seal.
Clamps must sit squarely over the fitting barb, neither too close to the pipe end nor overlapping the barb threads.
Tighten to manufacturer torque; inspect for uniform compression and replace distorted clamps.
Using wrong clamp or tool for pipe size/material
Selecting the correct clamp and tool for the specific PEX pipe size and material is essential to prevent leaks and fittings failure.
Using undersized, oversized, or incompatible clamps, or wrong crimping tools, deforms fittings or creates insufficient seal.
Match clamp type and diameter to manufacturer specs, use calibrated tools, and replace worn jaws or dies to guarantee uniform compression and long-term reliability.
Failing to prepare pipe or fitting properly
Failing to clean, cut, and align PEX pipe and fittings before clamping often causes leaks or weak connections.
Debris, burrs, or angled cuts prevent full seating of the fitting and damage O-rings or barbs. Properly deburr, square-cut, and inspect both pipe and fitting, verify alignment, and dry-fit before applying the clamp to guarantee a secure, leak-free joint.
Reusing clamps and why it’s risky
Reusing crimp or cinch clamps may seem economical, but it greatly increases the risk of leaks and joint failure.
Once deformed, clamps lose spring tension and proper bite, compromising seal integrity. Corrosion, tool marks, and uneven compression further degrade performance.
Replace clamps after removal; use new, manufacturer-recommended fittings and quality tools to guarantee consistent compression and long-term, leak-free PEX connections.
Comparison of Clamping vs Other PEX Connection Methods
A concise comparison of clamp rings, crimp rings, and expansion fittings highlights differences in cost, durability, installation ease, and code acceptance to guide selection. The following table summarizes key contrasts to clarify trade-offs for installers and inspectors. Readers should use local code and project priorities to determine the appropriate method.
| Feature | Summary |
|---|---|
| Methods compared | Clamp rings, crimp rings, expansion fittings |
| Cost | Clamps and crimp rings are generally low-cost; expansion tools and fittings raise upfront expense |
| Durability | All can be durable when properly installed; expansion fittings often favored in movement-prone applications |
| Installation & Code | Clamps and crimps are quicker for repairs; code acceptance varies by region—verify local requirements |
Clamp rings vs crimp rings vs expansion fittings
Choosing between clamp rings, crimp rings, and expansion fittings depends on tool availability, installation speed, and long-term serviceability.
Clamp rings use stainless steel bands tightened with a pinch tool, offering quick, reversible joints.
Crimp rings require a crimping tool and create permanent seals.
Expansion fittings expand PEX and rely on the pipe’s memory for secure connection.
Each method suits different project needs and preferences.
Cost, durability, ease of installation, and code considerations
Beyond tool choice and reversibility, cost, durability, ease of installation, and local code acceptance often determine which PEX connection method is preferred.
Clamp rings are inexpensive and quick but may require specific tools; crimp rings balance cost and proven durability; expansion fittings increase material cost yet offer strong, leak‑resistant joints.
Local plumbing codes and warranty requirements ultimately guide final selection.
Code, Standards, and Best Practices
Local plumbing codes and approved connection methods determine which clamping systems are permissible in a given jurisdiction.
Manufacturer instructions and warranty conditions should be reviewed before installation, since improper clamps or techniques can void coverage.
For complex runs, pressure testing, or uncertain code interpretation, a licensed plumber should be engaged.
Local code considerations and approved connection methods
When installing PEX, compliance with applicable building codes and manufacturer instructions determines which clamp fittings and fastening methods are permissible.
Jurisdictions may adopt differing editions of the International Plumbing Code, reference ASTM or CSA standards, or allow only specific manufacturers’ systems.
Inspectors often require listed fittings, approved crimp or clamp tools, and visible access for testing.
Verify local amendments, permit requirements, and approved material lists before installation.
Manufacturer recommendations and warranty implications
Following confirmation of code adoption and permitted connection types, attention should turn to manufacturer recommendations and how adherence affects product warranties and liability.
Manufacturers specify clamp type, tool calibration, installation technique, and compatible fittings. Deviating from instructions can void warranties and shift liability to the installer.
Documenting compliance, retaining receipts, and following specified torque or crimp dimensions preserves warranty coverage and risk protection.
When to hire a licensed plumber
Although many basic PEX clamp installations can be completed by a competent homeowner, complex or code-sensitive work—such as service connections, concealed repairs, multi-zone manifolds, or projects requiring permits—should be performed by a licensed plumber.
A professional guarantees code compliance, correct material selection, pressure testing, and reliable sealing.
Hire a licensed plumber for unfamiliar systems, institutional work, or when permits and inspections are mandated.
Tips for Long-Term Reliability and Maintenance
For long-term reliability, the article highlights simple maintenance steps and signs to watch for that indicate clamp or PEX wear.
Readers are encouraged to follow a routine inspection schedule and apply protective measures to prevent corrosion and movement.
Key focal points include:
- Regular inspection schedule and signs of wear
- Protecting clamps from corrosion and movement
- Best materials for high-temperature runs
- Outdoor installation practices and UV/weather protection
Regular inspection schedule and signs of wear
Routine inspection is essential to catch degradation of PEX clamped joints before they lead to leaks or system failure.
Inspections every six months, with a thorough annual check, are recommended. Look for discoloration, loose or deformed clamps, softened or swollen PEX, and small damp spots.
Record findings, tighten or replace faulty clamps, and monitor previously marginal connections for recurring issues.
Protecting clamps from corrosion and movement
After inspections identify vulnerable clamps, protection against corrosion and movement extends the life of PEX connections and prevents premature failures.
Apply corrosion-resistant coatings or replace with stainless steel clamps, add rubber or plastic sleeves to isolate metal from PEX, and secure clamps with cable ties or metal straps to limit shifting.
Periodically check fastenings and re-tighten or replace compromised clamps promptly.
Best materials and practices for high-temperature or outdoor runs
When PEX is exposed to high temperatures or outdoor conditions, selecting heat-resistant tubing, UV-stable fittings, and corrosion-proof clamps is essential to maintain long-term integrity.
Insulation, proper expansion loops, and secure weatherproof fastenings further reduce stress and degradation over time. Use stainless steel or brass clamps, EPDM or silicone seals, and UV-rated jacketing.
Inspect periodically, replace degraded sections, and avoid direct sunlight or heat sources.
Quick Troubleshooting Guide for Common Scenarios
A quick troubleshooting guide helps identify and resolve the most common clamping issues without unnecessary steps.
Consider these scenarios and initial checks:
- Small drip at clamp seam
- Loose clamp after thermal cycling
- Damaged pipe during installation
- Damaged barb during installation
Technicians can use these prompts to determine whether a simple retighten, replacement of the clamp, or replacement of the fitting and pipe is required.
Small drip at clamp seam
If a small drip appears at the clamp seam, it usually indicates an imperfect seal between the clamp and PEX fitting.
Inspect the clamp for uneven compression, burrs, or misalignment.
Verify the ferrule is fully seated and the PEX end is cleanly cut.
Tighten or replace the clamp; if leak persists, remove assembly and reseat the fitting with a new clamp and proper tool calibration.
Loose clamp after thermal cycling
After addressing a drip at the seam, attention should turn to clamps that loosen after repeated thermal cycling.
Thermal expansion and contraction can reduce clamp tension over time. Inspect for visible gap, corrosion, or warped rings.
Replace with properly sized stainless-steel clamps, retighten to manufacturer torque, and leave a small expansion allowance.
Recheck after several heat/cool cycles to confirm stability.
Damaged pipe or barb during installation
Discarding a compromised connection immediately can prevent leaks and failures later; when a PEX pipe or barb is nicked, crushed, or scored during installation, the damaged section must be evaluated and usually removed rather than patched.
Cut back to sound material, replace the barb or fitting, and re-clamp with correct tools.
Do not reuse deformed fittings; inspect for microcracks and test under pressure before concealment.
Visual References and Helpful Diagrams
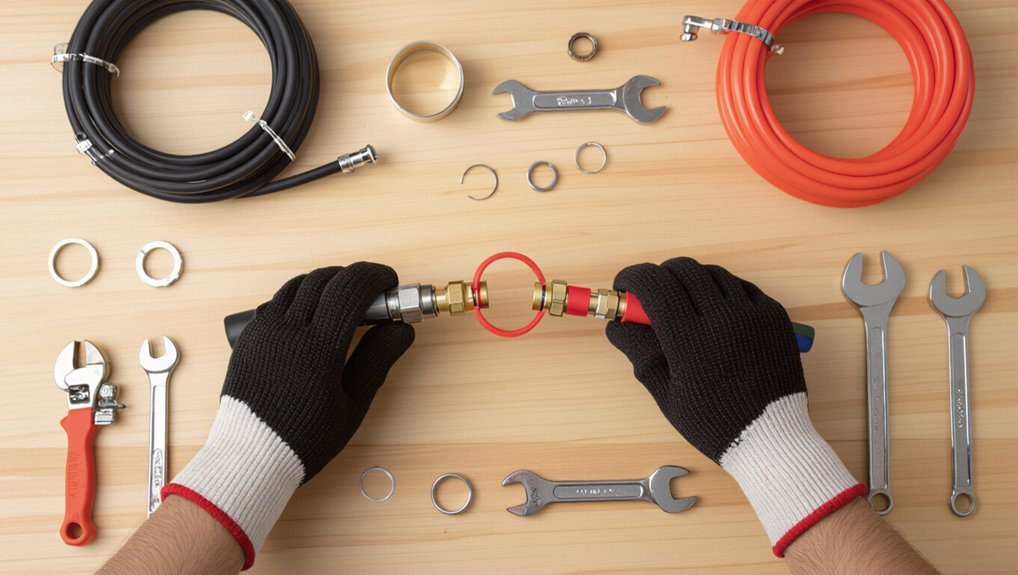
The article includes clear illustrations showing exact clamp placement on different PEX fittings.
Sequential images demonstrate tool operation and the steps required to secure each clamp.
Side-by-side before-and-after photos highlight correct versus incorrect clamping for quick comparison.
Proper clamp placement illustration
When illustrating proper clamp placement on PEX pipe, diagrams should show clamps positioned directly over the pipe fitting’s barb or crimp ring, with spacing, orientation, and distance from the fitting clearly labeled.
Clear callouts indicate minimum edge clearance, clamp alignment perpendicular to pipe axis, and recommended spacing for multiple clamps.
Use scaled views and cross-sections to confirm coverage and prevent gaps.
Tool operation step images
Begin by showing a step-by-step sequence of the crimping or clamp tool in use, using clear, numbered images that focus on hand placement, tool orientation, and interaction with the PEX fitting.
Include close-ups of jaw alignment, clamp seating, and final squeeze force. Annotate each image with brief captions: action, tip, and common mistake to avoid.
Keep visuals high-contrast and scalable.
Before-and-after examples of correct vs incorrect clamps
Following the step-by-step crimp and clamp tool images, a set of before-and-after visual comparisons reinforces proper technique by juxtaposing correct and incorrect installations.
Clear labeled photos show proper clamp placement, fully compressed rings, and straight tubing versus common errors: misaligned clamps, incomplete crimps, overlaps, and gaps.
Short captions explain consequences (leaks, loosening) and corrective steps for each faulty example.
Conclusion
Clamping PEX secures connections, prevents leaks, and preserves system integrity; it requires correct tools, careful preparation, and consistent technique. Following steps guarantees proper seating, uniform compression, and pressure testing; observing codes, using quality fittings, and maintaining clamps prolongs service life. Regular inspection, swift repairs, and adherence to manufacturer guidance sustain reliability. With attention to detail, commitment to standards, and routine maintenance, clamped PEX delivers dependable performance, predictable outcomes, and lasting peace of mind.