How to Repipe Your House: A Step-by-Step Guide for DIYers and Homeowners
How to Repipe Your House: A Step-by-Step Guide
Re-piping your house involves replacing old or failing water lines to address issues like leaks, low water pressure, and contamination risks. To start, decide if you need a whole-house or partial re-pipe, select suitable materials such as PEX or copper, and ensure you have the necessary permits and budget. Gather essential tools and safety gear, and turn off the water supply. Remove the old piping, install the new lines with the correct fittings, pressure-test the system, and schedule inspections. Finally, flush the system, document the work, and perform routine checks to maintain your plumbing. Follow this guide for detailed steps on each phase of the process.
Overview of Re-piping a House: What Re-piping Means and When It’s Needed
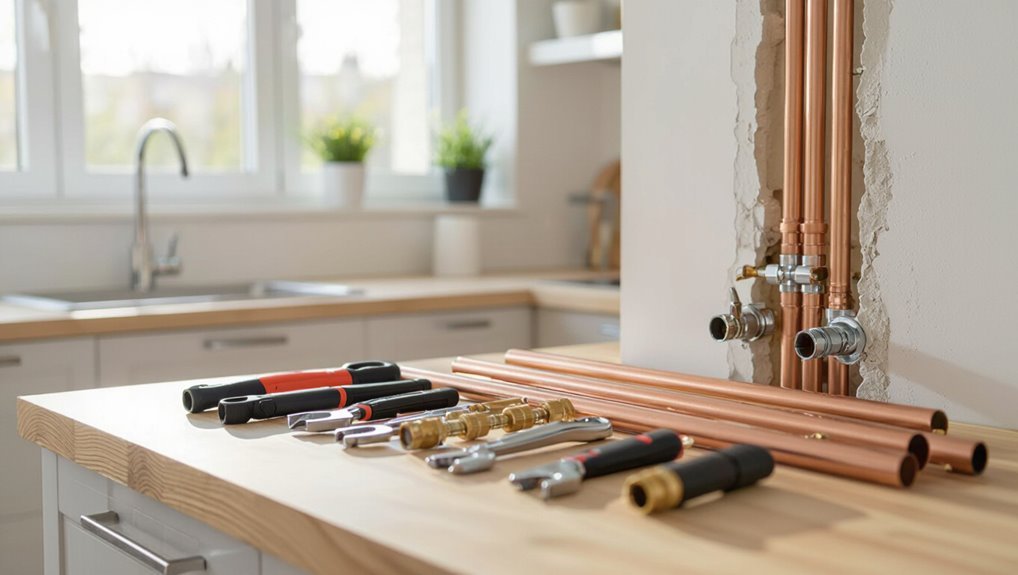
Re-piping refers to replacing a home’s water distribution system and is typically prompted by recurring leaks, discolored or low-pressure water, and frequent pipe failures.
A concise comparison of common materials—copper, PEX, CPVC, and galvanized steel—highlights differences in cost and expected lifespan.
Local permits, building codes, and professional evaluation determine scope and guarantee compliant, safe installation.
Common signs your home needs re-piping
Recognizing deterioration in a home’s plumbing system is essential for preventing costly failures and water damage.
Visible corrosion, persistent leaks, low water pressure, rusty or discolored water, frequent pipe repairs, and unusual noises indicate aging piping.
Sudden spikes in water bills or recurring mold and stains beneath fixtures also signal replacement.
Homeowners researching how to repipe your house should assess these clear warning signs.
Types of piping materials and lifespan comparison
A home’s plumbing relies on several common pipe materials—copper, galvanized steel, PVC, CPVC, PEX, and polybutylene—each with distinct strengths, weaknesses, and service lifespans that influence when full replacement becomes necessary. Comparison below summarizes typical durability, cost, and common issues.
| Material | Typical Lifespan | Common Issue |
|---|---|---|
| Copper | 50–70 years | Corrosion in aggressive water |
| Galvanized | 20–50 years | Rust, reduced flow |
| PEX | 30–50 years | UV sensitivity |
| PVC/CPVC | 25–50 years | Brittle with heat |
| Polybutylene | 10–25 years | Prone to failure |
Permits, codes, and when to consult a professional
Many municipalities require permits and adherence to building codes before any significant plumbing work begins. Homeowners should understand that failure to comply can lead to fines, failed inspections, or complications when selling the property.
Verify local code requirements, obtain necessary permits, and schedule inspections.
For complex layouts, mains relocation, structural work, or uncertain compliance, hire a licensed plumber or engineer to guarantee safety, legality, and warranty protection.
Quick Answer: Can You Repipe Your House Yourself?
A homeowner can handle simple repipe tasks like replacing a short run of accessible supply line or swapping a visible fixture connection with basic tools and materials.
Complex jobs—extensive pipe runs, work inside walls or under slabs, gas or multi-family systems, or projects tied to code inspections—require a licensed plumber.
Choosing DIY when scope or code compliance is uncertain risks damage, failed inspections, and higher long-term costs.
Simple scenarios suitable for DIYers
Homeowners can tackle repiping themselves in straightforward situations where the work is limited, tools are on hand, and local codes permit homeowner-performed plumbing.
Suitable scenarios include replacing short runs, swapping visible sections of piping, upgrading to PEX in accessible areas, or repairing single fixtures.
Adequate plumbing knowledge, proper fittings, leak testing, and adherence to permit and inspection requirements remain essential for safe, code-compliant results.
Situations that require licensed plumbers
While simple repiping tasks can be handled by a competent DIYer under the right conditions, more complex or high-risk situations should be left to licensed plumbers.
Examples include main service line replacement, gas line work, extensive copper-to-PEX conversions, structural modifications, municipal code compliance, concealed leaks, multi-family systems, and projects requiring permits or inspections.
Professional experience reduces safety, legal, and warranty risks.
Planning Your Re-pipe Project
Planning a re-pipe begins with a clear assessment of scope, deciding between a whole-house replacement or targeted, partial work.
A realistic timeline and budget should be set alongside identification of required permits, inspections, and documentation.
Material choices—copper, PEX, or CPVC—must be weighed for cost, durability, and compatibility with the home’s plumbing system.
Assessing the scope: whole-house vs. partial re-pipe
Deciding whether to re-pipe an entire house or address only sections hinges on the age and condition of the existing plumbing, the layout of problem areas, and budgetary constraints.
Whole-house repipes prevent recurring failures and guarantee consistent materials and water quality.
Partial repipes target localized corrosion or failures, minimizing disruption.
Inspection results, accessibility, long-term goals, and resale considerations guide the final decision.
Creating a realistic timeline and budget
A realistic timeline and budget for a re-pipe project hinges on clear scope definition, contractor availability, and the home’s access points.
Quantifying tasks—inspection, permitting, material delivery, demolition, installation, testing, and restoration—lets homeowners map work phases against days and costs.
Itemize labor hours, material quantities, contingency (10–20%), and temporary accommodations.
Compare multiple contractor estimates and schedule buffers for delays to control cost and timing.
Required permits, inspections, and documentation
Many municipalities require permits, inspections, and signed documentation before, during, and after a re-pipe to confirm code compliance and safe workmanship.
Homeowners should verify local codes, submit permit applications, and schedule rough‑in and final inspections.
Retain receipts, approved plans, inspection reports, and contractor licenses.
Proper documentation prevents delays, guarantees resale disclosure, and avoids fines or forced remediation.
How to choose piping material (copper, PEX, CPVC)
With permits in hand and inspection requirements understood, selecting piping material becomes the next practical decision for a re‑pipe project. The guide compares copper, PEX, and CPVC by cost, durability, ease of installation, and code acceptance. Consider water quality, budget, and longevity; consult local code. Choose based on priorities: corrosion resistance, flexibility, or heat tolerance.
| Material | Strength | Cost |
|---|---|---|
| Copper | High | $$$ |
| PEX | Flexible | $$ |
| CPVC | Heat‑resistant | $ |
Tools, Materials, and Safety Gear You’ll Need
The section outlines the essential plumbing tools required for a re-pipe, including wrenches, pipe cutters, and soldering or crimping equipment.
It then provides a materials checklist organized by system—hot and cold water lines, fittings, insulation, and fixture supplies.
Finally, it covers required safety equipment and precautions such as eye protection, gloves, gas detection, and proper ventilation.
Essential plumbing tools for re-piping
Proper re-piping requires a concise set of tools, materials, and safety gear chosen for durability and compatibility with the existing system.
Essential hand tools include pipe cutters, tubing benders, adjustable wrenches, basin wrenches, and pliers.
Power tools: reciprocating saw and cordless drill.
Joining tools: soldering kit or crimping tool and torch.
Safety gear: gloves, eye protection, respirator, and knee pads.
Materials checklist by system (hot/cold water, fixtures)
A clear, system-specific materials checklist helps guarantee each segment of a re-pipe—hot supply, cold supply, and individual fixtures—receives the correct pipe type, fittings, and consumables.
Include pipe (PEX/CPVC/copper) lengths, appropriate elbows, tees, unions, adapters, valves, mounting clamps, insulation for hot lines, dielectric fittings for dissimilar metals, fixture supply lines, thread sealant, flux/solder or crimp rings, and spare connectors.
Safety equipment and precautions
Several essential safety items and clear precautions are required before beginning any repipe work to protect personnel, property, and the plumbing system.
Workers should use gloves, eye protection, hearing protection, respirators for soldering, knee pads, and steel-toe boots.
Verify gas and electrical shutoffs, depressurize and drain lines, ventilate confined spaces, post isolation signage, keep a fire extinguisher nearby, and follow local codes.
Pre-work Steps Before Starting the Re-pipe
Before beginning a repipe, the main water supply must be located and shut off to prevent flooding.
Remaining pressure should be relieved and lines drained, while the work area and nearby utilities are protected.
A clear map of the existing plumbing and a planned layout for new routes should be prepared to guide the installation.
Locating and turning off main water supply
One clear step that sets the repipe in motion is locating and shutting off the home’s main water supply; this prevents flooding, protects fixtures, and allows work to proceed safely.
The technician or homeowner should identify the meter or shutoff valve—often in a basement, crawlspace, garage, or exterior curb box—then close it fully, verify stoppage at faucets, and clearly tag the valve.
Draining lines and relieving pressure
Drain the system and relieve pressure to prevent water damage and make pipe removal safer: open all hot and cold faucets, including exterior hose bibs, and drain low points and fixtures such as toilets and tubs;
next, open any inline drain valves or bleeder valves at high points and in appliance connections to purge trapped water and air.
After draining, inspect drains and repeat until flow is minimal; collect discharged water.
Protecting the work area and utilities
With lines emptied and pressure relieved, attention shifts to protecting the work area and utilities to prevent damage and interruption.
Floors and surfaces receive drop cloths and plywood pathways; fixtures and appliances are masked or removed.
Electrical panels, HVAC components, and exposed wiring are isolated.
Temporary shutoffs and clear signage limit accidental use.
Debris containment and routine cleanup preserve access and safety.
Mapping existing plumbing and planning new routes
A thorough map of the existing plumbing layout is essential before new routes are planned; it documents pipe runs, fixture connections, valve locations, and hidden chases so installers can identify constraints and opportunities.
Inspect, measure, and photograph basements, crawlspaces, walls and attics. Mark materials, diameters, slopes, and access points.
Draft proposed routes minimizing bends, preserving access, and avoiding structural or electrical conflicts.
Step-by-Step Re-piping Process for DIYers
The DIY re-piping sequence begins with safe removal of old piping, using proper isolation, cutting, and corrosion-safe disposal methods.
Next, installers choose and run supply lines—detailing practical techniques for PEX and copper—while planning branches to fixtures and individual shutoff valves.
The process concludes with making secure connections and fittings and replacing or updating fixture connections to guarantee leak-free operation.
Removing old pipes safely
Begin by shutting off the main water supply and draining the system to eliminate pressure and reduce water in the lines.
Next, ventilate work areas and wear PPE.
Inspect pipe materials for hazards like lead or asbestos; test and abate if needed.
Cut accessible sections, support remaining piping, remove fittings, and label connections.
Dispose of old materials per local regulations.
Installing supply lines: techniques for PEX and copper
Installers should choose between PEX and copper based on budget, durability, local code, and the home’s access for routing; PEX offers flexibility and faster connections with fewer fittings, while copper provides proven longevity and heat resistance but requires soldering or crimping and more rigid routing.
Route lines with proper slope and support, protect from abrasion and freezing, and plan manifolds and branch runs for efficient water delivery.
Making secure connections and fittings
Secure connections are achieved by matching the correct fittings to the chosen piping material, preparing clean, square cuts, and following the recommended joining method—crimp, clamp, push-fit, solder, or compression—for each joint.
Proper tools, calibration, and torque prevent leaks. Follow manufacturer torque specs, use appropriate seals or flux, deburr and clean surfaces, and pressure-test sections before concealment to verify integrity.
Branching to fixtures and shutoff valves
Tapping into the main runs and routing branches to fixtures requires planning each branch length, valve location, and service access to guarantee function and future maintenance.
Install dedicated shutoff valves near each fixture, secure proper pitch for drainage, support branches at regular intervals, and minimize bends.
Label valves and document layout.
Pressure-test each branch after installation and before closing walls to confirm leak-free connections.
Replacing or updating fixture connections
Begin by shutting off the appropriate branch valves and draining the lines to isolate each fixture before disconnecting supply and drain connections.
Remove old fittings, inspect tails and hoses, and clean connection points.
Fit new connectors or adapters compatible with updated piping materials, using proper sealants or compression fittings.
Tighten to manufacturer torque, restore local isolation, and check for visible leaks while restoring fixtures to service.
Pressure testing the new system
Pressure testing verifies the integrity of the new piping before returning the system to regular use.
The installer isolates sections, fills lines with water, and uses a calibrated gauge to pressurize to recommended PSI.
Maintain pressure for the specified hold time, inspect joints for leaks, and document readings.
If pressure drops, locate and repair defects, then retest until stable readings confirm a sound system.
Electrical, HVAC, and Structural Considerations During Re-pipe
The re-pipe process must account for existing electrical wiring and HVAC ductwork to prevent conflicts and maintain system integrity.
Attention to load-bearing framing and structural elements is required when routing pipes or cutting access openings.
Coordination with electricians, HVAC technicians, and structural contractors guarantees safe, code-compliant work and minimizes rework.
Avoiding conflicts with wiring and ductwork
Many repiping projects intersect with existing electrical, HVAC, and structural systems, so careful planning is required to prevent service interruptions, code violations, and costly rework.
Assess routing to avoid electrical cables and ducts, coordinate with electricians and HVAC technicians, maintain required clearances and access panels, mark concealed services before cutting, and use insulated clamps and sleeves where pipes cross to prevent abrasion, vibration, and airflow disruption.
Working around load-bearing structures and framing
Navigate repiping routes with strict regard for load-bearing members and framing to prevent structural compromise and costly repairs.
Inspect joists, studs, beams, and headers before drilling or notching. Use approved plates, hangers, and sleeves; avoid cutting critical members.
When modifications are unavoidable, design and install appropriate reinforcements per code.
Document changes and consult structural plans or a licensed engineer for uncertain conditions.
Coordinating with other trades
Moving from framing concerns to trade coordination, repiping work must be planned around electrical, HVAC, and structural systems to prevent conflicts and hazards.
Contractors should review plans jointly, mark penetration points, and sequence work to avoid rework.
Guarantee electrical clearances, preserve HVAC airflow and supports, and reinforce structures where pipe runs alter loads.
Permit and inspection coordination minimizes delays and liability.
Common Problems and How to Troubleshoot Them
Common post-repipe issues include leaks at joints that require resealing or redoing connections, and low water pressure or trapped air that often needs bleeding and system flushing.
Corrosion and sudden changes in water quality should be assessed quickly to determine whether material incompatibility or disturbed sediments are the cause.
The following section outlines straightforward troubleshooting steps and when to call a professional.
Leaks at joints and how to fix them
Leaks at pipe joints often originate from loose fittings, degraded seals, or improper installation. They typically present as localized drips, dampness, or corrosion around connections.
Inspect fittings, tighten nuts or replace damaged compression rings, cut back and re-seat soldered or push-fit joints, replace worn rubber O-rings, clean threads and apply appropriate tape or compound.
Then pressure-test and monitor for recurrence.
Low water pressure or air in lines after re-pipe
Diagnose low water pressure or air in lines promptly after a repipe, as these issues commonly indicate trapped air, partially closed valves, clogged aerators, or sizing and routing problems in the new piping.
Check and bleed air at fixtures, fully open isolation and main valves, remove and clean aerators, inspect branch sizing and fittings for restrictions, and verify manifold port alignment to restore proper flow.
Corrosion, water quality changes, and mitigation
Although new piping is designed to improve water delivery, changes in materials, flow patterns, or chemistry can accelerate corrosion and alter water quality. Homeowners should watch for discoloration, metallic taste, staining, or increased particulate matter as early indicators.
Promptly test pH, hardness, and chloride levels. Flush systems, install corrosion inhibitors or dielectric unions, and consider filtration.
Replace affected sections and consult a water treatment professional if issues persist.
When to Call a Professional: Red Flags and Liability Issues
When repiping involves complex multi‑story stacks, commercial‑type layouts, gas lines, sewer connections, or structural alterations, a licensed professional should be engaged to manage the technical and safety risks.
Homeowners must also consider insurance, warranties, and local code compliance, since improper work can void coverage or trigger fines.
Clear thresholds for professional intervention help allocate responsibility and limit liability.
Complex multi-story or commercial-type systems
If a repipe involves multiple stories, mixed commercial and residential spaces, or interconnected systems serving large occupancies, a licensed plumbing professional should evaluate the project before work begins.
Complex layouts raise risks: load calculations, zoning, fire suppression interfaces, permitting, and code compliance.
Liability and insurance exposure increase; contractors can assess structural impacts, staging, material selection, and documentation to minimize risk and guarantee legal, safe completion.
Gas lines, sewer connections, and structural alterations
Any work involving gas lines, sewer mains, or structural changes demands professional assessment due to safety, health, and liability stakes.
Licensed plumbers, gas-fitters, and structural engineers should handle pressure-rated gas connections, sewer lateral ties, and any alterations to load-bearing elements.
DIY attempts risk explosions, contamination, collapse, code violations, and personal liability; engage certified contractors for permits, testing, and documented approvals.
Insurance, warranties, and code compliance considerations
Several key interactions between repiping work and insurance, manufacturer warranties, and building codes can determine whether a project remains financially and legally protected.
Homeowner policies may deny claims for unpermitted work; warranties often void if installation deviates from manufacturer instructions; local codes require permits, inspections, and licensed contractors for certain systems.
Consult insurers, read warranties, obtain permits, and hire professionals when liability or code complexity arises.
Cost Breakdown and How to Save Money
Typical repipe projects vary by material and home size, with common ranges provided for pipes, fittings, and labor to help set realistic budgets.
Practical cost-saving strategies—such as grouping work, sourcing materials competitively, and handling nonhazardous prep tasks—are noted while maintaining safety and code compliance.
The long-term perspective covers energy and insurance effects as well as resale value to weigh upfront costs against future benefits.
Typical cost ranges for materials and labor
Cost clarity matters when planning a repipe: material and labor expenses commonly span wide ranges depending on pipe type, house size, accessibility, and regional labor rates.
Typical material costs: PEX $800–$2,500, copper $1,500–$6,000.
Labor often ranges $1,500–$8,000 or more.
Total project estimates usually fall between $2,300 and $14,000, influenced by permits, demolition, and finish work.
DIY cost-saving tips without cutting safety
While homeowners can reduce repipe expenses by taking on select tasks, they should focus on nontechnical work that preserves safety and code compliance.
Tasks like demolition, painting, fixture removal, and site cleanup save labor costs.
Rent specialty tools only when necessary, buy quality materials to avoid rework, compare contractor bids, and obtain permits.
Never attempt sealed, pressurized, or code-critical plumbing without licensed help.
Long-term value: energy, insurance, and resale impacts
How does a full repipe affect a home’s long-term expenses and marketability?
A complete repipe reduces leak risk, lowers water heating and repair costs, and can slightly improve energy efficiency.
Insurers may offer reduced premiums or easier claims after updated plumbing.
Prospective buyers value documented, modern systems, often enabling higher resale price and faster sale compared with homes showing aged, problematic piping.
Post-Installation Tasks and Maintenance
After repiping, the homeowner should confirm final inspections are completed and all required paperwork is filed to satisfy codes and warranties.
The system then needs flushing, disinfection, and any conditioning to remove debris and guarantee water quality before regular use.
A clear routine maintenance schedule with practical tips helps preserve pipe integrity and prevent future issues.
Final inspections and required paperwork
When the repiping work is finished, a final inspection and completion of all required paperwork guarantee the system meets code and the homeowner can document the job for warranties and resale.
Inspectors will verify pressure testing, proper fittings, and venting, while contractors submit permits, invoices, and manufacturer warranty registrations.
Copies of approved permits, signed inspection reports, lien waivers, and warranties should be retained and provided to buyers.
Flushing, disinfecting, and conditioning the system
Begin by thoroughly flushing the new piping to remove debris. Then disinfect all potable lines and condition finishes according to manufacturer and local codes.
Verify clearance of particulates, then apply approved disinfectant (chlorine or alternative) at specified concentrations and contact times.
Purge and retest until chlorine residual and bacteriological results meet standards.
Rinse, restore fixtures, document chemicals used and test outcomes.
Routine maintenance schedule and tips
Although the system has passed commissioning, a structured routine maintenance schedule is essential to preserve water quality, prevent deterioration, and detect issues early.
Inspect visible pipes, joints, and supports quarterly; test water pressure and quality biannually; clean aerators and strainers every three months; replace sacrificial anodes, filters, and damaged sections per manufacturer intervals; document inspections and address leaks immediately to avoid escalation.
Case Examples and Project Timelines
The section presents representative case examples and realistic project timelines to clarify what homeowners can expect. It compares a small single-floor re-pipe, a whole-house two-story job, and a phased approach for budget-conscious homeowners, highlighting key lessons learned.
Readers are encouraged to use these scenarios to plan timing, disruption, and cost trade-offs.
- Small single-floor re-pipe: typical 1–2 day timeline, minimal drywall work, common quick fixes
- Whole-house two-story re-pipe: typical 3–7 day timeline, stairwell and floor access needs, higher labor coordination
- Phased re-pipe approach: staged replacements by priority areas, spreads cost over months, requires careful record-keeping
- Typical unexpected delays: permit waits, hidden corrosion, supply shortages
- Lessons learned: clear access, contingency budget, and contractor communication
Small single-floor re-pipe: timeline and lessons
When a small, single-floor repipe proceeds smoothly, the work typically completes within a single day to a few days depending on access, fixtures, and materials.
The following case examples illustrate typical timelines, common delays, and practical lessons learned so homeowners can set realistic expectations and prepare accordingly.
Typical scenarios: one-bath repipe in one day; kitchen-plus-bath in two to three days.
Delays: hidden corrosion, part availability, access barriers.
Whole-house two-story re-pipe: timeline and lessons
Many two-story whole-house repipes span two to five days depending on pipe routing, wall access, and fixture count; case examples below highlight typical timelines, common hold-ups, and actionable lessons for planning and communication.
Typical schedule: demo and access day, rough-in day, inspection and adjustments, fixture hookups, and cleanup.
Frequent delays: hidden obstructions, permit waits, and specialty fittings; communication and contingency parts mitigate overruns.
Phased re-pipe approach for budget-conscious homeowners
Although budget constraints often rule out a single thorough re-pipe, homeowners can stagger work by priority zones—kitchen, bathrooms, then remaining supply runs—so costs are spread and disruption minimized.
Example timelines show kitchen-first in one weekend, primary bath next month, secondary baths over subsequent months. Each phase includes isolation, temporary service routing, inspection, and final connections, balancing expense, usability, and contractor scheduling.
Practical Tips and Common Mistakes to Avoid
The section outlines best practices for clean, code-compliant installations, emphasizing proper materials, secure supports, and correct joint techniques.
It then highlights common mistakes that cause costly rework or create safety hazards, such as improper slope, unsecured lines, and neglected pressure testing.
Finally, a concise checklist for inspections before closing walls is provided to catch errors and document compliance.
Best practices for clean, code-compliant installations
Start each repiping project by reviewing local plumbing codes and creating a clear plan that specifies materials, pipe routes, access points, and required permits.
Use approved fittings, proper support spacing, and correct fasteners.
Maintain accessible shutoffs and inspection points.
Pressure-test systems per code before concealment.
Label new piping and document changes.
Keep work areas clean to prevent contamination and facilitate inspections.
Mistakes that lead to rework or safety hazards
A common source of costly rework and safety risks is improper preparation and shortcutting during repiping projects, which can include incorrect pipe sizing, inadequate support, poor joint assembly, and failure to verify system isolation before cutting into existing lines.
Additional mistakes include neglecting pressure testing, improper material selection for compatibility, insufficient corrosion protection, unsecured fixtures, and ignoring ventilated or combustible-clearance requirements that compromise safety and code compliance.
Checklist to review before closing up walls
Before walls are closed, a concise checklist verifies all plumbing work is complete, code-compliant, and safe:
Verify pressure and leak testing passed, confirm proper slope and support, ascertain correct pipe insulation and clearance from electrical, validate valve access and labeling, check venting and trap installations, obtain required inspections and permits, document materials and as-built locations, and photograph work before insulation and drywall proceed.
Resources and Further Reading
The guide points readers to municipal building department websites and permit offices for local code requirements and contact information.
It also lists authoritative manufacturer installation manuals and online tutorials for specific pipe materials.
Finally, it outlines practical criteria and verification steps for locating and vetting qualified plumbers, including licensing, references, and insurance checks.
Where to find local code info and permit contacts
Where can homeowners locate the specific plumbing codes and permit contacts that govern repiping projects in their area?
Local building department websites list code editions, permit requirements, fee schedules, and inspection procedures.
County or city permit centers provide phone, email, and online portals.
State plumbing boards and regional code councils publish statutes and interpretations.
Homeowner associations may add local rules; verify with official municipal sources before permitting.
Recommended manufacturer guides and tutorials
Which manufacturer resources are most useful depends on the materials and methods selected for a repipe: manufacturers of PEX, copper fittings, valves, and press systems provide targeted installation manuals, sizing charts, troubleshooting guides, and video tutorials that align with product-specific requirements and warranty conditions.
Consult manufacturer installation guides, press-tool instructions, torque/spec tables, chemical compatibility lists, and warranty documents; bookmark video demonstrations and downloadable checklists for accurate, compliant work.
How to find and vet qualified plumbers
How can homeowners identify plumbers qualified for a full-house repipe? A detached checklist clarifies verification steps, references, credentials, and contract practices to guarantee competent selection.
- Verify state license and specialty in repiping
- Check insurance and bonding documentation
- Request three local references with similar projects
- Review written estimates and timelines
- Confirm warranty terms and permit handling
Conclusion
In the end, the house emerges almost triumphant, its arteries gleaming like a champion athlete after a spa day. Re-piping converts dripping despair into a symphony of steady flow, and the homeowner—now part plumber, part strategist—can almost hear the pipes applaud. While not every DIYer will morph into a plumbing prodigy overnight, sensible planning, patience, and respect for safety make the transformation feel nothing short of miraculous.